Today, I’m sharing a Valentine’s Day card that I made for my husband this year using Kit and Clowder – January – February 2024 Markers – Valentine’s Bear Bonus Class on-line colouring class taught by Alyce Keegan for the front of the card and Kraftin’ Kimmie Stamps – Your Gnaw-some! by Neda Sadreddin for the inside of the card.

The base card was created to the size of 5.5″ x 5.5″ out of Recollections – Red cardstock. I printed out the image for the cup and bear from the card class using a HP Printer onto Copic Marker X-Press It Blending Card. The bear, cup and hearts were coloured in following the instructional video by Alyce Keegan from Kit and Clowder. Once this was completed, using a Cuttlebug and Waffle Flower – Nesting Square dies, I die cut the image using the 4.25″ x 4.25″ die. The background was coloured in with a BG000 marker and then I added in the sentiments using Cloud 9 – Matt Blending Ink – Strawberry Sundae for the “I Love You” and then restamping it again using VersaMark. Versa Fine – Onyx Black was used for the “Happy Valentine’s Day” sentiment. Both sentiments were embossed with Ranger – Clear Super Fine Detail Embossing Powder and then heat embossed using a Marvy Uchida – Embossing Heat Tool. Anna Griffin – 3D Square Cardcentric Compendium Dies were die cut using the Cuttlebug and the 5-1/8″ x 5-1/8″ die out of Recollections – Matte Gold Foil cardstock. I applied the finished image onto the frame with liquid glue. U-Line Double-Sided Foam Tape was applied to the back of frame and it was centered onto the front of the card.
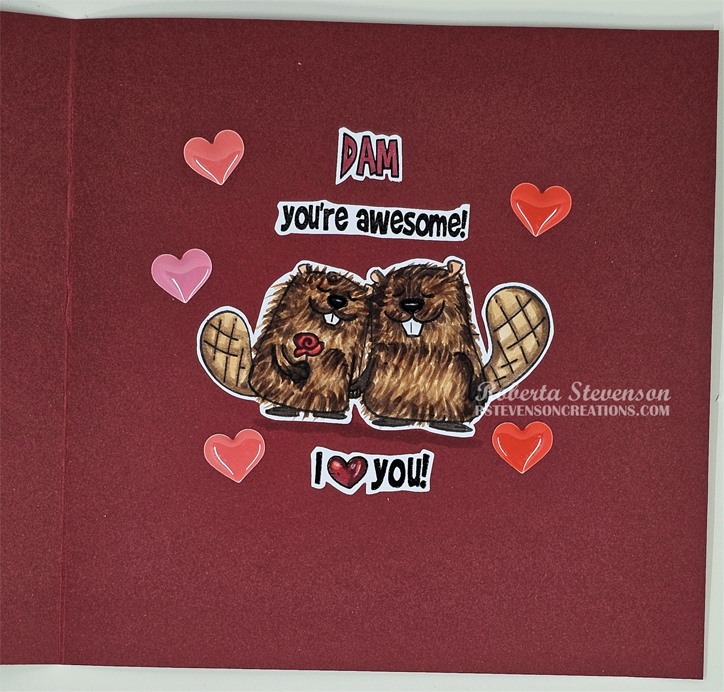
For the inside of the card, the image for the beavers was stamped onto the same Copic paper using Memento – Tuxedo Black ink and a MISTI. This was coloured in with Copic markers listed below and then fussy cut. The sentiments were all stamped using the same method and inks as above that were used for “The Happy Valentine’s Day” sentiment. I coloured in the heart and the lettering with Copic markers and then fussy cut around all of the sentiments. Liquid glue was applied to all of the pieces and they were adhered onto the card. Lastly, to finish everything off, some Kraftin’ Kimme Hearts Krafty Dots were added.
Card Recipe:
Stamp Class and image front: Kit and Clowder – January – February 2024 Markers – Valentine’s Bear Bonus Class on-line colouring class taught by Alyce Keegan
Stamp Sentiments: Art Impressions – Valentine Critters Set – 5117 and Lawn Fawn – Your Just My Type
Stamp Image and Sentiment Inside of card: Kraftin’ Kimmie Stamps – Your Gnaw-some! by Neda Sadreddin (Retired)
Paper: Copic Marker X-Press It Blending Card, Recollections – Matte Gold Foil cardstock, Recollections – Red cardstock
Inks: Cloud 9 – Matt Blending Ink – Strawberry Sundae, VersaMark, Versa Fine – Onyx Black, Memento – Tuxedo Black, HP Printer
Die Cuts: Waffle Flower – Nesting Square dies, Anna Griffin – 3D Square Cardcentric Compendium Dies
Embossing Powder: Ranger – Clear Super Fine Detail
Miscellaneous: Marvy Uchida – Embossing Heat Tool, Kraftin’ Kimmie – Hearts Dots, U-Line Double-Sided Foam Tape, MISTI – Most Incredible Stamping Tool
Copic Markers:
Beavers: E79, E27, E25, E23, E21, R02, C1, C00
Flower and Lettering: R59, R37, R24
Hope you like it and have a great week!