Archives

Ellie & Friends!!


It’s Wednesday, and this week, I made an Easter card using High Hopes Rubber Stamps Ellie & Friends – TDG025 for the image and Happy Easter! – F096 for the sentiment. We are celebrating our new “Spring Fever Release” this month and who couldn’t love this adorable image!

To make my card this week, I began with a card base of AC Cardstock – White, cut and scored to be 6″ x 6″. I cut the flower cardstock from Echo Park – Welcome Easter at 6″ x 1.75″ and Lawn Fawn – Watercolor Wishes Rainbow paper to 6″ x 4.5″. I applied double-side tape and adhered both pieces directly to the base. Tim Holtz Distress Ink – Wilted Violet ink was used to ink around all of the edges of the base card. Using My Creative Time -Stitched Squares Inside and Out and my Cuttlebug, I die cut Momenta – Cardstock and inked around the edges with Tim Holtz Distress Ink – Fossilized Amber. 3M double-sided tape was applied to the back of this and it was popped up onto the base card.

Using PinkFresh Studios – Essentials: Blanket Stitched Square Die Set and my Cuttlebug, I die cut Copic Marker X-Press It Blending Card. I stamped the main image onto this die cut and sentiment onto Copic Marker X-Press It Blending Card using my MISTI and Memento – Tuxedo Black. The image was coloured in with Copic Markers and then U-Line double-side tape was applied to the back of it. This was popped up over top of the yellow square.

I fussy cut around the sentiment and inked around the edges with Tim Holtz Distress Ink – Wilted Violet. I ran it through my Xyron Create a Sticker and applied it to the Momenta – Cardstock and fussy cut around it again. I applied Scrapbook Adhesives – 3D Foam Strips to the back of the sentiment layers and added it to the bottom right of the card. Lastly, I added in 3 DoodleBug Design Inc. – Sprinkles Spring Assortment to complete the card.

Card Recipe:

Stamps: Ellie & Friends – TDG025 (High Hopes Rubber Stamps)

Sentiment: Happy Easter! – F096 (High Hopes Rubber Stamps)

Inks: Memento – Tuxedo Black, Tim Holtz Distress Ink – Wilted Violet, Tim Holtz Distress Ink – Fossilized Amber

Paper: Copic Marker X-Press It Blending Card, Lawn Fawn – Watercolor Wishes Rainbow – 6″ x 6″, Echo Park – Welcome Easter (6″ x 6″), Momenta – Cardstock, AC Cardstock – White

Die Cuts: My Creative Time -Stitched Squares Inside and Out, PinkFresh Studios – Essentials: Blanket Stitched Square Die Set

Tools: MISTI – Most Incredible Stamping Tool, U-Line double-sided tape, 3M double-sided tape, Cuttlebug, Xyron Create a Sticker, DoodleBug Design Inc. – Sprinkles Spring Assortment, Scrapbook Adhesives – 3D Foam Strips

Image coloured with Copic Markers:

Elephant: C5, C3, C2, C1, R30, R20

Chicks: E53, E50, E15, YR31, YR18, YR14, Y21, Y08, Y14, Y08

Flowers, Stems and Leaves: V09, V06, V04, V01, Y17, Y13, G85, G43

Eggs: Y17, Y13, Y04. BG15, BG13, BG11, BG10, V17, V15, V12, B04, B02, B01, RV66, RV55, RV13, RV11, RV10

Sky: B60, B02, B01, B00, B000, C1, Colorless Blender

Grass: G14, YG23, YG11, YG03, YG01

Hope you like it and have a fantastic week!

Check out more adorable images in the new “Spring Fever Release” at High Hopes Rubber Stamps!

You can find lots of inspiration from the Design Team Divas at the High Hopes blog, and the High Hopes Rubber Stamps Facebook Fan page plus you can also follow us on
Instagram, Twitter and Pinterest.

Beautiful Blessings!!


It’s Wednesday, and this week, I made an Easter card using High Hopes Rubber Stamps Easter Gnome – SLF034  for the main image and Beautiful Blessings – FDG030  for the sentiment. I love to colour gnomes and was so excited when I saw this adorable character in the High Hopes Rubber Stamps new “This and That” Spring Release.

To make my card this week, I began with a card base of Hammermill – Premium Colour 100 lb. cardstock, cut and scored to be 5.5″ x 4.25″. I cut Forever In Time – Viola cardstock to be the same size as the base card and attached it using double-sided tape. Echo Park – Welcome Easter cardstock and Forever In Time – Sky cardstock were die cut using My Creative Time – Rectangle Frame Layers and my Cuttlebug. I trimmed the Forever In Time – Sky cardstock to 2″. Both pieces were inked with Tim Holtz Distress Ink – Evergreen Bough around all edges. I applied the smaller piece to the centre of the egg background and then applied U-Line Double-sided tape and popped it up onto the base background.

Using PinkFresh Studio – Essentials: Folk Edge Squares, I die cut Copic Marker X-Press It Blending Card cardstock. The image was then stamped onto it with my MISTI and Memento – Tuxedo Black ink. I stamped the sentiment onto Copic Marker X-Press It Blending Card cardstock and die cut it with My Creative Time – Bunch of Fun Circle Dies. The image and frame around it were coloured in with Copic Markers.

The remainder of the card was now ready to finish being assembled. I applied U-Line double-sided tape to the back of the image and sentiment and popped them up onto the egg background. Lastly, I added in a few YNS Gumdrops to complete the card.

Card Recipe:

Stamps: Easter Gnome- SLF034 (High Hopes Rubber Stamps)

Sentiment: Beautiful Blessings – FDG030 (High Hopes Rubber Stamps)

Inks: Memento – Tuxedo Black, Tim Holtz Distress Ink – Evergreen Bough

Paper: Copic Marker X-Press It Blending Card, Hammermill – Premium Colour 100 lb., Echo Park – Welcome Easter (6″ x 6″), Forever In Time – Sky, Forever In Time – Viola

Die Cuts: My Creative Time – Rectangle Frame Layers, My Creative Time – Rectangle Frame Dies, My Creative Time – Bunch of Fun Circle Dies, PinkFresh Studio – Essentials: Folk Edge Squares

Tools: MISTI – Most Incredible Stamping Tool, U-Line double-sided tape, Cuttlebug, YNS GumDrops

Image coloured with Copic Markers:

Skin: E21, E11, E04, E00, E000

Beard: C5, C4, C3, C1, C0

Hat and Clothing: BG34, BG32, BG15, BG11, BG10, V15, V12, V01, V000

Boots: E33, E31, E30, E27, E25, E23, E21

Bunny and Bunny Ears: C3, C1, C0, RV11, R20

Carrot and Stem: E08, YR18, YR14, YR12, Y08, G14, G07, YG23, YG11, YG03

Grass: YG17, YG13, YG03

Background: Y00, G00, B000

Border around Square Frame Circle: V12

Hope you like it and have a fantastic week!

You can find lots of inspiration from the Design Team Divas at the High Hopes blog, and the High Hopes Rubber Stamps Facebook Fan page plus you can also follow us on
Instagram, Twitter and Pinterest.

Have A Blessed Easter!


Today, I’m sharing an Easter card using Three Pane Easter – M043 by High Hopes Rubber Stamps for the main image and Blessed Easter Greetings – G151 (High Hopes Rubber Stamps) for the sentiment. Happy Easter to family, friends and everyone!

To make my card this week, I started with Craft Smart Card Paper pre-made to 5.5″ x 4.25″. I stamped the images and sentiment using MISTI and Memento – Tuxedo Black ink onto Copic Marker X-Press It Blending Card. Using my Brother Scan and Cut, I cut out each of the images. My Creative Time – Rectangle Frame Die Layers and my Cuttlebug were used to die cut the sentiment and Craft Sparkling Stickers – Purple (02-3068629) paper.

The main images were coloured in with Copic Markers. The background papers were all from Your Next Stamp – Happy Spring (6″x6″) paper pad. I cut each section at 4″ x 1.5″ and then inked around all of the edges with Tim Holtz Distress Ink – Wilted Violet. The sentiment was inked with Tim Holtz Distress Ink – Fossilized Amber.

To assemble the card, using glue, I attached the 3 background papers onto the base card. Crafts ribbon was attached using double-sided tape. The images, sentiment and sentiment background were attached to the background papers using 3M VHB – 2 sided tape. Lastly, to finish off the card, I cut 3 Easter eggs out of some watercolour paper that I had used various Cosmic Shimmer colours on previously. I inked around the edges with Tim Holtz Distress Ink – Wilted Violet and glued them directly to the background paper.

Card Recipe:

Stamp: Three Pane Easter – M043 (High Hopes Rubber Stamps)

Sentiment:  Blessed Easter Greetings – G151 (High Hopes Rubber Stamps)

Inks: Memento – Tuxedo Black, Tim Holtz Distress Ink – Wilted Violet, Tim Holtz Distress Ink – Fossilized Amber

Paper: Copic Marker X-Press It Blending Card, Craft Smart – Cards and Envelopes, Your Next Stamp – Happy Spring (6″x6″) 

Die Cuts: My Creative Time – Rectangle Frame Die Layers – MCT-D274

Tools: MISTI – Most Incredible Stamping Tool, Cuttlebug, 3M VHB – 2 sided tape, Cosmic Shimmer, Brother Scan and Cut

Image coloured with Copic Markers:

Bunny: E35, E34, E33, E31, E30, R30, R24, R20, Eyes (Sakura Glaze – Black)

Chick: Y17, Y08, Y04, YR18, YR16, YR12, Eyes (Sakura Glaze – Black)

Lamb: BV20, C3, C1, C00, Eyes (Sakura Glaze – Black)

Backgrounds for images: Y17, Y08, Y04, V17, V15, V12

Hope you like it and have a fantastic week!

You can find lots of inspiration from the Design Team Divas at the High Hopes blog, and the High Hopes Rubber Stamps Facebook Fan page plus you can also follow us on
Instagram, Twitter and Pinterest.

Bunny Blooms!


It’s Wednesday, and this week, I made an Easter card using Bunny Blooms – T063 by High Hopes Rubber Stamps for the main image and Script Easter Greetings – F093 (High Hopes Rubber Stamps) for the sentiment. Easter is almost here and this little bunny is about to brighten someone’s day!

To make my card this week, I started with Arches Watercolour Paper cut to 5.5″ x 4.25″. I ran this through my Cuttlebug using Tranquil Tulips Stencil from Simply Cards and PaperCraft. Next, I played with multiple Cosmic Shimmer products and spritzed some water to create this shimmery background. I let this dry overnight. I wanted the embossed tulips to show up more, so using a finger sponge, Tim Holtz Distress Ink – Wilted Violet was brushed over top of the raised edges. And of course, there is never enough shimmer so I added some Irridescent Glitter Dust spray as well. Then I glued this directly to the base card of Hammermill Premium 100 lb. Cardstock folded at 5.5″ x 4.25″. Lastly, I inked around the edges with the same ink.

The main image Bunny Blooms – T063 (High Hopes Rubber Stamps) and Script Easter Greetings – F093 (High Hopes Rubber Stamps) sentiment were stamped using my MISTI and Memento – Tuxedo Black ink onto Copic Marker X-Press It Blending Card. The main image and sentiment were coloured in with Copic Markers.

To assemble the remainder of my card, both the image and sentiment were attached to the background using 3M VHB – 2 sided tape. C.C. Designs – Dragon Dreams Enamel Dots were added to complete the card.

Card Recipe:

Stamp: Bunny Blooms – T063 (High Hopes Rubber Stamps)

Sentiment: Script Easter Greetings – F093 (High Hopes Rubber Stamps)

Inks: Memento – Tuxedo Black, Tim Holtz Distress Ink – Wilted Violet

Paper: Copic Marker X-Press It Blending Card, Arches Watercolour Paper, Hammermill Premium 100 lb. Cardstock

Stencil: Simply Cards and PaperCraft – Tranquil Tulips Stencil

Tools: MISTI – Most Incredible Stamping Tool, Cuttlebug, 3M VHB – 2 sided tape, Glitter Dust – Irridescent Spray, C.C. Designs – Dragon Dreams Enamel Dots

Image coloured with Copic Markers:

Bunny: E35, E34, E33, E31, E30, R30, R24, R20, Eyes (Sakura Glaze – Black)

Flowers and Leaves: V17, V15, V12, YR14, Y17, Y04, G17, G14, G07

Cosmic Shimmer: Pixi Powder: Purple Violet, Sun Yellow, Aubergine Dream, Purple Violet, Emerald Green, Pixie Sparkles: Groovy Grape, Pale Blush

Hope you like it and have a fantastic week!

You can find lots of inspiration from the Design Team Divas at the High Hopes blog, and the High Hopes Rubber Stamps Facebook Fan page plus you can also follow us on
Instagram, Twitter and Pinterest.

Easter Gnome!!


Sharing a card I made today using KLM Digital Designs – Easter Delivery Gnome from the new March release. This Easter gnome is collecting coloured eggs for the Easter Bunny to hand out to all of the little children. This stamp comes with 2 more sentiments as well as the one shown here on my card. “Easter Blessings” and “some bunny loves you”.

To make the card, I first imported the image and sentiment into Microsoft Word. I sized both the image and sentiment to fit 5.5″ x 4.25″ and printed everything out onto Copic Marker X-Press It Blending Card using my HP Printer. I used my Brother Scan and Cut to cut around the image and my cutter to cut around the sentiment and scissors to round the corners. The image and sentiment were coloured in with Copic markers.

For the base card, Hammermill – Premium Colour 100 lb. paper was used at the size of 5.5″ x 4.25″. I die cut the base to be same size using Your Next Stamp – Happy Spring paper and used double-sided tape to attach it directly to the base card. Tim Holtz Distress Ink – Evergreen Bough was used to ink around the edges. Hot Buy – Recollections – Jewel Tones was cut to 5.5″ x 3″ and glued on top of the patterned paper. Lastly, I had some watercolour paper that I had created a pattern on using some inks, a roller and Gel plate from a class a few years back. I though it went great with the colour scheme and almost look like a wood pattern. This was cut to 5.5″ x 2.5″ and glued on top of the Purple paper. To complete the card, I attached both the sentiment and image using 3M VHB – 2 sided tape and added a few Your Next Stamp Gumdrops.

Card Recipe:

Stamp and Sentiments: Easter Delivery Gnome (KLM Digital Designs)

Inks: HP Printer Grayscale, Tim Holtz Distress Ink – Evergreen Bough

Paper: Copic Marker X-Press It Blending Card, Hammermill – Premium Colour 100 lb., Hot Buy – Recollections – Jewel Tones, Your Next Stamp – Happy Spring (6″x6″)

Miscellaneous: Your Next Stamp Gumdrops, 3M VHB – 2 sided tape

Image coloured with Copic Markers:

Skin: E21, E11, E04, E00, E000

Beard: E49, E47, E44, E42

Shirt: V17, V15, V12

Pants: B26, B23, B21

Hat: BG72, BG57, BG32, BG11

Bunny Ears: R30, R20, BV20, C1, C0

Boots: E57, E55, E47, E44, E33, E30, E27, E25, E23

Large stick: E59, E57, E55, E53

Nest: E53, E23, Y19, YR31, YR21

Eggs: BG72, BG57, BG32, BG11, Y08, Y04, Y00, RV06, RV04, RV02

Pot: E99, E97, E08

Sentiment: Y08, Y04, Y02, V17, V15, V12

Hope you like it and have a great week!

You can find more cards to inspire you at KLM Designs, KLM Digital Design Team and KLM Digital Designs on the Facebook Fan page from the rest of our design team.

Easter Fun!


It’s Wednesday, and this week, I made an Easter card using Easter Fun – Q023 by High Hopes Rubber Stamps for the main image and Hoppy Easter – H245 (High Hopes Rubber Stamps) for the sentiment. This image reminds me so much of when I was younger. Every year, my mom would make boiled eggs and then we would all sit around the table and put them in the various dies to make some cool colourful eggs. It was always so much fun.

To make my card this week, I used AC White Paper for my base folded at 6″ x 6″. I combined 2 separate pieces of purple ribbon and some patterned ribbon eggs together using double sided tape. I attached this to Your Next Stamp Designer – Happy Spring paper. Then I attached this directly to the base using double-side tape. The sides were all inked with Tim Holtz Distress Ink – Wilted Violet. The egg embellishments were die cut using my Cuttlebug and Lawn Fawn – Mini Easter Eggs. The top layers were cut from Copic Marker X-Press It Blending Card and coloured with Copic B01 and BG32. The bottom layers were cut from Crafts – Sparkling Stickers  – 02-3068629. I added some glue to the top layer and attached them to the base egg. I attached these directly to the base.

The background for the bunny image was cut using Whimsy – Nested Frames Die Set. The background die was cut from Hot Buy – Recollections – Jewel Tones and them main image cut was from Copic Marker X-Press It Blending Card. The base frames were attached to the background using 3M VHB – 2 sided tape. The main image Easter Fun – Q023 (High Hopes Rubber Stamps) and Hoppy Easter – H245 sentiment were stamped using my MISTI and Memento – Tuxedo Black ink. The main image was coloured in with Copic Markers and the sentiment was coloured in using Zig Clean Color Real Brush Markers. Clear – Wink of Stella was brushed over top to make it sparkle.

To assemble the remainder of my card, I ran the coloured image and sentiment through my Xyron’s and then attached them to the base shapes on the card.

Card Recipe:

Stamp: Easter Fun – Q023 (High Hopes Rubber Stamps)

Sentiment: Script Easter Greetings – F093 (High Hopes Rubber Stamps)

Inks: Memento – Tuxedo Black, Tim Holtz Distress Ink – Wilted Violet

Paper: Copic Marker X-Press It Blending Card, AC White, Hot Buy – Recollections – Jewel Tones, YNS Designer Paper Pad – Happy Spring, Crafts – Sparkling Stickers  – 02-3068629

Die Cuts: Whimsy – Nested Frames Die Set, Lawn Fawn – Mini Easter Eggs

Tools: MISTI – Most Incredible Stamping Tool, Cuttlebug, 3M VHB – 2 sided tape, Clear – Wink of Stella, Xyron Create a Sticker, Xyron Creative Station

Image coloured with Copic Markers:

Bunnies: E35, E34, E33, E31, E30, R30, R20, C2, C1, C0, Eyes (Sakura Glaze – Black, Gelly Roll Sakura #8 Pen)

Shirts: BG72, BG57, BG32, BG11, V17, V15, V12

Eggs and Paint Tins: BG32, B04, B02, B01, Y17, Y13, C5, C3, C1, E53, E51, E50

Water and Egg Carton: E53, E51, E50, B000, B0000

Table and Shadow: W2, W1, W0

Background: Y02

Sentiment: Zig Clean Color Real Brush Markers – English Lavender (803), Lilac (083), Yellow (050), Orange (070), Turquoise Green (042), Green Shadow (049), Light Pink (026)

Hope you like it and have a fantastic week!

You can find lots of inspiration from the Design Team Divas at the High Hopes blog, and the High Hopes Rubber Stamps Facebook Fan page plus you can also follow us on
Instagram, Twitter and Pinterest.
Easter Egg Gift!


It’s Wednesday, and this week, I made an Easter card using this hoppy little Bunny With Gift – S118 by High Hopes Rubber Stamps for the main image and Script Easter Greetings – F093 (High Hopes Rubber Stamps) for the sentiment. Look at how “hoppy” he is to share his  decorated egg with a special person! I don’t know about you, but I hope it’s filled with chocolate. LOL!

To make my card this week, I used Recollections – Hot Buy Pre-Cut Cards for my base folded at 5.5″ x 4.25″. Next I die cut Hot Buy – Recollections – Spring Posies using my Cuttlebug and My Creative Time – Rectangle Frame Die. Using some spare ribbon I had, using some double-sided tape, I attached it directly to this die-cut. Then, using double sided tape, I attached this piece directly to the base card. The aqua colour paper is from Hot Buy – Recollections – Jewel Tones. I created this die cut using my Cuttlebug and Gina Marie Designs – Loopy Rectangle Die Set.

The frame for the sentiment was created in Microsoft Word and then printed out onto white cardstock. This was coloured in with ZIG Clean Color Markers – 050 – Yellow and 025 – Pink. I stamped the Bunny With Gift – S118 (High Hopes Rubber Stamps) and Script Easter Greetings – F093 sentiment using my MISTI. Using my Brother Scan and Cut, I cut around the image leaving a small white border. This was coloured in with Copic Markers.

To assemble the remainder of my card, I first used some double-side tape to attach the finished sentiment to the bottom of the aqua die cut. 3M VHB – 2 sided tape was added to both pieces and attached to card. Lastly, the completed image was attached to the die cut, using 3M VHB – 2 sided tape.

Card Recipe:

Stamp: Bunny With Gift – S118 (High Hopes Rubber Stamps)

Sentiment: Script Easter Greetings – F093 (High Hopes Rubber Stamps)

Inks: Memento – Tuxedo Black

Paper: Copic Marker X-Press It Blending Card, Craft Smart – Cards and Envelopes, Hot Buy – Recollections – Jewel Tones, Hot Buy – Recollections – Spring Posies

Die Cuts: My Creative Time – Rectangle Frame Dies, Gina Marie Designs – Loopy Rectangle Die Set

Tools: MISTI – Most Incredible Stamping Tool, Cuttlebug, 3M VHB – 2 sided tape

Images coloured with Copic Markers:

Bunny: E35, E34, E33, E31, E30, R30, R20

Egg and Bow: BG72, BG57, BG32, BG11, Y17, Y08, Y04, R83, R81, RV00, RV000

Easter Greetings: ZIG Clean Color Markers – 050 – Yellow, 025 – Pink

Hope you like it and have a fantastic week!

You can find lots of inspiration from the Design Team Divas at the High Hopes blog, and the High Hopes Rubber Stamps Facebook Fan page plus you can also follow us on
Instagram, Twitter and Pinterest.

Posing Easter Bunny!


It’s Wednesday, and this week, I made an Easter card using this sassy little Posing Bunny – R080 by High Hopes Rubber Stamps. She’s all prettied up with her Easter Bonnet and wanted to show it off. LOL!

To make my card this week, I used Recollections – Hot Buy Pre-Cut Cards for my base folded at 5.5″ x 4.25″. Next I die cut Craft Smart – Hot Buy – Spring & Hop using my Cuttlebug and My Creative Time – Rectangle Frame Die. This was inked all around the edges with Tim Holtz Distress Ink – Mermaid Lagoon. It was then attached directly to the base card using Tombow Multi Mono Liquid Glue. The big Easter Egg is from Simple Stories – Bunnies & Baskets. This was popped up using 3M VHB – 2 sided tape.

I stamped Posing Bunny – R080 (High Hopes Rubber Stamps) using my MISTI and then used my Brother Scan and Cut to cut around it. This was coloured in with Copic Markers and I gave her eyes some eyelashes. I added this to the card using 3M VHB – 2 sided tape. To complete the card I added in some flowers.

Card Recipe:

Stamp: Posing Bunny – R080 (High Hopes Rubber Stamps)

Inks: Memento – Tuxedo Black, Tim Holtz Distress Ink – Mermaid Lagoon

Paper: Copic Marker X-Press It Blending Card, Simple Stories – Bunnies & Baskets, Craft Smart – Hot Buy – Spring & Hop, Recollections – Hot Buy Cards and Envelopes

Die Cuts: My Creative Time – Rectangle Frame Dies

Tools: MISTI – Most Incredible Stamping Tool, Cuttlebug, 3M VHB – 2 sided tape

Images coloured with Copic Markers:

Bunny: BV20, C3, C2, C1, R30, R20, E53, E51, E50

Hat and Ribbon: B04, B02, B01, B00, V09, V06, V04, V01

Hope you like it and have a fantastic week!

You can find lots of inspiration from the Design Team Divas at the High Hopes blog, and the High Hopes Rubber Stamps Facebook Fan page plus you can also follow us on
Instagram, Twitter and Pinterest.

He Is Risen!


It’s Wednesday, and this week, I made an Easter Card using  He Lives! – R057 (High Hopes Rubber Stamps) for the main image and He Is Risen! – H137 (High Hopes Rubber Stamps) for the sentiment. I really love the serenity of this image. Here’s hoping that we will get to spend Easter with our loved ones this year.

To make my card this week, I used AC Cardstock for my base folded at 6″ x 6″. For the main background, I used this beautiful paper from Heartfelt Creations – Flowering Dogwood Collections cut to the same size as the base and attached it using double-sided tape. Tim Holtz Distress Inks – Peeled Paint was used to ink around all of the edges. My Creative Time – Scalloped Stitched Oval Dies was used to cut all of the ovals and My Creative Time – Rectangle Frame Die Layers was used to cut the small rectangle. Tim Holtz Distress Ink – Fossilized Amber was used to ink around the large scalloped oval and Tim Holtz Distress Inks – Dusty Concord was used to ink around the larger oval and small rectangle. I used 2 types of purple ribbon and ran both pieces through my Xyron Create a Sticker to make it easier to attach them to each other and then onto the card. I used some double-sided tape and glue to adhere the larger oval to the base. 3M VHB – 2 sided tape was used to add the larger oval.

I stamped the image and sentiment using Memento – Tuxedo Black and my MISTI onto Copic Marker X-Press It Blending Card. I coloured in the image using Copic markers. For the sentiment, I found the white was too bright, so I coloured over it with a soft purple Copic marker – V01. I added 3M VHB – 2 sided tape to the back of the coloured image and placed it on top of the larger oval. For the sentiment, I doubled up on the 3M VHB – 2 sided tape before attaching it to the card.

Card Recipe:

Stamp:  He Lives! – R057 (High Hopes Rubber Stamps)

Sentiment Background: He Is Risen – H137 (High Hopes Rubber Stamps)

Inks: Memento – Tuxedo Black, Tim Holtz Distress Ink – Fossilized Amber, Tim Holtz Distress Inks – Dusty Concord, Tim Holtz Distress Inks – Peeled Paint

Paper: Copic Marker X-Press It Blending Card, Heartfelt Creations – Flowering Dogwood Collections – 12″ x 12″ Paper Pad – HCDP1-275, AC White Cardstock, Yellow Cardstock, Purple Cardstock

Die Cuts: My Creative Time – Rectangle Frame Die Layers – MCT-D274, My Creative Time – Scalloped Stitched Oval Dies

Tools: MISTI – Most Incredible Stamping Tool, Cuttlebug, 3M VHB – 2 sided tape, Xyron Create a Sticker

Images coloured with Copic Markers:

Cross: E59, E39, E35, E33, E31

Sash: BV08, V17, V15, V09, V04

Flower and Leaves: YG17, YG03, YG01, Y02, C0

Lamb: B60, C3, C1, C0, R30, Colorless Blender

Grass: YG13, YG11, YG03, YG01

Sky: Y02, Y06, Y08

Hope you like it and have a fantastic week!

You can find lots of inspiration from the Design Team Divas at the High Hopes blog, and the High Hopes Rubber Stamps Facebook Fan page plus you can also follow us on
Instagram, Twitter and Pinterest.

Time to Smell the Flowers!


It’s Wednesday, and this week, I used Daffodil Bunny – SLF006 (High Hopes Rubber Stamps) for the main image from the new August 2020 release and Smell The Flowers – G189 (High Hopes Rubber Stamps) for the sentiment. This adorable little bunny is taking time out to smell the flowers. We have a really nice garden of flowers that my husband takes care of. I’m not a green thumb at all. LOL! It’s always nice to take a moment and enjoy the beauty of them.

To make my card this week, I started out with a simple white card base, sized at 6″ x 6″. The base background was also cut at 6″ x 6″ using Craft Consortium – Cottage Garden paper and then inked around the edges with Tim Holtz Distress Ink – Fossilized Amber. I just thought this paper went so well with this adorable image. I added the 2 colours of ribbon with some 2-sided tape and then adhered the entire background paper to the base with 2-sided tape.

The scalloped circle and inside image circle were both die cut using my Cuttlebug and Craftin Desert Diva’s Stitched in Circle Dies. The circle in between the 2 of them was die cut with Lifestyle Crafts Cutting Dies – Nesting Circles. The edges of the large scalloped circle were inked with Tim Holtz Distress Ink – Picked Raspberry. For the sentiment, My Creative Time – Rectangle Frame Dies were used. The die was larger in depth, so I just die cut one side and then turned it around and only put it part way through my Cuttlebug to cut the other edge. It too, was then inked around the edges with Tim Holtz Distress Ink – Fossilized Amber. The image was coloured with Copic Markers.

To assemble the remainder of the card, the mid circle was attached directly to the large scalloped circle and then popped up with 3M VHB – 2 sided tape. The image and sentiment were popped up on top with 3M VHB – 2 sided tape as well.

Card Recipe:

Stamp: Daffodil Bunny – SLF006 (High Hopes Rubber Stamps)

Sentiment: Smell The Flowers – G189 (High Hopes Rubber Stamps)

Inks: Memento – Tuxedo Black, Tim Holtz Distress Ink – Fossilized Amber, Tim Holtz Distress Ink – Picked Raspberry

Paper: Copic Marker X-Press It Blending Card, Momenta – Cardstock, Crafts Sparkling Stickers – 02-3068629, Craft Consortium – Cottage Garden 6″x6″

Die Cuts: Craftin Desert Diva’s Stitched in Circle Dies, Lifestyle Crafts Cutting Dies – Nesting Circles, My Creative Time – Rectangle Frame Dies

Tools: MISTI – Most Incredible Stamping Tool, Cuttlebug, 3M VHB – 2 sided tape

Image coloured with Copic Markers:

Bunny: E37, E35, E34, E33, E31, E30, R11, R02, R000

Bow: RV19, RV17, RV13

Grass and Greenery for Plants: BG99, BG97, G21, YG17, YG13, YG07, YG03, YG01

Daffodil: E15, Y38, Y18, Y04

Clouds and Sky: B60, B01, B00, B000, B0000, C0, Colorless Blender

Hope you like it and have a fantastic week!

You can find lots of inspiration from the Design Team Divas at the High Hopes blog, and the High Hopes Rubber Stamps Facebook Fan page plus you can also follow us on
Instagram, Twitter and Pinterest.


Happy Easter to my Gnomies!


Today, I’m sharing a card that I made using Bunny Painter Gnome and Sentiments Digital Stamp (KLM Digital Designs)! This little Easter Gnome has all of his eggs painted up to give out for Easter. Do you still paint your eggs for Easter too?

To make the card, I printed out the image and sentiment with my HP printer using High Quality Grayscale onto Copic Marker X-Press It Blending Card. I coloured in the image and then fussy cut around it and the sentiment.

For the background, I cut out a piece of Strathmore Bristol paper 5.5″ x 4.25″.  Then with a stencil that I made using Avery Elle – Custom Steel Dies – Pierced Clouds Die, I created the sky using Tim Holtz Distress Ink – Salty Ocean. For the grass, I used a mixture of Tim Holtz Distress Ink Greens – Mowed Lawn, Peeled Paint, and Twisted Citron. Then I used some water and 1/4 round Sable brush and #1 Fine Liner to create the grass.

I used my Xyrons to create a sticker out of the coloured image and sentiment and then mounted the finished image onto a white card base of 5.5″ x 4.25″ using double-sided tape.

Card Recipe:

Stamp and Sentiment: Bunny Painter Gnome and Sentiments Digital Stamp (KLM Digital Designs)

Inks: HP Printer – Greyscale, Tim Holtz Distress Ink – Salty Ocean, Tim Holtz Distress Ink – Mowed Lawn, Tim Holtz Distress Inks – Peeled Paint, Tim Holtz Distress Ink – Twisted Citron

Paper: Copic Marker X-Press It Blending Card, Strathmore Bristol Paper

Die Cuts: Avery Elle – Custom Steel Dies – Made in the USA – D-05-01 PiercedCloudsDie

Tools: Xyron Create a Sticker, Xyron Creative Station

Image coloured with Copic Markers:

Skin: E21, E11, E04, E00, E000

Beard and Mustache: W5, W4, W3, W1, W0

Hat: YG45, YG41, G21

Pants: B26, B23, B21

Boots: E37, E35, E34, E33, W3, W2, W1, BG49, BG45, BG34

Paintbrush: E53, E51, E50, E37, E34, E33, C4, C2, C1, BG49, BG45, BG34

Eggs: B02, B01, B00, BG49, BG45, BG34, Y13, Y08, Y04, R83, R81, RV02

Background: B70, B01, B00, B000, B000, C0, Colorless Blender

Hope you like it and have a great week! Happy Easter Everybody!

You can find more cards to inspire you at KLM DesignsKLM Digital Design Team and KLM Digital Designs on the Facebook Fan page from the rest of our design team.

Hoppy Easter!


Welcome Back Dreamerland Craft Fans!

Today, I’m sharing a couple of images that I combined from Dreamerland Crafts stamps called Sending Love Flowers – D18002 and from their Mix and Match Set Mailbox and Wall – M18301. I thought this would make a great combo for a cheerful Easter card.

I made this card in stages. First I die-cut a 5″ x 5″ square out of Copic Marker X-Press It Blending Card using my Cuttlebug and My Creative Time – Stitched Squares Inside and Out. Then I stamped all of the images onto Inkadoo Stamping Mask Paper. Using Memento – Tuxedo Black ink and my MISTI, I stamped the Girl, bunnies and Bird House first. Then added the mask over top of them.

For the next stage, I stamped the wall. Then I added the mask over top of it as well.

Lastly, I stamped the foliage above the wall with Memento – Bamboo Leaves ink, removed all of the masks and then coloured in the entire image.

Once the image was coloured in, I added the sentiment and then mounted it onto the front of white cardstock cut to 5″ x 5″.

Card Recipe:

Stamps:  Sending Love Flowers – D18002 (Dreamerland Crafts), Mailbox and Wall – M18301 (Dreamerland Crafts)

Sentiment: Hoppy Friends (Kraftin Kimmie)

Inks: Memento – Tuxedo Black, Versa Fine – Onyx Black, Memento – Bamboo Leaves

Embossing Powder: Ranger – Clear Super Fine Detail embossing powder.

Paper: Copic Marker X-Press It Blending Card, White Card Stock

Die Cuts: My Creative Time – Stitched Squares Inside and Out

Tools: MISTI – Most Incredible Stamping Tool, Cuttlebug, Inkadoo Stamping Mask Paper

Image coloured with Copic Markers:

Skin: E000, E00, E04, E11, E21, R22, R20

Hair:  Y38, E15, Y21

Dress and Boot: V25, BV02, BV01, BV00, BV000

Rabbits: W3, W1, W0, R20, Colorless Blender, Sakura Glaze – Black

Basket: E44, E43, E41

Brick: E57, E35, E33, E09, TN2, TN0

Foliage: YG17, YG13, YG03, YG01

Flowers and Leaves: Y17, Y08, Y04, Y00, G17, G14, G07

Bird: BG07, BG05, BG02, YR12, Sakura Glaze – Black

Rocks: C7, C5, C3, C1

Birdhouse: R39, R29, R27, R24, E27, E25, E23

Sidewalk: C3, C2, C1, C0

Sky: B60, B01, B00, B000, B0000, C0, Colorless Blender

Hope you like it and have a great week!

You can find more cards to inspire you at Dreamerland Crafts and Pointer Scrapbooking on the Facebook Fan pages from the rest of our design team.

Carrot Express!!!


It’s Wednesday, and Easter is quickly approaching. So for this week, I used Carrot Express – S055 (High Hopes Rubber Stamps) for the main image and Canadian Easter Greetings – H139 (High Hopes Rubber Stamps) for the sentiment.

To put this card together, I first die-cut some Copic Marker X-Press It Blending Card using my Cuttlebug and My Creative Time -Stitched Squares Inside and Out. Next, I stamped the image with Memento – Tuxedo Black ink using my MISTI to get a nice clean image. I put the die-cut back over the image again and used it for a template to get a nice clean white border. I created a mask out of the image and used the die-cut from Avery Elle – Custom Steel Dies – Made in the USA – D-05-01 PiercedCloudsDie and Tim Holtz Distress Ink – Salty Ocean to create the sky background.

I mounted the plaid paper from Recollections – Easter Paper onto a white card base of 5.5″ x 4.25″and then edged around the image and card with Tim Holtz Distress Inks and embossed the sentiment using Tim Holtz Distress Ink – Wilted Violet and VersaMark.

Lastly, I popped up the image onto the card using 3M – VHB 2-sided tape and added in some Kraftin’ Kimmie Pastel Krafty Dots.

Card Recipe:

Stamp: Carrot Express – S055 (High Hopes Rubber Stamps)

Sentiment: Canadian Easter Greetings – H139 (High Hopes Rubber Stamps)

Inks: Memento – Tuxedo Black, Tim Holtz Distress Ink – Wilted Violet, Tim Holtz Distress Inks – Shaded Lilac, VersaMark

Paper: Copic Marker X-Press It Blending Card, Recollections – Easter Paper

Embossing: Ranger – Clear Super Fine Detail embossing powder

Die Cuts: Avery Elle – Custom Steel Dies – Made in the USA – D-05-01 PiercedCloudsDie, My Creative Time -Stitched Squares Inside and Out

Tools: MISTI – Most Incredible Stamping Tool, Cuttlebug, 3M VHB – 2 sided tape, Kraftin’ Kimmie Pastel Krafty Dots

Image coloured with Copic Markers:

Rabbit: W5, W3, W1, R30, R02

Overalls: B26, B23, B21, R29, R27, R24

Carrots and Leaves: YR27, YR12, YR09, YR04, G14, G07, YG25, YG21

Wagon: E35, E33, E31, R29, R27, R24, W9, W7, W5, C2, C1, C0

Dirt: E37, E35, E33, E31

Hope you like it and have a fantastic week!

You can find lots of inspiration from the Design Team Divas at the High Hopes blog, and the High Hopes Rubber Stamps Facebook Fan page plus you can also follow us on
Instagram, Twitter and Pinterest.


Easter Masterpiece!


It’s Wednesday, and this week I used High Hopes Rubber Stamps Bunny Masterpiece – S063 for the main image and Egg-Stra Special -G243 for the sentiment. These little bunnies are getting prepared for Easter. I remember making painted eggs every year in the kitchen with my mom and brothers as a child. Do you have an Easter tradition of painting eggs too?

To create the card I coloured in the image and then popped it up using 3M VHB – 2 sided tape. I also popped up the sentiment. I found some old cardstock and cut out some of the little eggs and then edged around each of them with various Tim Holtz colours listed below. The card is 6″ x 6″.

Card Recipe:

Stamp:  Bunny Masterpiece – S063 (High Hopes Rubber Stamps)

Sentiment: Egg-Stra Special -G243 (High Hopes Rubber Stamps)

Inks: Memento – Tuxedo Black, Tim Holtz Distress Inks – Dusty Concord, Spun Sugar, Wilted Violet, Evergreen Bough, Shaded Lilac and Fossilized Amber

Paper: Copic Marker X-Press It Blending Card, Recollections – Blue Ombre Cardstock, Recollections – Purple Ombre Cardstock, Recollections – Easter Printed Cardstock

Die Cuts: My Creative Time -Stitched Squares Inside and Out

Tools: MISTI – Most Incredible Stamping Tool, Cuttlebug, 3M VHB – 2 sided tape

Image coloured with Copic Markers:

Bunnies: C3, C2, C1, C0, R30, R02, RV04

Overalls: B26, B23, B21, V09, V06, V04, BV04, BV02, BV01, BV000

Egg: Y08, Y06, Y02, BG13, BG11, BG10, RV04, RV02, RV00, G02, G00, G000, B41, B34, B32

Paintbrushes: N4, N0, E27, E23, BG13, BG11, BG10, B34, B41

Grass: G17, G14, G07

Sky: B02, B01, B00, B000

Hope you like it and have a fantastic week!

You can find lots of inspiration from the Design Team Divas at the High Hopes blog, and the High Hopes Rubber Stamps Facebook Fan page plus you can also follow us on
Instagram, Twitter and Pinterest.


Happy Easter From Canada!


Hello OCS Fans!

It’s Wednesday, and today I’m sharing an Easter card that I made for some very young cousins in the USA using High Hopes Rubber Stamps.

On the front of the card, I used Carrot Patch (High Hopes Rubber Stamps) as my main image. Then printed out the sentiment in Microsoft Word using Georgia Font – Bold, Italic, PS 36. After stamping and colouring the image, I used Inkadoo Stamping Mask Paper and stamped the image again. Then I fussy cut around the mask and placed it over the image to do my clouds using the cloud stencils that I made from Avery Elle – Custom Steel Dies – Made in the USA – D-05-01 PiercedCloudsDie and Tim Holtz Distress Ink – Salty Ocean ink.

Here is a close-up of the Easter Bunny!

On the inside of the card, Peeking Spring Buddies (High Hopes Rubber Stamps) and Canadian Easter Greetings (High Hopes Rubber Stamps) for the sentiment.

All images were stamped onto Copic Marker X-Press It Blending Card using Memento – Tuxedo Black ink and my MISTI (Most Incredible Stamping Tool) and then coloured in with Copic Markers.

Stamps: Carrot Patch – TT116 (High Hopes Rubber Stamps); Peeking Spring Buddies – Q128 (High Hopes Rubber Stamps); Canadian Easter Greetings – H139 (High Hopes Rubber Stamps)

Bunny: E37, E35, E33, E31, R22, R20, R00, Sakura Glaze Black, Gelly Roll #8 Sakura Pen

Carrot: YR18, YR16, YR15, Leaves: YG17, YG13, YG03, YG01

Flowers: Y06, Y04, V06, V04, V12, YG17, YG13

Grass: G17, G14, G07

Egg: BG13, BG11, BG10, Y06

Butterflies: N6, N2, B4, BV2, BV1, Gelly Roll #8 Sakura Pen

Sentiment Front: Georgia Font – Bold, Italic, PS 36

Inside Bunny: E37, E35, E33, E31, R22, R20, R00

Flowers \ Dress \ Bandana: Y06, Y04, V06, V04, V12, YG17, YG13

Ducks: Y17, Y15, Y11, YR15, YR14, YR12

Bowties: BG13, BG11, BG10

Inks: Tim Holtz Distress Ink – Fossilized Amber, Tim Holtz Distress Ink – Salty Ocean (Clouds), Tim Holtz Distress Ink – Wilted Violet, Tim Holtz Distress Ink – Evergreen Bough, Tim Holtz Distress Ink – Wild Honey, Memento – Tuxedo Black, VersaFine – Onyx Black

Embossing Powder: Ranger – Super Fine Clear Detail

Paper: Copic Marker X-Press It Blending Card; Background Paper: Easter Scrapbook Paper – Scrapbooking Love to Know (Digital)

Die Cuts: Your Next Stamp – Stitched Rectangle Die Set (YNSD214); Avery Elle – Custom Steel Dies – Made in the USA – D-05-01 PiercedCloudsDie


Be sure to visit the One Crazy Stamper blog for your daily inspiration, and check out our Facebook page, Pinterest and Twitter as well!


Boo’s Easter Card to Vet 2017


Hi There,

Sharing Boo’s Easter card for her vet and staff for this year.

Digi stamps are from Kadoodle Bugs Designs – Whimsical Inklings – DS Cute Kitty Easter – Illustration by Cheryl Gillihan.

Inside:

Coloured in image with a mixture of Copic and Spectrum Noir markers.

Sentiment on inside is from Craftin Desert Diva’s – Honey Bunny.

Background paper – Momenta – Cardstock.

Die cuts – Sizzix Rounded Tags – 8 dies.

Edged around paper with – Tim Holtz Distress Ink – Wilted Violet and Tim Holtz Distress Ink – Mustard Seed.

Happy Easter everyone from the Stevenson family and “Boo”.


Sassy – Easter Bunny Honey


Hi There,

Back to share a card that I made for this month’s Sassy Studio’s Designs April FB Progressive Challenge “Easter Bunny Honey”.


Sassy Bunny

Coloured in the image with Spectrum Noir Markers.

Patterned paper is from Recollections Signature – Kaitlin.

Sentiment is from Peachy Keen – PK-193 Baby Easter Bunny.

Ribbon End Dies – MCT-D134 – My Creative Time.

Purple Ribbon – Forever in Time – Ribbons & Trims Stickers.

Hope you like it!

Hubby Easter Card


Hi There,

Back again to share the Easter card that I had made for my husband from me and our cat “Boo”. He loved it!!!

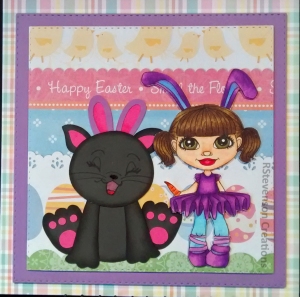
I made the card using Too Cute by Jessica Hallowe’en Cats by Jessica Weible Illustrations, LLC. and DoodleBug Ballerina by Faery Ink.

BooEasterFaeryInk

The faces on the cat was stamped with Memento – Tuxedo Black ink using Peachy Keen Stamps PK-110 Here Kitty Kitty Face Assortment.

The ballerina was coloured in with Spectrum Noir markers. Used Gelly Roll Sakura #8 Pen for the whites on the eyes.

Background paper is from Recollections Easter Printed Stock and also Cardstock Paper – All Seasons 6 x 6″ (15.2 x 15.2 cm).

Used My Creative Time -Stitched Squares Inside and Out to cut out the borders.

Hope you like it!

Boo’s Easter Card for the Vet – 2016


Hi There,

Back to share a card I made for Easter to our vet and his staff from our black cat Boo for this year.

I made the card using 2 files from Too Cute By Jessica – JS Spring Animals by JessicaSawyerDesign and Hallowe’en Cats by Jessica Weible Illustrations, LLC.

Here is the front of the card.

Bunny2


To create this card I uploaded the .svg files into Cricut Design Space and the used Cricut Explore to cut each of the images.

Here is a close up:

BunnyCU1

This is the inside of the card.

EasterBoo2

Here is a close-up.

EasterBooCup

Made the bunny ears by using Cricut Cartridge – Stretch your Imagination – Bunny with Basket – #M46835. Deleted basket and the spliced the ears with a circle.

Grass: Background Cricut Cartridge – Grass #M44E6A – Disney® – Mickey and Friends

Grass: Foreground – Cricut Cartridge – Border #M34848 – Paper Dolls for Everyday

Clouds – Avery Elle – Custom Steel Dies – Made in the USA – D-05-01 PiercedCloudsDie – Cut out clouds using the die and then used that as a stencil for the clouds.

Sky- Tim Holtz Ranger Distress Ink – Broken China

Bunny Face – Peachy Keen Stamps PK-440 Cute & Cuddly Face Assortment

Cat Face and Whiskers for both animals – Peach Keen Stamps PK-110 Here Kitty Kitty Face Assortment

White on eyes and across noses – Sharpie Water Based Paint – White – Extra Fine Point

Sentiment on Front – Cricut Cartridge – Zoo Day; Patterned Paper – #Summer Paper Pad by American Crafts 6 x 6″ (15.2 x 15.2 cm) for the colourful lettering.

Sentiment on inside: My Creative Time – MCT-245 – Ears To You, “Boo” – Peachy Keen Stams PK-131 Happy Haunting Ghosts

Various ink pads for highlighting characters.

Hope you like it and Happy Easter everyone!


Easter Card – Lamb


Hi There,

Back to share the first of some new Easter Cards that I made using Too Cute By Jessica – JS Spring Animals by JessicaSawyerDesign.


EasterLamb1

To create this card I uploaded the .svg files into Cricut Design Space and the used Cricut Explore to cut each of the images.

Here is a close up:

LambCUp

Easter Basket – Treasure Box Gems

Basket Weave – Lifestyle Crafts – Embossing Folder

Here is a close up:

TBG-Basket

Grass: Background Cricut Cartridge – Grass #M44E6A – Disney® – Mickey and Friends

Grass: Foreground – Cricut Cartridge – Border #M34848 – Paper Dolls for Everyday

Clouds – Avery Elle – Custom Steel Dies – Made in the USA – D-05-01 PiercedCloudsDie – Cut out clouds using the die and then used that as a stencil for the clouds.

Sky- Tim Holtz Ranger Distress Ink – Broken China

White on eyes and across noses – Sharpie Water Based Paint – White – Extra Fine Point

Texture for lamb’s wool – Cuttlebug and D’Vine Swirl

Sentiment – Cricut Cartridge – Ashlyn’s Alphabet Block; Patterned Paper – #Summer Paper Pad by American Crafts 6 x 6″ (15.2 x 15.2 cm) for the colourful lettering.

Various ink pads for highlighting characters.

Hope you like it and Happy Easter everyone!