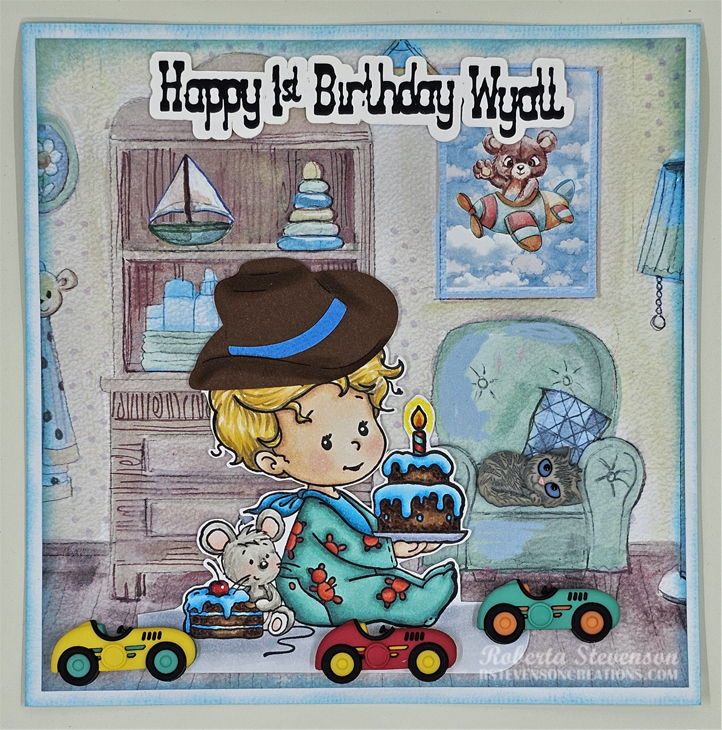
Archives

Work Hard, Travel Harder!


Today I’m sharing an outdoors camping card using KLM Digital DesignCamper Boy from the new April 2024 release. This image also comes with 2 more sentiments, “Make S’more memories” and “Let’s go camping!”. One way to see the world is to just hook up the camper and just start driving, letting the adventure take you to all different locations to explore.

I began making my card by creating a 5.5″ x 4.25″ base made from Hammermill – Premium Colour 100 lb. cardstock. I cut Recollections – Black cardstock to the same size and adhered it directly to the base. Authentique – “Rustic Three” paper was cut to 5.25″ x 4″ and then all edges were inked with a finger dauber and Tim Holtz Distress Ink – Aged Mahagony. This was then centred onto to the black cardstock with double-sided tape.

The image and sentiment were imported into Microsoft Word and printed out onto Copic Marker X-Press It Blending Card. The image was coloured in with the Copics listed below and then fussy cut. The sentiment was cut using a cutter and then it was attached to black cardstock. Once again, I used the cutter to leave a small trim all away around it. U-Line Double-Sided Foam Tape was applied to the image and sentiment and they were both popped up onto the card.

Card Recipe:

Stamp and Sentiment:  KLM Digital DesignCamper Boy

Inks: HP Printer Grayscale, Tim Holtz Distress Ink – Aged Mahagony

Paper: Copic Marker X-Press It Blending Card, Hammermill – Premium Colour 100 lb., Authentique – “Rustic Three”, Recollections – Black cardstock

Miscellaneous: U-Line Double-Sided Foam Tape

Image coloured with Copic Markers:

Skin: E21, E11, E04, E00, E000, R30, R22

Hair and Shoes: E27, E25, E23, E21

Shirt: E97, E13, E09, E08, E07, B16

Jeans: B99, B97, B95, B91

Belt: E39, E37, E15, YR24, Y35, Y08

Trailer: B69, B66, B63, C9, C7, C5, C3, C2, C1, C0, C00, Colorless Blender, White PrismaColor Premier Pencil – PC938 (Windows)

Coffee Cup: E42, E41, E40, E18, E17, E13

Drapes: BG18, BG15, BG13, BG10

Trailer Inside: Y23, Y21, Y00

Trailer Hitch, Door Handle, Curtain Rod: C5, C3, C1

Hope you like it and have a great week!

You can find more cards to inspire you at KLM Designs, KLM Digital Design Team and KLM Digital Designs on the Facebook Fan page from the rest of our design team.

Fishing Gnome!


Today I’m sharing a Birthday card using KLM Digital DesignFisherman Gnome from the new April 2024 release that I made for my dad. This image also comes with 2 more sentiments, “May all your fishes come true” and “…I’m hooked on you”. My dad loves fishing and goes every chance he gets!

The image and sentiment were imported into Microsoft Word and printed out onto Copic Marker X-Press It Blending Card. I had created a 5.5″ x 4.25 frame around the image before printing it out with a HP Printer. I also printed out a second image onto plain photocopy paper and fussy cut around it. I attached the mask that I had created out of the plain paper over top of the coloured image. Using some stencils that I had created previously with Avery Elle – Pierced Clouds Dies and Tim Holtz Distress Ink – Salty Ocean, I created the clouds with a blender brush.

The image was coloured in with the Copics listed below and then attached to the base card.

Card Recipe:

Stamp and Sentiment:  KLM Digital DesignFisherman Gnome

Inks: HP Printer Grayscale, Tim Holtz Distress Ink – Salty Ocean

Paper: Copic Marker X-Press It Blending Card, Hammermill – Premium Cardstock 110 lb.

Dies \ Stencil: Avery Elle – Pierced Clouds Die (D-05-01)

Image coloured with Copic Markers:

Skin: E21, E11, E04, E00, E000

Beard: C3, C2, C1,C0

Jeans and Hat: B99, B97, B95, B91

Shirt: E57, E55, E53

Dock: E79, E57, E53, E23

Fish: YR61, YR02, YR00, R02, W3, W2, W1, Y35, E93

Pole and Sign: C2, C1,C0, C00, W3, W2, W1, Colorless Blender

Fishing Rod and Ball: E27, E25, E23, YR09, YR07, YR04, YG07, YG06, YG03, Y08, Y06, Y04

Water: B93, B91, B45, B41, B32, B05, B02, BG10

Hope you like it and have a great week!

You can find more cards to inspire you at KLM Designs, KLM Digital Design Team and KLM Digital Designs on the Facebook Fan page from the rest of our design team.

Old Fart!


Today I’m sharing a birthday card using Whimsy StampsOld Geezer and sentiments from their Old Fart stamp set and Old Fart Word Die that I made for my younger brother this week! Couldn’t resist teasing him about getting older and entering into his 60’s!. LOL!

I began making my card by creating a 5.5″ x 4.25″ base made from Hammermill – Premium Colour 100 lb. cardstock. I used 3 circles that were cut out with Photo-Play – Circle Windows Etched Dies and Echo Park – Birthday Girl – Bouncing Balloons from a previous card that I made. Tim Holtz Distress Inks: Salty Ocean and a blender brush were used to colour the white circle and then the same ink was used to ink the edges around the other 2 circles and card base.

The image was stamped onto Copic Marker X-Press It Blending Card with Memento – Tuxedo Black ink and a MISTI. It was coloured in with the Copics listed below and then fussy cut. Using the MISTI again for placement, I stamped the sentiments using Versa Fine – Onyx Black ink. This was then embossed with Ranger – Clear Super Fine Detail embossing powder and then heat embossed with a Marvy Uchida – Embossing Heat Tool. With a Cuttlebug and dies from Whimsy Stamps – Old Fart Word die set and Art ImpressionsJournal Letter Die Set, I die cut out the sentiments with black cardstock.

To assemble the card, I used liquid glue to attach the die cut wording and “60” onto the circles. All of the circles were applied to the base card using liquid glue. The main image was popped up onto the base card using U-Line Double-Sided Foam Tape. I also added a few more fun sentiments from the same stamp sets on the inside of the card too! LOL!  My brother loved his card and I hope you do too!

Card Recipe:

Stamp and Sentiments:  Whimsy StampsOld Geezer and Old Fart

Inks: Memento – Tuxedo Black, Tim Holtz Distress Inks: Salty Ocean, Versa Fine – Onyx Black

Paper: Copic Marker X-Press It Blending Card, Hammermill – Premium Colour 100 lb., Echo Park – Birthday Girl – Bouncing Balloons

Dies: Whimsy Stamps – Old Fart Word, Photo-Play – Circle Windows Etched Dies (#SIS2379),  Art ImpressionsJournal Letter Die Set (5562)

Embossing Powder: Ranger – Clear Super Fine Detail embossing powder

Miscellaneous: U-Line Double-Sided Foam Tape, Marvy Uchida – Embossing Heat Tool

Image coloured with Copic Markers:

Skin: E21, E11, E00, E000

Hair: YR12, C1, C00

Clothing and Slippers: B37, B14, B12, B00, C9

Toot: C1, C1, C00

Hope you like it and have a great week!

Is That Cake???


Today I’m sharing a birthday card that I made for my manager who is an avid hunter using Art ImpressionsOle Buck Set.

AC White cardstock was used to create a 6″ x 6″ card base. I cut Creative Memories – Hot Fudge paper to the size of (6″ x 6″) and (3.75″ x 3.75″). Using the same paper, and my Cuttlebug, I die cut the larger circle using My Creative Time – Little Gift Tags – 1.25″. Photo-Play – Camp Happy Bear paper was cut to the size of 5.75″ x 5.75″. My Creative Time -Stitched Squares Inside and Out was die cut with my Cutttlebug to the size of  (3.5″ x 3.5″ ) and a (1″) Circle using a circle punch from Copic Marker X-Press It Blending Card.

Using a MISTI and Memento – Tuxedo Black, I stamped the image onto the Copic paper. For the circle, I first stamped the Bull’s eye with Tim Holtz Distress Ink – Pumice Stone and then over top of this, I stamped the sentiment with Versa Fine – Onyx Black ink and then applied Ranger – Clear Super Fine Detail embossing powder. This was then heat embossed with a Marvy Uchida – Embossing Heat Tool and set aside.

To create the background, I first applied the blue sky using a blending brush that still had some blue ink on it from another project. Using Tim Holtz Distress Inks – Peeled Paint and Memory Box – Snowy Pine Landscape rubber stamp, I applied the trees in the background. Using a blending brush and the same ink, I applied the greenery below the trees and then blended in Krafty Kolours – Sandy Shores with another blending brush. The picture was coloured in with Copic markers and then I fussy cut all around it. Once I completed the cutting, I applied a black marker all around the edges to make it stand out more against the background.

The card was now ready to assemble. I attached the 6″ x 6″ paper directly onto the base and then centred the background paper over it using double-sided tape. The die cut square was applied directly to larger square using double-sided tape. This was then popped up onto the card using U-Line Double-Sided Foam Tape. I applied the U-Line Double-Sided Foam Tape to the back of the image and popped it up onto the coloured background. Using what was left on my blender brush, I coloured the copic paper green with a little touch of blue and the applied the 2 circles together with liquid glue. The larger circle was attached to the card using U-Line Double-Sided Foam Tape in the right corner.

On the inside of the card, I added the sentiment “Happy Birthday Ole Buck” and the dear from the same set.

Card Recipe:

Stamps: Art ImpressionsOle Buck Set – 5403, Memory Box – Snowy Pine Landscape (F1900)

Inks: Memento – Tuxedo Black, Tim Holtz Distress Inks – Peeled Paint, Tim Holtz Distress Ink – Pumice Stone, Krafty Kolours – Sandy Shores, Versa Fine – Onyx Black

Paper: Copic Marker X-Press It Blending Card, AC White Cardstock, Creative Memories – Hot Fudge (12″ x 12″), Photo-Play – Camp Happy Bear (6″ x 6″)

Dies: My Creative Time -Stitched Squares Inside and Out, My Creative Time – Little Gift Tags (Retired)

Embossing Powder: Ranger – Clear Super Fine Detail embossing powder

Miscellaneous: Marvy Uchida – Embossing Heat Tool, U-Line Double-Sided Foam Tape, Cuttlebug

Skin: E21, E11, E04, E00, E000, R22, R30

Greens: G99, G94, G82, G43

Browns: E87, E84, E81, E55, E50, E49, E47, E44, E43, E42, E41, E37, E35, E34, E31, E30, E27, E25, E23, E21

Hope you like it and have a great week!

Toad-ally In Love!!


It’s Wednesday, and this week, I made a card using High Hopes Rubber Stamps Toad-ally In Love – M127  for the image and sentiment. I toad-ally love this sweet image because it can be used for both Valentine’s Day, an Anniversary or just to let someone know that you love them.

To make my card this week, I began with a card base of Hammermill – Premium Colour 100 lb. cardstock, cut and scored to be 5″ x 5″. I used Picket Fence – Blending Brushes, Tim Holtz Distress Ink: Mowed Lawn, Crushed Olive, Peeled Paint, Festive Berries, Fired Brick and Barn Door and Lawn Fawn – Lots of Hearts Background Stencils to create my card background. Using Lawn Fawn – Valentine’s Hearts Border and my Cuttlebug, I die cut some Craft Smith – Hot Buy – Green and Forever In Time – Texture Rouge cardstock and adhered the 2 pieces together with some glue. I did this twice and then glued the 2 finished pieces to the base card. With my MISTI and Memento – Tuxedo Black ink, I stamped the image onto the Copic Marker X-Press It Blending Card cardstock. I then die cut it using Sizzix Framelets by Stephanie Barnard – 562676 – Hearts Dotted. The image was coloured in and popped up onto the background using U-line douhble-sided tape. I applied some glue onto the backs of 3 of the pre-cut hearts and placed them onto the base background to complete the card.

Card Recipe:

Stamp and Sentiment: Toad-ally In Love – M127 (High Hopes Rubber Stamps)

Inks: Memento – Tuxedo Black, Tim Holtz Distress Ink: Mowed Lawn, Crushed Olive, Peeled Paint, Festive Berries, Fired Brick and Barn Door

Paper: Copic Marker X-Press It Blending Card, Hammermill – Premium Colour 100 lb., Craft Smith – Hot Buy – Green, Forever In Time – Texture Rouge

Die Cuts: Sizzix Framelets by Stephanie Barnard – 562676 – Hearts Dotted, Lawn Fawn – Valentine’s Hearts Border

Stencils: Lawn Fawn – Lots of Hearts Background Stencils

Tools: MISTI – Most Incredible Stamping Tool, U-Line double-sided tape, Cuttlebug

Image coloured with Copic Markers:

Toad: YG17, YG06, YG03, YG00, E81, R30, BG99, E84, E81Colorless Blender (Eyes – Sakura Glaze – Black, Gelly Roll Sakura #5 Pen)

Hearts: R46, R14, R08, YG17, YG06, YG03

Big Heart Background: R27, R24, R22, R21, R20, (C3, C2, E23 – Shadow under Toad)


Hope you like it and have a fantastic week!

You can find lots of inspiration from the Design Team Divas at the High Hopes blog, and the High Hopes Rubber Stamps Facebook Fan page plus you can also follow us on
Instagram, Twitter and Pinterest.

You Got This!!


It’s Wednesday, and this week, I made a card using High Hopes Rubber Stamps Lasso Some Snow – TDG021  for the main image and Don’t Worry – FDG021 for the sentiment. We all need a little bit of encouragement every now and then and this little snowman is here to give us some.

To make my card this week, I began with a card base of Hammermill – Premium Colour 100 lb. cardstock, cut and scored to be 5.5″ x 4.25″.  I used Echo Park Paper Co. – My Favorite Winter cardstock cut to the same size as the base card for the background. I attached this to the base using double-sided tape. Using my Cuttlebug, a mixture of square dies from My Creative Time -Stitched Squares Inside and Out and Waffle Flower – Nesting Square dies, I die cut cardstock from Scrapbook.com Neutrals Smooth Cardstock and also Copic Marker X-Press It Blending Card. I applied double-sided tape to the back of the tan square and applied it directly to the background. U-Line double-sided tape was added to the back of the dark brown square and popped up onto the centre of the tan square.

With my MISTI and Memento – Tuxedo Black ink, I stamped the image onto the Copic Marker X-Press It Blending Card cardstock square and coloured it in with Copic markers. Gelly Roll Sakura #10 Pen was used to create the snow in the sky. Sakura Glaze – Black and Gelly Roll Sakura #5 Pen were used on the eyes of the snowman. I applied U-line douhble-sided tape to the back of the completed image and popped it up onto the centre of the dark brown square.

With my MISTI and Memento – Tuxedo Black ink, I stamped the sentiment onto Recollections – White cardstock and then die cut it out using my Cuttlebug and My Creative Time – Ribbon End Dies. I inked around the edges using Copic – E59 marker to give it a dark brown border. I used my knife to remove the double border from the piece left behind and then traced the shape of the ribbon onto the remaining piece of Scrapbook.com Neutrals Smooth Cardstock. I cut this out with my cutter and scissors. U-Line double-sided tape was applied to both pieces and the completed sentiment was popped up onto the card below the main image to complete the card.

Card Recipe:

Stamp: Lasso Some Snow – TDG021 (High Hopes Rubber Stamps)

Sentiment: Don’t Worry – FDG021 (High Hopes Rubber Stamps)

Inks: Memento – Tuxedo Black

Paper: Copic Marker X-Press It Blending Card, Hammermill – Premium Colour 100 lb., Echo Park Paper Co. – My Favorite Winter (6″ x 6″), Scrapbook.com – Neutrals Smooth Cardstock (5.5″ x 4.25″), Recollections – White cardstock

Die Cuts: My Creative Time -Stitched Squares Inside and Out, Waffle Flower – Nesting Square dies, My Creative Time – Ribbon End Dies

Tools: MISTI – Most Incredible Stamping Tool, U-Line double-sided tape, Gelly Roll Sakura #10 Pen, Gelly Roll Sakura #5 Pen, Sakura Glaze – Black, Cuttlebug

Image coloured with Copic Markers:

Snowman: B60, C9, C7, C5, C00, E49, YR18, YR16, YR12, Colorless Blender (Eyes – Sakura Glaze – Black, Gelly Roll Sakura #5 Pen)

Hats, Mitts and Scarf: B99, B977, B95

Coat: E51, E50, E37, E35, E34, E33, E31

Birds: E59, E37, E35

Fence: E29, E27, E25, E23, E21

Wheel and Rope: E77, E74, E47, E44, E43, Y35, YR31

Sky: B04, B02, B01, B00

Snow: B000, B60, C00, Colorless Blender, Stickles – Diamond

Hope you like it and have a fantastic week!

You can find lots of inspiration from the Design Team Divas at the High Hopes blog, and the High Hopes Rubber Stamps Facebook Fan page plus you can also follow us on
Instagram, Twitter and Pinterest.

You Are My Son, Moon and Stars!!


Sharing a card I made today using KLM Digital Designs –  L’il Boy Gnome from the new November release. This image also comes with 2 more sayings: “Happy Birthday” and “You’ll outgrow my lap, but never my heart!”.

To make the card, I first imported the image and sentiment into Microsoft Word. I added in an oval circle with a 2 pt border and placed it behind the sentiment to give me a guide line for where to cut when printed out. I printed them out onto Copic Marker X-Press It Blending Card. I used my Brother Scan and Cut to cut out the main image and I fussy cut out the moon. I coloured in the image and moon with Copic markers.

The base was created with Hammermill – Premium Colour 100 lb. cardstock cut and folded to the size of 5.5″ x 4.25″. I attached the background pattern paper from Hunky Dory Crafts – Mirri Card – Starry Galaxies, cut to the same size as the base with double-sized tape. I ran the moon through my Xyron Create a Sticker and placed it onto the starry background and then cut off the excess around the bottom of the card. I added in some stickers onto the background using Forever In Time – Foil Fancy Stickers – Outer Space. The boy was added using U-Line double-sided tape to pop him up onto the card. To finish everything off and complete the card, I used W R Memory Keepers – Crop-A-Dile Corner Chomper to create .5″ rounded corners.

Card Recipe:

Stamp and Sentiment:  L’il Boy Gnome – KLM Digital Designs

Inks: HP Printer Grayscale

Paper: Copic Marker X-Press It Blending Card, Hammermill – Premium Colour 100 lb., Hunky Dory Crafts – Mirri Card – Starry Galaxies – 8.25″ x 11.5″

Miscellaneous: U-Line – 2 sided tape, Xyron Create a Sticker, Brother Scan and Cut, Forever In Time – Foil Fancy Stickers – Outer Space (SS171C), W R Memory Keepers – Crop-A-Dile Corner Chomper

Image coloured with Copic Markers:

Skin: E21, E11, E04, E00, E000, R30, R20

Hair: E47, E44, E43

Hat and Overalls: B26, B23, B21, C3, C2, C1

T-Shirt: BV02, BV01, V20

Boots: E53, E51, E50, E27, E25, E23, E21

Moon and Shadow: T3, T1, T0

Hope you like it and have a great week!

You can find more cards to inspire you at KLM Designs, KLM Digital Design Team and KLM Digital Designs on the Facebook Fan page from the rest of our design team.

Happy Birthday MVP!!!


It’s Wednesday, and this week, I made a masculine card using Touchdown Trevor – R027 by High Hopes Rubber Stamps for the main image and Happy Birthday MVP – G174 (High Hopes Rubber Stamps) for the sentiment. Both of my brothers were All Stars when they played Football in High-School a long time ago. Sports were always a big part of our lives growing up and for a lot of our family, they still are!!!

To make my card this week, the image and sentiment were both stamped using my MISTI and Memento – Tuxedo Black ink. I used my Brother Scan and Cut to die cut the image and then I coloured it in with Copic markers. For the background, I used my Cricut Explore to die cut the football and goal post using Hammermill – Premium Colour 100 lb. paper with an image from 3 Birds – Life’s a A Party. Using pre-cut stencils for clouds, I used Tim Holtz Distress Ink – Salty Ocean and a Picket Fence – Blending Brush to create them. I added in the grass with a Picket Fence – Blending Brush, finger dauber and Tim Holtz Distress Ink – Mowed Lawn. Black, brown and yellow cardstock were added behind the cut-out. The sentiment was cut with my cutter and the corners were snipped off with scissors. To give it an edge, I went around the cut sentiment with Copic marker – E23.

To assemble the card, I used The Paper Studio – Primary Simply Solids (4.25″ x 5.5″) for the base. 2-sided tape was applied to the back of the coloured background image and it was attached directly to the base. 3M VHB – 2 sided tape was attached to the back of the coloured image and back of sentiment and applied to the top of the card.

Card Recipe:

Stamp: Touchdown Trevor – R027 (High Hopes Rubber Stamps)

Sentiment: Happy Birthday MVP – G174 (High Hopes Rubber Stamps)

Inks: Memento – Tuxedo Black, Tim Holtz Distress Ink – Salty Ocean and Tim Holtz Distress Ink – Mowed Lawn

Paper: Copic Marker X-Press It Blending Card, Hammermill – Premium Colour 100 lb., The Paper Studio – Primary Simply Solids (4.25″ x 5.5″), Yellow Cardstock, Black Cardstock, Brown Cardstock

Cricut Die Cuts: 3 Birds – Life’s a A Party

Stencil: Avery Elle – Custom Steel Dies – Made in the USA – D-05-01 PiercedCloudsDie , Whimsy Stamps – Grass and Cloud Edger Die Set (Used both to create stencils)

Tools: MISTI – Most Incredible Stamping Tool, Picket Fence – Blending Brush, 3M VHB – 2 sided tape, Brother Scan and Cut, Cricut Explore

Image coloured with Copic Markers:

Skin: E21, E11, E04, E00, E000, R30, R20

Hair: E47, E44, E43, E40

Browns: E29, E27, E25, E23

Gold: E15, Y35, Y108, YR24

Pants: C1, C0, C00, Colorless Blender

Hope you like it and have a fantastic week!

You can find lots of inspiration from the Design Team Divas at the High Hopes blog, and the High Hopes Rubber Stamps Facebook Fan page plus you can also follow us on
Instagram, Twitter and Pinterest.

Live Life!!


It’s Wednesday, and this week, I’m sharing a card I made from the High Hopes Rubber Stamps “Mix It Up Release”  using Sports Car 1 – SS048 for the main image and Live Life – GG037 for the sentiment! It would be great to win a lottery and drive something similar to this awesome car! Then, I could rent a race track and speed around it. That would be sooooo much fun! LOL!

To make my card this week, I stamped the image and sentiment using my MISTI and Memento – Tuxedo Black ink onto Copic Marker X-Press It Blending Card. I coloured in the image with Copic markers and then fussy cut around it and set it aside. A piece of Copic Marker X-Press It Blending Card was cut to the size of 5.5″ x 4.25″ for me to create my background. The background was also coloured in with Copic markers. Next, I die cut the background using my Cuttelbug and My Creative Time – Rectangle Frame Layers. The sentiment was die cut with Waffle Flower – Nesting Square dies and for the outer square, My Creative Time -Stitched Squares Inside and Out die was used. Tim Holtz Distress Ink – Chipped Sapphire was used to ink around the edges of both squares.

To assemble the card, 3M VHB – 2 sided tape was attached to the backs of the car image, sentiment and larger blue square. The background coloured image was adhered directly to the base card of The Paper Studio – Primary Simply Solids (4.25″ x 5.5″). The car and the sentiment were than attached onto the main background.

Card Recipe:

Stamp: Sports Car 1 – SS048 (High Hopes Rubber Stamps)

Sentiment: Live Life – GG037 (High Hopes Rubber Stamps)

Inks: Memento – Tuxedo Black, Tim Holtz Distress Ink – Chipped Sapphire

Die Cuts: My Creative Time – Rectangle Frame Layers, Waffle Flower – Nesting Square dies, My Creative Time -Stitched Squares Inside and Out

Paper: Copic Marker X-Press It Blending Card, The Paper Studio – Primary Simply Solids (4.25″ x 5.5″), Blue cardstock

Tools: MISTI – Most Incredible Stamping Tool, 3M VHB – 2 sided tape

Image coloured with Copic Markers:

Sports Car: B39, B37, B14, B12, B000, C10, C8, C6, C5, C3, C1, C0

Mountains: BV23, BV20, C7, C5, C3, C1, B000

Sky and Fence: B00, B000, B000, Colorless Blender

Roadway: E74, E71, E70, BV23, BV20, W2, W0, C7, C5, C3, C1, C0, C00, B00, Rubbing Alcohol, Q-Tip

Check out some other fun new returning stamps from the Mix It Up Release here:
Mix It Up Release – High Hopes Rubber Stamps (highhopesstamps.com)

Hope you like it and have a fantastic week!

You can find lots of inspiration from the Design Team Divas at the High Hopes blog, and the High Hopes Rubber Stamps Facebook Fan page plus you can also follow us on
Instagram, Twitter and Pinterest.

Seas The Day!!


Sharing a card I made today using KLM Digital Designs – Boating Gnome from the new June release. This stamp comes with 2 other sentiments, “It’s a boat time” and “You float my boat”. There’s nothing like getting up early in the morning and rowing a boat along a shore seeing the wildlife when you go camping. It’s so peaceful and serene.

To make the card, I first imported the image into Microsoft Word and printed it out onto Copic Marker X-Press It Blending Card and copy paper using my HP Printer. Using my Cuttlebug, My Creative Time – Rectangle Frame Dies and My Creative Time – Rectangle Frame Layers, I die cut red, blue cardstock and the image. I coloured in the image with Copic markers and I created the cloud background using Tim Holtz Distress Ink: Salty Ocean, Broken China, Tumbled Glass with a mixture of cloud stencils I created using Avery Elle – PiercedCloudsDie. I had used my Brother Scan and Cut to create the mask to put over the image while I created the clouds.

To assemble the card, I used Hot Buy – Cards and Envelopes cardstock (5.5″ x 4.25″) for the base. I attached the coloured image to the blue layer using double-sided tape. 3M VHB – 2 sided tape was applied to backs of the red and blue rectangles and attached directly to the base.

Card Recipe:

Stamp: Boating Gnome – KLM Digital Designs

Inks: HP Printer Grayscale, Tim Holtz Distress Ink – Salty Ocean, Tim Holtz Distress Inks – Broken China, Tim Holtz Distress Inks – Tumbled Glass

Paper: Copic Marker X-Press It Blending Card, Hot Buy – Cards and Envelopes (5.5″ x 4.25″), Red cardstock, Blue cardstock

Die Cuts Stencils: Avery Elle – Pierced Clouds Die (D-05-01), My Creative Time – Rectangle Frame Dies, My Creative Time – Rectangle Frame Layers

Miscellaneous: 3M VHB – 2 sided tape, Cuttlebug, Brother Scan and Cut, Picket Fence – Blending Brush

Image coloured with Copic Markers:

Skin: E21, E11, E00, E000

Beard: E47, E44, E43, E42

Hat and Glasses: R29, R27, R24, R22, C5

Bathing Suit: B79, B69, B66

Boat and Oar: E39, E37, E35, E34, E33, E31, E30, E29, E27, E25, E23, E21, WR27, R24, R17

Water: BG70, B93, B91, B52, B41, B06, B02, B01, B000

Hope you like it and have a great week!

You can find more cards to inspire you at KLM Designs, KLM Digital Design Team and KLM Digital Designs on the Facebook Fan page from the rest of our design team.

Feel Good!!


Today, I’m sharing a card that I made using Dreamerland Crafts stamps called Having You Around – D19078 for the main image and sentiment. There’s nothing like the love between a boy and his faithful companion. They become best friends as they both grow older together!!!

To make this card I used a base card of 5.5″ x 4.25″ using Hammermill – Premium Colour 100 lb. cardstock. I also cut a panel the same size out of Copic Marker X-Press It Blending Card. I used this to create my background using stencils I created to make clouds by Avery Elle – Pierced Clouds Die (D-05-01) and inks listed below by Tim Holtz. Copic markers were used to colour in the water and I used My Favourite Things – Slimline Grassy Edges Stencil as a guide for the grass on the bottom of the card. Using my MISTI and Versa Fine – Onyx Black ink, I stamped the sentiment and then embossed the ink with Ranger – Clear Super Fine Detail embossing powder. This was heat set with Marvy Uchida – Embossing Heat Tool. I used double-sided tape and attached my background panel to the base card.

Using my Cuttlebug and dies from Studio Light – Wonderful Autumn, I cut the trees and landscape out of Copic Marker X-Press It Blending Card. Using my Copic markers, I coloured these in as well. Then I layered them on top of each other and used glue to adhere them to the coloured background.

Next, using my MISTI and Memento – Tuxedo Black ink, I stamped the main image onto Copic Marker X-Press It Blending Cardstock and coloured it in with Copic markers. I fussy cut around the image by hand and used a black marker to go around all of the edges. 3M VHB – 2 sided tape was applied to the back of the image and it was placed on top of the background to finish off the card.

Card Recipe:

Stamp and Sentiment: Having You Around – D19078 – Dreamerland Crafts

Inks: Memento – Tuxedo Black, Tim Holtz Distress Ink – Salty Ocean, Tim Holtz Distress Inks – Broken China, Versa Fine – Onyx Black

Paper: Copic Marker X-Press It Blending Card, Hammermill – Premium Colour 100 lb.

Die Cuts: Studio Light – Wonderful Autumn – StencilWA311, Avery Elle – Pierced Clouds Die (D-05-01)

Stencil: My Favourite Things – Slimline Grassy Edges Stencil (ST-151)

Embossing Powder: Ranger – Clear Super Fine Detail

Tools: MISTI – Most Incredible Stamping Tool, Cuttlebug, Picket Fence Studio Blender Brushes, Marvy Uchida – Embossing Heat Tool

Image coloured with Copic Markers:

Skin: E21, E11, E00, E000, R22, R20

Hair: E47, E44, E43, E40

Shirt and Hat: E89, E87, E84, R24

Jeans:  B26, B23, B21

Dog: E55, E53, E51

Boat: E49, E27, E25, E23, E21

Trees: E25, E23, G99, G94, G82

Grass: YG17, YG13, YG03, YG01

Water: B93, B91, B52, B41, B06, B04, B02, B01, B000

Hope you like it and have a great week!

You can find more cards to inspire you at Dreamerland Crafts and Pointer Scrapbooking on the Facebook Fan pages from the rest of our design team.

Soccer For You!!


Sharing a card I made today using KLM Digital Designs – Soccer Gnome from the new May release. This image also comes with 3 more sentiments, “I Bet You Play Soccer”, “Because Your A Keeper” and “I Get A Kick Out of You!”.

To make the card, I first imported the image into Microsoft Word and printed it out onto Copic Marker X-Press It Blending Card and then again on to plain paper using my HP Printer. Using my Brother Scan and Cut, I cut the image out of the plain paper to use as a mask. I put this over top of my main image character and added in the clouds using Tim Holtz Distress Ink – Salty Ocean, Broken China and Tumbled Glass and a mixture of cloud stencils I created using Avery Elle – Pierced Clouds Dies. Then I removed the mask. I coloured in the remainder of the image with Copic markers and then trimmed it off to be 5.25″ x 4″.

For the base, The Paper Studio – Christmas Box of Cards 2012 pre-made cards was used at the size of 5.5″ x 4.25″. I attached the coloured image directly to the base card using double-sided tape.

Card Recipe:

Stamp and Sentiment: Soccer Gnome – KLM Digital Designs

Inks: HP Printer Grayscale, Tim Holtz Distress Inks – Salty Ocean, Broken China and Tumbled Glass

Paper: Copic Marker X-Press It Blending Card, The Paper Studio – Christmas Box of Cards 2012

Die Cuts Stencils: Avery Elle – Custom Steel Dies – Made in the USA – D-05-01 PiercedCloudsDie

Image coloured with Copic Markers:

Skin: E21, E11, E04, E00, E000

Beard: E49, E47, E44, E43, E42

Shirt, Hat and Shoes: R59, R39, R37, R35

Pants and Shoes: C1, C00, Colorless Blender

Soccer Ball: C1, C00, Colorless Blender

Grass: YG17, YG13, YG11, YG03, YG01

Hope you like it and have a great week!

You can find more cards to inspire you at KLM Designs, KLM Digital Design Team and KLM Digital Designs on the Facebook Fan page from the rest of our design team.

Surfing Gabriel!!


It’s Wednesday, and this week, I made a masculine card using Surfing Gabriel – TT516 by High Hopes Rubber Stamps for the main image and No Waves – FR011 (High Hopes Rubber Stamps) for the sentiment. Gabriel is enjoying the waves and the bright skies. I can’t wait for the weather to warm up here so that I can start swimming again too!

To make my card this week, I die cut a square from Copic Marker X-Press It Blending Card using My Creative Time -Stitched Squares Inside and Out. A larger square was cut using Waffle Flower – Nesting Square dies and spare blue cardstock. The image and sentiment were both stamped using my MISTI and Memento – Tuxedo Black ink. I coloured in the image with Copic markers. Then, I created a mask and put it over top of the coloured image and added in my clouds using various Tim Holtz inks listed below and Avery Elle – Pierced Clouds Die (Used to create stencils). To create the spray on the waves, I mixed a little bit of FolkArt – Extreme Glitter Acrylic Paint and Delta Ceramcoat – White paint and applied it to the coloured image using a 1/4″ H.J. Domed Dry Stipple brush. For a little extra sparkle, I added some DecoArt Glamour Dust while the paint was still wet.

Brother Scan and Cut was used to die-cut around the sentiment. Edges were inked with Tim Holtz Distress Ink – Blueprint Sketch. A second circle was die cut using Lifestyle Crafts Cutting Dies – Nesting Circles out of aqua cardstock and inked with Tim Holtz Distress Inks – Peacock Feathers.

To assemble the card, I used Recollections – Winter 4.25″ x 5.5 for the base. Tim Holtz Distress Ink – Salty Ocean was used to ink around the edges of the card. The coloured image was glued to the larger square and the sentiment was glued to the larger circle. 3M VHB – 2 sided tape was attached to the backs of the larger circle and square and attached to the base card. To finish it off, YNS Gumdrops were added.

Card Recipe:

Stamp: Surfing Gabriel – TT516 (High Hopes Rubber Stamps)

Sentiment: No Waves – FR011 (High Hopes Rubber Stamps)

Inks: Memento – Tuxedo Black, Tim Holtz Distress Ink – Salty Ocean, Tim Holtz Distress Inks – Tumbled Glass, Tim Holtz Ranger Distress Ink – Broken China, Tim Holtz Distress Ink – Blueprint Sketch, Tim Holtz Distress Inks – Peacock Feathers

Paper: Copic Marker X-Press It Blending Card, Recollections – Winter 4.25″ x 5.5 (Assorted Box of Cards), Aqua cardstock, Blue cardstock

Die Cuts: My Creative Time -Stitched Squares Inside and Out, Waffle Flower – Nesting Square dies, Lifestyle Crafts Cutting Dies – Nesting Circles

Stencil: Avery Elle – Custom Steel Dies – Made in the USA – D-05-01 PiercedCloudsDie (Used to create stencils)

Tools: MISTI – Most Incredible Stamping Tool, Picket Fence – Blending Brush, 1/4″ H.J. Domed Dry Stipple, YNS Gumdrops, 3M VHB – 2 sided tape

Image coloured with Copic Markers:

Skin: E21, E11, E04, E00, E000, R30, R20 (Eyes: Sakura Glaze – Black, Gelly Roll Sakura #8 Pen)

Hair: E47, E44, E43, E40

Swim Trunks: B79, B69, B66, YG03, YG01

Surf Board: Y38, Y17, Y15, YR18, YR16, BG57, BG32, BG11

Water: BG70, B93, B91, B52, B41, B06, B02, B01, B000

Water Droplets: B06, B02, B00

Sentiment: B000

Foamy Water: FolkArt – Extreme Glitter Acrylic Paint, Delta Ceramcoat – White, DecoArt Glamour Dust

Check out some other fun new stamps from the vault for Boys and Men here:
THE VAULT IS OPEN! MEN & BOYS RELEASE Archives – High Hopes Rubber Stamps (highhopesstamps.com)

Hope you like it and have a fantastic week!

You can find lots of inspiration from the Design Team Divas at the High Hopes blog, and the High Hopes Rubber Stamps Facebook Fan page plus you can also follow us on
Instagram, Twitter and Pinterest.