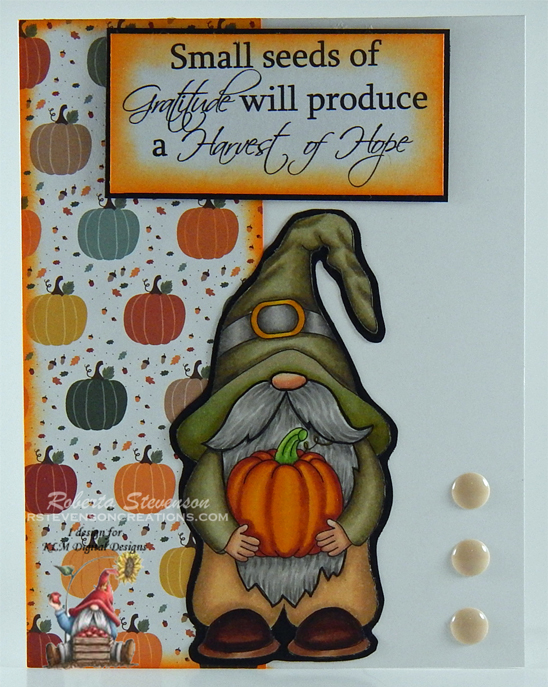
Today I’m sharing a CAS card using KLM Digital Design – Pilgrim Gnome – Girl image and sentiment from the new August 2024 release. This stamp also comes with 2 more sentiments, “Hello Pumpkin” and “Oh my gourd, your awesome”. Thanksgiving is not that far off, but as the sentiment says, even without the season, “There is always something to be thankful for”.
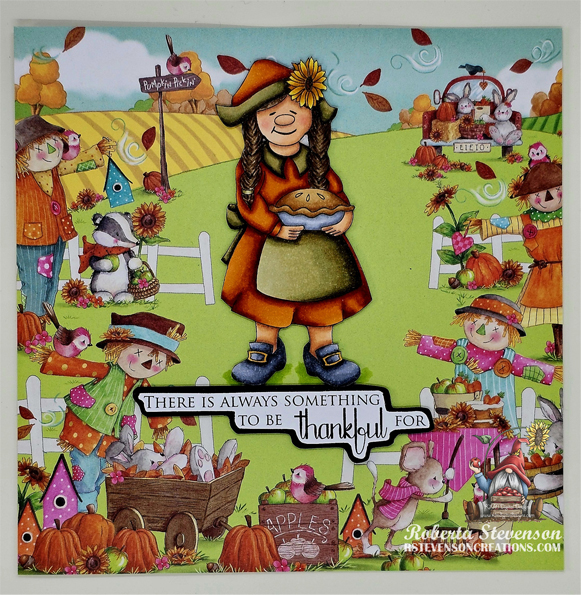
To create this card, I began with a 6″ x 6″ card base using AC Cardstock – White. Craft Consortium – Happy Harvest patterned paper was cut to the same size and adhered to the base using double-sided tape. I thought this paper was the perfect background for the new stamp and sentiment.
I printed out the main image and sentiment onto Copic Marker X-Press It Blending Card using an HP Printer. After colouring in the image with Copic markers listed below, I fussy cut around it and the sentiment. The sentiment was put through a Xyron Create a Sticker and attached to Recollections black cardstock. Then I fussy cut around it again. With a black marker, I inked around the entire image to give it a solid black line. U-Line Double-Sided Foam Tape was applied to the backs of the image and sentiment and they were both popped up onto the card.
Card Recipe:
Stamp and Sentiment: KLM Digital Design – Pilgrim Gnome – Girl
Inks: HP Printer Grayscale
Paper: Copic Marker X-Press It Blending Card, AC Cardstock – White, Craft Consortium – Happy Harvest (6″ x 6″), Recollections – Black cardstock
Tools: U-Line Double-Sided Foam Tape, Xyron Create a Sticker
Image coloured with Copic Markers:
Skin: E000, E00, E04, E11, E21, R22, R20
Hair: E47, E44, E43
Clothing: E08, YR18, YR14, YR12, E87, E84, E81
Shoes: C9, C7, C5, C3, YR23
Pie: C5, C3, C2, C1, E34, E33, E31, YR21
Flower: E49, E47, E15, YR24, YR23, E17, E15, E13
Hope you like it and have a great week!
You can find more cards to inspire you at KLM Designs, KLM Digital Design Team and KLM Digital Designs on the Facebook Fan page from the rest of our design team.