Today I’m sharing a Christmas CAS card that I made using KLM Digital Designs – Pre-Colored Snowflake Gnome from the new December 2024 Release. This pre-coloured image makes it very easy to create lots of last minute Christmas cards.
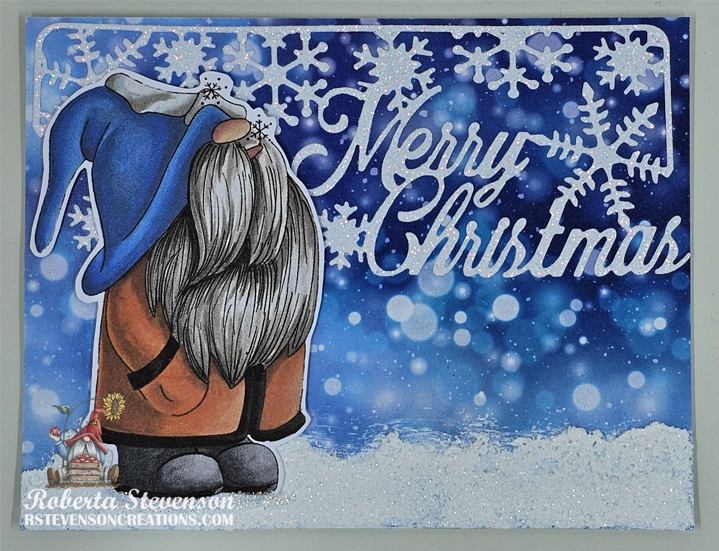
The base card was created to the size of 4.25″ x 5.5″ out of Hammermill – Premium 110 lb. cardstock. Whimsy Stamps – Blurry Flurries paper was cut to the same size and applied to the base card using double-sided tape.
The image was printed out onto Copic Marker X-Press It Blending Card and fussy cut. Joy Crafts – Merry Christmas Cutting Stencil was die cut using a Cuttlebug and Lawn Fawn – Sparkle Cardstock in “Pixie Dust” paper. This was applied along the top of the card using liquid glue. With a spatula, DecoArt Snow-Tex was applied along the bottom of the card and then some glitter was sprinkled onto it while it was still wet. Gentle pressure was used to push the glitter into the DecoArt Snow-Tex. U-Line Double-Sided Foam Tape was applied to the upper part of the image and it was popped up onto the card. Lastly, Stickles – Diamond was applied along the bottom of the feet.
Card Recipe:
Stamp: KLM Digital Designs – Pre-Colored Snowflake Gnome
Sentiment Die: Joy Crafts – Merry Christmas Cutting Stencil (6002/0683)
Inks: HP Printer
Paper: Copic Marker X-Press It Blending Card, Hammermill – Premium Cardstock 110 lb., Whimsy Stamps – Blurry Flurries WSDP25 (6″ x 6″), Lawn Fawn – Sparkle Cardstock in “Pixie Dust” (8.5″ x 11″)
Miscellaneous: U-Line Double-Sided Foam Tape, DecoArt Snow-Tex, Stickles – Diamond
Hope you like it and have a great week!
You can find more cards to inspire you at KLM Designs, KLM Digital Design Team and KLM Digital Designs on the Facebook Fan page from the rest of our design team.
NOTE: KLM Designs will be closing as of January 1st, 2025. All physical stamps are now $2.50!
Stock up while supplies last!