It’s Wednesday, and this week, I made a Christmas card using Christmas Penguins – TDG004 by High Hopes Rubber Stamps for the main image and Happy Holidays – FDG006 (High Hopes Rubber Stamps) for the sentiment. This is just a sneak peek to all of the wonderful images coming soon on Monday, December 6, 2022 as we celebrate our Woodland Winter Release for the month of December at High Hopes Stamps.
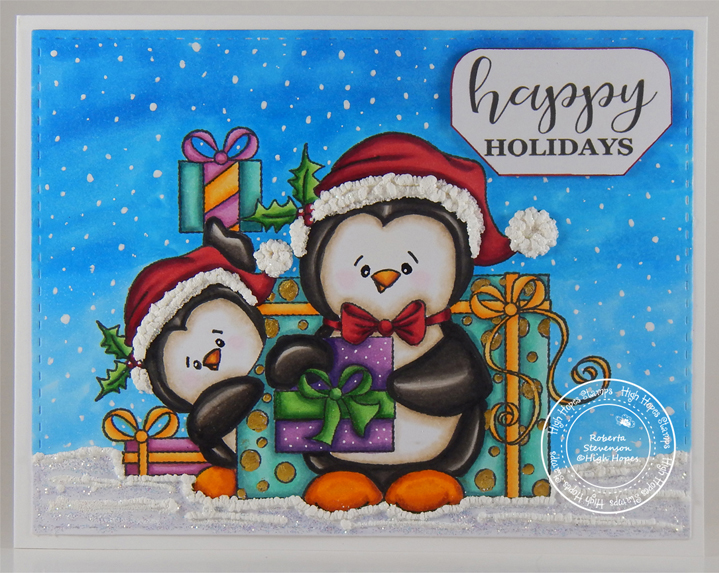
To make my card this week, I began with a card base of Hammermill – Premium Colour 100 lb. cardstock, cut and scored to be 5.5″ x 4.25″. I die cut Copic Marker X-Press It Blending Card with my Cuttlebug and My Creative Time – Rectangle Frame Layers. With my MISTI and Memento – Tuxedo Black ink, I stamped the image onto the die cut and the sentiment onto Copic Marker X-Press It Blending Card. I coloured the image in with Copic markers and added in the snow in the sky with Gelly Roll Sakura #10 Pen. I combined Cosmic Shimmer Fluffy Stuff and WOW! Embossing Glitter – White Puff Twinkle for their hats and pom-poms and heat embossed them with my Marvy Uchida – Embossing Heat Tool. I added in the snow on the bottom with Cosmic Shimmer Fluffy Stuff and Sprinkled some WOW! Sparkling Snow Embossing Glitter on as well after using a Ranger – Emboss It Pen Clear in spots. This too, was heat embossed with my Marvy Uchida – Embossing Heat Tool. Lastly, I added in some Stickles – Diamond for snow as well. I love sparkle. LOL! Using double-sided tape, I adhered the finished scene to the base card. I rounded the sentiment with a 1/4″ rounder on the top and cut the 2 bottoms at a diagonal. Copic Marker R37 was used to go around the edges. I popped this onto the finished image using U-Line double-sided tape to complete the card.
Card Recipe:
Stamp: Christmas Penguins – TDG004 (High Hopes Rubber Stamps)
Sentiment: Happy Holidays – FDG006 (High Hopes Rubber Stamps)
Inks: Memento – Tuxedo Black
Paper: Copic Marker X-Press It Blending Card, Hammermill – Premium Colour 100 lb.
Die Cut: My Creative Time – Rectangle Frame Layers
Tools: MISTI – Most Incredible Stamping Tool, U-Line double-sided tape, Marvy Uchida – Embossing Heat Tool, Gelly Roll Sakura #10 Pen, Ranger – Emboss It Pen Clear
Image coloured with Copic Markers:
Penguins: W9, W7, W5, W3, W00, E15, YR14, Y17, Y11, RV00, E43, E42, E41, E40
Hats and Bow for Penguin: R59, R37, R35
Holly and Bow: G14, G07, YG23, YG11
Large Gift and Small Gift: BG72, BG57, BG32, BG11, Y17, Y15, Y13
Medium Gift: V17, V15, V12
Long Gift: RV66, RV63, RV55
Ribbons: Y38, Y35, Y32, RV66, RV63, RV55
Sky: B05, B04, B03, B02
Snow: BV06, Cosmic Shimmer Fluffy Stuff, WOW! Sparkling Snow Embossing Glitter, WOW! Embossing Glitter – White Puff Twinkle, Stickles – Diamond
Hope you like it and have a fantastic week!
You can find lots of inspiration from the Design Team Divas at the High Hopes blog, and the High Hopes Rubber Stamps Facebook Fan page plus you can also follow us on
Instagram, Twitter and Pinterest.