Today I’m sharing a Christmas card that I made using KLM Digital Designs – Owl – Santa Hat from the new September 2024 Release. This image also comes with 2 other sentiments, “Merry Christmas” and “Owl I want for Christmas is you” besides the sentiment that I have used one this card.

The base card was created to the size of 4.25″ x 5.5″ out of Hammermill – Premium 110 lb. cardstock. Light Blue cardstock and Recollections – Christmas Snow Globe Vellum were cut to the same size as the base. The blue cardstock was attached with double-sided tape and the vellum was attached over top of this with liquid glue. The glue was only applied to the bottom of the vellum and then behind some snowflakes where the glue would not show. Lawn Fawn – Sparkle Cardstock in “Pixie Dust” was cut to the size of 4.25″ x 1.5″ and then cut with scissors to create the wavy ground. This was popped up onto the vellum using U-Line Double-Sided Foam Tape. Trees were then added under the hill that were created at an earlier time using my Cricut Explore and .svg files from Miss Kate Cuttables – Snowy Tree using liquid glue.
The image and sentiment were printed out with my HP Printer onto Copic Marker X-Press It Blending Card using High Quality Grayscale and coloured in with Copic markers, then fussy cut. Sakura Glaze – Black pen was used to apply the dot in the eye and a black marker was used to go around the entire out-line of the owl. Cosmic Shimmer Fluffy Stuff was then applied to the hat fringe and pompom. A Marvy Uchida – Embossing Heat Tool was used to heat the liquid to create the fluff effect. Using my finger, I dabbed Stickles – Diamond over the top of the fluff on the hat and pompom. Stickles – Diamond was also applied to the tops of the snow pieces on the trees.
Once the Stickles dried, 2 layers of U-Line Double-Sided Foam Tape and some liquid glue were applied to the back of the image and 1 layer was applied to the sentiment. Both items were popped up onto the card. Lastly, Recollections – Snowflake Specialty Polyester Glitter was placed onto the card to hide where the glue seeped through the Vellum.
Card Recipe:
Stamp and Sentiment: KLM Digital Designs – Owl – Santa Hat
Inks: HP Printer High Quality Grayscale
Paper: Copic Marker X-Press It Blending Card, Hammermill – Premium Cardstock 110 lb., Light Blue Cardstock, Recollections – Christmas Snow Globe Vellum (12″x12″), Lawn Fawn – Sparkle Cardstock in “Pixie Dust” (8.5″ x 11″)
Die Cuts: Miss Kate Cuttables – Snowy Tree (10342) (.svg)
Miscellaneous: Sakura Glaze – Black pen, U-Line Double-Sided Foam Tape, Cosmic Shimmer Fluffy Stuff, Recollections – Snowflake Specialty Polyester Glitter, Stickles – Diamond
Image coloured with Copic Markers:
Owl: Y38, Y35, Y17, Y13, E79, E53, E51, E50, E25, E23, E21, B39, B37, W9, W7,
Hat: BG09, BG05, BG02, BG01
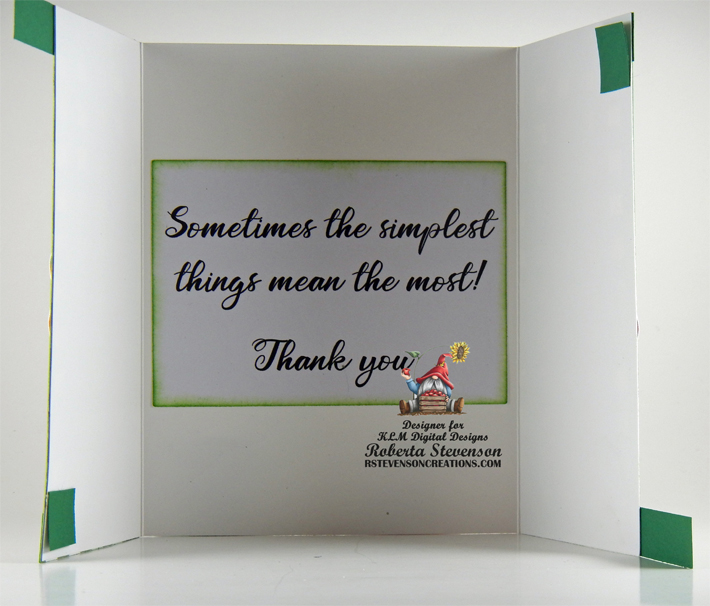
Hope you like it and have a great week!
You can find more cards to inspire you at KLM Designs, KLM Digital Design Team and KLM Digital Designs on the Facebook Fan page from the rest of our design team.