Today I’m sharing a miniature Baby card using Art Impressions – MB Nursery – 5495, MB Template Dies (5317) and MB Envelope Die (5318) that I made for my niece’s baby shower. She was very surprised when she saw how small the card was. LOL! I always love seeing everyone’s expression when they receive their little matchbook sized cards.
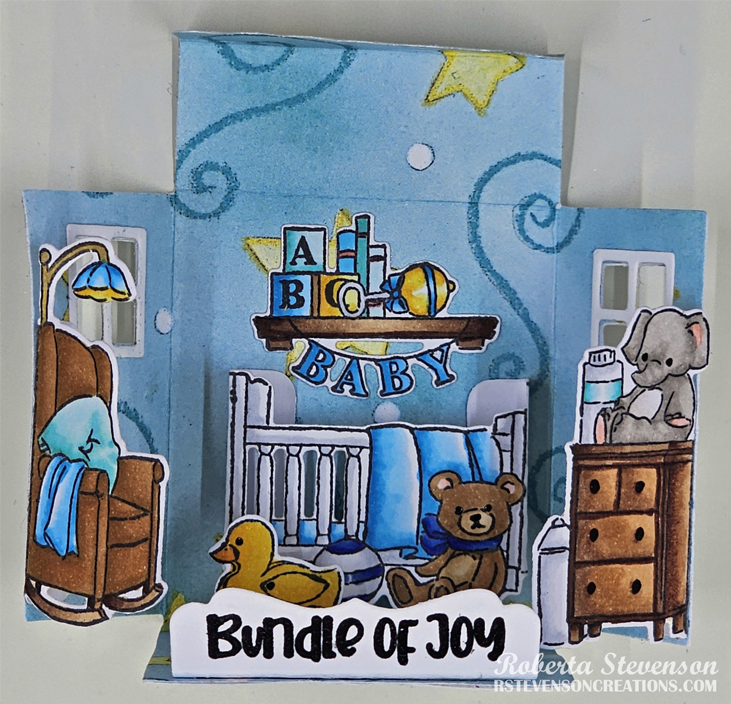
To create the card, I began with the card base using some scrap paper from my stash for the background. The design was only on one side, so I doubled it up and glued it together. Then using a Cuttlebug die-cutting machine and the Art Impressions – MB Template Dies (5317), I die cut the designer paper for the base of the card and also the Sentiment pop-up out of a scrap of white cardstock.
With Memento – Tuxedo Black ink and my MISTI, I stamped all of the images and the sentiment onto Copic Marker X-Press It Blending Card. I coloured in all of the images with Copic markers listed below. Once this was completed, the images were all cut out using Art Impressions – MB Nursery – 5495 dies and the pop-ups were adhered to the card with double-sided tape. The window frames, Baby Blocks and Wording were applied using liquid glue. I stamped the sentiment onto some white cardstock with Versa Fine – Onyx Black ink and applied Ranger – Clear Super Fine Detail embossing powder. This was heat embossed using a Marvy Uchida – Embossing Heat Tool.
Lastly, I die cut the envelope out of some scrap double-sided paper that I had in my stash using the Art Impressions – MB Envelope Die (5318). A smaller message was written on an even tinier miniature envelope to my niece and nephew.

Card Recipe:
Stamps and Sentiment: Art Impressions – MB Nursery – 5495
Inks: Memento – Tuxedo Black, Versa Fine – Onyx Black
Paper: Copic Marker X-Press It Blending Card, Hammermill – Premium Colour 100 lb., Designer Paper from my stash
Dies: Art Impressions – MB Nursery – 5495, MB Template Dies (5317) and MB Envelope Die (5318)
Miscellaneous: MISTI – Most Incredible Stamping Tool, Cuttlebug, Ranger – Clear Super Fine Detail embossing powder, Marvy Uchida – Embossing Heat Tool.
Image coloured with Copic Markers:
Crib, Trash Can: C2, C1, C0
Elephant: W5, W4, W3, W1, W0, W00, R30, R02
Duck: Y19, Y17, Y15, YR16, YR15, YR12
Dresser, Shelf, Rocking Chair Legs: E29, E25, E23, E21
Bear: E57, E55, E53, E51, E35, E34, E33, R30, R02
Ball and Bear Bow: B29, B28, B23
Blankets, Bedding, B Block, “Baby”, Rattle Bow, Lamp Shade, Book: B04, B02, B000
Rattle, C Block, Lamp Light: Y17, Y15, Y11
Chair: E35, E34, E33
Pillow, A Block, Books: BG13, BG11, BG10
Hope you like it and have a great week!


