Today I’m sharing another Christmas card using Hunkydory – For the love of Stamps – Polar Bear Pals .
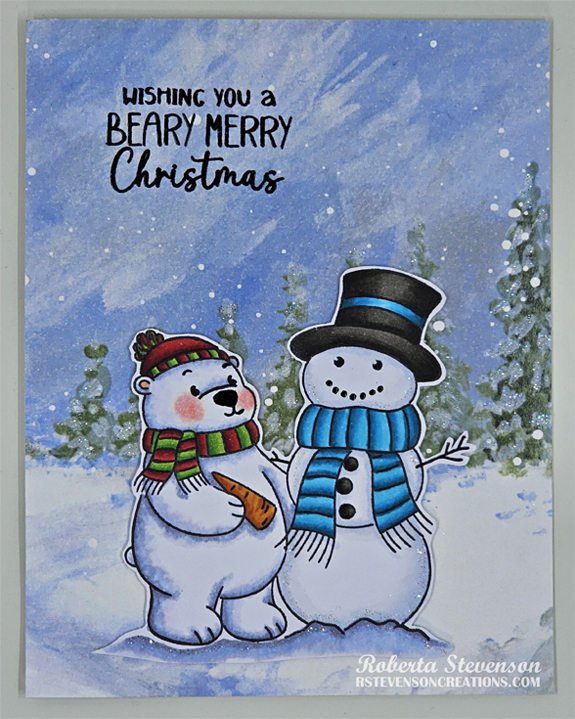
To create the card, I began with the card base using Hammermill – Premium Colour 100 lb. folded to the size of 4.25″ x 5.5″. Stampendous! – Quick Card Backgrounds – Winter Splash was cut to the same size as the base and applied with double-sided tape.
With Memento – Tuxedo Black ink and my MISTI, I stamped the image onto Copic Marker X-Press It Blending Card. I coloured in the image with Copic markers listed below and a Sakura Glaze – Black pen was used for the eyes, nose, buttons and mouth . The image was fussy cut, leaving a touch of white all around it and U-line Double-Sided Foam tape was applied. The sentiment was stamped directly onto the background with Versa Fine – Onyx Black ink and Ranger – Clear Super Fine Detail embossing powder was applied over top of it. This was heat embossed using a Marvy Uchida – Embossing Heat Tool. The image was then popped up onto the card. Lastly, Nellie’s – Effect Snow and mixed glitter were applied to the tree branches for some added sparkle.
Card Recipe:
Stamps and Sentiment: Hunkydory – For the love of Stamps – Polar Bear Pals
Inks: Memento – Tuxedo Black, Versa Fine – Onyx Black
Paper: Copic Marker X-Press It Blending Card, Hammermill – Premium Colour 100 lb., Stampendous! – Quick Card Backgrounds – Winter Splash 8.5 x 11″ sheets
Miscellaneous: MISTI – Most Incredible Stamping Tool, Ranger – Clear Super Fine Detail embossing powder, Marvy Uchida – Embossing Heat Tool, Sakura Glaze – Black, Nellie’s – Effect Snow, Mixed glitter
Image coloured with Copic Markers:
Bear: R22, R20, R02, BV23, BV20, B60, Colorless Blender, Mouth, Eyes, Nose (Sakura Glaze – Black)
Bear Scarf and Hat: R59, R37, R35, G16, YG25, YG23
Carrot: YR18, YR15, YR12
Snowman and Snow: B60, C1, C0, Colorless Blender, Mouth, Eyes, Buttons (Sakura Glaze – Black)
Snowman Hat: W9, W7, W5
Snowman Scarf and Hat Band: BG09, BG05, BG02, BG01
Hope you like it and have a great week!


