Archives

Owl Always Love You!!


Welcome High Hopes Rubber Stamps Fans!

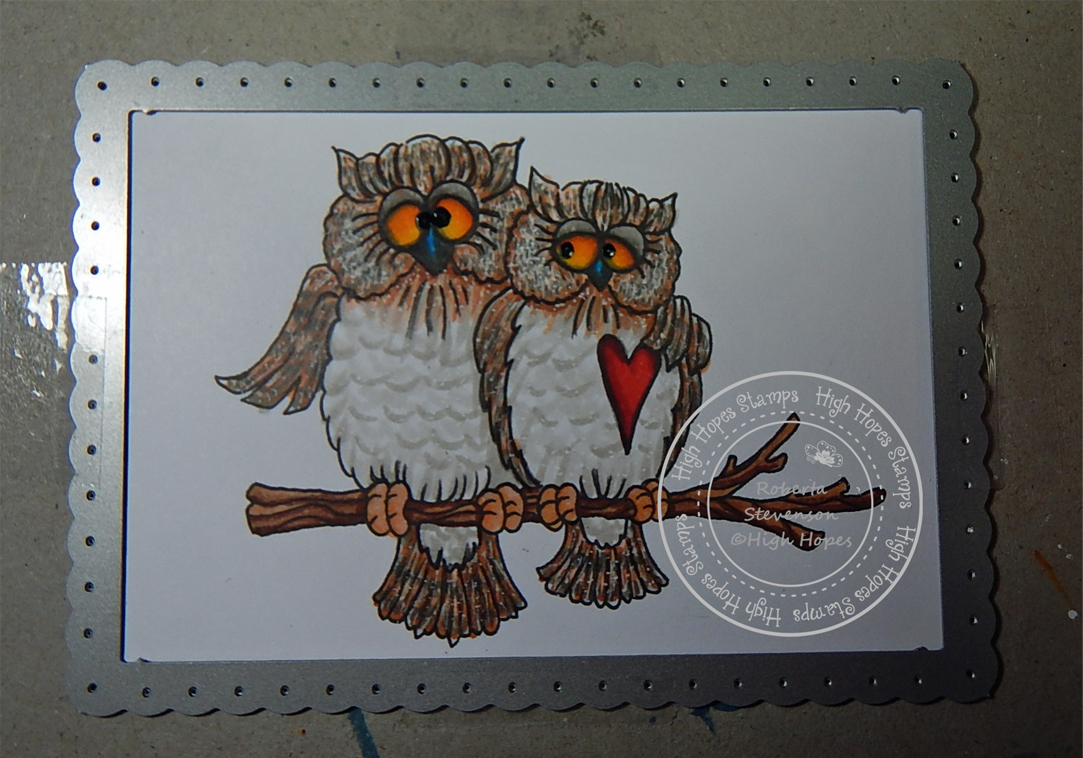
It’s Wednesday, and this week I’m sharing a card that I made using 2 little love birds called Feathered Friends S261 for the main image and Owl Love You G239 for the sentiment.

This card can be used for either Valentine’s Day or for an Anniversary.

I decided to try something new this week and wanted to make the owl’s feathers look real. I believe that I was finally able to get the look that I was after. LOL!

After my main image was all coloured in, it was time to create the sky. Before doing this, I decided to die cut the image first using Lawn Fawn – Fancy Scalloped Rectangle Stackables. Next, I taped the main image down onto a piece of thin cardboard and then taped the die cut down on top of it.

This allowed me to use the inner part of the frame to colour and to leave the outer part of the frame white. I used a variety of Blue Copic markers to create the sky. I had also drawn in some heart shaped clouds with BG70 first, so that I would know where to stop with the other blues. Once my sky was all coloured in, I then used a Colorless Blender to soften the images around the cloud-shaped hearts and also to create some other small hearts as you can see in the finished card above.

To complete the card, I mounted everything onto Cyan and White cardstock and then mounted the image and sentiment on top using 3M VHB – 2 sided tape. Lastly, I added in some small hearts which I had die cut using Sizzix Framelets by Stephanie Barnard – 562676 – Hearts Dotted die. I ran these little hearts through my Xyron to turn them into stickers and then placed them onto the card.

Card Recipe:

Stamp:  Feathered Friends S261  (High Hopes Rubber Stamps)

Sentiment: Owl Love You G239 (High Hopes Rubber Stamps)

Inks: Memento – Tuxedo Black

Paper: Copic Marker X-Press It Blending Card, Simply Cards & Papercraft – Valentine’s Day Cardmaking PackSimply Cards & Papercraft – Valentine’s Day Cardmaking Pack, Cyan Cardstock

Die Cuts: Lawn Fawn – Fancy Scalloped Rectangle Stackables, Sizzix Framelets by Stephanie Barnard – 562676 – Hearts Dotted

Tools: MISTI – Most Incredible Stamping Tool, Cuttlebug, Xyron Create-A-Sticker

Image coloured with Copic Markers:

Owls: W7, W5, W3, W1, W0, E97, E95, E15, B05, B26, Black PrismaColor Pencil, Gelly Roll Sakura #5 Pen

Eyes: E15, YR18, YR16, Y35, Y08, Sakura Glaze – Black, Black PrismaColor Pencil

Heart: R59, R37, R35

Tree Branch: E29, E25, E23

Sky: B04, B02, B01, B00, B000, BG70, Colorless Blender

Hope you like it and have a fantastic week!

You can find lots of inspiration from the Design Team Divas at the High Hopes blog, and the High Hopes Rubber Stamps Facebook Fan page plus you can also follow us on
Instagram, Twitter and Pinterest.


Happy Valentine’s Day My Prince!


My mom always told me that when I met my husband, I found my prince charming because he’s really handsome and does everything for me. My family calls me the princess! I don’t think it’s quite what my hubby had in mind for his princess, but it works for us! LOL! Everyone always asks me if they could borrow him. Sorry, ladies he’s all mine and has been for going on over 34 years. I couldn’t live without him, he’s my best friend.

This year, I thought I’d make him a special Valentine’s card with a little bit of humour that reflects our relationship! I do help when he lets me.

On the front of the card is the digital image from The Paper Shelter – Prince Charming.

Here is a close-up of the prince:

On the inside I used the stamps from Ai – Art Impressions – 4729 – In the Bag Set.

Here is a close-up:

The captions above and below the image were typed in Microsoft Word using the font Cooper Black, Size 14.

Background PaperK&Company – Kelly Panacci – KP Valentine – 30-599338, K&Company – Kelly Panacci – KP Valentine – 30-5993345

Die CutSizzix Framelets by Stephanie Barnard – 562676 – Hearts Dotted

EmbellishmentsJot Jewel Stickers

Used Copic Marker X-Press It Blending Card and coloured in all images with Copic markers. Stamped images using Memento – Tuxedo Black.

He laughed when I gave him his card and he loved it! I hope you do too!

Happy Valentine’s Day Everyone!

Valentine for Vet 2017 from Boo


Hi There,

Sharing the card that I made for the vet from out black cat “Boo” for Valentine’s Day.

boovalentine2017fr

Here is a close-up:

boovalentine2017frcu

For the inside I wrote a little sentiment from “Boo” to our vet and his wonderful staff.

boovalentine2017in

Kittens are from Kadoodle Bug Designs – DS Cute Kitty Valentine.

For sentiment on front page used imported image from Cricut Cartrige –  Holiday Cakes  – Happy Valentine’s Day  #M3F6FB  into Cricut Design Space and then cut with Cricut Explore.

Cut out frame for image with Spellbinders S4-353 – Labels Twenty-Four and then edged with Tim Holtz – Festive Berries.

Coloured both images with a mixture of Copic and Spectrum Noir markers. Used Sakura Glaze – Black for his eyes, nose and whiskers.

They loved it! Hope you do too!

Sorry for the late posting!


Valentine’s Day 2017 – Hubby


Hi There,

Sharing the Valentine’s Card that I made for my
wonderful husband this year.

A little late in posting on-line.

toddvalentine2017fr

Here is a close-up:

toddvalentine2017fr-cu


On the inside:

toddvalentine2017in

Close-Up:

toddvalentine2017in-cu

All Images by: Simply Betty from her FanPageImages collection.

CupidBetty and CupidCorinne.

Used Cricut Design Studio to import image:  Gypsy Wanderings – Heart #M3FF59. Made a copy of the hear and then welded it together. Then used my Cricut Explore to cut out the pieces.

Stamped background – Local King Rubber Stamp – Words (1) on the white hearts.

Coloured image with Copic markers.

My husband loved it! Hope you do to.

Valentine’s Day 2017 – Mom


Sharing a Valentine’s Day card that I made for my
mom and dad this year.


momvalentine2017

Here is a close-up:

momvalentinecu2017

Image by: faeryink_doodlebug_vdaylollipop

Image coloured with Copic Markers and Gelly Roll Sakura #8 Pen for highlights on eyes.

Used Cricut Design Studio to import image:  Gypsy Wanderings – Heart #M3FF59. Made a copy of the hear and then welded it together. Then used my Cricut Explore to cut out the pieces.

Hope you like it!


Bears – SG Hugs and Kisses Bear


Hi There,

Like to share a special card I made for my dear sweet husband. I’ve been very sick over the past couple of weeks and he has been taking great care of me. Love him so much!

When we were married our theme was bears. So I thought this card was perfect.

I’ve included 2 images. The first image is before I put the shaker card together. The second image is the completed card.

BearyMuchFrt_300 dpi  BearyMuchFrt4_300 dpi

The bears are from Too Cute by Jessica – SG Hugs and Kisses Bear by Saskatoon Graphics.

I uploaded the bear into Cricut Design Space and then copied it and made a mirror image. For the girl bear I added a little bow. Cut the designs out with my Cricut Explore.

For the sentiment and lips and hearts on the background, I used Peachy Keen Stamps – PKS-13 January 2013.

I stamped the sentiment first with VersaMark and then embossed with Ranger – Super Fine Detail Clear.

Sequence is from Craftin Desert Diva’s – Heart Breaker.

Heart patterned paper is from K&C Company – KP Valentine.  Kelly Panacci.

Highlights on the eyes were done using Gelly Roll Sakura #8 Pen.

Craft foam was also used to make the shaker card.

Used Cricut Design Space and my Cricut Explore to create the window and frame border for the shaker card.

I am also happy to announce that I am now a Designer for Too Cute By Jessica. YAY!

It’s still not too late to join the current challenge. http://toocutebyjessicadt.blogspot.ca/2016/02/valentines-day-challenge.html


Valentine’s Card for Parents


Hi There,

Back to share another card that I made for Valentine’s Day. Since my parents live so far away, I thought these 2 digi stamps from Craftin Desert Diva’s would be perfect for a simple little Valentine’s card for them.

I brought the 2 digi’s into Microsoft Word and then duplicated them 3 more times for a total of 4 images each. This allowed me to fussy cut the images after colouring the various parts and then layer them to give the characters some depth. I printed the images out onto “100% Recycle Paper, Robert Bateman, Cover Series, Artist Quality Sketchbook” paper and then used PrismaColor Premier Pencils and Gamsol blending medium to colour the images. I highlighted the eyes with Gelly Roll Sakura #8 Pen and the noses with Gelly Roll Sakura #6 Pen. A touch of Clear – Wink of Stella on the small hearts.

The 2 digis that I used were:

On the Front: “Little Lovelies Bear with Mailbox”

VPSFront

Here is a closer look.

VPSCloseUp

I embossed the “Happy Valentine’s Day” with Versamark and Ranger Embossing Powder – Rich Red.

On the inside is the digi called: “Little Lovelies Love Letter Bear”.

I think the first photo shows off the layers better. This is the same image. Just shown at 2 different angles.

VPInside  IMG_20160128_230506

Here is the close up.

VPSInCloseUp

For the background paper I used K&Company 2-sided Valentine’s paper. I cut it out with Spellbinders Postage Stamps S4-348 and my Sizzix BigKick machine.

The little sentiment on the front is also from K&Company.

Hope you like it!

Entering this card into 2 of Craftin Desert Diva’s Challenges.

Craftin Desert Diva’s (Linky Party – Week 2 Challenge)

and also:

https://www.facebook.com/media/set/?set=oa.1672559509651821&type=1 (January Digi Challenge).


Valentine’s Day Card for my Hubby


Hi There,
Back again to share a Valentine’s card that I made for my wonderful husband of 25 years.
Love Bug Front   Card open

To make the shape of the card, I used Cricut Design Space and then cut the card layout and all of the images using my Cricut Explore.
I made the card 6″ x 6″ and cut 2″ off either side of the panels so that they would come together to make the front of the card.
I adhered the 2 (4″ x 3″ panels rectangles on both sides). I also used Cricut Design Space to cut the hearts directly in half so I knew they would match up on the front.
I duplicated the large hearts while they were still together and used them on the inside. The large hearts are both part of the Cricut Craft Room Basics.
The “Happy Valentine’s Day” is from Cricut – “Phrases” cartridge.

Love Bugs are all from Miss Kate Cuttables.
Valentine LadyBug Boy, Valentine Ladybug and Love Bug Title.

Here’s a closer look.

Girl Bug Mail Bug

Inside Bug

Paper background is from K@Company 12 x 12″ Designer Paper.
Wording is from Cricut – “Baby Steps Font”.

For the final touch, I added a some Clear “Wink of Stella” on the Lady and some of the hearts.
Hope you like it!

Entered this card into “Miss Kate Cuttables Galleria – January Challenge.”

Also entered into “https://www.facebook.com/groups/CricutLoversGuide/permalink/865475223573693/” – Cricut Lovers Guide to Design Space.

And: http://www.craftindesertdivasblog.com/2016/01/craftin-desert-divas-shaped-card-linky.html


Valentine’s Card for my Hubby


“Hi There,

Liked to share the card I made for my husband this year with you.

Forever Yours

For the front of the card, I used a design that I found in “Complete Cardmaking – Making Beautiful Cards with your PC” magazine.

The original design by Nancy Malaka can be found on page 27 and is called “Forever Yours”.

I uploaded the .jpg from the CD into Cricut Design Studio for the couple and then used the “Print and Cut” feature to print the image to my printer and then Cricut Explore to cut my image for me. Love this new feature!

Next, I used my Copic and Spectrum Noir markers to colour the image. PrismaColor Premier Pencils were used for creating more contrast and shadow.

Using Cricut Design Studio, I used the following cartridges:

Background: Paper Lace II – Gears

Lettering: Cricut Alphabet

Clock: Picturesque – Clockface Circle Card Seal

Clock Hands: Gypsy Wanderings – Clock Hand

Heart design: Elegant Edges – Heart Scallop Design Label

Scalloped Rectangles – Elegant Edges – Heart Rectangle Design Label (Removed Heart with Design Studio)

The following papers were used:

Scrap paper for wood background.

Light brown for gears background and went around edges with Walnut Stain Ranger Tim Holtz Distress Ink.

Greyish Blue was used for large scalloped label behind clock.

Newspaper cardstock for smaller scalloped label behind clock and went around edges with Walnut Stain Ranger Tim Holtz Distress Ink.

For the inside of the card:

Todd Valetine 2015

I stamped the images using Memento Tuxedo Black ink and Peachy Keen stamps from PKS-04 April 2012 for the clocks and sentiments. Cutting them after they were coloured.

The faces are from PKS-1357 Sweet on You Face Assortment.

Background paper is from K&C Company Kelly Panacci designer paper, KP  Valentine.

Copics and Spectrum Noir pens to colour faces and hearts in background.

Some pink chalk to colour cheeks.


Boo’s Valentine Card


This was Boo’s Valentine card to the vet this year. I make cards for all occasions for her vet.

This is a little late getting posted, but I thought I would share it with you anyways.

To make this easel card, I used my Cricut Explore to cut the heart out of the cardstock and the really adorable cat from Miss Kate Cuttables.

The cat was a free svg download from http://www.misskatecuttables.com/.

It can be found here: http://www.misskatecuttables.com/products/animals-pets/freebie-of-the-day-cute-valentine-kitty.php

I altered the pattern to give my cat pink paw pads and a tail that was all black.

The sentiment is from Peachy Keen stamps PKS-13 January 2103.

Boo V card

Above is a close up from my scanner of the finished image.

IMG_20150213_072807

This was taken with my phone to show how it stands as an easel card.

Materials used: Light and hot pink cardstock. Black, light and medium grey cardstock. Miniature green gems for the eyes. Background paper from K&C Company Kelly Panacci designer paper, KP  Valentine. Inkssentials Glossy Accents for the nose. A small piece of hot pink ribbon.