Tag Archive | #High Hopes

Hoppy Valentine’s Day


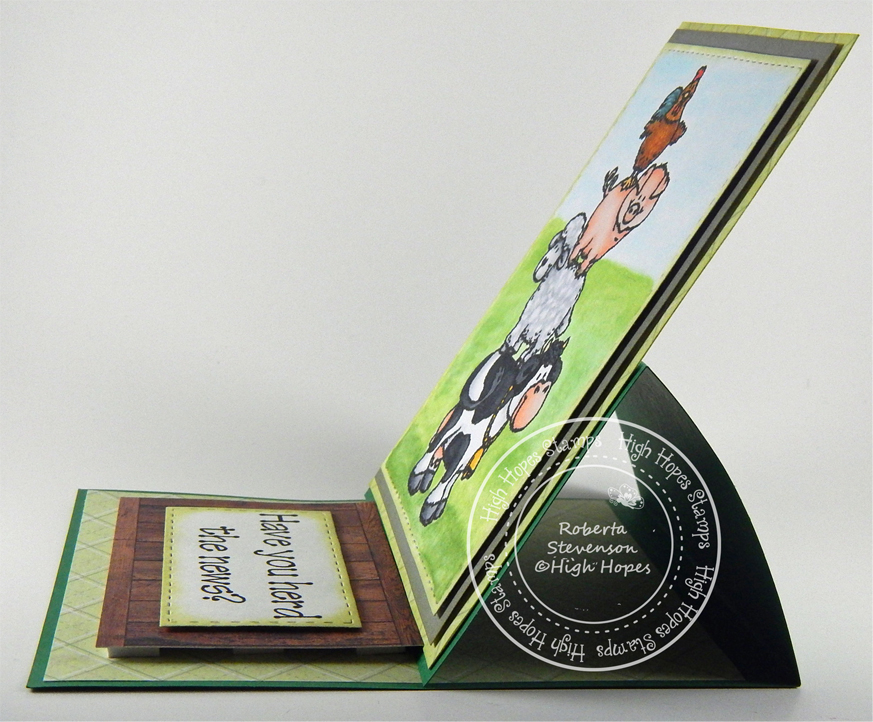
It’s Wednesday, and this week I’m sharing a Valentine’s Card featuring Bunny Love – S054 from (High Hopes Rubber Stamps) for the main image and Hoppy Valentines – F092 (High Hopes Rubber Stamps) for the sentiment. Love this adorable image and it can be used for so many different occasions, Valentine’s, which I’ve used here, Easter or even for an Anniversary card.

To create the card this week, I stamped the main image and sentiment onto Copic Marker X-Press It Blending Card using Memento – Tuxedo Black ink and my MISTI. I coloured in the main image with Copic Markers. Then I fussy cut around it. The sentiment was die cut using Whimsy Stamps – Quick Strips Die Set – WSD330.

To create the base I began with AC Cardstock – Christmas (6″ x 6″). Then I die cut K&Company – Kelly Panacci – KP Valentine – 30-599338 paper using My Creative Time -Stitched Squares Inside and Out. For the smaller heart, I used K&Company – Kelly Panacci – KP Valentine – 30-599345 paper and Sizzix Framelets by Stephanie Barnard – 562676 – Hearts Dotted dies. I also used the same dies to cut the larger heart using Recollections – Christmas Noel paper. I inked around all of the cut images with Tim Holtz Distress Ink – Aged Mahagony and also Tim Holtz Distress Ink – Barn Door.

To assemble the card, the large square was attached directly to the base using double side tape. All of the remaining layers were popped up using 3M VHB – 2 sided tape.

Card Recipe:

Stamp: Bunny Love – S054 from (High Hopes Rubber Stamps)

Sentiment: Hoppy Valentines – F092 (High Hopes Rubber Stamps)

Inks: Memento – Tuxedo Black, Tim Holtz Distress Ink – Barn Door, Tim Holtz Distress Ink – Aged Mahagony

Paper: Copic Marker X-Press It Blending Card, K&Company – Kelly Panacci – KP Valentine – 30-599345, K&Company – Kelly Panacci – KP Valentine – 30-599338, AC Cardstock – Christmas, Recollections –

Die Cuts: My Creative Time -Stitched Squares Inside and Out, Sizzix Framelets by Stephanie Barnard – 562676 – Hearts Dotted, Whimsy Stamps – Quick Strips Die Set – WSD330, Recollections – Christmas Noel

Tools and Miscellaneous: MISTI – Most Incredible Stamping Tool, Sakura Glaze – Black, 3M VHB – 2 sided tape

Image coloured with Copic Markers:

Bunnies: BV23, BV20, B60, E43, E42, E40, R85, R83, R81, Sakura Glaze – Black (Eyes)

Hope you like it and have a fantastic week!

You can find lots of inspiration from the Design Team Divas at the High Hopes blog, and the High Hopes Rubber Stamps Facebook Fan page plus you can also follow us on
Instagram, Twitter and Pinterest.

Congrats Grad!!!


It’s Wednesday, and this week I’m sharing a Graduation Card featuring Grad Boy – R114 from (High Hopes Rubber Stamps) for the main image and Lg. Fancy Congrats – J006 (High Hopes Rubber Stamps) for the sentiment. My nephew graduated a while ago, but we just found out about it. So this is a belated graduation card. LOL! You know what they say, better late than never!!


To create the card this week, I stamped the main image and sentiment onto Copic Marker X-Press It Blending Card cut at 5.25″ x 4″ using my MISTI and Memento – Tuxedo Black ink. Then I used just the hat and stamped it at different angles to create my background. The images were coloured in with Copic Markers. I decided to pop one hat up in the air. I stamped it separately, fussy cut the image and then coloured it in and popped it up using 3M VHB – 2 sided tape.

To finish off the card, I used double-sided tape and attached the coloured image onto 5.5″ x 4.25″ cardstock from The Paper Studio – Christmas Box of Cards.

Card Recipe:

Stamp: Grad Boy – R114 (High Hopes Rubber Stamps)

Sentiment: Lg. Fancy Congrats – J006 (High Hopes Rubber Stamps)

Inks: Memento – Tuxedo Black

Paper: Copic Marker X-Press It Blending Card, The Paper Studio – Christmas Box of Cards 2012

Tools and Miscellaneous: MISTI – Most Incredible Stamping Tool, Sakura Glaze – Black, 3M VHB – 2 sided tape

Image coloured with Copic Markers:

Skin and Mouth: E21, E11, E04, E00, E000, R89, R85, R83, R29, Sakura Glaze – Black (Eyes)

Hair: C10, C7, C5

Gown: N10, N6, N5, N4

Hats: 100, N10, N8, N6, R39, R29

Shirt, Tie and Socks: B39, B37, B18, C1, C00

Pants: T5, T3, T2

Shoes: C5, C3, C1, 100

Diploma: B60, C1, Colorless Blender

Hope you like it and have a fantastic week!

You can find lots of inspiration from the Design Team Divas at the High Hopes blog, and the High Hopes Rubber Stamps Facebook Fan page plus you can also follow us on
Instagram, Twitter and Pinterest.

Babies Are Sweet Beginnings!!!


It’s Wednesday, and this week I’m sharing a Baby Card featuring Sweet Beginnings – S169 from (High Hopes Rubber Stamps). I love this adorable stamp and I also have a few nieces that are pregnant right now. We are all looking forward to seeing pictures of the new little one’s when they are born. Once Covid19 is over, hopefully, we will be able to travel again and see them in person.

To create the card this week, I stamped the image onto Copic Marker X-Press It Blending Card using my MISTI and Memento – Tuxedo Black ink. I fussy cut around the image and then coloured it in with Copic Markers.

I created a card base made from Hammermill – Premium Colour 100 lb. paper, folded to 5.5″ x 4.25″. For the background paper, I cut a piece the same size as the base from Echo Park – Hello Baby – It’s a Girl. I attached this directly to the base with double-sided tape and then inked around the edges using Tim Holtz Distress Ink – Spun Sugar. I popped up the coloured image using 3M VHB – 2 sided tape. Lastly, I added some little embellishments from Forever In Time – Painted Wood Buttons – Patchwork Elephants to finish off the card.

Card Recipe:

Stamp: Sweet Beginnings – S169 (High Hopes Rubber Stamps)

Inks: Memento – Tuxedo Black, Tim Holtz Distress Ink – Spun Sugar

Paper: Copic Marker X-Press It Blending Card, Hammermill – Premium Colour 100 lb., Echo Park – Hello Baby – It’s a Girl (6″x6″)

Embellishments: Forever In Time – Painted Wood Buttons – Patchwork Elephants – SE083C

Tools and Miscellaneous: MISTI – Most Incredible Stamping Tool, Sakura Glaze – Black, 3M VHB – 2 sided tape

Image coloured with Copic Markers:

Banner: R85, RV13, RV11, RV10

Bear: E29, E25, E23, E21, R30, R02, Y35, Y18, Y13, Sakura Glaze – Black – Eyes and Mouth

Bunny: BV23, BV20, B60, R22, R20, BG49, BG23, BG15, BG10, BG11, YG41, G00, G000, Sakura Glaze – Black – Eyes

Kitten: N8, N5, N3, N1, V17, V15, V04, V01, Sakura Glaze – Black – Eyes and Nose

Hope you like it and have a fantastic week!

You can find lots of inspiration from the Design Team Divas at the High Hopes blog, and the High Hopes Rubber Stamps Facebook Fan page plus you can also follow us on
Instagram, Twitter and Pinterest.

Feeling Up To Par!!!


It’s Wednesday, and this week I’m sharing a Get Well Card featuring Golfer Glen – T084 from (High Hopes Rubber Stamps) paired with the sentiment Up To Par – G257 (High Hopes Rubber Stamps). It’s always hard to find Get Well Cards for men, and I thought the pairing of these 2 stamps went so well together.

To create the card this week, I die cut Copic Marker X-Press It Blending Card using my Cuttlebug and My Creative Time – Rectangle Frame Dies. Then, I stamped the image and sentiment using my MISTI and Memento – Tuxedo Black ink. The image was then coloured in with Copic Markers. I stamped the image again onto Post-It Note paper and used it as a mask. Then, I applied the clouds using Tim Holtz Distress Ink – Salty Ocean and cloud stencils I made from Avery Elle – PiercedCloudsDie and Whimsy Stamps – Grass and Cloud Edger Die Set. Then I used some washi tape to mask the main image border and inked around it using Tim Holtz Distress Ink – Salty Ocean.

The card was now ready to assemble, I attached the coloured image to a card base made from Hammermill – Premium Colour 100 lb. paper, folded to 5.5″ x 4.25″.

Card Recipe:

Stamp: Golfer Glen – T084 (High Hopes Rubber Stamps)

Sentiment: Up To Par – G257 (High Hopes Rubber Stamps)

Inks: Memento – Tuxedo Black, Tim Holtz Distress Ink – Salty Ocean

Paper: Copic Marker X-Press It Blending Card, Hammermill – Premium Colour 100 lb.

Die Cuts: My Creative Time – Rectangle Frame Dies, Avery Elle – Custom Steel Dies – Made in the USA – D-05-01 PiercedCloudsDie, Whimsy Stamps – Grass and Cloud Edger Die Set

Tools and Miscellaneous: MISTI – Most Incredible Stamping Tool, Cuttlebug

Image coloured with Copic Markers:

Skin: E21, E11, E04, E00, E000, R22, R21, R20, R01, R00, B23

Hair and Iron: C5, C3, C1

Shirt: Y38, Y35, Y32

Pants: E50, E39, E35, E33

Socks: Y38, Y35, Y32, YR18

Shoes: E53, E50, E49, E47, E39, E37, E37

Bird: B69, B41, B29, B23, YR16

Tee and Grass and Ball: YG61, YG17, YG25, YG03, YR18, YR16, C1

Hope you like it and have a fantastic week!

You can find lots of inspiration from the Design Team Divas at the High Hopes blog, and the High Hopes Rubber Stamps Facebook Fan page plus you can also follow us on
Instagram, Twitter and Pinterest.

Nutcracker – Seasons Greetings!!!


It’s Wednesday, and this week I’m sharing a Christmas card featuring Nutcracker – M104 from (High Hopes Rubber Stamps) paired with the sentiment Seasons Greetings – F300A (High Hopes Rubber Stamps). It’s always fun to use Nutcrackers at Christmas time, that is if your parents let you play with them? LOL! Do you use your nutcrackers if you have one or are they strictly for decoration?

To create the card this week, I stamped the main image using my MISTI and Memento – Tuxedo Black ink onto Copic Marker X-Press It Blending Card. Then I die cut the image using Creative Expression Craft Dies by Sue Wilson – Noble Dies – Double Pierced Ovals and my Cuttlebug. The image was then coloured in with Copic Markers.

I stamped the sentiment using VersaMark Ink and then embossed it with Ranger – Super Fine Gold Embossing Powder. This was then heated using my Marvy Uchida – Embossing Heat Tool.  I used the same die cuts to cut the remaining ovals. I used PhotoPlay – Christmas Memories for the main background paper and cut it to 6″ x 6″. I edged around the main background, background patterned oval and sentiment with Tim Holtz Distress Ink – Mowed Lawn. To create the ribbon, I used some scrap red cardstock, Crafts – Sparkling Stickers – 02-3068629 – Gold and white cardstock. For the Sparkling stickers, I first attached the paper to some white cardstock to give it more stability. Once the pieces for the ribbons were created, I ran all of them through my Xyron Create a Sticker to make it easier to adhere the layers to each other.

The card was now ready to assemble, I attached the main background to a card base of 6″ x 6″. I layered all of the rectangles to create my ribbon and also added the sentiment to this ribbon as well. I then placed this directly onto the base card. The ovals were all popped up using 3M VHB – 2 sided tape.

Card Recipe:

Stamp: Nutcracker – M104 (High Hopes Rubber Stamps)

Sentiment: Seasons Greetings – F300A (High Hopes Rubber Stamps)

Inks: Memento – Tuxedo Black, VersaMark, Tim Holtz Distress Ink – Mowed Lawn

Paper: Copic Marker X-Press It Blending Card, Hammermill – Premium Colour 100 lb., Crafts – Sparkling Stickers – 02-3068629 – Red, PhotoPlay – Christmas Memories (6″x6″), Crafts – Sparkling Stickers – 02-3068629 – Gold

Die Cuts: Creative Expression Craft Dies by Sue Wilson – Noble Dies – Double Pierced Ovals

Embossing Powder: Ranger – Super Fine Gold Embossing powder

Tools and Miscellaneous: MISTI – Most Incredible Stamping Tool, Cuttlebug, Marvy Uchida – Embossing Heat Tool, Xyron Create a Sticker

Image coloured with Copic Markers:

Skin: E21, E11, E04, E00, E000, R22, R21, R20, C1

Hair and Beard: E49, E47, E44, E43

Hat and Outfit: R59, R39, R37, R35, G99, G21, YG67, YG17, E15, Y35, YR24, Y08, Yellow gem

Boots: C10, C8, C7, C6, C5, C3

Hope you like it and have a fantastic week!

You can find lots of inspiration from the Design Team Divas at the High Hopes blog, and the High Hopes Rubber Stamps Facebook Fan page plus you can also follow us on
Instagram, Twitter and Pinterest.

Santa in the Chimney!!!


It’s Wednesday, and this week I’m sharing a Christmas card featuring Santa in Chimney – S202 from (High Hopes Rubber Stamps) paired with the sentiment Bold – From One Flake – K201 (High Hopes Rubber Stamps). December is almost here and Santa is on his way to deliver all of the goodies to everyone. Hope your not on the naughty list. LOL!

To create the card this week, I stamped the main image and then coloured it in with Copic Markers. I stamped the image again and used it as a mask. I have a magnetic cutting mat, so I just used a very strong magnet to hold the mask down. Then I used multiple Tim Holtz Distress Inks to create the sky.

Once the sky was created, I removed the mask and used My Creative Time – Rectangle Frame to die cut the image. I added the sentiment using the top half of the sentiment stamp only. To do this, using my MISTI to get a good clean stamped image, I used VersaMark Ink and then embossed it with Ranger Embossing Powder White – Extra Fine Detail. This was then heated using Marvy Uchida – Embossing Heat Tool.

To finish off my background, I added in some snowflakes and stars using Gelly Roll Sakura #10 Pen and Gelly Roll Sakura #5 Pen. For the eyes and notches on the belt, Sakura Glaze – Black ink was used. For the snow on the roof top, Gina K Designs – Glitz Glitter Gel was applied with a little sprinkle of Martha Stewart Crafts – Crystal Fine Glitter. Stickles was added to the hat, collar and cuffs of Santa’s outfit.

To create the layers, I first die cut Hot Buy Craft Smart – Holiday Glitz Glitter Paper with My Creative Time – Rectangle Frame Layers and then the dark blue panel with My Creative Time – Rectangle Frame dies. For the card, I used Hammermill – Premium Colour 100 lb. paper, which was cut at 8.5″ x 5.5″ and then scored at 4.25″ and to create a base card of 4.25″ x 5.5″.

To assemble the remainder of the card. I placed the dark blue layer directly to the base using double-sided tape. The silver layer was applied the same way. The coloured image was then popped up using 3M VHB – 2 sided tape.

Card Recipe:

Stamp: Santa in Chimney – S202 (High Hopes Rubber Stamps)

Sentiment: Bold – From One Flake – K201 (High Hopes Rubber Stamps)

Inks: Memento – Tuxedo Black, Tim Holtz Distress Inks – Black Soot, Dusty Concord, Blueprint Sketch and Chipped Sapphire, VersaMark

Paper: Copic Marker X-Press It Blending Card, Hot Buy Craft Smart – Holiday Glitz Glitter Paper 12″ x 12″, Dark Blue Cardstock, Hammermill – Premium Colour 100 lb.

Die Cuts: My Creative Time – Rectangle Frame Layers, My Creative Time – Rectangle Frame Dies

Embossing Powder: Ranger Embossing Powder White – Extra Fine Detail

Glitter: Martha Stewart Crafts – Crystal Fine Glitter, Gina K Designs – Glitz Glitter Gel, Stickles

Tools and Miscellaneous: MISTI – Most Incredible Stamping Tool, Cuttlebug, Marvy Uchida – Embossing Heat Tool

Image coloured with Copic Markers:

Skin: E21, E11, E04, E00, E000, R22, R21, R20

Hair: W3, W2, W1, W00

Hat and Outfit: R59, R39, R37, R35

Belt: C9, C7, C5, C4, E15, YR24, Y35, Y08

Mitts: C9, C7, C4

Sack: G94, G28, G09, G07, G05, YG67, YG63, YG61

Chimney: E99, E97, E13, E08, T5, T3, T1

Hope you like it and have a fantastic week!

You can find lots of inspiration from the Design Team Divas at the High Hopes blog, and the High Hopes Rubber Stamps Facebook Fan page plus you can also follow us on
Instagram, Twitter and Pinterest.

Christmas Joy!


It’s Wednesday, and this week I’m sharing a Christmas card featuring Christmas Joy Snowy – S228 from (High Hopes Rubber Stamps). I love snowmen, winter and Christmas! Growing up in a northern community, we had a lot of snow. It was always so much fun and seeing the snow fall on Christmas day was always wonderful. Where we live now, we don’t get as much and it’s always disappointing when we don’t see snow on the ground for Christmas. It’s ok for the other days, but Christmas is extra special. Hopefully, Christmas Joy Snowy will bring some snow for us this year on our special day. LOL!

To create the card this week, I first used my Cuttlebug and Creative Expressions by Sue Wilson – Festive Collection Peeking Snowflake to create a die cut out of Copic Marker X-Press It Blending Card paper. I stamped the image and then coloured it in with Copic Markers. Once it was all coloured in, I added added some snowflakes to the sky using Gelly Roll Sakura #10 Pen. Clear – Wink of Stella was applied to all of the leaves. Stickles – Diamond was added to create the ground snow effect and I sprinkled some Martha Stewart Crafts – Crystal Fine Glitter on top of the Stickles while it was still wet. The coloured image was set aside to let it dry.

I die cut the larger oval using the same dies out of Crafts – Thick Glitter Craft Paper. I love this paper, but in order to prevent the glitter from getting everywhere, I first sprayed it with some hairspray.

The card was now ready to assemble. I used Recollections – Winter 4.25″ x 5.5″ card for my base. The large oval was adhered directly onto the base using 2-sided tape. The main image was added using 3M VHB – 2 sided tape and some snowflake embellishments were added to complete the card.

Card Recipe:

Stamp: Christmas Joy Snowy – S228 (High Hopes Rubber Stamps)

Inks: Memento – Tuxedo Black

Paper: Copic Marker X-Press It Blending Card, Crafts – Thick Glitter Craft Paper 02-302270, Recollections – Winter 4.25″ x 5.5 (Assorted Box of Cards)

Die Cut: Creative Expressions by Sue Wilson – Festive Collection Peeking Snowflake

Stickles: Diamond

Tools and Miscellaneous: MISTI – Most Incredible Stamping Tool, Marvy Uchida – Embossing Heat Tool, Cuttlebug, Clear – Wink of Stella, 3M VHB – 2 sided tape

Image coloured with Copic Markers:

Snowman: B60, B0, B00, R22, R20, Colorless Blender

Jacket and Hat: B39, B32, B28, B24, B23, B21

Buttons: E15, YR24, Y35, Y08

Mitts and Scarf: BG57, BG53, BG49, BG13, BG11, BG10

Holly and Leaves: G99, YG67, YG17, YG01, G21, R39, R37, Gelly Roll Sakura #5 Pen

Nose: E08, YR18, YR16, YR12

Background: B60, B04, B02, B00, B000, BV20, Stickles – Diamond, Gelly Roll Sakura #10 Pen, Martha Stewart Crafts – Crystal Fine Glitter

Hope you like it and have a fantastic week!

You can find lots of inspiration from the Design Team Divas at the High Hopes blog, and the High Hopes Rubber Stamps Facebook Fan page plus you can also follow us on
Instagram, Twitter and Pinterest.

Buddy’s Present


It’s Wednesday, and this week I’m sharing another Christmas card featuring Buddy’s Gift Block – R161 from (High Hopes Rubber Stamps) with the sentiment Sm. Christmas Script – F051 (High Hopes Rubber Stamps). Buddy and his little birdie friend are all set for Christmas with his gift all wrapped up for you? How soon do you start wrapping presents for Christmas?

To create the card this week, I stamped the main image and then coloured it in with Copic Markers. Once it was all coloured in, I fussy cut around it and used a black marker to go around all of the edges. I used some 2-sided tape and placed it onto some white cardstock. Then I used my cutter  to cut a thin border all around the image. I repeated this process with some red cardstock and edged around all of the sides with Tim Holtz Distress Ink – Barn Door. I added some Stickles – Sea Glass around the inside border, Stickles – Icicle for the hat and pom-pom and some Clear – Wink of Stella to the all of the baubles and set everything aside to dry.

For the sentiment, I cut the the stamp in half so that I could place it on 2 lines. To stamp the sentiment, I used my MISTI, Versa Fine – Onyx Black ink and Ranger – Clear Super Fine Detail embossing powder. The powder was heat set using Marvy Uchida – Embossing Heat Tool.

For the base card I started out with white cardstock folded in half to create a 5.5″ x 4.25″ card. Doodlebug – Milk and Cookies paper was used for the background. I fussy cut along the bottom following the flow of the words. Some red cardstock was glued from the back onto the background paper and then I followed the flow of the previous cut to create a thin border. I repeated this process with some green cardstock. Once all of the 3 layers were complete, I cut the piece to be approximately 5-1/8″ x 3.25″. Tim Holtz Distress Ink – Mowed Lawn was used to go around all of the edges.

To assemble the card, I glued the combined background layers onto the base card.  The main image and frame created earlier were added using 3M VHB – 2 sided tape to complete the card.

Card Recipe:

Stamp: Buddy’s Gift Block – R161 (High Hopes Rubber Stamps)

Sentiment: Sm. Christmas Script- F051 (High Hopes Rubber Stamps)

Inks: Memento – Tuxedo Black, Versa Fine – Onyx Black, Tim Holtz Distress Ink – Mowed Lawn, Tim Holtz Distress Ink – Barn Door

Paper: Copic Marker X-Press It Blending Card, Doodlebug – Milk and Cookies (6″x6″)

Stickles: Icicle, Sea Glass

Embossing Powder: Ranger – Clear Super Fine Detail

Tools and Miscellaneous: MISTI – Most Incredible Stamping Tool, Marvy Uchida – Embossing Heat Tool

Image coloured with Copic Markers:

Bear: E35, E34, E33, E31, E27, E25, E23, R22, R20, Sakura Glaze – Black, Gelly Roll Sakura #5 Pen

Present and Bow: B16, B05, B02, YG17, YG06, YG05, YG03, YG01

Baubles: B16, B05, B02, B00, G46, G29, G28, G24, R59, R39, R37, R35, Pental Sunburst Metalic Med Gel Pen, Atayou Spica – Gold 11, Clear – Wink of Stella

Cardinal: R27, R24, R08, Y17

Hat: R59, R39, R37, R35

Background: R81

Checkered Frame: G29, G28, G24

Hope you like it and have a fantastic week!

You can find lots of inspiration from the Design Team Divas at the High Hopes blog, and the High Hopes Rubber Stamps Facebook Fan page plus you can also follow us on
Instagram, Twitter and Pinterest.

Elf Christmas


It’s Wednesday, and this week I’m sharing a Christmas card featuring Munchin Melvin Elf – M023 from (High Hopes Rubber Stamps) who just isn’t able to resist the delicious Gingerbread cookie, paired with the sentiment Have Your Elf – H094 (High Hopes Rubber Stamps).

I remember my mom baking little Gingerbread men every year when we were little and she even let us decorate some on our own. It was always so much fun! Then it was even more fun when we were aloud to eat them. Yum! Yum!

To create the card this week, I stamped the main image and then coloured it in with Copic Markers. I used my Brother Scan and Cut to cut around the image leaving a small white border. For the sentiment, I stamped it out using Versa Fine – Onyx Black ink and then embossed it using Ranger – Clear Super Fine Detail embossing powder. This was heat set using Marvy Uchida – Embossing Heat Tool. Next, Tim Holtz Distress Ink – Cracked Pistachio ink was used to colour the white paper to match the edging around the base of the card.

For the base card I started out with white cardstock folded in half to create a 6″ x 6″ card. The elf background from Doodlebug – Christmas Magic was cut to the same size as the base and adhered to it using double-sided tape. For the inside paper, Doodlebug – Christmas Magic paper was used again. Using my Cuttlebug and Creative Expressions Festive Collection – Gingerbread Man die I cut the centre piece out. I used the same die to cut out the red border as well. Then I die cut one more piece using just the large border for the white glitter background. Hot Buy Craft Smart – Holiday Glitz Glitter Paper was chosen to do this with.

To assemble the remainder of the card. I first taped the centre piece to the main red piece at the back. This was then glued to the white glitter background. The frame, main image and sentiment were added using 3M VHB – 2 sided tape. To complete the card, I used some embellishments from Dress It Up – Holiday Collection and Carta Bella – Santa’s Workshop.

Card Recipe:

Stamp: Munchin Melvin Elf – M023 (High Hopes Rubber Stamps)

Sentiment: Have Your Elf – H094 (High Hopes Rubber Stamps)

Inks: Memento – Tuxedo Black, Tim Holtz Distress Ink – Cracked Pistachio, Versa Fine – Onyx Black

Paper: Copic Marker X-Press It Blending Card, Doodlebug – Christmas Magic – 6″ x 6″, Hot Buy Craft Smart – Holiday Glitz Glitter Paper 12″ x 12″, Crafter’s Companion Luxury Cardstock – Red – 8.5 x 11″

Die Cuts: Creative Expressions Festive Collection – Gingerbread Man

Embossing Powder: Ranger – Clear Super Fine Detail embossing powder

Embellishments: Dress It Up – Holiday Collection, Carta Bella – Santa’s Workshop

Tools and Miscellaneous: MISTI – Most Incredible Stamping Tool, Cuttlebug, Brother Scan and Cut, Marvy Uchida – Embossing Heat Tool

Image coloured with Copic Markers:

Skin: E21, E11, E04, E00, E000, R22, R20

Hair: E08, YR18, YR15, YR12

Hat and Dress: RV17, RV14, RV11

Shoes: BG49, BG15, BG11, R39, R37, R35, C5, C3, C1

Socks: RV000, R37, R35

Gingerbread Man: E35, E33, E31, E21, R39, R37, R35, G09, G05, G02

Hope you like it and have a fantastic week!

You can find lots of inspiration from the Design Team Divas at the High Hopes blog, and the High Hopes Rubber Stamps Facebook Fan page plus you can also follow us on
Instagram, Twitter and Pinterest.

Three Kings Bringing Joy


It’s Wednesday, and this week I’m sharing a Christmas card featuring the adorable image Three Kings – T201 from (High Hopes Rubber Stamps) with the sentiment Joy To The World – GLL012 (High Hopes Rubber Stamps).  Have you started your Christmas cards yet?

To create the card this week, I stamped the main image and then coloured it in with Copic Markers. I used my Brother Scan and Cut to cut around the image and then used a black marker to go around all of the edges. For the sentiment, I stamped it out and then used My Creative Time: Fun Vertical Greetings to die cut it.

For the base card I used Hammermill – Premium Colour 100 lb. to create my background at 5.5″ x 4.25″ and also the base card.  I used various Tim Holtz inks listed below to create the night sky and earth at the bottom. After the basic blending was done, I layered Kraftin’ Kimmie – Twinkle Little Stars stencil over top of the base and applied Stampin Up – Whisper White using a sponge dauber. I removed the stencil and cleaned it off. Then placed it on top again. This time, I used a sponge dauber and FolkArt – Extreme Glitter Acrylic Paint to give the stars some sparkle. Note: A little dab of this paint goes a long way. Marvy Uchida – Embossing Heat Tool was used to help speed up the drying process.

Once the paint was all dry, the card was ready to be assembled. I cropped the background to 5.25″ x 4″ and placed it directly onto the base. Then the main image and sentiment were added using 3M VHB – 2 sided tape.

Card Recipe:

Stamp: Three Kings – T201 (High Hopes Rubber Stamps)

Sentiment: Joy To The World – GLL012 (High Hopes Rubber Stamps)

Inks: Memento – Tuxedo Black, Tim Holtz Distress Ink – Chipped Sapphire, Blueprint Sketch, Salty Ocean, Tumbled Glass, Vintage Photo, Gathered Twigs, Tea Dye, Wild Honey, Stampin Up – Whisper White

Paper: Copic Marker X-Press It Blending Card, Hammermill – Premium Colour 100 lb.

Die Cuts: My Creative Time: Fun Vertical Greetings

Stencil: Kraftin’ Kimmie – Twinkle Little Stars

Tools and Miscellaneous: MISTI – Most Incredible Stamping Tool, Cuttlebug, FolkArt – Extreme Glitter Acrylic Paint, Brother Scan and Cut

Image coloured with Copic Markers:

Skin: E21, E11, E04, E00, E000, R22, R20

Hair: Black, C9, C7, C5, C3, C2, C1

Shoes: C5, C3

Left King Clothing and Urn: V28, V25, V22, E15, YR24, Y35, Y08, R39, R37, R35

Centre King Clothing and Bag: B69, B28, B24, B18, B16, B14, B12, E89, E87, E84, E55, E53, E51, E50, E15, YR24, Y35, Y08

Right King Clothing and Bottle: R59, R39, R37, R35, E15, YR24, Y35, Y08, G19, G17, G14, YG09, YG07, YG03

Hope you like it and have a fantastic week!

You can find lots of inspiration from the Design Team Divas at the High Hopes blog, and the High Hopes Rubber Stamps Facebook Fan page plus you can also follow us on
Instagram, Twitter and Pinterest.

Little Nutty Buddy


It’s Wednesday, and this week I’m sharing a card featuring Little Nutty Buddy – M150 from (High Hopes Rubber Stamps) with the sweet sentiment Happy Fall Y’all – G086 (High Hopes Rubber Stamps). My husband and I went on a wonderful nature walk this past weekend through the forest to see to falls. It was very beautiful seeing the fall colours and the little squirrels running around gathering acorns for their winter supply of food, just like little Nutty Buddy.

To create the card this week, I began with base card 5.25″ x 4.25″ from The Paper Studio – Primary Base Colours. I inked around all of the edges with Tim Holtz Distress Inks – Ground Espresso. The scalloped circles were die cut using my Cuttlebug and Spellbinders Nestabilities – Petite Scalloped Circles – Large. For the larger circle – AC Cardstock – Autumn was used and then inked around with the same ink used on the base card. The background acorn paper was die cut using My Creative Time – Rectangle Frame Dies. Both of the background papers are from Your Next Stamp – Fabulous Fall collection. I inked around the patterned die cuts with Tim Holtz Distress Ink – Spiced Marmalade.

The sentiment was stamped with Memento – Tuxedo Black ink and then Nellie Snellin Die – MFD 007 was used to cut it out. I then cut the border part of the die cut off and just left the oval centre. This was inked with Tim Holtz Distress Ink – Spiced Marmalade. 2 Kraftin’ Kimmie – Holiday Dots were added on both sides.

I stamped the main image onto Copic Marker X-Press It Blending Card using my MISTI and Memento – Tuxedo Black ink. It was coloured in with Copic Markers. Then I put it through my Brother Scan and Cut to create the thin white border around the image.

To assemble the card, I attached the main background and large scalloped circle directly to the base using 2-sided tape. The sentiment, smaller scalloped circle and image were popped up with 3M VHB – 2 sided tape.

Card Recipe:

Stamp: Little Nutty Buddy – M150 (High Hopes Rubber Stamps)

Sentiment: Happy Fall Y’all – G086 (High Hopes Rubber Stamps)

Inks: Memento – Tuxedo Black, Tim Holtz Distress Ink – Spiced Marmalade, Tim Holtz Distress Inks – Ground Espresso

Paper: Copic Marker X-Press It Blending Card, The Paper Studio – Primary Base Colours, AC Cardstock – Autumn, Your Next Stamp – Fabulous Fall – 6″ x 6″

Die Cuts: My Creative Time – Rectangle Frame Dies, Nellie Snellin Die – MFD 007, Spellbinders Nestabilities – Petite Scalloped Circles – Large

Tools and Miscellaneous: MISTI – Most Incredible Stamping Tool, Cuttlebug, Kraftin’ Kimmie – Holiday Dots, Brother Scan and Cut

Image coloured with Copic Markers:

Squirrel: E99, E97, E55, E53, E51, E11, E08, YR18, YR15, R22, R02, 100

Acorns: E15, YR27, YR24, YR15, Y19, E55, E53, E51, E27, E25, E23

Hope you like it and have a fantastic week!

You can find lots of inspiration from the Design Team Divas at the High Hopes blog, and the High Hopes Rubber Stamps Facebook Fan page plus you can also follow us on
Instagram, Twitter and Pinterest.

Happy Fall Y’All


It’s Wednesday, and this week I’m sharing a card featuring Fall Joy – T041 from (High Hopes Rubber Stamps) with the sweet sentiment Happy Fall Y’All – G290 (High Hopes Rubber Stamps). These racoons are having a blast playing in the leaves. We used to do that too when we were little. So much fun. I love seeing all of the beautiful fall colours. Such a wonderful time of the year.


To create the card this week, I stamped the main image and then coloured it in with Copic Markers. Using My Creative Time – Rectangle Frame Dies, My Creative Time – Rectangle Frame Layer Dies and my Cutttlebug, I die cut the main image and the background layers.

For the base card 5.25″ x 4.25″, I used The Paper Studio – Primary Base Colours. The backing behind the main images is from AC Cardstock – Autumn. I attached the main image to this piece using double-sided tape. The plaid paper is from PhotoPlay – Gnome for the Holidays Thanksgiving. Once this background paper was die-cut, all of the edges were inked with Tim Holtz Distress Ink – Carved Pumpkin. This was then applied directly to the base with double-sided tape.

To complete the assembly, I added 3M VHB – 2 sided tape on the back of the first layers and popped them up onto the bottom 2 layers. The sentiment was stamped with Memento – Tuxedo Black in and I fussy cut around it. I ran this through my Xyron Create a Sticker and then layered it onto some Orange cardstock. Then I fussy cut around it again and ran it through my Xyron as well. Then I inked around the edges with the same Tim Holtz ink I used earlier. I placed it over the main image and used 2 very small pieces of 3M VHB – 2 sided tape where it went over the edges of the main image.

Card Recipe:

Stamp: Fall Joy – T041 (High Hopes Rubber Stamps)

Sentiment: Happy Fall Y’All – G290 (High Hopes Rubber Stamps)

Inks: Memento – Tuxedo Black, Tim Holtz Distress Ink – Carved Pumpkin

Paper: Copic Marker X-Press It Blending Card, The Paper Studio – Primary Base Colours, AC Cardstock – Autumn, PhotoPlay – Gnome for the Holidays Thanksgiving

Die Cuts: My Creative Time – Rectangle Frame Layers, My Creative Time – Rectangle Frame Dies

Tools and Miscellaneous: MISTI – Most Incredible Stamping Tool, Cuttlebug, Xyron Create a Sticker

Image coloured with Copic Markers:

Racoons: E49, E44, E31, W8, W6, W4, W2, W0, R02, PrismaColor Premiere Pencils – Black (PC935), 90% Gray (PC1076), 70% Gray (PC1056),  30% Gray (PC1052), Chocolate (PC1082)

Trees: E49, E37, E25, E23

Leaves: YG93, YG61, YG25, YG06, YG03, R14, R08, R05, R02, YR68, YR15, YR14, YR12, Y19, Y08

Hope you like it and have a fantastic week!

You can find lots of inspiration from the Design Team Divas at the High Hopes blog, and the High Hopes Rubber Stamps Facebook Fan page plus you can also follow us on
Instagram, Twitter and Pinterest.

Gnome – Merry Christmas!


It’s Wednesday, and this week I’m featuring a Christmas card I made using the image Flying Gnome – TLF008 and sentiment Sm Christmas Script – F051 from (High Hopes Rubber Stamps).  I just love colouring these adorable little gnomes. Also, it’s always good to make Christmas cards a little at a time throughout the year so that you are not rushing to get them all done in December. LOL! Have you started making your Christmas cards yet this year?

To create the card this week, I first used the die cut from Creative Expressions by Sue Wilson – Festive Collection – Pointsettia Mini Background – CED3049 to cut some Copic Marker X-Press It Blending Card using my Cuttlebug. I stamped the main image and then coloured it with Copic Markers. I started off doing the sky first as I didn’t want any of the Reds smearing into it. (This happens sometimes if you are not careful.) Once the image was all coloured in, I used Sakura Glaze – Black and Gelly Roll Sakura #8 Pen to increase the intensity of the eye on the bird. I outlined the entire image with Pigma Micron 03 black marker to make it stand out more against the sky. Lastly, I used a mixture of Gelly Roll Sakura #8 Pen and Gelly Roll Sakura #10 Pen to create the snow and stars in the sky.

For the base of the card, I began with a standard white card base of 4.25″ x 5.5″. I cut another piece of white cardstock the same size and applied the red shimmer topping on it using Crafts – Sparkling Stickers – 02-3068629. I used the same die cut listed above to cut out the intricate design using my Cuttlebug and the gold paper from Hot Buy Craft Smart – Holiday Glitz Glitter Paper. I had put the gold paper through my Xyron Creative Station before I die cut it. This made it easier to just peel and stick onto the base.

For the sentiment, I die cut some spare red cardstock using Craftin Desert Diva’s – Flag Banner Dies. Using my MISTI and VersaMark ink, I stamped the sentiment onto the die cut and embossed it using Ranger Super Fine Gold Embossing powder. This was heated with my Marvy Uchida – Embossing Heat Tool. The image and the sentiment were both popped up with 3M VHB – 2 sided tape to complete the card.

Card Recipe:

Stamp: Flying Gnome – TLF008 (High Hopes Rubber Stamps)

Sentiment: Sm Christmas Script – F051 (High Hopes Rubber Stamps)

Inks: Memento – Tuxedo Black, VersaMark

Paper: Copic Marker X-Press It Blending Card, Hot Buy Craft Smart – Holiday Glitz Glitter Paper 12″ x 12″, Crafts – Sparkling Stickers – 02-3068629

Die Cut: Creative Expressions by Sue Wilson – Festive Collection – Pointsettia Mini Background – CED3049, Craftin Desert Diva’s – Flag Banner Dies (Retired)

Embossing Powder: Ranger Super Fine Gold

Tools and Miscellaneous: MISTI – Most Incredible Stamping Tool, Cuttlebug, Pigma Micron 03 black marker, Xyron Creative Station, Marvy Uchida – Embossing Heat Tool

Image coloured with Copic Markers:

Skin: E21, E11, E04, E00, E000

Beard: W5, W4, W3, W2, W1, W0, W00

Hat and Outfit: R59, R39, R37, R35, YG97, YG95, YG93, G43

Cardinal Bird: R37, R35, R24, R22, R17, R14, R08, R05, R02, R000, YR15, YR12, C3, N10, N8, Gelly Roll Sakura #8 Pen, Sakura Glaze – Black

Leaves and Holly: R59, R37, R24, YG97, YG95, YG93, YG05, G43

Shoe: E34, E33, E31

Sky: B99, B97, B95, B93, Gelly Roll Sakura #8 Pen, Gelly Roll Sakura #10 Pen

Hope you like it and have a fantastic week!

You can find lots of inspiration from the Design Team Divas at the High Hopes blog, and the High Hopes Rubber Stamps Facebook Fan page plus you can also follow us on
Instagram, Twitter and Pinterest.


Birthday Belle!


It’s Wednesday, and this week I’m sharing a CAS card featuring Birthday Belle – T076 from (High Hopes Rubber Stamps) with the sweet sentiment Bummer – H263 (High Hopes Rubber Stamps). Our birthday girl this week isn’t too keen on having another birthday to remind her how old she is, but she is still having fun blowing out all of the candles. LOL! I decided to colour her outfit and cake pink, because I remember how much my grandmother loved that colour.

To create the card this week, I stamped the main image and then coloured it in with Copic Markers. My Creative Time -Stitched Squares Inside and Out die and my Cutttlebug were used to cut out the main coloured image and the hot pink background paper.

For the base card I cut some yellow cardstock 10″ long by 5″ high. It was then scored and folded in half to be 5″ x 5″. All of the edges for the base card and die-cuts were then inked around using the various Tim Holtz Distress inks listed below. I mounted the hot pink cardstock directly to the base using double-sided tape. Then the main image was popped up with 3M VHB – 2 sided tape. Finally, to finish it off, I used some crafty dots by Crafts.

Card Recipe:

Stamp: Birthday Belle – T076 (High Hopes Rubber Stamps)

Sentiment: Bummer – H263 (High Hopes Rubber Stamps)

Inks: Memento – Tuxedo Black, Tim Holtz Distress Ink – Picked Raspberry, Tim Holtz Distress Ink – Fossilized Amber, Tim Holtz Distress Ink – Evergreen Bough

Paper: Copic Marker X-Press It Blending Card, Hot Pink Cardstock, Yellow Cardstock

Die Cuts: My Creative Time -Stitched Squares Inside and Out

Tools and Miscellaneous: MISTI – Most Incredible Stamping Tool, Cuttlebug, Crafts Stickers – 02-3010802

Image coloured with Copic Markers:

Skin,Lips and Eyeshadow: E21, E11, E04, E00, E000, R22, R20, YG09, YG06, YG03

Hair: N5, N3, N1

Blouse and Cake Icing and Earring Pinks: RV09, RV06, RV04, RV02, RV00, RV000

Cake Flowers, Leaves and Trim : G17, G14, G07, Y38, Y19, Y18, Y04, BG32, BG13, BG10

Balloons: BG34, BG18, BG15, BG10, RV09, RV06, RV04, RV00, Y38, Y19, Y04, Y00

Candles: BG34, BG13, BG10, YR14, Y19, Y04, Y00

Hat: RV09, RV06, RV02, BG34, BG10

Hope you like it and have a fantastic week!

You can find lots of inspiration from the Design Team Divas at the High Hopes blog, and the High Hopes Rubber Stamps Facebook Fan page plus you can also follow us on
Instagram, Twitter and Pinterest.


Witchy Poo’s Happy Hallowe’en!!!


It’s Wednesday, and Sitting Witchy Poo from (High Hopes Rubber Stamps) is back again to celebrate a Happy Hallowe’en and wondering what to do with all her candy.  My husband and I just LOVE Hallowe’en! We try to decorate our yard every year for the little ghosts and goblins who come to visit and we give out lots and lots of candy. Our front lawn gets turned into a grave yard for a day with spooky black cats, crows, skeletons, and more. On the porch we put out all of the animated little toys and of course the talking skeletons playing poker at the Bistro table. LOL! The children just love it and so do the parents! LOL!

To create the card this week, I stamped the main image and then coloured it with Copic Markers listed below. I fussy cut around Witchy Poo leaving just a little bit of white around the top of her body, but going directly to the line for the bottom of her. Flag Banner Dies from Craftin’ Desert Diva’s (restired) were used for the die cut and then the sentiment was stamped onto it. Tim Holtz Distress Ink – Carved Pumpkin was applied around the edges to create a frame around the orange cardstock.

To create the background, Pebbles – Boo! paper was used. I wanted to add something a little extra so I pulled out my Kraftin’ Kimmie – Bats and Moons Stencil and applied Nuvo Glimmer Paste – Amethyst Purple! I just love the way it turned out. The bottom piece of cardstock was cut at 1″ x 5.5″. Tim Holtz Distress Ink – Black Soot was used to go around all of the edges of the top and bottom piece.

Once everything was dry my card was ready to be assembled. I began with a standard white card base of 4.25″ x 5.5″. I mounted the coloured circles and bats cut at the same size directly on top of the base with 2-sided tape. I did the same with the candy on the very bottom. The image and the sentiment were both popped up with 3M VHB – 2 sided tape. Finally, to cover some of my paste boo-boos, I added in some candy corn from Dress My Craft – Dessert Mix.

Card Recipe:

Stamp: Sitting Witchy Poo – S151 (High Hopes Rubber Stamps)

Sentiment: Happy Halloween – H232 (High Hopes Rubber Stamps)

Inks: Memento – Tuxedo Black, Tim Holtz Distress Ink – Carved Pumpkin, Tim Holtz Distress Ink – Black Soot

Paper: Copic Marker X-Press It Blending Card, Pebbles – Boo! (6×6 in / 15.2×15.2 cm), Orange cardstock, White Cardstock

Die Cut: Craftin Desert Diva’s – Flag Banner Dies (Retired)

Stencil: Kraftin’ Kimmie – Bats and Moons

Tools and Miscellaneous: MISTI – Most Incredible Stamping Tool, Cuttlebug, Nuvo Glimmer Paste – Amethyst Purple, Dress My Craft – Dessert Mix

Image coloured with Copic Markers:

Skin: BG96, BG93, BG90, YG23, G40

Hair: E18, E08, YR18, YR14

Hat, Blouse, Pantaloons: V17, V09, V06, V04

Vest, Dress and Hat Band: YR68, YR65, YR18, YR15, YR12, YR00

Socks: YR18, YR15, YR12, YG09, YG07

Shoes: V17, V09, V06, V04, N6, N4, N2, E15, Y38, Y35, Y15

Star: E15, Y38, Y35, Y15

Hope you like it and have a spooktacular week!

You can find lots of inspiration from the Design Team Divas at the High Hopes blog, and the High Hopes Rubber Stamps Facebook Fan page plus you can also follow us on
Instagram, Twitter and Pinterest.


Happy Trick or Treating!


It’s Wednesday, and today I’m sharing a CAS card using Witchy Poo with Kitty Frame – P120 (High Hopes Rubber Stamps) for the main image and Trick or Treat Greeting – H231 (High Hopes Rubber Stamps) for the sentiment. Witchy Poo and Kitty are looking out to see all of the wonderful little trick or treaters coming to visit them for their treats! What are you dressing up as this year?

To make the card, I started with a 5.5″ x 4.25″ cards base. My Mind’s Eye – Dolled Up – 6″ x 6″ was cut to the same size and adhered to the base card with double-sided tape. Tim Holtz Distress Ink – Walnut Stain ink was used to edge across the bottom of the card. The image was stamped and then coloured in with Copic Markers. I used my Brother Scan and Cut to cut around the image and then used a black marker to go around all of the edges.

The sentiment was stamped and then die cut with Essentials by Tattered Lace Dies – Easel Slider. Tim Holtz Distress Ink – Carved Pumpkin and a black marker were used to ink all of the 4 sides of the sentiment.

The coloured image and sentiment were popped up onto the card using 3M VHB – 2 sided tape and some stickers were add for embellishments.

Card Recipe:

Stamp: Witchy Poo with Kitty Frame – P120 (High Hopes Rubber Stamps)

Sentiment: Trick or Treat Greeting – H231 (High Hopes Rubber Stamps)

Inks: Memento – Tuxedo Black, Tim Holtz Distress Ink – Carved Pumpkin, Tim Holtz Distress Ink – Walnut Stain

Paper: Copic Marker X-Press It Blending Card, My Mind’s Eye – Dolled Up – 6″ x 6″, Orange Cardstock

Die Cut: Essentials by Tattered Lace Dies – Easel Slider

Tools: MISTI – Most Incredible Stamping Tool, Cuttlebug, Hallowe’en Stickers – HCM0001F, HCM0001C, HCM0001A, Brother Scan and Cut

Image coloured with Copic Markers:

Skin: BG96, BG93, BG90, YG23, G40, R22, R20

Hair: E18, E08, YR18, YR14

Hat and Dress: V25, V17, V15, V09, V06, V04, YR68, YR65, YR18, YR15, YR12, YR00, Gelly Roll Sparkle Pen for Swirls

Cat: C9, C7, C5, C3, YG09, YG07, YG03, Y02, R22, R02, R00

Moon and Stars: V17, V15, V09, V06, V04

Window Background: E15, Y38, Y35, Y15, Y06

Window Frame: E29, E25, E23

Hope you like it and have a spooktacular week!

You can find lots of inspiration from the Design Team Divas at the High Hopes blog, and the High Hopes Rubber Stamps Facebook Fan page plus you can also follow us on
Instagram, Twitter and Pinterest.


Have You Herd The News???


It’s Wednesday, and this week, I couldn’t wait to colour up this super adorable image called Funny Farm – T065 by High Hopes Rubber Stamps.  I also thought that the sentiment – Have You Herd The News – G080 (High Hopes Rubber Stamps) was perfect for these little characters. Their facial expressions, just make you wonder what it is that is so secret that they can’t wait to tell you!! Hmmmm! Could it be a birthday surprise, or maybe a new baby is coming? or someone is retiring??? or someone just graduated???? This combo could be use for so many possibilities and that is why it was so much fun to play with.

Above is the card from the front angle and below is the card from the top angle.

To make my card this week, I started off with a green cardstock base of 5.5″ x 11″. Then I scored it at 5.5″ and 2.75″ on one side from the edge to make it a pop-up card. I also cut another piece of cardstock at about 4-1/8″ x 5.25″. I added some patterned paper from DCWV – Fashion District to this piece and to the inside bottom of the card, cut to the same size. Next, used My Mind’s Eye – Lost & Found paper cut at 3.75″ x 5″ which I popped up with 3M VHB – 2 sided tape. Before attaching the background papers, I edged around them with Tim Holtz Distress Ink – Shabby Shutters.

I die-cut the main image out of Copic Marker X-Press It Blending Card using my Cricut and Your Next Stamp – Stitched Rectangle Die Set. Then I stamped the image using my MISTI and Memento – Tuxedo Black ink. After that, I coloured in the image using Copic markers. For the background, I used a new technique that I learned. First I used a Q-Tip to moisten the background with some Copic Colorless Blender and then I used a mixture of Copic Re-inkers listed below with a Q-Tip to create the sky and grass. Love this technique, as it is quick and easy. After colouring the image, I inked around the edges with the same Tim Holtz ink and then popped up the image using some 3M VHD – 2 sided tape.

I die cut the sentiment using the same die set that I used for the main image and then stamped the sentiment with Memento – Tuxedo Black Ink. I mounted it with 3M VHB – 2 sided tape onto Joy Crafts – Artist Trading Card Wood Texture cardstock. Then, I popped up the entire base background and sentiment with Forever in Time – Pop-Dot Adhesives onto the inside base of the card.

I attached the finished image that was mounted onto the background papers onto the lower half of the card that had been scored at 2.75″ earlier, leaving the top half empty.

Card Recipe:

Stamp:  Funny Farm – T065  (High Hopes Rubber Stamps)

Sentiment: Have You Herd The News – G080 (High Hopes Rubber Stamps)

Inks: Memento – Tuxedo Black, Tim Holtz Distress Ink – Shabby Shutters

Paper: Copic Marker X-Press It Blending Card, DCWV – Fashion District (6×6″, 15.2×15.2cm), Joy Crafts – Artist Trading Card – Wood Texture (2-3/8×3-3/8″ – 85mm x 60mm), My Mind’s Eye – Lost & Found (6×6″)

Die Cuts: Your Next Stamp – Stitched Rectangle Die Set (YNSD214)

Tools: MISTI – Most Incredible Stamping Tool, Cuttlebug, 3M VHB – 2 sided tape, Forever in Time – Pop-Dot Adhesives

Image coloured with Copic Markers:

Pig: E93, E44, E43, E40, R20, R000, R00

Sheep: C5, C3, C1, C0, B60

Cow: R20, R02, R00, R000, E93, C10, C9, C8, C6, C5, C3, C2, C1, Y17, Y15, Y13, Colorless Blender

Rooster: E99, E97, E23, E09, R24, BG53, BG78, BG75, BG72, Y06, YR21

Sky: B000, B00, Colorless Blender

Grass: YG17, YG13, YG11, Colorless Blender

Hope you like it and have a fantastic week!

You can find lots of inspiration from the Design Team Divas at the High Hopes blog, and the High Hopes Rubber Stamps Facebook Fan page plus you can also follow us on
Instagram, Twitter and Pinterest.

Check out the High Hopes Website for something else to give you a big smile!

Over on the High Hopes Website there is a Store Wide sale, save 20% off right now when you use the coupon Code Love at the checkout!


4 Alarm Birthday!!!


It’s Wednesday, and this week, I used Fireman Matthew – S017 (High Hopes Rubber Stamps) for the main image and 4 Alarm Day – H059 (High Hopes Rubber Stamps) for the sentiment. Fireman Matthew is prepped and ready to put out the fire from all of those flames rising up from the birthday candles on your cake! He even has a lot of little firetrucks on standby too, just in case! LOL!

To make my card this week, I started off with a card base of 6″ x 6″. I used Echo Park – Scoot by Deena Rutter paper for the background. I just loved those little firetrucks. My older brother used to be a fireman, so I was always looking for background paper to go with the Fireman stamps I would find to make his cards.

I created the brick background by embossing some brown tan paper, using my Cuttlebug and Darice – Brick Wall Embossing Folder. Then I used a mixture of Tim Holtz brown inks listed below to create the texture for the wall. I stamped the image onto Copic Marker X-Press It Blending Card using my MISTI and Memento Tuxedo Black Ink and then coloured the image in with Copic Markers. Once it was coloured in, I fussy cut around it and went along all of the edges with a black marker.

The sentiment was long and I wanted to make it square, so I did it in several steps. Using my MISTI and Memento Tuxedo Black Ink, I covered the portion of the stamp with tape that I didn’t want to stamp. Inked the portion that I wanted and then removed the tape. Then I stamped it, cleaned it off and moved the tape to the next portion that I didn’t want to stamp. I did this 3 times to get the result seen in this photo. This allowed me to make the sentiment into a square. Once this was done, I die cut it out using my Cuttlebug and My Creative Time – Stitched Squares Inside and Out.

I ran both the die-cut sentiment and finished coloured image through my Xyron Creative Station. Then I mounted the image onto the brick wall and the sentiment onto some red cardstock. I used my cutter to create a nice square for the sentiment. Next I went around the entire card with Tim Holtz – Fired Brick Distress Ink and popped up the brick wall and sentiment using 3M VHB – 2 sided tape. I added in some water droplets using Stickles – Ice Blue to finish off the card.

Card Recipe:

Stamp:  Fireman Matthew – S017  (High Hopes Rubber Stamps)

Sentiment: 4 Alarm Day – H059 (High Hopes Rubber Stamps)

Inks: Memento – Tuxedo Black, Tim Holtz – Fired Brick, Tim Holtz Distress Ink – Gathered Twigs, Tim Holtz Distress Ink – Rusty Hinge, Tim Holtz Distress Ink – Vintage Photo

Paper: Copic Marker X-Press It Blending Card, Echo Park – Scoot by Deena Rutter (6″x6″ – Double-sided), Red Cardstock, Tan Cardstock

Die Cuts: My Creative Time -Stitched Squares Inside and Out

Embossing Folder: Darice – Brick Wall Embossing Folder

Tools: MISTI – Most Incredible Stamping Tool, Cuttlebug, Xyron Creative Station, 3M VHB – 2 sided tape

Image coloured with Copic Markers:

Skin: E21, E11, E04, E00, E000, R22, R20

Hair: E47, E44, E43

Coat and Pants: E53, YR21, Y21, Y04, C3, C2, C1

Hat: E53, YR21, Y21, R46, R29, R24

Boots: C10, C8, C6, C5, C3

Hose: R46, R29, R24, C3, C2, C1, E53, YR21, Y21

Water: Stickles – Ice Blue

Shadow: C3, C2, C1

Hope you like it and have a fantastic week!

You can find lots of inspiration from the Design Team Divas at the High Hopes blog, and the High Hopes Rubber Stamps Facebook Fan page plus you can also follow us on
Instagram, Twitter and Pinterest.

Check out the High Hopes Website for something else to give you a big smile!

Over on the High Hopes Website there is a Store Wide sale, save 20% off right now when you use the coupon Code Love at the checkout!


Rainy Day Smiles


It’s Wednesday, and this week, I used Mary Angel – Q020 (High Hopes Rubber Stamps) for the main image and Rainy Rainy Day – H048 (High Hopes Rubber Stamps) for the sentiment. We are in for a lot of rain in the next little while here, but Mary is well prepared for it with her adorable little boots and is ready to play in the puddles. Did you love playing in the puddles with your rain boots when you were little too?

To make my card this week, I started off with a card base of 6″ x 6″. I used Forever in Time – Splish Splash paper for the background as I thought it went so well with this image. The background paper is double-sided and I loved how well it went together to frame the image and sentiment. I stamped the image onto Copic Marker X-Press It Blending Card and then coloured the image in with Copic Markers. Once it was coloured in, I fussy cut around it and used B01 to fill in all of the white space as it matched the background paper so well. For the sentiment, I thought it would be cute to turn it into an umbrella as well. To do this, I stamped the sentiment and then drew an umbrella shape around it. I used a scrap piece of copic paper and drew the handle for it and then coloured it and cut it out as well. To finish off the card, I popped up the image and the sentiment with 3M VHB – 2 sided tape and added some Ranger Inkssentials – Glossy Accents onto the water and droplets, Gelly Roll Stardust – Clear to the wings, Mary’s umbrella and pockets on the raincoat. Unfortunately, the glitter isn’t showing up in the picture.

Card Recipe:

Stamp:  Mary Angel – Q020  (High Hopes Rubber Stamps)

Sentiment: Rainy Rainy Day – H048 (High Hopes Rubber Stamps)

Inks: Memento – Tuxedo Black

Paper: Copic Marker X-Press It Blending Card, Forever In Time – Splish Splash SP344U Double Sided Paper

Tools: MISTI – Most Incredible Stamping Tool, Ranger Inkssentials – Glossy Accents, Gelly Roll Stardust – Clear, 3M VHB – 2 sided tape, Wink of Stella – Clear

Image coloured with Copic Markers:

Skin: E21, E11, E04, E00, E000, R22, R20

Hair: E21, E25, E29

Raincoat and Hat: RV17, RV14, RV06, RV04, Gelly Roll Stardust – Clear

Boots: YG17, YG09, YG06, YG05

Umbrella: RV17, RV14, RV06, RV04, RV02, V15, V09, V04, V01, E37, E35, Gelly Roll Stardust – Clear

Wings: Y000, RV000, BG0000, B0000, Gelly Roll Stardust – Clear, Wink of Stella – Clear

Water: B29, B24, B14, B12, Ranger Inkssentials – Glossy Accents

Hope you like it and have a fantastic week!

You can find lots of inspiration from the Design Team Divas at the High Hopes blog, and the High Hopes Rubber Stamps Facebook Fan page plus you can also follow us on
Instagram, Twitter and Pinterest.

Check out the High Hopes Website for something else to give you a big smile!

Over on the High Hopes Website there is a Store Wide sale, save 20% off right now when you use the coupon Code Love at the checkout!


Friends for Heifer!


It’s Wednesday, and this week, I used Clarabelle and Riley – Q032 (High Hopes Rubber Stamps) for the main image and Friends for Heifer – G183 (High Hopes Rubber Stamps) for the sentiment. Riley thought Clarabelle could use a big hug. It will be so nice when we can get back together again with friends and family and give them a big hug too!

To make my card this week, I thought I would keep it simple. I thought the cow print from Doodle Bug Designs Inc. – Down on the Farm went with this card beautifully. I stamped the image onto Copic Marker X-Press It Blending Card and then coloured the image in with Copic Markers. Once I coloured the image in, I carefully placed it behind the patterned paper and then placed it onto my card base sized 5.5″ x 5.5″. I inked around the edges of the card with Tim Holtz Distress Ink – Black Soot and added a little black bow to finish it off.

Card Recipe:

Stamp:  Clarabelle and Riley – Q032  (High Hopes Rubber Stamps)

Sentiment: Friends for Heifer – G183 (High Hopes Rubber Stamps)

Inks: Memento – Tuxedo Black, Tim Holtz Distress Ink – Black Soot

Paper: Copic Marker X-Press It Blending Card, Doodle Bug Designs Inc. – Down on the Farm – 6″ x 6″ paper pad

Die Cuts: My Creative Time – Bunch of Fun Circle Dies

Tools: MISTI – Most Incredible Stamping Tool, Cuttlebug

Image coloured with Copic Markers:

Skin: E21, E11, E04, E00, E000, R22, R20

Hair: E47, E44, E43

Shirt: YG67, YG63, YG61, R29, R27, R24

Pants: B26, B23, B21

Hat and Boots: E29, E27, E25, E23

Scarf: B26, B23, B21, R29

Cow: C10, C8, C6, C1, C0, R11, R02, R01, E53, E51, E50

Hope you like it and have a fantastic week!

You can find lots of inspiration from the Design Team Divas at the High Hopes blog, and the High Hopes Rubber Stamps Facebook Fan page plus you can also follow us on
Instagram, Twitter and Pinterest.

Check out the High Hopes Website for something else to brighten your day!

Over on the High Hopes Website there is a Store Wide sale, save 20% off right now when you use the coupon Code Love at the checkout!