Tag Archive | Gelly Roll Sakura #8 Pen

Dinosaur Pilgrim!!


Hi Everyone, I took most of the summer off to enjoy the beautiful weather and also to visit family, so I didn’t make a lot of cards. But, now I’m back and ready to start sharing some weekly creations with all of you!

Today, I’m sharing a Thanksgiving card from the new KLM Designs September release called Dinosaur Pilgrim.  He’s loving the fall colours and is sending everyone some special wishes! This stamp set also comes with 2 other sentiments, “Autumn Blessings” and “Happy Thanksgiving”.

To make the card, I first imported the image and sentiment into Microsoft Word. I sized both the image and sentiment to fit 5.5″ x 4.25″ and printed everything out onto Copic Marker X-Press It Blending Card using my HP Printer. The image was coloured in with Copic markers. Gelly Roll Sakura #8 Pen was used to create the whites of the eyes. I drew in the tree and leaves on the tree and added in the sky and background. A Black PrismaColor pencil was used to go around the entire image of the Dinosaur, pumpkin and leaves on the ground to make them stand out more. I fussy cut around the sentiment and ran both pieces through a Xyron Create a Sticker and attached 1 piece to some orange and the other to some green scrap cardstock that I had. Scrapbook Adhesives 3D Foam Strips were added to the back of the sentiments and they were both popped up onto card.

Card Recipe:

Stamp and Sentiments: Dinosaur Pilgrim (KLM Digital Designs)

Inks: HP Printer Grayscale

Paper: Copic Marker X-Press It Blending Card, Hammermill – Premium Colour 100 lb.

Image coloured with Copic Markers:

Dinosaur: YG97, YG95, YG67, YG63, YG61, G85, G82, E89, E87, E84, R27, R22, R20, R24, Y08, YR12, Gelly Roll Sakura #8 Pen

Hat: C10, C7, C5, C3, C1, Y17

Collar: C1, C00, Colorless Blender

Pumpkin: E08, YR18, YR16, YR14, YR12, G05, G02

Leaves: E99, E98, , E95, E08, R05, G07, G05, G02, Y08

Grass: YG13, YG11, YG03, YG01

Trees and Leaves: E35, E34, E27, E25, E23, YG25, R24, R05, Y17, Y08, YR12

Sky: B02, B01, B00, B000

Hope you like it and have a great week!

You can find more cards to inspire you at KLM Designs, KLM Digital Design Team and KLM Digital Designs on the Facebook Fan page from the rest of our design team.


Birthday Present Girl!!


Today, I’m sharing a birthday card that I made using this fun image from Polkadoodles called Surprise Gift Digi – Winnie Celebrations 2.

To make the card, I first imported the image and sentiment into Microsoft Word. I sized the image to fit 3.75″ x 2.5″ and printed it out onto Copic Marker X-Press It Blending Card using my HP Printer. Using my Cuttlebug and My Creative Time – Rectangle Frame Dies, I die-cut the image out. The frame was die cut using Hot Buy – Recollections – Jewel Tones paper and Gina Marie Designs – Loopy Rectangle Die Set. Hammermill – Premium Colour 100 lb. cardstock was used to create the base card at the size of 5.5″ x 4.25″. Doodlebug – hey cupcake paper was cut to the same size as the base and applied using double-sided tape. Tim Holtz Distress Ink – Picked Raspberry and a finger dauber were used to ink around all of the 4 sides of the card.

The image was coloured in with Copic markers and 3M double-sided pop-up tape were applied to the back of the image and Loopy rectangle. Both were attached to the centre of the card. The sentiment was stamped onto Fuschia paper using my MISTI and then die cut with a circle punch. Using a white gel pen, I created stitched lines. 2 layers of 3M double-sided popup tape were added to the back of the circle on one side and then glue on the other half and it was popped up onto the card. Lastly, I added a few Kraftin’ Kimmie – Festive Dots just to add a little bit more colour!

Card Recipe:

Stamp: Surprise Gift Digi Stamp – Winnie Celebrations 2Polkadoodles

Inks: HP Printer Grayscale, Tim Holtz Distress Ink – Picked Raspberry

Paper: Copic Marker X-Press It Blending Card, Hammermill – Premium Colour 100 lb., Doodlebug – hey cupcake (6″x6″) paper pad, Hot Buy – Recollections – Jewel Tones

Die Cuts: Gina Marie Designs – Loopy Rectangle Die Set, My Creative Time – Rectangle Frame Dies

Miscellaneous: Kraftin’ Kimmie – Festive Dots

Image coloured with Copic Markers:

Skin: E21, E11, E00, E000, R22, R20, Eyes (Gelly Roll Sakura #8 Pen, Sakura Glaze – Black)

Hair: E47, E44, E43, E40

Dress and Shoes: BG09,  BG05, BG02, BG01

Ribbons and Dress Trim: RV04, RV02, RV00

Presents and Bows: E15, Y35, Y17, Y08, G02, G00, G000

Shadow: C3, C2, C1, Colorless Blender

Hope you like it and have a great week!

Christmas Kitty Fun!!!


It’s Wednesday, and this week, I made a Christmas card using High Hopes Rubber Stamps Christmas Kitty Fun – S107 for the main image and Merry Christpaws – FLL006 for the sentiment. Our cats could never resist playing with our Christmas wrapping paper and playing in the boxes. I can’t even begin to count how many cardboard boxes they demolished over the years! LOL! Wishing you and all of your pets a very safe and joyous Merry Christmas and A Happy New Year!

To make my card this week, I began with a card base of 6″ x 6″ using AC Cardstock – White. I thought this patterned paper from Craft Smart – Hot Buy called Happy Pawlidays went perfect with this image and sentiment.

The image was stamped using my MISTI and Memento – Tuxedo Black ink onto Copic Marker X-Press It Blending Card cardstock and Lawn Fawn – Let It Shine Snowflakes patterned paper. I coloured in the image and then fussy cut around it. With a black marker, I inked around the outside of the image.  I ran the patterned paper through my Xyron Creative Station to make it like a sticker and then fussy cut around the gift paper and paper pieced it onto the coloured image. The entire image was then adhered to the card using liquid glue. I removed the backing from the remainder of the gift portions and applied them directly to the card base as well. A few extra white and sparkly dots were added onto the patterned gift paper using a Gelly Roll Sakura #8 Pen and Gelly Roll Stardust – Clear pen. Stickles – Diamond was applied to the hat, pompom, snowflakes and dots on the background patterned paper to add some extra sparkle.

Using my MISTI and VersaMark ink, I stamped the sentiment onto a scrap piece of red cardstock. Ranger Embossing Powder White – Extra Fine Detail was applied over top of the ink and then heat set with a Marvy Uchida – Embossing Heat Tool. This was die cut using my Cuttlebug and Pink & Main – Large Sentiment Strip Dies. The sentiment was popped up onto the top of the card using U-Line double-sided tape. Lastly, I glued on some embellishment buttons after removing the backings from Dress It Up – Holiday Collection – Itty Bitty Snowflakes and Dress It Up – Holiday Collection – Glitter Holly. Tim Holtz Distress Ink – Barn Door was inked around the outside edges of the card with a sponge dauber to finish it off.

Card Recipe:

Stamp: Christmas Kitty Fun – S107 (High Hopes Rubber Stamps)

Sentiment: Merry Christpaws – FLL006 (High Hopes Rubber Stamps)

Inks: Memento – Tuxedo Black, Tim Holtz Distress Ink – Barn Door, VersaMark

Paper: Copic Marker X-Press It Blending Card, Hammermill – Premium Colour 100 lb., Lawn Fawn – Let It Shine Snowflakes (6″ x 6″), Craft Smart – Hot Buy – Happy Pawlidays (12″ x 12″)

Die Cut: Pink & Main – Large Sentiment Strip Dies (PNM327)

Embossing Powder: Ranger Embossing Powder White – Extra Fine Detail

Tools and Embellishments: MISTI – Most Incredible Stamping Tool, U-Line double-sided tape, Xyron Creative Station, Dress It Up – Holiday Collection – Itty Bitty Snowflakes, Dress It Up – Holiday Collection – Glitter Holly, Marvy Uchida – Embossing Heat Tool, Gelly Roll Sakura #8 Pen, Gelly Roll Stardust – Clear, Sakura Glaze – Black, Stickles – Diamond, Cuttlebug

Image coloured with Copic Markers:

Kitty 1: E97, E95, E13, YR14, YR12, R02, R01, (Eyes and Nose – Sakura Glaze – Black)

Kitty 2: C8, C6, C4, C2, R02, R01, (Eyes and Nose – Sakura Glaze – Black)

Santa Hat: R59, R37, R35, BV23, BV20, Colorless Blender

Ribbon: R59, R37, R35, R20

Box: E35, E34, E33, E31

Paper Wrapping: YG07, YG03, Colorless Blender

Shadow: C1

Hope you like it and have a fantastic week!

You can find lots of inspiration from the Design Team Divas at the High Hopes blog, and the High Hopes Rubber Stamps Facebook Fan page plus you can also follow us on
Instagram, Twitter and Pinterest.

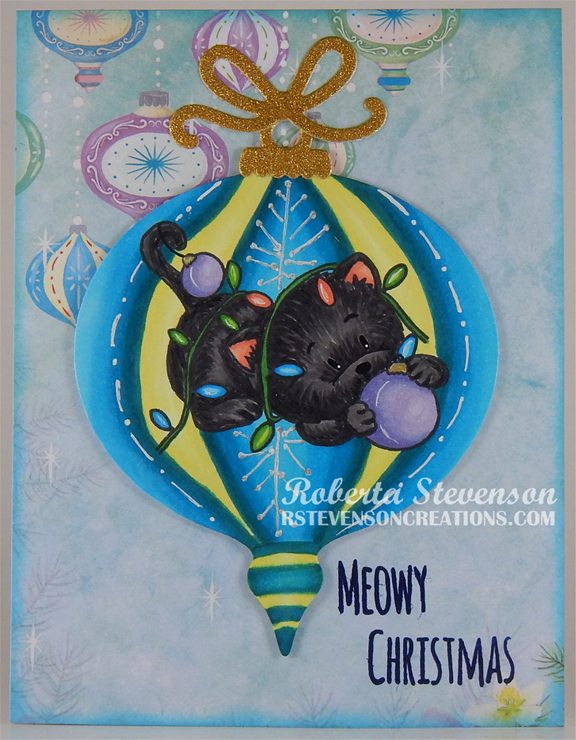
Meowy Christmas!


It’s the last day of the 2022 Cat Lovers Hop and today I’m sharing a Christmas card I made using Gerda Steiner Designs –  Deck The Halls – GSD438. I thought this image was adorable! Have fun hopping everyone!

I created a 5.5″ x 4.25″ card base using Hammermill – Premium Colour 100 lb. cardstock. I cut the background to be the same size using Wild Rose Studio – Winter Bauble Paper and adhered it directly to the base using double-sided tape. Using Tim Holtz Distress Inks – Tumbled Glass and a finger dauber, I inked around all of the edges of the card. With my Cuttlebug and Hero Arts – Infinity Dies – Ornaments, I die cut a large ornament from Copic Marker X-Press It Blending Card cardstock and the ribbon and topper from a scrap piece of gold cardstock.

Using my MISTI and Memento – Tuxedo Black ink, I stamped the image onto the Copic Marker X-Press It Blending Card cardstock and with Versafine – Majestic Blue, I stamped the sentiment onto the base card. I embossed the sentiment with Ranger – Clear Super Fine Detail embossing powder and then heat set it with a Marvy Uchida – Embossing Heat Tool. The image was coloured in with Copic markers and with a Gelly Roll Sakura #8 Pen designs were added to the ornaments and light bulbs. I tried to create the ornament as close to the paper as I could. Once this was completed, using liquid glue, I attached the top piece and the bow to the ornament. U-Line double-sided tape was added to the back of ornament die cut and it was popped up onto the background. With a Gelly Roll Sakura #8 Pen, I added in some string for the bauble.

Card Recipe:

Stamp and Sentiment:  Deck The Halls – GSD438 – Gerda Steiner Designs

Inks: Memento – Tuxedo Black, Versafine – Majestic Blue, Tim Holtz Distress Inks – Tumbled Glass

Die Cuts: Hero Arts – Infinity Dies – Ornaments (D1400)

Paper: Copic Marker X-Press It Blending Card, Hammermill – Premium Colour 100 lb., Wild Rose Studio – Winter Bauble Paper (6″ x 6)

Embossing Powder: Ranger – Clear Super Fine Detail embossing powder

Miscellaneous: U-Line – 2-sided tape, Gelly Roll Sakura #8 Pen, MISTI (Most Incredible Stamping Tool), Marvy Uchida – Embossing Heat Tool,

Image coloured with Copic Markers:

Kitten: T9, T7, T5, T3, R30, R22

Large Ornament: BG09, BG05, BG02, BG01, Y11, Y00, YG00, Gelly Roll Sakura #8 Pen

Baubles: BV11, BV02, BV00, BV000

Lights and Wire Cord: R14, RV42, G07, YG07, YG01, B06, B04, B000

Hope you like it and have a great week!

Also entered into:

https://gsd-stamps.com/blogs/share-your-designs/play-along-in-november-22-challenge


Hallowe’en Kitty and Friends!!


It’s Wednesday, and this week, I made a Hallowe’en card using High Hopes Rubber Stamps Hallowe’en Kitty – TT042 for the image and Happy Halloween – H232 for the sentiment. I thought it would be fun to end the month off with another spooky card since Hallowe’en is only a few days away from now.

To make my card this week, I began with a card base of Hammermill – Premium Colour 100 lb. cardstock, cut and scored to be 5.5″ x 4.25″. Textura Select Cardstock – Tropicana was cut to the same size as the base and adhered using double-sided tape. Using my Cuttlebug, Copic Marker X-Press It Blending Card was die cut using My Creative Time – Rectangle Frame Dies. I stamped the main image onto the die cut and the sentiment onto a scrap piece of orange cardstock using my MISTI and Memento – Tuxedo Black ink. Using my Cuttlebug and Gina K Designs – Sentiment Strips, I die cut the sentiment that I stamped.

The image was coloured in and then I used a black Prismacolor Premier Pencil to highlight a few of the areas to make them stand out a little more. I also extended the fence to the ends of the die cut on both sides. I added back in the whites of the eyes with a Gelly Roll Sakura #8 Pen and some stars in the night sky. U-Line double-sided tape was applied to the back of the sentiment and the coloured image. They were both popped up onto the base to complete the card.

Card Recipe:

Stamps: Hallowe’en Kitty – TT042 (High Hopes Rubber Stamps)

Sentiment: Happy Halloween – H232 (High Hopes Rubber Stamps)

Inks: Memento – Tuxedo Black

Paper: Copic Marker X-Press It Blending Card, Hammermill – Premium Colour 100 lb., Textura Select Cardstock – Tropicana (12″ x 12″)

Die Cuts: My Creative Time – Rectangle Frame Dies, Gina K Designs – Sentiment Strips

Tools: MISTI – Most Incredible Stamping Tool, U-Line double-sided tape, Gelly Roll Sakura #8 Pen

Image coloured with Copic Markers:

Black Cat: C9, C7, C5, R22, R20

Hat: V17, V09, V06, V04, YR68, YR24, YR18, YR16, YR04, E15, Y35, Y08

Mouse: W5, W3, W1, R20

Bat: BV29, BV25, BV23

Ghost: BV20, C00, Colorless Blender

Moon: Y00, BV20, C00, Colorless Blender

Gravestone: YR18, YR16, T5, T3, T1

Grass: G99, YG67, YG17

Sky: C9, BV29, BV25, BV23, BV20

Hope you like it and have a fantastic week!

Check out more adorable Fall images at High Hopes Rubber Stamps!

You can find lots of inspiration from the Design Team Divas at the High Hopes blog, and the High Hopes Rubber Stamps Facebook Fan page plus you can also follow us on
Instagram, Twitter and Pinterest.


Also entered this into the following contests

https://herpeacefulgarden.blogspot.com/

https://lostcoastportaltocreativity.blogspot.com/2022/10/challenge-154-cats-and-dogs-challenge.html


Making Beautiful Music!!


Today, I’m sharing a Christmas card that I made using Dreamerland Crafts stamps called Making Beautiful Music – D152002. This little angel is so sweet and is spreading Christmas cheer to everyone early this year.

To create this card I began by making a base of 5.5″ x 5.5″ using AC Cardstock – White. AC – Christmas Cardstock – Green was cut to be the same size as the base and then adhered to the card using double-sided tape. The frame was created using Couture Creations – Go Power and Emboss die-cutting machine, Creative Expressions by Sue Wilson – Festive Collection – Ornate Holly Framed Noel die and Lawn Fawn – Sparkle Cardstock in “Pixie Dust” paper. I applied liquid glue to the back of this piece and then adhered it to the card.

With my Cuttlebug, I die cut a 3.5″ x 3.5″ square using My Creative Time -Stitched Squares Inside and Out and Copic Marker X-Press It Blending Card cardstock. The main image was stamped using my MISTI and Memento – Tuxedo Black ink onto Copic Marker X-Press It Blending Card. I cleaned off the angel and then stamped in place again using VersaMark ink for the snowflakes. Ranger Embossing Powder White – Extra Fine Detail was applied to the image and then heat embossed with a Marvy Uchida – Embossing Heat Tool. I coloured in the image and then added some sparkles onto the dress using a Gelly Roll Sakura #8 Pen. Sparkle was added to wings with Clear – Wink of Stella. To make the snowflakes a little brighter and to add some smaller snowflakes in the sky, I used a white Gelly Roll Sakura #10 Pen. I created a small mixture of FolkArt – Extreme Glitter Acrylic Paint, DecoArt Glamour Dust, Delta Ceramcoat – White onto an acrylic block and with a paint brush added in the snowy background along the bottom of the square. Using a small Stylus, I added in a few more sparkly snowflakes and sprinkled DecoArt Glamour Dust over them while they were still wet. This was then put aside to dry.

Using my Cuttlebug, I die cut 6 petals and 7 leaves out of scraps of paper using Spellbinders – Holiday Flower & Greenery dies. Liquid glue was used to attach the petals together and the I added U-Line double-sided tape and some liquid glue to the bottoms of them to attach them to the card. I trimmed the leaves and with a small amount of liquid glue applied to the tips of the leaves, I adhered them to the card under the flowers. PinkFresh Studio – Essentials Jewel Mix yellow jewels were glued to the centre of each flower. Using my Cuttlebug once again, I die cut 2 sentiments using Creative Expressions by Sue Wilson – Festive Collection – Ornate Holly Framed Noel die with some scrap gold paper. The oval was die cut using Creative Expressions – Frames and Tags – Charlotte dies and a scrap piece of AC – Christmas Cardstock – Burgundy. I glued the 2 sentiments on top of each other to give it some dimension and then attached the sentiment to the oval. U-Line double-sided tape was added to the back of the finished image and it was popped up onto the centre of the card. U-Line double-sided tape was applied to the oval and it was popped up onto the top of the card to finish it off.

Card Recipe:

Stamps: Making Beautiful Music – D152002 – Dreamerland Crafts

Inks: Memento – Tuxedo Black, VersaMark

Paper: Copic Marker X-Press It Blending Card, AC – Christmas Cardstock, Lawn Fawn – Sparkle Cardstock in “Pixie Dust” (8.5″ x 11″)

Die Cuts: Creative Expressions – Frames and Tags – Charlotte (CED4319), Creative Expressions by Sue Wilson – Festive Collection – Ornate Holly Framed Noel – CED3073, Spellbinders – Holiday Flower & Greenery (S1-099), My Creative Time -Stitched Squares Inside and Out

Embossing Powder: Ranger Embossing Powder White – Extra Fine Detail

Tools: MISTI – Most Incredible Stamping Tool, Marvy Uchida – Embossing Heat Tool, U-Line double-sided tape, PinkFresh Studio – Essentials Jewel Mix, Gelly Roll Sakura #10 Pen, Gelly Roll Sakura #8 Pen, Cuttlebug, Clear – Wink of Stella

Image coloured with Copic Markers:

Skin: E21, E11, E04, E00, E000, R30, R22, R20

Hair: E47, E44, E43, E41

Dress: R59, R37, R35, R21, C1, Gelly Roll Sakura #10 Pen

Wing: BG0000, BG000, B0000, Y000, RV0000, Clear – Wink of Stella

Flower: R59, R37, R35, R21, Y35

Horn: E15, YR24, Y35, Y08

Background Sky: B02, B01, B00, B000

Snow: FolkArt – Extreme Glitter Acrylic Paint, DecoArt Glamour Dust, Delta Ceramcoat – White

Hope you like it and have a great week!

You can find more cards to inspire you at Dreamerland Crafts and Pointer Scrapbooking on the Facebook Fan pages from the rest of our design team.

Book Worm!!


It’s Wednesday, and this week, I couldn’t resist making this very easy bookmark using High Hopes Rubber Stamps Book Worm – P100 for the image. My husband I both love to read and with this adorable image, it is quick to create multiple bookmarks quickly. They would also be a great gift for the readers in your life too!

To make my bookmark this week, I stamped the main image onto Copic Marker X-Press It Blending Card cardstock using my MISTI and Memento – Tuxedo Black ink. I coloured in the image and I wanted the eyes to stand out. I added in a small line with a Pigma Micron #5 – Black pen and then added some colour to the eyes. To finish the eyes,  I added a little dot of white using a Gelly Roll Sakura #8 Pen. The image was then fussy cut with a small white border all around it. Crafts – Designer Paper – 02-3093268 was die cut using Die-Namics MFT-489 PCD Fishtail Figs STX and my Anna Griffin Empress Mini Machine. I punched a hole using We R Memory Keepers Crop-A-Dile Eyelet and Snap Punch at the top of the bookmark. We R Memory Keepers Embellishment Makers Basic Tools-Tassel Loom was used to create the tassel along with 3 yards of twine and then 2 6″ pieces of twine.  I wanted the image to lay flat on the bookmark, so I ran it through my Xyron Create a Sticker and then applied it to the die cut. I tied a knot in the twine to join the tassel to the book mark and then added some Ranger Inkssentials – Glossy Accents to the glass lenses to finish it off.

Card Recipe:

Stamp: Book Worm – P100 (High Hopes Rubber Stamps)

Ink: Memento – Tuxedo Black

Paper: Copic Marker X-Press It Blending Card, Hammermill – Premium Colour 100 lb., Crafts – Designer Paper – 02-3093268 (6″ x 6″)

Die Cuts: Die-Namics MFT-489 PCD Fishtail Figs STX

Tools: MISTI – Most Incredible Stamping Tool, Xyron Create a Sticker, Gelly Roll Sakura #8 Pen, Ranger Inkssentials – Glossy Accents, Pigma Micron #5 – Black, Anna Griffin Empress Mini Machine, We R Memory Keepers Crop-A-Dile Eyelet and Snap Punch, We R Memory Keepers Embellishment Makers Basic Tools-Tassel Loom

Image coloured with Copic Markers:

Worm: YG23, YG11, YG09, R20, R30

Eyes: C1, C0, E25, E23, Y17, W9, Gelly Roll Sakura #8 Pen, Pigma Micron #5 – Black

Glasses and Bow Tie: BV29, BV25, BV23, Ranger Inkssentials – Glossy Accents for the lenses

Book: BV25, BV23, V000

Hope you like it and have a fantastic week!

Check out more adorable images at High Hopes Rubber Stamps!

You can find lots of inspiration from the Design Team Divas at the High Hopes blog, and the High Hopes Rubber Stamps Facebook Fan page plus you can also follow us on
Instagram, Twitter and Pinterest.

A Million Wishes


Sharing a birthday card I made today for my husband using Whimsy Stamps –  A Million Dollars – DDB0071 and A Million Wishes – CWSD402. He works in the financial industry, so I thought this combination was perfect for him when I saw it! LOL!

To make this card, I started with stamping the A Million Dollars – DDB0071 using my large MISTI, Kraftin’ Kimmie – Wicked Black Ink and lime green cardstock. The images were stamped using my smaller MISTI, Memento – Tuxedo Black and Copic Marker X-Press It Blending Card. I coloured in the images with Copic markers and then fussy cut around them. Using my small MISTI again, Versamark ink, Recollections – Black cardstock and sentiment from A Million Wishes – CWSD402 – Whimsy Stamps, I stamped the sentiment. This was then embossed with Ranger Embossing Powder White – Extra Fine Detail and then heat embossed with my Marvy Uchida – Embossing Heat Tool. The sentiment was die cut using Poppystamps – Christmas Quotes dies and Anna Griffin Empress Mini die-cutting Machine. The “$” sign was stamped using the same stamp set with Versamark Ink and Ranger Super Fine Gold Embossing powder onto the large background and then heat embossed with my Marvy Uchida – Embossing Heat Tool.

The card was now ready to assemble. I created the base card using Hammermill – Premium Colour 100 lb. cardstock, cut and scored to be 8.25″ x 3.5″. I attached the large money piece that I had stamped earlier using double-sided tape to the base. U-Line double sided tape was added to the back of the sentiment piece and main images. Everything was then popped them up onto the background to complete the card.

Card Recipe:

Stamp and Sentiment:  A Million Dollars – DDB0071 – Whimsy Stamps, A Million Wishes – CWSD402 – Whimsy Stamps

Inks: Memento – Tuxedo Black, Versamark

Paper: Copic Marker X-Press It Blending Card, Hammermill – Premium Colour 100 lb., Recollections – Black, Lime Green Carstock

Embossing Powder: Ranger Embossing Powder White – Extra Fine Detail, Ranger Super Fine Gold Embossing powder

Dies: Poppystamps – Christmas Quotes

Miscellaneous: U-Line – 2 sided tape, Marvy Uchida – Embossing Heat Tool, Pental Sunburst Metalic Med Gel Pen – Silver, Anna Griffin Empress Mini Machine

Image coloured with Copic Markers:

Skin: E21, E11, E00, E000

Clothing, Hat Band and Money: G14, YG23, YG11

Money Bags: YR30, E31, E30

Gold Bar and Coins: E15, YR24, Y35, Y08

Wallet and Contents: E29, E27, E25, E23, E15, YR24, Y35, Y08, C5, C3, C1, C0, C00, (Pental Sunburst Metalic Med Gel Pen – Silver for the clasp.)

Hope you like it and have a great week!

Wizard


Sharing a card I made today using KLM Digital Design –  Owl Gnome from the new August 2022 release. This image comes with 2 other sentiments as well, “Owl-ways friends” and “Have a wicked Day!”. Creating the spiral background with Stickles Glitter Gel was a little out of my comfort zone, but I love how the background turned out. I thought it went very well with this image and sentiment. What do you think?

To make my card this week, I started with creating my background first. I wanted to create a mystical background and I couldn’t quite decide between using white or black for the base. I finally decided to try black and I fell in love with the results. A Colorful Life Designs – Striped Spiral Stencil was placed over top of Recollections – Black cardstock. Using a spatula for even coverage over the stencil, Stickles Glitter Gel – Galaxy, Aquarius and Pegasus were added to the spirals. I carefully lifted off the stencil and set the background aside to dry. Once it was all dry, I felt that is was missing something. I didn’t like just the solid black behind and in between the spirals, so I decided to add in guess what? More glitter! LOL! This time, using my small spatula, I added Stickles Glitter Gel – Moon Dust over top of everything. This created the magical effect that I was looking for and I could still see the colourful spirals. Once again, the background was set aside to dry.

The image and sentiment were imported into Microsoft Word and printed out onto Copic Marker X-Press It Blending Card. The image was coloured in and then I fussy cut all around it and the sentiment words. Using my Xyron Create a Sticker, I ran the sentiment words through it and then applied it to a scrap piece of Recollections – Purple Passions cardstock. Once again, I fussy cut around the sentiment words leaving a small border. I applied U-Line double-sided tape to the back of the image and sentiment pieces.

The card was now ready to assemble. I created the base card using Hammermill – Premium Colour 100 lb. cardstock, cut and scored to be 5.5″ x 5.5″. I cut down the background piece that I had created earlier to be the same size and then using double-sided tape adhered it to the base. I added a little bit of glue to the U-Line double sided tape that I had applied earlier to the backs of the sentiment pieces and main image and then popped them up onto the background to complete the card.

Card Recipe:

Stamp and Sentiment:  Owl Gnome – KLM Digital Designs

Inks: HP Printer Grayscale

Paper: Copic Marker X-Press It Blending Card, Hammermill – Premium Colour 100 lb., Recollections – Black, Recollections – Purple Passions 8.5″ x 11″

Stencil: A Colorful Life Designs – Striped Spiral Stencil

Stickles Glitter Gel: Moon Dust, Galaxy, Aquarius, Pegasus

Miscellaneous: U-Line – 2 sided tape, Xyron Create a Sticker, Gelly Roll Sakura #8 Pen, Pental Sunburst Metalic Med Gel Pen – Gold, Pental Sunburst Metalic Med Gel Pen – Silver

Image coloured with Copic Markers:

Skin: E21, E11, E00, E000

Beard: C3, C2, C1, C0

Clothing and Hat: BV29, BV27, BV23, V17, V15, V12, B79, B69, B66, Y17, Y08, Pental Sunburst Metalic Med Gel Pen – Gold, Pental Sunburst Metalic Med Gel Pen – Silver (Outline of Spider Web)

Shoes: 100, C8, C6, C4, C2

Staff:  E29, E27, E25, E23, E21

Owl: E95, E97, E55, E53, E51, E15, E11, Y38, Y35, Y32, YR21, C8, C6, 100, B63, YR23, YR21, Eyes (Gelly Roll Sakura #8 Pen)

Grass: YG17, YG13, YG03

Hope you like it and have a great week!

You can find more cards to inspire you at KLM Designs, KLM Digital Design Team and KLM Digital Designs on the Facebook Fan page from the rest of our design team.

Witchy and Friends!!


It’s Wednesday, and this week, I made a Hallowe’en card using High Hopes Rubber Stamps Witchy & Friends – TT019 for the image and Take Flight – HH008 for the sentiment. This little witch and her crew don’t look like they could frighten anyone, but I’m sure they will have lots of fun trying! LOL!

To make my card this week, I began with a card base of Hammermill – Premium Colour 100 lb. cardstock, cut and scored to be 4.25″ x 5.5″. I cut the background to be the same size using Doodlebug Design Inc. – Ghost Town patterned paper and adhered it to the base card using double-sided tape. Doodlebug Design Inc. – Hallowe’en Parade patterned paper was cut to the size of 1-7/8″ x 5.5″ and adhered directly to the base background using double-sided tape.

I stamped the sentiment and image using my MISTI and Memento – Tuxedo Black ink onto Copic Marker X-Press It Blending Card cardstock. Using my Anna Griffin Empress Mini die-cutting Machine and Hero Arts – Infinity Die Ovals, the image was die cut. A cutter was used to cut around the sentiment. Tim Holtz Distress Ink – Villainous Potion and a finger dauber were used to ink around the base card and sentiment. The image was coloured in and then I used a Sakura Glaze – Black pen for the eyes and noses on the characters. Then, I applied a small dot of Gelly Roll Sakura #8 Pen to the eyes and also to create stars in the night sky. U-Line double-sided tape was added to the back of the coloured image and sentiment and then they were both popped up onto the card. To finish it off, I added some YNS Gumdrops – Pretty Peacock Matte.

Card Recipe:

Stamp: Witchy & Friends – TT019 (High Hopes Rubber Stamps)

Sentiment: Take Flight – HH008 (High Hopes Rubber Stamps)

Inks: Memento – Tuxedo Black, Tim Holtz Distress Ink – Villainous Potion

Paper: Copic Marker X-Press It Blending Card, Hammermill – Premium Colour 100 lb., Doodlebug Design Inc. – Ghost Town (6″ x 6″), Doodlebug Design Inc. – Hallowe’en Parade (6 in. x 6 in.)

Die Cuts: Hero Arts – Infinity Die Ovals

Tools: MISTI – Most Incredible Stamping Tool, Anna Griffin Empress Mini Machine, U-Line double-sided tape, Sakura Glaze – Black, Gelly Roll Sakura #8 Pen, YNS Gumdrops – Pretty Peacock Matte

Image coloured with Copic Markers:

Skin: E21, E11, E04, E00, E000, R30, R20, Eyes (Sakura Glaze – Black, Gelly Roll Sakura #8 Pen)

Hair: RV66, RV63, RV55, G09, G05, YG03

Hat: 100, C8, C6, C4, V09, V06, V04, YR24, Y38, Y32

Cat and Spider: 100, C8, C6, C4, RV42, R30

Dress, Cape, Socks and Shoes: 100, C9, C7, C5, BV29, BV225, BV23, BV20, V17, V15, V12, V09, V06, V04, YR68, YR65, YR61, YG07, YG03, YG01

Bat: BV29, BV25, BV23 (Eyes – Sakura Glaze – Black, Gelly Roll Sakura #8 Pen)

Broom: E27, E25, E23, Y38, YR21, Y11

Pumpkin: YR09, YR07, YR04, YR02, Y08

Grass: YG99, YG97, YG95

Sky: BV31, BV25, BV23, BV20

Moon: B60, Y000, C1, C0, C00, Colorless Blender

Hope you like it and have a fantastic week!

You can find lots of inspiration from the Design Team Divas at the High Hopes blog, and the High Hopes Rubber Stamps Facebook Fan page plus you can also follow us on
Instagram, Twitter and Pinterest.

Love One An-udder!!


It’s Wednesday, and this week, I made an Anniversary card using High Hopes Rubber Stamps Cow Hugs – TT136 for the image and Love An Udder – F205 for the sentiment. Love this adorable combination and thought it would be great for an Inspirational card or an Anniversary card!

To make my card this week, I began with a card base of Hammermill – Premium Colour 100 lb. cardstock, cut and scored to be 5.5″ x 4.25″. Doodle Bug Designs Inc. – Down on the Farm cardstock background paper was cut to the size of 5.5″ x 4.25″ and adhered directly to the base using double-sided tape. Tim Holtz Distress Ink – Black Soot and a finger dauber were used to ink around all of the edgs of the card. Using my Anna Griffin Empress Mini Machine and dies from Whimsy Stamps – Wavy Nested Frame Dies Set, I die cut one pattern out of Recollections – Black cardstock and a smaller cut from Copic Marker X-Press It Blending Card. Using PinkFresh Studio – Slim Stripes dies and my Anna Griffin Empress Mini Machine, I die cut some black stripes using the half-inch die from Recollections – Black cardstock. I added some U-Line double-sided tape to the backs of the 2 black pieces and popped them up onto the patterned background. Using scisssors, I cut off the excess from the black stripe after it was adhered to the base.

I stamped the main image and sentiment onto the Copic Marker X-Press It Blending Card using my MISTI and Memento – Tuxedo Black. The image was coloured in with Copic Markers. I used a Sakura Glaze – Black pen, and Gelly Roll Sakura #8 Pen to create the eyes. After the image was coloured in, I added some U-Line double-sided tape to it and popped it up onto the black die cut. Using my machine again, I die cut the sentiment using Gina K Designs – Sentiment Strips. This was popped up with Scrapbook Adhesives – Black 3D Foam Strips onto the black stripe. To finish off my card, I added 2 little button cows on either side of the sentiment from Dress It Up – In the Barnyard and Dress It Up – Mooove It.

Card Recipe:

Stamps: Cow Hugs – TT136 (High Hopes Rubber Stamps)

Sentiment: Love An Udder – F205 (High Hopes Rubber Stamps)

Inks: Memento – Tuxedo Black, Tim Holtz Distress Ink – Black Soot

Paper: Copic Marker X-Press It Blending Card, Hammermill – Premium Colour 100 lb., Doodle Bug Designs Inc. – Down on the Farm – 6″ x 6″ paper pad, Recollections – Black

Die Cuts: PinkFresh Studio – Slim Stripes, Whimsy Stamps – Wavy Nested Frame Dies Set (WSD382), Gina K Designs – Sentiment Strips

Tools: MISTI – Most Incredible Stamping Tool, U-Line double-sided tape, Anna Griffin Empress Mini Machine, Sakura Glaze – Black Pen, Gelly Roll Sakura #8 Pen, Dress It Up – In the Barnyard and Dress It Up – Mooove It

Image coloured with Copic Markers:

Cows: N9, N7, N5, N0, E42, E41, E40, R30, R02, R01, R00, R000 (Eyes – Sakura Glaze – Black, Gelly Roll Sakura #8 Pen)

Leaves and Grass: G99, YG67, YG17, G21, G07, G05

Flowers: B29, B26, B24, B21, YR16, YR12, E15, Y35, Y11, Y08, Y06, Y04, R46, R14, R08

Bow and Cow Bell: R46, R14, R08, Y38, Y35, Y17, Y15

Sky and Clouds: B60, B01, B00, B000, B0000

Hope you like it and have a fantastic week!

You can find lots of inspiration from the Design Team Divas at the High Hopes blog, and the High Hopes Rubber Stamps Facebook Fan page plus you can also follow us on
Instagram, Twitter and Pinterest.

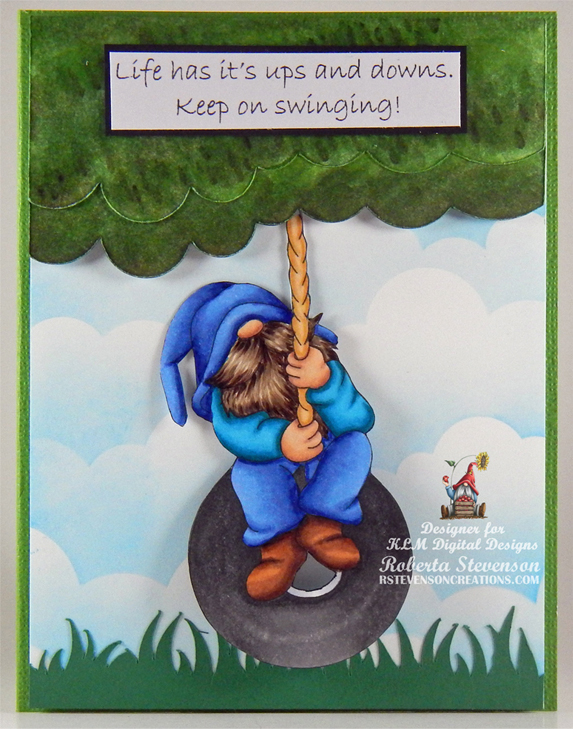
Keep On Swinging!!


Sharing a card I made today using KLM Digital Design –  Tire Swing Gnome from the new April 2022 release. This image also comes with 2 more sentiments, “May your toes touch the sky” and “Why can’t we just swing into Friday?” I think it would be good if we could just swing into Friday and have fun weekends all the time! Don’t you?

Here it is in action.


I used The Paper Studio – Primary Simply Solids (4.25″ x 5.5″) for my base card. I wanted to create an interactive swinging card and I found a video on You Tube from My Favourite Things called “Creating an Interactive Swing Card” by Stephanie on Mar 7, 2019. I didn’t have the dies, so I used the video for inspiration and decided to create my own mechanism and die cuts. Using my Cricut, I took a rectangle and added a bunch of circles and then welded them all together to create the tree. I also created the swing mechanism by joining a circle and thin long rectangle and then welding them together. The grass was also die cut on my Cricut Explore. I die cut the trees and swing mechanism using Copic Marker X-Press It Blending Card and the grass with Recollections – Green cardstock. I coloured in the trees with Copic markers. Using Hammermill – Premium Colour 100 lb. and Tim Holtz Distress Ink – Salty Ocean, I created the clouds with Lawn Fawn Cuts – Cloudy Stencil. Using the mechanism for placement, I die cut a circle into the cloud background.

I imported the image and sentiment into Microsoft Word and printed them out onto Copic Marker X-Press It Blending Card. The image was coloured in with Copic markers. Using scissors, I fussy cut around the coloured image and inked around the edges with a black marker. I cut the sentiment with my cutter and ran it through my Xyron Create a Sticker. I attached it to some Recollections – Black cardstock and cut around it again.

The card was now ready to assemble. I applied a small circle double-side pop-dot to the centre of the hole cut earlier on the cloud paper and attached it to a slightly larger circle at the back of the cloud paper. Using my EK Success Powder tool, I went around all of the sides of the pop-up to remove any stickiness. I applied the mechanism over top of the pop-dot and attached some extra two-sided tape. I applied another die cut circle over top of the raised pop-dot. This allowed the mechanism to now move freely back and forth on the page. Using double-sided tape on the back of the cloud paper, I applied the double-sided tape everywhere except around the mechanism and popped it onto the base card. I ran the grass die cut through my Xyron Create a Sticker and applied it directly to the cloud base. I took the 2 tree die cuts that I had created earlier and coloured and glued them both together. I attached the gnome image to the mechanism with double-sided tape and cut off the extra length not required. I added some double-sided tape behind the trees on both sides and only part way along the top on both sides leaving the area for the swinging mechanism free. This was then popped up onto the cloud background. I applied some U-Line double-sided tape and popped up the sentiment on top of the trees. Lastly, I added a penny to the back of the gnome to give it more momentum when swinging.

Card Recipe:

Stamp and Sentiment:  Tire Swing Gnome – KLM Digital Designs

Inks: HP Printer Grayscale, Tim Holtz Distress Ink – Salty Ocean

Paper: Copic Marker X-Press It Blending Card, The Paper Studio – Primary Simply Solids (4.25″ x 5.5″), Hammermill – Premium Colour 100 lb., Recollections – Green, Recollections – Black cardstock

Dies: Lawn Fawn Cuts – Cloudy Stencil

Miscellaneous: U-Line – 2 sided tape, EK Success Powder Tool, Cricut Explore, Xyron Create a Sticker, penny

Image coloured with Copic Markers:

Skin: E21, E11, E04, E00, E000

Beard: E47, E44, E43, E41

Shirt: BG09, BG05, BG02, BG01

Hat and Jeans: B26, B23, B21

Boots: E27, E25, E23, E21

Tire: T7, T5, T3, C2, C1, C0, Colorless Blender

Rope: Y21, E53, E52, E51

Hope you like it and have a great week!

You can find more cards to inspire you at KLM Designs, KLM Digital Design Team and KLM Digital Designs on the Facebook Fan page from the rest of our design team.

Hoppy Easter Bunny!!


It’s Wednesday, and this week, I made an Easter card using High Hopes Rubber Stamps Carrot Patch – TDG029 for the image and Hoppy Easter! – E038 for the sentiment. We always looked forward to Easter time every year because we knew we would be colouring all of the Easter eggs with our mom in all different colours. It was always such a fun time!

To make my card this week, I began with a card base of Hammermill – Premium Colour 100 lb., cut and scored to be 5.5″ x 4.25″. I die cut the background papers from Echo Park – Welcome Easter cardstock using My Creative Time – Rectangle Frame Dies and my Cuttlebug. Tim Holtz Distress Ink – Spiced Marmalade was used to ink around all of the edges of both die cuts. I applied U-Line double-double sided tape and popped both papers onto the base card. Using the same set of dies, I die cut Copic Marker X-Press It Blending Card cardstock. I stamped the main image onto this die cut and the sentiment onto Copic Marker X-Press It Blending Card using my MISTI and Memento – Tuxedo Black. The image was coloured in with Copic Markers. I used a black marker to add in more details to the butterflies and also to add a couple of antennas. U-Line double-side tape was applied to the back of the coloured image and it was popped up into the centre of the orange rectangle. Lastly, to finish it off, I added in a few YNS Tropical Paradise Gumdrops.

Card Recipe:

Stamps: Carrot Patch – TDG029 (High Hopes Rubber Stamps)

Sentiment: Hoppy Easter! – E038 (High Hopes Rubber Stamps)

Inks: Memento – Tuxedo Black, Tim Holtz Distress Ink – Spiced Marmalade

Paper: Copic Marker X-Press It Blending Card, Echo Park – Welcome Easter (6″ x 6″), Hammermill – Premium Colour 100 lb.

Die Cuts: My Creative Time – Rectangle Frame Dies

Tools: MISTI – Most Incredible Stamping Tool, U-Line double-sided tape, Cuttlebug, YNS Tropical Paradise Gumdrops

Image coloured with Copic Markers:

Rabbit: B60, C1, C0, R30, R20 (Eyes – Sakura Glaze – Black, Gelly Roll Sakura #8 Pen)

Carrots: E07, YR18, YR16, YR15, TR14, YR12

Leaves: G99, YG67, YG17, G21

Flowers: V12, V06, V04, Y17, Y08

Egg: BG72, BG57, BG32, BG11, RV06, RV04, RV02, Y15, Y08, Y02

Butterflies: YR27, Y38, Y17, Y08, E47

Grass: YG67, YG63, YG45, YG41

Sky: B60, B02, B01, B00, B000, C0

Hope you like it and have a fantastic week!

Check out more adorable images in the new “Spring Fever Release” at High Hopes Rubber Stamps!

You can find lots of inspiration from the Design Team Divas at the High Hopes blog, and the High Hopes Rubber Stamps Facebook Fan page plus you can also follow us on
Instagram, Twitter and Pinterest.

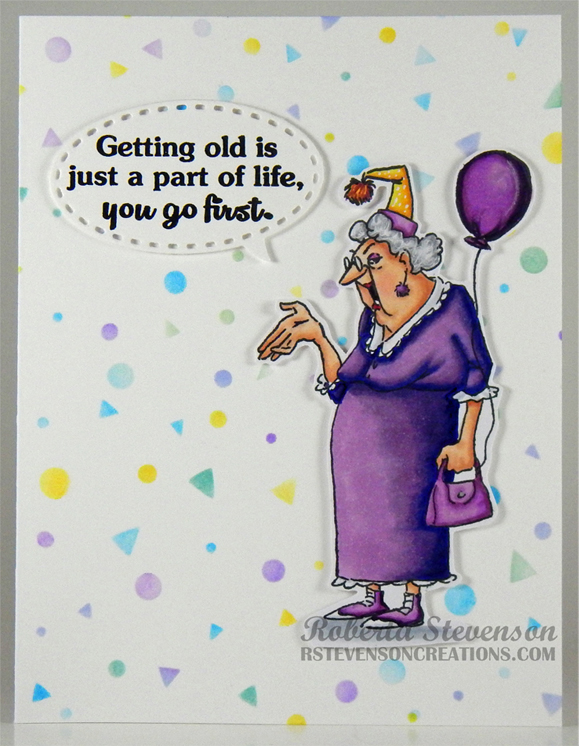
You Go First!!


Sharing a birthday card I made using Art Impressions Never Too Old – 5114  for the main image and sentiment. My friend and I tease each other about getting older. So, I thought this would be a fun card to make for her. LOL! I used another sentiment from this same set on the inside too, which reads, “Thanks for always being older than me”.

To make my card, I began with a card base of Hammermill – Premium Colour 100 lb. cardstock, cut and scored to be 5.5″ x 4.25″. For the background, I used multiple inks from Tim Holtz listed below, Picket Fence Studio Blender Brushes and Lawn Fawn – Confetti Stencils. Using my MISTI, Memento – Tuxedo Black ink, I stamped the image onto Copic Marker X-Press It Blending Card cardstock. The image was coloured in and fussy cut. Using my MISTI and Versa Fine – Onyx Black ink, I stamped the image onto Hammermill – Premium Colour 100 lb. cardstock. It was then embossed using my Marvy Uchida – Embossing Heat Tool and Ranger – Clear Super Fine Detail embossing powder. Spellbinders Die D-Lites – Conversation Bubble Three (S2-137) and my Cuttlebug were used to die cut the sentiment. U-Line double-sided tape was added to the backs of the sentiment and coloured image and they were both popped up onto the background to complete the front of the card. I repeated the process of inking and embossing for the inside sentiment to complete the card.

Card Recipe:

Stamp and Sentiment: Never Too Old – 5114 (Art Impressions)

Inks: Memento – Tuxedo Black, Versa Fine – Onyx Black, Tim Holtz Distress Ink – Salty Ocean, Shaded Lilac, Mustard Seed, Wilted Violet and Evergreen Bough

Paper: Copic Marker X-Press It Blending Card, Hammermill – Premium Colour 100 lb.

Dies: Spellbinders Die D-Lites – Conversation Bubble Three (S2-137)

Stencil: Lawn Fawn – Confetti Stencils (6″ x 6″)

Embossing Powder: Ranger – Clear Super Fine Detail embossing powder

Tools: MISTI – Most Incredible Stamping Tool, U-Line double-sided tape, Cuttlebug, Marvy Uchida – Embossing Heat Tool, Gelly Roll Sakura #8 Pen, Picket Fence Studio Blender Brushes

Image coloured with Copic Markers:

Skin: E21, E11, E00, E000, R46, R30, R20

Hair: N4, N3, N2, N0

Clothing, Purse, Shoes, Hat and Balloon: B69, V17, V15, V12, V09, V06, V05, V04, V01, E13, Y17, Y15, Y13, C2, C1, C00

Shadow: C3, C2, C1, C00

Hope you like it and have a great week!

How You Doin’??


Sharing a card I made today using KLM Digital Design –  Window Gnome – Boy from the new January 2022 release. This image also comes with 2 more sentiments, “Hang in there” and “Dropping in to say Hi”.

I created a 6″ x 6″ card base using AC Cardstock – White. I applied 6″ x 6″ – 49 and Market Tattered Garden cardstock directly to the base using double-sided tape. I imported the image and sentiment into Microsoft Word and printed them out onto Copic Marker X-Press It Blending Card. The image was coloured in with Copic markers. Using scissors, I fussy cut around the coloured image and sentiment and popped them both up onto the background using U-Line double-sided tape.

Card Recipe:

Stamp and Sentiment:  Window Gnome – Boy – KLM Digital Designs

Inks: HP Printer Grayscale

Paper: Copic Marker X-Press It Blending Card, 49 and Market Tattered Garden – 6 x 6 Collection Pack, AC Cardstock – White

Miscellaneous: U-Line – 2 sided tape, Gelly Roll Sakura #8 Pen

Image coloured with Copic Markers:

Skin: E21, E11, E00, E000

Beard: E47, E44, E43, E41

Hat: R46, R14, R08

Shirt: E89, E87, E84

Wallpaper: G05, YG01, Y04, Gelly Roll Sakura #8 Pen

Window Sill: E74, E71, E70

Hope you like it and have a great week!

You can find more cards to inspire you at KLM Designs, KLM Digital Design Team and KLM Digital Designs on the Facebook Fan page from the rest of our design team.

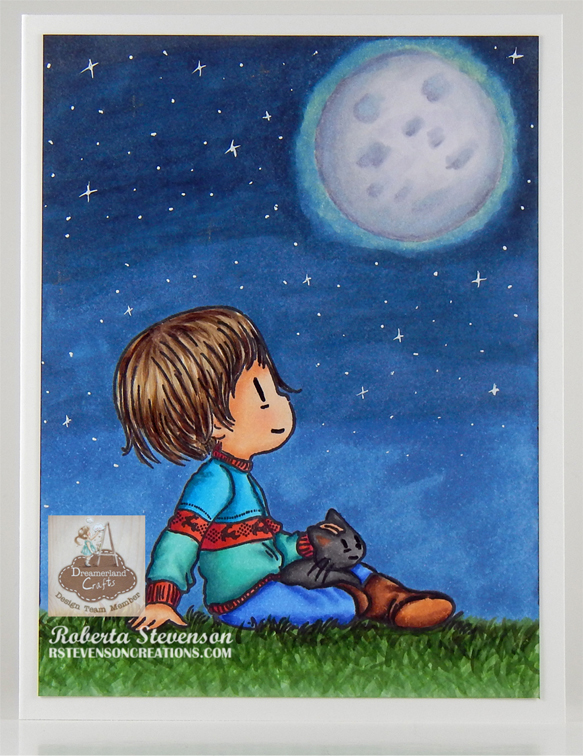
Wish Upon A Star!!


Today, I’m sharing a card using Dreamerland Crafts stamps called Being With Each Other – D17011.  This boy and his little kitty are enjoying the moment and wishing upon a star!

To make this card I used a base of 5.5″ x 4.25″ using Hammermill – Premium Colour 100 lb. I stamped the image using my MISTI and Memento – Tuxedo Black ink onto Copic Marker X-Press It Blending Card which was cut to the size of 5-1/8″ x 3-7/8″. I coloured in the image with Copic Markers and added some stars in the sky using Gelly Roll Sakura #5 Pen, Gelly Roll Sakura #8 Pen and Gelly Roll Stardust – Clear pen.  I adhered the completed image to the base card using double-sided tape.

Card Recipe:

Stamp: Being With Each Other – D17011 – Dreamerland Crafts

Inks: Memento – Tuxedo Black

Paper: Copic Marker X-Press It Blending Card, Hammermill – Premium Colour 100 lb.

Tools: MISTI – Most Incredible Stamping Tool, Gelly Roll Sakura #5 Pen, Gelly Roll Sakura #8 Pen and Gelly Roll Stardust – Clear

Image coloured with Copic Markers:

Skin: E21, E11, E00, E000, R30, R22, R20,

Hair: E47, E44, E43, E41, Sakura Glaze – Black – Eyes

Sweater: BG72, BG57, BG32, BG11, BG09, BG05, BG02, BG01, R46, R14, R08

Jeans: B26, B23, B21

Boots: E27, E25, E23, E21

Kitten: T7, T5, T3, R02

Grass: G99, YG67, YG17, G21

Night Sky and Moon: B99, B97, B95, B60, C7, C2, C1, C0, C00, BV23, BV20, Y000

Hope you like it and have a great week!

You can find more cards to inspire you at Dreamerland Crafts and Pointer Scrapbooking on the Facebook Fan pages from the rest of our design team.

Polar Friends!!!


It’s Wednesday, and this week, I made a Christmas card using Polar Friends – TT058 by High Hopes Rubber Stamps for the main image and All Hearts – HDG004 (High Hopes Rubber Stamps) for the sentiment. Sharing Christmas with loved ones is always something to look forward to.

Using My Creative Time – Rectangle Frame Dies and my Cuttlebug, I die cut a 5.25″ x 4″ rectangle from Copic Marker X-Press It Blending Card paper. With my MISTI and Memento – Tuxedo Black ink, I stamped the image onto it. I coloured in the image with Copic markers and then added some snow to the sky using a Gelly Roll Sakura #8 Pen and Sharpie Water Based Paint – White – Extra Fine Point. Stickles – Diamond was added to the ice cubes and Wink of Stella – Clear was applied to the candy cane. Stickles – Star Dust was added to all of the snow. This was then set aside to dry.

Once everything was dry, I popped up the image onto Hammermill – Premium Colour 100 lb. paper cut and folded to 5.5″ x 4.25″ with U-Line double-sided tape. I stamped out the sentiment onto Copic Marker X-Press It Blending Card and coloured in the hearts with Copics and tinted the white paper with Lawn Fawn – Peacock ink. To finish off the card, I popped this up with 3M VHB – 2 sided tape.

Card Recipe:

Stamp: Polar Friends – TT058 (High Hopes Rubber Stamps)

Sentiment: All Hearts – HDG004 (High Hopes Rubber Stamps)

Inks: Memento – Tuxedo Black, Lawn Fawn – Peacock Ink

Paper: Copic Marker X-Press It Blending Card, Hammermill – Premium Colour 100 lb.

Die Cut: My Creative Time – Rectangle Frame Dies

Stickles: Star Dust, Diamond

Tools: MISTI – Most Incredible Stamping Tool, Cuttlebug, Gelly Roll Sakura #8 Pen, Sharpie Water Based Paint – White – Extra Fine Point, Wink of Stella – Clear, U-Line double-sided tape, 3M VHB – 2 sided tape

Image coloured with Copic Markers:

Polar Bear: B60, BV23, BV20, C1, C00, R30, R20, R02, Colorless Blender

Penguin: W9, W7, W5, W3, W00, E15, YR14, Y17, Y11, R11, RV00, E43, E42, E41, E40

Penguin Scarf and Hat: BG72, BG57, BG05, BG11, BG10, BG000, BG0000

Bear Scarf: RV66, RV63, RV55, BG09, BG07, BG02, BG01, B00, B000, B0000

Ice: B60, B000, B0000

Sky: B99, B97, B95, B93, B45, B41, BG45, BG11, BG10, BV25, BV23, BV20, BV04, V04, V01, YG11, RV04, RV63

Snow: BV23, BV20, Colorless Blender, Stickles – Star Dust

Soda: RV66, RV63, RV55, RV52

Candy Cane and Hearts: R59, R37, R35

Hope you like it and have a fantastic week!

You can find lots of inspiration from the Design Team Divas at the High Hopes blog, and the High Hopes Rubber Stamps Facebook Fan page plus you can also follow us on
Instagram, Twitter and Pinterest.

Believe!!!


It’s Wednesday, and this week, I made a Christmas card using Believe Snowman – TFL006 and Snow Globe – ULF002 by High Hopes Rubber Stamps for the main image and North Pole Greetings – GLL005 (High Hopes Rubber Stamps) for the sentiment. It’s time to start believing the magic of Christmas and the joy that it brings to everyone!

To make my card this week, I began with a card base using AC Cardstock – White cut and folded to 6″ x 6″. The snowflake background is from Lawn Fawn – Let It Shine Snowflakes (6″ x 6″) paper pad. I applied this directly to the base using double-sided tape.

Using Lifestyle Crafts Cutting Dies – Nesting Circles and my Cuttlebug, I die cut a 3.75″ circle from Copic Marker X-Press It Blending Card paper. With my MISTI and Memento – Tuxedo Black ink, I stamped the snowman scene image onto it. I coloured in the image with Copic markers and then added some snow to the sky and snowman’s arms using a Gelly Roll Sakura #8 Pen. Sakura Glaze – Black was added to the eyes of the snowman and birds and the snowman’s mouth. With a Ranger – Emboss It Pen Clear, I added some ink to the top of the Snowman’s hat, sign, icicles, tops of the birdhouses and snow drifts and then heat embossed everything with WOW! Sparkling Snow Embossing Glitter and a Marvy Uchida – Embossing Heat Tool. Stickles – Diamond was added as an extra layer to the snow and Wink of Stella – Clear was applied over all the snowman. This was then set aside to dry.

With my MISTI and Memento – Summer Sky ink I stamped the top part of the globe onto Copic Marker X-Press It Blending Card paper. I cleaned off the stamp and this time, I used some Post-it Notes to hide the background inside the globe and inked the braided border for both the top and bottom of the base with Versamark ink. I applied Ranger Super Fine Detail Gold Embossing powder and heat embossed it using a Marvy Uchida – Embossing Heat Tool. With my globe image still in place on my MISTI, I removed the snowglobe stamp and added the sentiment turning up both ends of the stamp slightly to give the words some curvature. The sentiment was stamped using Versamark ink and then Ranger Super Fine Detail Gold Embossing powder was applied to it and then heat embossed using a Marvy Uchida – Embossing Heat Tool. The base was then coloured in using my Copic markers and a Gelly Roll Stardust – Clear pen was used to colour in the white areas to give it some glitter. I also added some of this pen to the tops of the snowman’s arms. With my scissors, I fussy cut around the entire snow globe.

The card was now ready to assemble. I attached 3M double-side tape to pop up the snow globe onto the main background and then added 3M double-sided tape to the back of the circle and centred it on the top part of the globe. Lastly, to finish off the card, I applied some Nuvo Crystal Drops – Caribbean Ocean, Violet Galaxy and Nuvo Glitter Drops – Sherbert Shimmer to some of the snowflakes on the base card.

Card Recipe:

Stamp: Believe Snowman – TFL006 (High Hopes Rubber Stamps), Snow Globe – ULF002 (High Hopes Rubber Stamps)

Sentiment: North Pole Greetings – GL005 (High Hopes Rubber Stamps)

Inks: Memento – Tuxedo Black, Memento – Summer Sky ink, Versamark

Paper: Copic Marker X-Press It Blending Card, AC Cardstock – White, Lawn Fawn – Let It Shine Snowflakes (6″ x 6″)

Die Cut: Lifestyle Crafts Cutting Dies – Nesting Circles

Stickles: Diamond

Nuvo: Crystal Drops – Caribbean Ocean, Violet Galaxy and Glitter Drops – Sherbert Shimmer

Embossing Powder:Ranger Super Fine Detail Gold Embossing powder, WOW! Sparkling Snow Embossing Glitter

Tools: MISTI – Most Incredible Stamping Tool, Marvy Uchida – Embossing Heat Tool, Cuttlebug, Gelly Roll Sakura #8 Pen, Ranger – Emboss It Pen Clear, Sakura Glaze – Black pen, Gelly Roll Stardust – Clear pen

Image coloured with Copic Markers:

Snowman: B60, C1, C00, Colorless Blender

Hat and Buttons: C10, C8, C6, C4

Arms and Sign: E27, E25, E23, E21

Scarves, Patches, Hat Band: RV66, RV63, RV55, BG09, BG07, BG02, BG01

Bird Houses: RV66, RV63, RV55, BG09, BG07, BG02, BG01, E27, E25, E23, E21

Birds: R46, R14, R08

Sky: B99, B97, B95, B93, B91

Snow: B60, C1, C00, B0000, BG0000, Colorless Blender

Snow Globe: R46, R14, R08

Hope you like it and have a fantastic week!

You can find lots of inspiration from the Design Team Divas at the High Hopes blog, and the High Hopes Rubber Stamps Facebook Fan page plus you can also follow us on
Instagram, Twitter and Pinterest.

Time to Celebrate!!


Today, I’m sharing a Christmas card using Dreamerland Crafts stamps called Let’s Celebrate – D19074 for the main image and Christmas Snow Scene – M18313 for the background. For the sentiment, I used Holiday Sentiments Set 001 – D163001


To make this card I used a base of 5.5″ x 4.25″ using Hammermill – Premium Colour 100 lb. cardstock. My Cuttlebug and My Creative Time – Rectangle Frame Layers Die were used to die-cut Copic Marker X-Press It Blending Cardstock. Using the background stamps, I stamped the background using my MISTI and Memento – Summer Sky ink. I coloured in the sky, trees and house with Copic markers and then added some snow using Gelly Roll Sakura #8 Pen. Once this was done, I added Gina K Designs – Glitz Glitter Gel – Iridescent to the remainder of the die cut for the sparkling snow. I added a little bit more where the boys feet would land and set it aside to dry. Once again, I used my MISTI and Memento – Tuxedo Black ink and stamped the main images. I coloured them in with Copic markers and then applied Ranger – Emboss It Pen Clear to the fur trims for the hats and clothing. I applied WOW! Sparkling Snow Embossing Glitter to the inked areas and then heat embossed everything with my Marvy Heat Embossing Tool. For the pompoms, I applied Cosmic Shimmer Fluffy Stuff and then heat embossed the liquid for it to puff up. For the present, I added some gold swirls using a Pental Sunburst Metalic Med Gel Pen. Then I fussy cut around the images leaving a thin white border. I stamped the sentiment using my MISTI and Lawn Fawn – Peacock Ink on to the base card. Then I stamped it again, this time using Versamark ink and then added Ranger – Clear Super Fine Detail embossing powder and heat embossed it.

The card was now ready to assemble. Using double-sided tape, I attached the background to the scalloped border. I added 3M double-sided tape to the back of the scalloped border and popped it up onto the base card. Using 3M double-sided tape, I popped up the main image and present onto the background. A little more of the Stickles – Diamond was added to snow where his feet are to complete the card.

Card Recipe:

Stamps: Let’s Celebrate – D19074 – Dreamerland Crafts, Christmas Snow Scene – M18313 – Dreamerland Crafts

Sentiment: Holiday Sentiments Set 001 – DS163001 – Dreamerland Crafts

Inks: Memento – Tuxedo Black, Versamark, Lawn Fawn – Peacock Ink, Memento – Summer Sky ink

Paper: Copic Marker X-Press It Blending Card, Hammermill – Premium Colour 100 lb., Hot Buy – Recollections – Jewel Tones

Die Cuts: My Creative Time – Rectangle Frame Layers, Gina Marie Designs – Nested Scalloped Stitched Rectangles

Stickles: Diamond

Embossing Powder: WOW! Sparkling Snow Embossing Glitter, Cosmic Shimmer Fluffy Stuff, Ranger – Clear Super Fine Detail embossing powder

Tools: MISTI – Most Incredible Stamping Tool, Cuttlebug,  Marvy Heat Embossing Tool, Sakura Glaze – Black, Gelly Roll Sakura #8 Pen, Gelly Roll Sakura #5 Pen, 3M VHB – 2 sided tape and Pental Sunburst Metalic Med Gel Pen

Image coloured with Copic Markers:

All Eyes and Small Noses:  Sakura Glaze – Black pen, Gelly Roll Sakura #5 Pen

Skin: E21, E11, E00, E000, R30, R22, R20

Hair: E47, E44, E43

Clothing and Hat: B37, B14, B12

Mitts: YG67, YG63, YG61

Boots: C8, C6, C4, C2, C1

Bear: E57, E55, E53, E51

Pig: E95, E93, R00, R000

Rabbit: C2, C1, C00, R30, R20

Present and Bow: BG09, BG05, BG02, BG01, E15, Y38, Y15, Y08

House: E40, E41, E30, E18, E15, Y04

Trees: G99, G21, YG67, YG17

Sky: B04, B02, B01, B00

Hope you like it and have a great week!

You can find more cards to inspire you at Dreamerland Crafts and Pointer Scrapbooking on the Facebook Fan pages from the rest of our design team.

Santa’s New Ride!!!


It’s Wednesday, and this week, I made a Christmas card using Flyin’ High Santa – T093 by High Hopes Rubber Stamps for the main image and Here Comes Santa Claus – G272 (High Hopes Rubber Stamps) for the sentiment. Santa’s giving his reindeer a rest this year as he checks out his new ride. LOL!

To make my card this week, I began with a card base of Hammermill – Premium Colour 100 lb. cardstock, cut and scored to be 5.5″ x 4.25″. I cut the background paper from Creative Memories – Glacier Paper Pack to be the same size and applied this directly to the base card using double-sided tape. I took a small scrap of Recollections – Black cardstock and ran it through my Xyron Create a Sticker so that it would become a sticker. With my Cuttlebug and Joy Crafts – Lin & Len Design 1201/0027, I die cut the silhouette out of the black paper and then peeled off the backing and placed it directly to the bottom of the card. Stampendous – Snowflakes – Chunky White was sprinkled over top of the card and melted from the bottom of the card using my Marvy Uchida – Embossing Heat Tool.

With my MISTI and Memento – Tuxedo Black ink, I stamped both the image and the sentiment onto Copic Marker X-Press It Blending Card. I cut the sentiment in half using my cutter and ran it through the Xyron Create a Sticker. I placed the sticker on top of some Recollections – Black cardstock and cut it again using my small cutting tool. I coloured in the image with Copic markers and then I fussy cut around it. With a Gelly Roll Sakura #8 Pen, I coloured in the candy cane swirls on the airplane and small circles. Once it was dry, I used Gelly Roll Stardust – Clear to go over the big yellow gumdrop, the swirls on the propeller, the candy cane swirls, small circles on the plane and the star on the tree to add some glitter. For Santa’s cuffs, coat trim and hat, I used Ranger – Emboss It Pen Clear and sprinkled on some WOW! Sparkling Snow Embossing Glitter. I heated this with my Marvy Uchida – Embossing Heat Tool and then repeated the process to give it more texture. For Santa’s pop pom, I applied a little bit of Cosmic Shimmer Fluffy Stuff and then heat embossed it with my Marvy Uchida – Embossing Heat Tool.

The Santa image and sentiment were both popped up onto the background using 3M double-sided tape to complete the card.

Card Recipe:

Stamp: Flyin’ High Santa – T093 (High Hopes Rubber Stamps)

Sentiment: Here Comes Santa Claus – G272 (High Hopes Rubber Stamps)

Inks: Memento – Tuxedo Black

Paper: Copic Marker X-Press It Blending Card, Hammermill – Premium Colour 100 lb., Creative Memories – Glacier Paper Pack (12″ x 12″), Recollections – Black cardstock

Die Cut: Joy Crafts – Lin & Len Design 1201/0027

Embossing Powder: WOW! Sparkling Snow Embossing Glitter, Stampendous – Snowflakes – Chunky White

Tools: MISTI – Most Incredible Stamping Tool, 3M – 2 sided tape, Gelly Roll Stardust – Clear, Xyron Create a Sticker, Cosmic Shimmer Fluffy Stuff, Cuttlebug, Marvy Uchida – Embossing Heat Tool, Gelly Roll Sakura #8 Pen, Sakura Glaze – Black Pen, Gelly Roll Sakura #5 Pen, Ranger – Emboss It Pen Clear

Image coloured with Copic Markers:

Eyes: Sakura Glaze – Black Pen, Gelly Roll Sakura #5 Pen

Skin: E21, E11, E00, E000, R30, R20

Beard: C1, C0, C00, Colorless Blender

Santa Hat, Clothing, Mitts: R59, R37, R35, YG67, YG63, YG61, WOW! Sparkling Snow Embossing Glitter, Cosmic Shimmer Fluffy Stuff

Airplane: R29, R27, R22, R17, G14, YG23, YG01, BG0000, C5, C3, C2, C1, C0, C00, Colorless Blender, Gelly Roll Stardust – Clear

Star and Present Bow: Y17, Y13, Y04, BG07, BG05, BG02, BG01, Gelly Roll Stardust – Clear

Christmas Tree, Propeller and Leaves: G14, YG23, YG01, Y17, Y13, Y04, Gelly Roll Stardust – Clear

Hope you like it and have a fantastic week!

You can find lots of inspiration from the Design Team Divas at the High Hopes blog, and the High Hopes Rubber Stamps Facebook Fan page plus you can also follow us on
Instagram, Twitter and Pinterest.