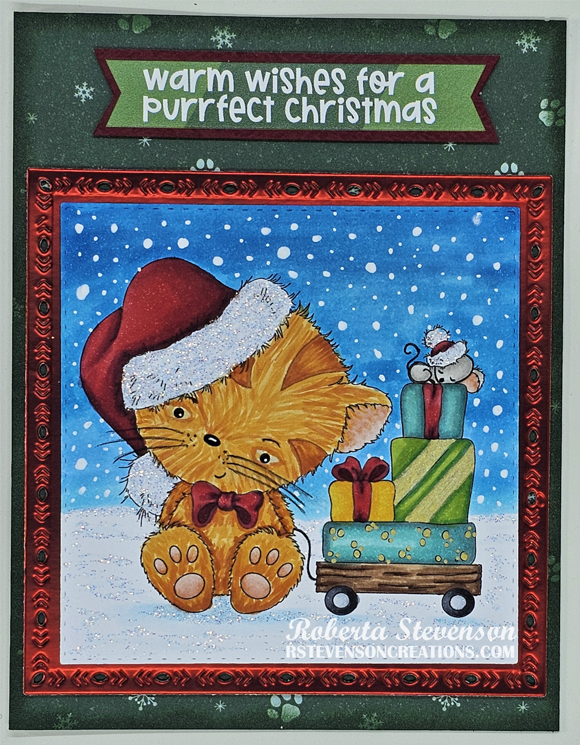
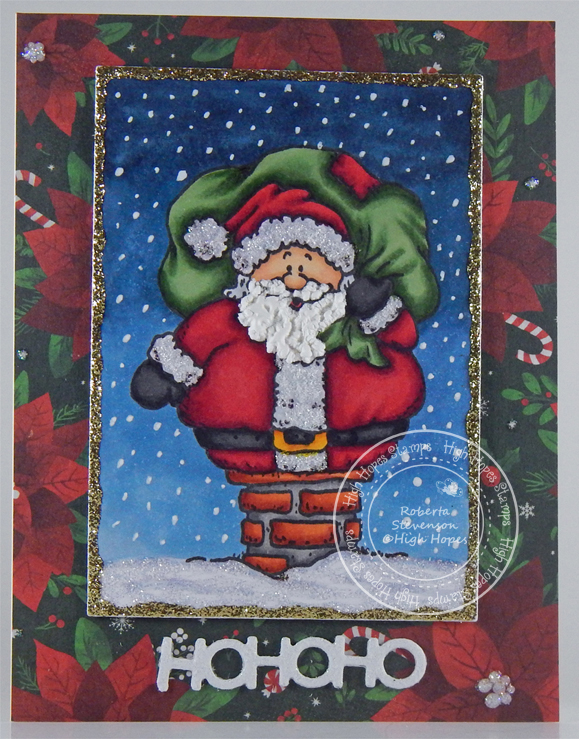
Tag Archive | Gelly Roll Sakura #5 Pen

Everything is Magical!


Sharing a Christmas card that I made today using KLM Digital DesignSledding Gnome from the new December 2022 release. This image also comes with 2 more sentiments, “Some people are worth melting for” and “Walking in a Winter WONDERLAND”.

Hammermill – Premium Colour 100 lb. cardstock was used to create a 5.5″ x 4.25″ card base. I cut Lawn Fawn – Let It Shine Snowflakes designer paper to be the same size and adhered it to the base using double-sided tape. The image and sentiment were imported into Microsoft Word and printed out onto Copic Marker X-Press It Blending Card. The printed image was die cut using my Cuttlebug and Die-namics – MFT – Stitched Rec Scallop Frame dies. It was coloured in and then I applied Cosmic Shimmer Fluffy Stuff. DecoArt Glamour Dust was sprinkled over top while it was still wet and then it was heat set with a Marvy Uchida – Embossing Heat Tool to puff up the snow. I applied the snow flakes in the sky using a UNIPosca PC-3M White marker and snow on the ground with Stickles – Diamond in between and on top of the fluffy snow. U-Line double-sided tape was applied to the image after the Stickles was dry and it was popped up onto the base.

Card Recipe:

Stamp and Sentiment:  Sledding Gnome – KLM Digital Designs

Inks: HP Printer Grayscale

Paper: Copic Marker X-Press It Blending Card, Hammermill – Premium Colour 100 lb., Lawn Fawn – Let It Shine Snowflakes (6″ x 6″)

Dies: Die-namics – Exclusive Designs for “My Favourite Things” – Stitched Rec Scallop Frame – MFT-860

Miscellaneous: U-Line double-sided tape, Stickles – Diamond, Cosmic Shimmer Fluffy Stuff, DecoArt Glamour Dust, Marvy Uchida – Embossing Heat Tool, UNIPosca PC-3M White marker

Image coloured with Copic Markers:

Skin: E21, E11, E00, E000

Beard: E47, E44, E43, E41

Hat and Mittens: BG72, BG57, BG32, BG11

Jeans: B26, B23, B21

Shoes: C9, C7, C5

Shirt: R46, R14, R08

Sled: E39, E37, E35, E34, E31, E30,  C5, C3, C1

Holly: BG99, YG17, YG03, R46

Sky: B02, B01, B00, B000

Snow: BV20, B000

Hope you like it and have a great week!

You can find more cards to inspire you at KLM Designs, KLM Digital Design Team and KLM Digital Designs on the Facebook Fan page from the rest of our design team.

Winter Wonderland


Sharing a CAS card that I made today using KLM Digital DesignSkier Gnome for the main image and Sledding Gnome for the sentiment from the new December 2022 release. I tried Cross-Country skiing a few times. I was so bad at it, that once was enough for any of my friends. They said I was too dangerous on them. LOL! I even skied down into a tree to avoid knocking over 3 people once going down a small hill. My friend was laughing so hard it took him a little while before he could help me back up away from the tree. But, by the time we got back he was freezing and I was hot from all of the hard work I was doing trying to keep up to him. He was a professional skier. That was the last time he ever went with me. Then there was the time that there were about 6 of us. They made the mistake of asking me to go first side-stepping up the hill. I almost made it to the top when my foot slipped and yes, I knocked everyone over like a bunch of bowling pins. LOL! Guess what??? They never went with me again either. Oh well! Some things are just not meant to be!!! As you may have guessed by now. Downhill is definitely out of the question for me.

To make my card this week, I started with a 5.5″ x 4.25″ card base using Hammermill – Premium Colour 100 lb. cardstock. Recollections – Christmas Plaids paper was cut to the same size and adhered directly to the base using double-sided tape! The image and sentiment were imported into Microsoft Word and printed out onto Copic Marker X-Press It Blending Card. With my Cuttlebug and My Creative Time – Rectangle Frame Dies, I die cut the printed image and sentiment.

I coloured in the image and then added in the snow in the sky using a combination of a Gelly Roll Sakura #10 Pen and UNIPosca PC-3M White marker. The snow at the bottom was created using a combination of Cosmic Shimmer Fluffy Stuff and DecoArt Glamour Dust. To puff up the snow, heat was applied using Marvy Uchida – Embossing Heat Tool. I added a little more glitter along the very top of the snow with Stickles – Star Dust. The completed image was then popped up onto the card using U-Line double-sided tape.

Card Recipe:

Stamp:  Skier Gnome – KLM Digital Designs

Sentiment: Sledding Gnome – KLM Digital Designs

Inks: HP Printer Grayscale

Paper: Copic Marker X-Press It Blending Card, Hammermill – Premium Colour 100 lb., Recollections – Christmas Plaids

Die Cuts: My Creative Time – Rectangle Frame Dies

Miscellaneous: U-Line double-sided tape, Cuttlebug, Gelly Roll Sakura #10 Pen, UNIPosca PC-3M White marker, DecoArt Glamour Dust, Cosmic Shimmer Fluffy Stuff, Stickles – Star Dust, Marvy Uchida – Embossing Heat Tool

Image coloured with Copic Markers:

Skin: E21, E11, E04, E00, E000

Beard: E08, YR18, YR16, YR12

Antlers: E33, E31, E30

Ears: R25, R23, R02, R01

Shirt and Hat: G46, G29, G24, G21, R39, R34

Jeans: B26, B23, B21

Boots: E34, E33, E31, E29, E27, E25, E23

Poles: E39, E37, E35, C8, C6, C5, C4, C3, C1

Sky: B99, B97, B95, B93

Hope you like it and have a great week!

You can find more cards to inspire you at KLM Designs, KLM Digital Design Team and KLM Digital Designs on the Facebook Fan page from the rest of our design team.

You’re How Old??


Sharing a CAS birthday card that I made today using KLM Digital DesignThinking Gnome from the new November 2022 release. This image comes with 2 other sentiments as well, “Just thinking of you” and “Thinking of you makes my day”. This little gnome is thinking really hard to figure out how old you are this year! LOL!

To make my card this week, I started with a 5.5″ x 4.25″ card base using Hammermill – Premium Colour 100 lb. cardstock. Echo Park – Happy Birthday paper was cut to the same size and adhered directly to the base using double-sided tape! The image and sentiment were imported into Microsoft Word and printed out onto Copic Marker X-Press It Blending Card. I coloured in the image and then fussy cut around it. I ran it through my Xyron Create a Sticker and placed it onto a small piece of Recollections – Black cardstock and fussy cut around it again. Using a Cuttlebug and dies from Sizzix Framelits – Banner Dies, I die cut the sentiment and a larger banner using Echo Park – Happy Birthday paper. With a blender brush, I inked over the sentiment die cut to give it a shade of green colour. With Tim Holtz Distress Ink – Pine Needles and a finger dauber, I inked around the 2 banners and all around the card. The larger banner was adhered directly to the card using liquid glue. The image and sentiment were both popped up onto the card using U-Line double-sided tape. YNS Gumdrops – Tropical Paradise were added to the card to finish it off.

Card Recipe:

Stamp and Sentiment:  Thinking Gnome – KLM Digital Designs

Inks: HP Printer Grayscale, Tim Holtz Distress Ink – Pine Needles

Paper: Copic Marker X-Press It Blending Card, Hammermill – Premium Colour 100 lb., Echo Park – Happy Birthday (6″ x 6″), Recollections – Black cardstock

Die Cuts: Sizzix Framelits – Banner Dies -561152

Miscellaneous: U-Line double-sided tape, Cuttlebug, Xyron Create a Sticker, YNS Gumdrops – Tropical Paradise

Image coloured with Copic Markers:

Skin: E21, E11, E04, E00, E000

Beard: E47, E44, E43, E41

Shirt and Socks: BG72, BG57, BG32, BG11, Gelly Roll Sakura #5 Pen

Jeans: B26, B23, B21

Hat and Boots: C7, BG78, BG75

Hope you like it and have a great week!

You can find more cards to inspire you at KLM Designs, KLM Digital Design Team and KLM Digital Designs on the Facebook Fan page from the rest of our design team.

Have A Hoppy Day!!


Sharing a birthday card that I made today using KLM Digital Design –  Hang In There Frog from the new November 2022 release. This image also comes with 2 more sentiments, “Take a leap of faith” and “Hang in there”.

The image and sentiment were imported into Microsoft Word and printed out onto Copic Marker X-Press It Blending Card. I coloured the image in and then fussy cut around it. Using a black marker, I inked around the image.

Hammermill – Premium Colour 100 lb. cardstock was used to create a 5″ x 4.25″ card base. Using multiple Tim Holtz Distress Inks and a blender brush, I created the background sky directly on the card base. The leafy border was die cut using Copic Marker X-Press It Blending Card, a Cuttlebug and Lawn Fawn – Tropical Leaves Backdrop dies. With multiple Tim Holtz inks and a blender brush I inked over the die cut and some extra leaves from the same die set. Then with Copic markers, I made some of the leaves a little darker to give the background some contrast.

Scrapbook Adhesives – 3D Foam Strips were attached to the back of the large die cut. I applied some glue to the ends of the vine for the frog and attached them to the leaves. Once the glue was dry, I added more Scrapbook Adhesives – 3D Foam Strips to the back of the coloured image. Both pieces were now attached to the base card. I applied some glue to the individual leaves and applied them directly to the base card underneath the die cut. Lastly, I die cut the sentiment using a Cuttlebug and Poppystamps – Christmas Quotes die. I inked around the edges of the die cut with a black marker and then glued it to the tops of the leaves to finish off the card.

Card Recipe:

Stamp and Sentiment:  Hang In There Frog – KLM Digital Designs

Inks: HP Printer Grayscale, Tim Holtz Distress Inks – Saltwater Taffy, Squeezed Lemonade, Tumbled Glass, Salty Ocean, Forest Moss, Rustic Wilderness, Mowed Lawn and Peeled Paint

Paper: Copic Marker X-Press It Blending Card, Hammermill – Premium Colour 100 lb.

Dies: Lawn Fawn – Tropical Leaves Backdrop, Poppystamps – Christmas Quotes

Miscellaneous: Scrapbook Adhesives – 3D Foam Strips, Blender Brushes

Image coloured with Copic Markers:

Frog: YG17, YG06, YG03, YG00, E81, C1, C0, Black (Eyes: G19, G16, YG03, Y38, C1, C00, Gelly Roll Sakura #5 Pen)

Leaves: G19, G16, G03

Vine: G99, YG67, YG63, YG61

Hope you like it and have a great week!

You can find more cards to inspire you at KLM Designs, KLM Digital Design Team and KLM Digital Designs on the Facebook Fan page from the rest of our design team.

Noel!!


It’s Wednesday, and this week, I made a CAS Christmas card using High Hopes Rubber Stamps Woodland Stocking – TDG011. We always had stockings under the tree filled with goodies and our names on each of the stockings. Even our dogs had their own stockings growing up. LOL!

To make my card this week, I began with a card base of 6″ x 6″ using AC Cardstock – White. I adhered Recollections – Christmas Cottage 6 in. x 6 in. cardstock to the base front using double-sided tape. Using my Cuttlebug and paper from Copic Marker X-Press It Blending Card, I die cut the frame with Waffle Flower – Nesting Square dies. The image was stamped onto the die cut using my MISTI and Memento – Tuxedo Black ink. I coloured in the image and then inked around the edges with a NUVO Glitter Marker – Golden Honey. I added some U-Line double-sided tape to the back of the coloured image and popped it up into the centre of the diamond. To finish off the card, I added 4 pop dots from YNS – Happy Harvest Gumdrops.

Card Recipe:

Stamps: Woodland Stocking – TDG011 (High Hopes Rubber Stamps)

Inks: Memento – Tuxedo Black, Tim Holtz Distress Ink – Pine Needles

Paper: Copic Marker X-Press It Blending Card, AC Cardstock – White, Recollections – Christmas Cottage (12″ x 12″)

Die Cuts: Waffle Flower – Nesting Square dies

Tools: MISTI – Most Incredible Stamping Tool, U-Line double-sided tape, NUVO Glitter Marker – Golden Honey, Cuttlebug, YNS – Happy Harvest Gumdrops

Image coloured with Copic Markers:

Cheeks: RV00, RV000

Eyes and Noses: Sakura Glaze – Black, Gelly Roll Sakura #5 Pen

Snowman: BV20, B0000, Y38, YR31, C9, C7, C5, B04, B02, B01, Colorless Blender

Owl: E55, E53, E51, W0, W00, Y38, YR31

Fox: E99, E97, E08, N1, N0, R02, R01

Penguin: C9, C7, C5, C3, E42, E41, YR31, Y38

Reindeer: E51, E50, E33, E31, E30, E29, E27, E25, E23, E21, R02, R01

Noel and Ribbon: YR27, YR23, Y15, Y11, Y00

Tree Branch and Pines: E29, E25, E23, G49

Holly, Leaves and Pine Needles: G99, G29, G21, YG67, YG17, R89, R27, R24

Sock: B04, B02, B01, B00, R59, R37, R35, C1, G29

Ribbon: R59, R37, R35

Hope you like it and have a fantastic week!

You can find lots of inspiration from the Design Team Divas at the High Hopes blog, and the High Hopes Rubber Stamps Facebook Fan page plus you can also follow us on
Instagram, Twitter and Pinterest.

Ho Ho Ho!!


It’s Wednesday, and this week, I made a Christmas card using High Hopes Rubber Stamps Santa In Chimney – S202 for the image. Christmas is only a few months away, so I’m busy making more Christmas cards for this year to give away! How about you?

To make my card this week, I began with a card base of Hammermill – Premium Colour 100 lb. cardstock, cut and scored to be 5.5″ x 4.25″. DCWV – Holiday Cheer was cut to the same size and applied to the base using double-sided tape. The image was die-cut using Anna Griffin Empress Mini Cutting Machine, My Creative Time – Rectangle Frame Dies and Copic Marker X-Press It Blending Card. The image was stamped onto the Copic Marker X-Press It Blending Card using my MISTI – Most Incredible Stamping Tool and Memento – Tuxedo Black ink. Once it was coloured in, I applied some Cosmic Shimmer Fluffy Stuff to his beard and then heat set it with a Marvy Uchida – Embossing Heat Tool to make it puff up. Stickles – Diamond was applied to the Coat trim and hat, as well as the roof. Stickles – Gold was applied all around the die-cut to create some extra sparkle. Stickles – Star Dust was applied to the insides of the background flowers and some snowflakes.  Once everything was dry, I added some U-Line double-sided tape and popped up the main coloured image onto the base card. For the sentiment, I die cut Recollections Christmas Ink Jet Printable Glitter Paper with the Anna Griffin Empress Mini Cutting Machine using Jolly Quickutz – Deck the Halls limited edition gift set. I applied Scrapbook Adhesives – 3D Foam Strips to the Sentiment and popped it up onto the card to finish it off.

Card Recipe:

Stamp: Santa In Chimney – S202 (High Hopes Rubber Stamps)

Sentiment: Jolly Quickutz – Deck the Halls limited edition gift set

Inks: Memento – Tuxedo Black

Paper: Copic Marker X-Press It Blending Card, Hammermill – Premium Colour 100 lb., DCWV – Holiday Cheer (6″ x 6″), Recollections Christmas Ink Jet Printable Glitter Paper

Die Cuts: Jolly Quickutz – Deck the Halls limited edition gift set, My Creative Time – Rectangle Frame Dies

Stickles: Diamond, Gold, Star Dust

Tools: MISTI – Most Incredible Stamping Tool, U-Line double-sided tape, Anna Griffin Empress Mini Machine, Stickles – Diamond, Cosmic Shimmer Fluffy Stuff, Marvy Uchida – Embossing Heat Tool, Scrapbook Adhesives – 3D Foam Strips

Image coloured with Copic Markers:

Skin: E21, E11, E00, E000, R30, R20, Eyes (Sakura Glaze – Black)

Hair: C2, C1, C00

Coat and Hat Trim: C2, C1, C00, Stickles – Diamond

Clothing: R59, R37, R35

Belt and Mitts: 100, T9, T7, T5, E15, Y38, Y35, Y15

Sack: G99, YG67, YG63, YG61, R59, Y37, R35

Chimney: E97, E19, E08, T5, T3, T1

Roof: BV20, B60, C1, C00, Stickles – Diamond

Sky: B99, B97, B95, B93

Hope you like it and have a fantastic week!

You can find lots of inspiration from the Design Team Divas at the High Hopes blog, and the High Hopes Rubber Stamps Facebook Fan page plus you can also follow us on
Instagram, Twitter and Pinterest.

Chi Chi’s Birthday Party!!


It’s Wednesday, and this week, I made a birthday card using High Hopes Rubber Stamps Chi Chi’s Party – TDG037 for the image and Happy Birthday – FDG027. This is just one of the new re-releases from our “Let’s Celebrate” previously retired stamps at High Hopes Rubber Stamps during the month of June. You should pop on over and take a peek at the other new re-releases too.

To make my card this week, I began with a card base of Hammermill – Premium Colour 100 lb. cardstock, cut and scored to be 5.5″ x 4.25″. I cut Paper Pizazz – Hearts, Coils, Stars designer paper to be the same size as the base and adhered it with double-sided tape. Tim Holtz Distress Ink – Chipped Sapphire was used to ink around all of the edges of the card. Using the Anna Griffin Empress Mini, I die-cut the rectangle using My Creative Time – Rectangle Frame Dies. The image and sentiment were stamped onto Copic Marker X-Press It Blending Card and I coloured in the image and the small balloon on the sentiment with Copic Markers. I added Wink of Stella – Clear to the yellow on the cupcake, hat and ribbons to make them sparkle. U-Line double sided tape was added to the backs of the image and sentiment and they were both popped up onto the patterned base card. Lastly, to finish the card off, I popped a red balloon over top of the balloon on the main image and then an additional 2 balloons for embellishments using Creative Impressions – Metallic Balloon Brads using 2 layers of U-Line double-sided tape.

Card Recipe:

Stamp: Chi Chi’s Party – TDG037 (High Hopes Rubber Stamps)

Sentiment: Happy Birthday – FDG027 (High Hopes Rubber Stamps)

Inks: Memento – Tuxedo Black, Tim Holtz Distress Ink – Chipped Sapphire

Paper: Copic Marker X-Press It Blending Card, Hammermill – Premium Colour 100 lb., Paper Pizazz – Hearts, Coils, Stars

Die Cuts: My Creative Time – Rectangle Frame Dies

Tools: MISTI – Most Incredible Stamping Tool, U-Line double-sided tape, Anna Griffin Empress Mini Machine, Creative Impressions – Metallic Balloon Brads – Item 90613, Wink of Stella – Clear

Image coloured with Copic Markers:

Chi Chi and Bear: E49, E47, E37, E35, E34, E33, E31, E30, R30, R20, R08

Presents: BG72, BG57, BG32, BG11, R46, R24, R08, YR23, Y15, Y11, Y00

Hat: R46, R24, R08, BG57, BG32

Cupcake: BG57, BG32, Y35, Y15, Y06, R08

Balloon: R46, R24, R08

Background: B39, B37, BG09, BG05, BG02, BG01, YG13, Y35, Y15, Y06, R46, R24, R08

Hope you like it and have a fantastic week!

You can find lots of inspiration from the Design Team Divas at the High Hopes blog, and the High Hopes Rubber Stamps Facebook Fan page plus you can also follow us on
Instagram, Twitter and Pinterest.

Thank You!!


It’s Wednesday, and this week, I made a Thank You card using High Hopes Rubber Stamps Gladiolas – TDG038 for the image. We are super excited to re-release 9 previously retired images today. This is the first image of many more to come!

It’s spring and my husband is busy in his garden, planting some beautiful flowers. Every year, he asks me what colours I would like to have in the garden and then he puts together a gorgeous display. Thank goodness he is taking care of them, because a green thumb is certainly something I was not blessed with. LOL!

To make my card this week, I began with a card base of Hammermill – Premium Colour 100 lb. cardstock, cut and scored to be 5.5″ x 4.25″. I cut Crafter’s Consortium – The Essential Craft Papers – Ink Drops – Ocean to be the same size as the base and adhered it with double-sided tape. I cut 2 .5″ strips of Recollections – Matte Gold Foil cardstock and adhered a piece on each side of the card using glue. I die cut the words “Thank You” using the same Matte Gold foil cardstock, PaperCrafter Today – 15 Die Cut Sentiment Set and my Anna Griffin Empress Mini Machine. I ran the words through my Xyron Create a Sticker and set them to the side.

The image was stamped onto Copic Marker X-Press It Blending Card and coloured in with Copic Markers. I fussy cut around the image and added some U-Line double-sided tape to the back of it. The images was then popped up onto card. I added the words “Thank You” that I had turned into stickers earlier to complete the card.

Card Recipe:

Stamp: Gladiolas – TDG038 (High Hopes Rubber Stamps)

Inks: Memento – Tuxedo Black

Paper: Copic Marker X-Press It Blending Card, Hammermill – Premium Colour 100 lb., Recollections – Matte Gold Foil cardstock, Crafter’s Consortium – The Essential Craft Papers – Ink Drops – Ocean (6″ x 6″)

Die Cuts: PaperCrafter Today – 15 Die Cut Sentiment Set

Tools: MISTI – Most Incredible Stamping Tool, U-Line double-sided tape, Anna Griffin Empress Mini Machine

Image coloured with Copic Markers:

Flower: B79, B66, B63, Y35, YR12

Leaves and Stem: G28, YG67, YG25, YG11

Hope you like it and have a fantastic week!

You can find lots of inspiration from the Design Team Divas at the High Hopes blog, and the High Hopes Rubber Stamps Facebook Fan page plus you can also follow us on
Instagram, Twitter and Pinterest.

Also entered into #Farmquest Challenge Blog #4.  “https://farmquestchallenge.blogspot.com/2022/05/fqcb-theme-4-poultry-and-wire-or-metal.html”.

High Tides


Sharing a card I made today using KLM Digital Design –  Beach Gnome from the new May 2022 release. This image also comes with 2 more sentiments, “Life is better at the beach” and “Enjoy the little things”.

I imported the image and sentiment into Microsoft Word and printed them out onto Copic Marker X-Press It Blending Card. The image was coloured in with Copic markers. I created the pattern on his shirt to make it look a little wild. Using scissors, I fussy cut around the coloured image. I also fussy cut around the sentiment, splitting it into 2 parts. I ran them through a Xyron Create a Sticker and adhered them directly to Recollections – Black cardstock. Once again, I fussy cut around the sentiments. I added U-Line double-sided tape to the backs of the sentiment and image and set them aside.

I created a 5.5″ x 4.25″ card base using Hammermill – Premium Colour 100 lb. cardsstock. I cut another panel to be the same size as the card base. Using Tim Holtz Distress Ink – Squeezed Lemonade ink, a Picket Fence – Blending Brush and Kraftin’ Kimmie – Sunburst stencil, I created the sunny background. I did this by first laying down the yellow background and then putting the stencil over top to make the sun rays a little brighter. Using Krafty Kolours – Sandy Shores ink, I created the sandy shore. For the waves, I thought the paper from Bo Bunny – Down by the Sea Collection was perfect. Using the coloured image as a guide for placement, I cut along the wavy lines with the piece measuring approximately 1.75″ x 4.25″. Using a finger dauber and Tim Holtz Distress Ink – Evergreen Bough, I inked along the top and bottom of the waves to remove the white. Using Tim Holtz Distress Inks – Tumbled Glass and a Picket Fence – Blending Brush, I added a bit of tint to the patterned paper. Using glue, I attached it to the background panel. I added in a small shadow under the sandals with Copic markers.

The card was now ready to assemble. I attached the panel to the base card using double-sided tape. I removed the tape backing from the image and sentiment and popped them both up onto the card. Using a button shank remover, I removed the backs to the Dress It Up Buttons. I applied some glue to the backs of each of them and placed them onto the card to finish it off.

Card Recipe:

Stamp and Sentiment:  Beach Gnome – KLM Digital Designs

Inks: HP Printer Grayscale, Tim Holtz Distress Ink – Squeezed Lemonade, Krafty Kolours – Sandy Shores, Tim Holtz Distress Inks – Tumbled Glass, Tim Holtz Distress Ink – Evergreen Bough

Paper: Copic Marker X-Press It Blending Card, Hammermill – Premium Colour 100 lb., Bo Bunny – Down by the Sea Collection (6″ x 6″ Paper Pad), Recollections – Black

Stencil: Kraftin’ Kimmie – Sunburst

Embellishments: Dress It Up – Ocean View, Dress It Up – Seashells At The Seashore

Miscellaneous: U-Line – 2 sided tape, Gelly Roll Sakura #10 Pen, Gelly Roll Sakura #5 Pen, Xyron Create a Sticker, Picket Fence – Blending Brushes

Image coloured with Copic Markers:

Skin: E21, E11, E04, E00, E000

Beard: E47, E44, E43, E41

Hat and Sandals: B26, B23, B21

Shirt: Y38, Y35, Y15, YR16, Gelly Roll Sakura #10 Pen

Bathing Suit: BG09, BG05, BG02, BG01

Sunglasses: BG09, BG05, BG00, Gelly Roll Sakura #5 Pen

Shadow Under Sandals: E35, E34, E33

Hope you like it and have a great week!

You can find more cards to inspire you at KLM Designs, KLM Digital Design Team and KLM Digital Designs on the Facebook Fan page from the rest of our design team.

Love One An-udder!!


It’s Wednesday, and this week, I made an Anniversary card using High Hopes Rubber Stamps Cow Hugs – TT136 for the image and Love An Udder – F205 for the sentiment. Love this adorable combination and thought it would be great for an Inspirational card or an Anniversary card!

To make my card this week, I began with a card base of Hammermill – Premium Colour 100 lb. cardstock, cut and scored to be 5.5″ x 4.25″. Doodle Bug Designs Inc. – Down on the Farm cardstock background paper was cut to the size of 5.5″ x 4.25″ and adhered directly to the base using double-sided tape. Tim Holtz Distress Ink – Black Soot and a finger dauber were used to ink around all of the edgs of the card. Using my Anna Griffin Empress Mini Machine and dies from Whimsy Stamps – Wavy Nested Frame Dies Set, I die cut one pattern out of Recollections – Black cardstock and a smaller cut from Copic Marker X-Press It Blending Card. Using PinkFresh Studio – Slim Stripes dies and my Anna Griffin Empress Mini Machine, I die cut some black stripes using the half-inch die from Recollections – Black cardstock. I added some U-Line double-sided tape to the backs of the 2 black pieces and popped them up onto the patterned background. Using scisssors, I cut off the excess from the black stripe after it was adhered to the base.

I stamped the main image and sentiment onto the Copic Marker X-Press It Blending Card using my MISTI and Memento – Tuxedo Black. The image was coloured in with Copic Markers. I used a Sakura Glaze – Black pen, and Gelly Roll Sakura #8 Pen to create the eyes. After the image was coloured in, I added some U-Line double-sided tape to it and popped it up onto the black die cut. Using my machine again, I die cut the sentiment using Gina K Designs – Sentiment Strips. This was popped up with Scrapbook Adhesives – Black 3D Foam Strips onto the black stripe. To finish off my card, I added 2 little button cows on either side of the sentiment from Dress It Up – In the Barnyard and Dress It Up – Mooove It.

Card Recipe:

Stamps: Cow Hugs – TT136 (High Hopes Rubber Stamps)

Sentiment: Love An Udder – F205 (High Hopes Rubber Stamps)

Inks: Memento – Tuxedo Black, Tim Holtz Distress Ink – Black Soot

Paper: Copic Marker X-Press It Blending Card, Hammermill – Premium Colour 100 lb., Doodle Bug Designs Inc. – Down on the Farm – 6″ x 6″ paper pad, Recollections – Black

Die Cuts: PinkFresh Studio – Slim Stripes, Whimsy Stamps – Wavy Nested Frame Dies Set (WSD382), Gina K Designs – Sentiment Strips

Tools: MISTI – Most Incredible Stamping Tool, U-Line double-sided tape, Anna Griffin Empress Mini Machine, Sakura Glaze – Black Pen, Gelly Roll Sakura #8 Pen, Dress It Up – In the Barnyard and Dress It Up – Mooove It

Image coloured with Copic Markers:

Cows: N9, N7, N5, N0, E42, E41, E40, R30, R02, R01, R00, R000 (Eyes – Sakura Glaze – Black, Gelly Roll Sakura #8 Pen)

Leaves and Grass: G99, YG67, YG17, G21, G07, G05

Flowers: B29, B26, B24, B21, YR16, YR12, E15, Y35, Y11, Y08, Y06, Y04, R46, R14, R08

Bow and Cow Bell: R46, R14, R08, Y38, Y35, Y17, Y15

Sky and Clouds: B60, B01, B00, B000, B0000

Hope you like it and have a fantastic week!

You can find lots of inspiration from the Design Team Divas at the High Hopes blog, and the High Hopes Rubber Stamps Facebook Fan page plus you can also follow us on
Instagram, Twitter and Pinterest.

Hedgies Happy Birthday!!


It’s Wednesday, and this week, I made a birthday card using High Hopes Rubber Stamps Hedgie Stack – TDG027 for the image and Mini Sentiment Set #1 – HLL001 for the sentiment. These little hedgies are excited to wish someone special a very Happy Birthday!

To make my card this week, I began with a card base of Hammermill – Premium Colour 100 lb. cardstock, cut and scored to be 5.5″ x 5.5″. I cut the Crafter’s Companion – Luxury Cardstock – Gold cardstock background paper to the size of 5.5″ x 5.5″ and adhered it directly to the base using double-sided tape. AITOH Origami – Print Chiyogami – Butterflies paper was cut to the size of 5.25″ x 5.25″ and glued on top of the gold paper. Using my Couture Creations – Go Power and Emboss and PinkFresh Essentials: Folk Edge Squares, I die cut another square from Crafter’s Companion – Luxury Cardstock – Gold and Copic Marker X-Press It Blending Card. I popped up the gold die cut onto the floral background using U-Line double-sided tape. I stamped the main image onto the Copic Marker X-Press It Blending Card using my MISTI and Memento – Tuxedo Black.

The image was coloured in with Copic Markers. I used a Gelly Roll Sakura #5 Pen to create some more texture in the fur by just dabbing it everywhere. I’m hoping that it looks like little spikes at the end of their fur. I applied U-Line double-sided tape to the back of the coloured image and popped it up onto the gold die-cut. I stamped the sentiment using my MISTI and Memento – Tuxedo Black ink onto Copic Marker X-Press It Blending Card. Using a 3/4″ punch, I punched out the circle surrounding the sentiment. Then, using my Cuttlebug and My Creative Time – Bunch of Fun Circle Dies, I die cut a slightly larger circle out of a scrap piece of gold paper from Crafter’s Companion – Luxury Cardstock – Gold. I ran the sentiment through my Xyron Create a Sticker and attached it directly to the gold circle. Using some U-Line double-sided tape, I popped it up onto the coloured image. Lastly, to complete my card, I added in some PinkFresh Studio – Essentials Jewel Mix and flowers gems from the Dollar Store.

Card Recipe:

Stamps: Hedgie Stack – TDG027 (High Hopes Rubber Stamps)

Sentiment: Mini Sentiment Set #1 – HLL001 (High Hopes Rubber Stamps)

Inks: Memento – Tuxedo Black

Paper: Copic Marker X-Press It Blending Card, Hammermill – Premium Colour 100 lb., Crafter’s Companion – Luxury Cardstock – Gold, AITOH Origami – Print Chiyogami – Butterflies

Die Cuts: PinkFresh Essentials: Folk Edge Squares, My Creative Time – Bunch of Fun Circle Dies

Tools: MISTI – Most Incredible Stamping Tool, U-Line double-sided tape, Couture Creations – Go Power and Emboss, Gelly Roll Sakura #10 Pen, Gelly Roll Sakura #5 Pen, PinkFresh Studio – Essentials Jewel Mix, Cuttlebug

Image coloured with Copic Markers:

HedgeHogs: T7, T5, T4, T3, E51, E50, R30, R22, R21, R20 (Eyes – Sakura Glaze – Black, Gelly Roll Sakura #10 Pen), Gelly Roll Sakura #5 Pen

Leaves and Grass: G99, YG67, YG17, YG13, G21

Flowers: Y17, RV02, RV10, RV00

Tree and Limbs: E31, E27, E25, E23

Sky: B02, B01, B00, B000, B0000

Hope you like it and have a fantastic week!

Check out more adorable images in the new “Spring Fever Release” at High Hopes Rubber Stamps!

You can find lots of inspiration from the Design Team Divas at the High Hopes blog, and the High Hopes Rubber Stamps Facebook Fan page plus you can also follow us on
Instagram, Twitter and Pinterest.

Birthday Wishes!!


It’s Wednesday, and this week, I made a card using High Hopes Rubber Stamps Fairy Flight – SLF036  for the image and Birthday Wishes – FDG024  for the sentiment. There are a lot of birthdays in our family during March, friends too, and this little birthday fairy is on her way to grant one of them their special birthday wishes.

To make my card this week, I began with a card base of Hammermill – Premium Colour 100 lb. cardstock, cut and scored to be 5.5″ x 4.25″. Scrapbook.com – Roses Smooth Cardstock was adhered to the base using double-side tape.  I die cut Creative Memories – Mermaid Cove Designer Paper Pack using my Cuttlebug and My Creative Time – Rectangle Frame Layers and adhered it to the rose background using double-sided tape. Using Gina Marie Designs – Petite Looped Lace Rectangle Die Set, I die cut Copic Marker X-Press It Blending Card.

The image and sentiment were then stamped with my MISTI and Memento – Tuxedo Black ink onto the Copic Marker X-Press It Blending Card cardstock. The image was coloured in with Copic Markers. I added some stars onto the dress with Gelly Roll Sakura #5 Pen and then used Wink of Stella – Clear over top of the flower, dress, shoes and wings. Using R85 and R83 Copic markers, I went around the edges of the die cut for the image to create a solid border. I fussy cut around the sentiment and ran it through my Xyron Create a Sticker. I attached the sentiment to Scrapbook.com – Peppermint Smooth Cardstock and fussy cut around it again. The card was now ready to finish being assembled. I applied U-Line double-sided tape to the back of the coloured image and sentiment and popped them up onto the card. Lastly, I added in some YNS Gumdrops to complete the card.

Card Recipe:

Stamps: Fairy Flight – SLF036 (High Hopes Rubber Stamps)

Sentiment: Birthday Wishes – FDG024 (High Hopes Rubber Stamps)

Inks: Memento – Tuxedo Black

Paper: Copic Marker X-Press It Blending Card, Hammermill – Premium Colour 100 lb., Scrapbook.com – Peppermint Smooth Cardstock – 4.25″ x 5.5″, Scrapbook.com – Roses Smooth Cardstock – 4.25″ x 5.5″, Creative Memories – Mermaid Cove Designer Paper Pack

Die Cuts: My Creative Time – Rectangle Frame Layers, Gina Marie Designs – Petite Looped Lace Rectangle Die Set

Tools: MISTI – Most Incredible Stamping Tool, U-Line double-sided tape, Cuttlebug, Wink of Stella – Clear, Pental Sunburst Metalic Med Gel Pen – Gold, Gelly Roll Sakura #5 Pen, Xyron Create a Sticker, YNS Gumdrops

Image coloured with Copic Markers:

Skin: E21, E11, E04, E00, E000, R22, R20, (Eyes – Gelly Roll Sakura #5 Pen)

Hair: E47, E44, E43, E41

Dress, Shoes and Heart: R85, R83, R81, RV00, RV000, E15, YR24, Y35, Y08, Wink of Stella – Clear, Gelly Roll Sakura #5 Pen

Wings: B000, BG000, RV0000, V0000, Y000, Wink of Stella – Clear

Wand and Flower: R85, R83, R81, RV00, RV000, E15, YR24, Y35, Y19, Y08, Wink of Stella – Clear, Pental Sunburst Metalic Med Gel Pen – Gold

Socks: C1, C00

Hope you like it and have a fantastic week!

You can find lots of inspiration from the Design Team Divas at the High Hopes blog, and the High Hopes Rubber Stamps Facebook Fan page plus you can also follow us on
Instagram, Twitter and Pinterest.

Every Little Moment!!


Today, I’m sharing a card using Dreamerland Crafts stamps called When You Love Someone – D20005 and Mix and Match Collection – Railing and Lampost – M18309 for the main images and Mix and Match – DCS19095 for the sentiment. Loved combining these stamps as they could be used for Valentine’s Day, Anniversary or just a note to let your special someone know how much you love them.

To make this card I used a base of 5.5″ x 4.25″ using Hammermill – Premium Colour 100 lb. cardstock. I die cut Copic Marker X-Press It Blending Card paper with my Cuttlebug and My Creative Time – Rectangle Frame Layers. Using my MISTI and Memento – Tuxedo Black ink, I stamped the Dreamerland image When You Love Someone – D20005 and then stamped it again onto Post-It Note paper. I cut around the image on the Post-It Note paper and applied it over top of my stamped image. Once this was in place, I used my MISTI and Memento – Tuxedo Black ink to stamp the Dreamerland image Mix and Match Collection – Railing and Lampost – M18309. The railings were stamped on both sides of the image and then again using my MISTI, I stamped the lamp posts multiple times. I also used Copic – W9 to make the bottom halves a little darker as well. This was done on both sides of the main image. I had used some Post-It note paper to put on both ends so that the fence wouldn’t go past the small border around the card when I was stamping. I coloured in the image with Copic Markers. Once the image and background were coloured in, I stamped the sentiment using VersaMark ink, my MISTI and Ranger Embossing Powder White – Extra Fine Detail. Lastly, some stars were added to the sky using Gelly Roll Sakura #5 Pen and Gelly Roll Sakura #10 Pen.  I adhered the completed image to some Recollections – Black cardstock using double-sided tape. To finish off the card, I applied U-Line double-sided tape and popped the completed image and matting onto the base card.

Card Recipe:

Stamps: When You Love Someone – D20005 – Dreamerland Crafts, Mix and Match Collection – Railing and Lampost – M18309 – Dreamerland Crafts

Sentiment: Mix and Match – DCS19095 – Dreamerland Crafts

Inks: Memento – Tuxedo Black, Versamark

Paper: Copic Marker X-Press It Blending Card, Hammermill – Premium Colour 100 lb., Recollections – Black cardstock

Die Cuts: My Creative Time – Rectangle Frame Layers

Embossing Powed: Ranger Embossing Powder White – Extra Fine Detail

Tools: MISTI – Most Incredible Stamping Tool, Gelly Roll Sakura #5 Pen, Gelly Roll Sakura #10 Pen

Image coloured with Copic Markers:

Skin: E21, E11, E00, E000, R30, R20, Eyes – Gelly Roll Sakura #10 Pen for highlight

Hair: E47, E44, E43, E41

Dress and Shoes: R83, R81, RV00, RV000, E23, 21

Jeans: B26, B23, B21

Boots: E27, E25, E23, E21

Shirt: BG99, YG67, YG17, G21

Walkway: E55, E53, E51, E50, W4, W3

Night Sky and Lights: B99, B97, B95, B93, Y02, Y000, Gelly Roll Sakura #5 Pen, Gelly Roll Sakura #10 Pen

Hope you like it and have a great week!

You can find more cards to inspire you at Dreamerland Crafts and Pointer Scrapbooking on the Facebook Fan pages from the rest of our design team.

Year of the Tiger – 2022!!


Today, I’m sharing the Chinese New Year cards using stamps called Safari Digital Stamp – PickledPotpourriDigi and Cute Tiger – AlexShopsArt. Every year, I enjoy make cards and sending them out to my friends here and overseas hoping to bring them some happiness in bringing in the New Year!

To make this card I first imported the images into Microsoft Word. I sized the tiger for the front of the card and created my sentiment and then added the “Cute Tiger” for the inside of the card. I printed out 8 copies of each onto Copic Marker X-Press It Blending Card. I coloured in all of the images with Copic Markers and then I fussy cut around all of the tiger faces for the front of the card. The inside of the card was die cut using My Creative Time – Rectangle Frame Dies and my Cuttlebug. The letters and numbers were cut using my Cricut Explore and Crafter’s Companion – Luxury Cardstock – Gold cardstock. I ran all of these through my Xyron Create a Sticker and my Xyron Creative Station.

To assemble the card, I used Hot Buy – Reds – Cards and Envelopes (5.5″ x 4.25″) for my base. I placed the words and numbers onto the front of the card and added in the Tiger face in place of the “0”. I applied double-sided tape to the backs of the coloured images die-cut previously for the inside of  the card and adhered it directly to the base.


Altogether, I made 8 individual cards this year.

Card Recipe:

Stamps: Safari Digital Stamp – PickledPotpourriDigi, Cute Tiger – AlexShopsArt

Inks: HP Printer Grayscale

Paper: Copic Marker X-Press It Blending Card, Crafter’s Companion – Luxury Cardstock – Gold, Hot Buy – Reds – Cards and Envelopes (5.5″ x 4.25″)

Die Cuts: Cricket Explore – Text: Rockwell Condensed Bold, Cricut – DonJuan Cartridge, My Creative Time – Rectangle Frame Dies

Tools: Gelly Roll Sakura #5 Pen, Xyron Create a Sticker, Xyron Creative Station

Image coloured with Copic Markers:

Tiger – Front: W9, W5, W3, W1, W00, YR16, YR15, YR12, E71, E15, RV00, R02, R00, G03, YG13, Gelly Roll Sakura #5 Pen, Copic MultiLiner SP 0.5

Tiger – Inside: W9, W3, W2, W1, W00, C1, C00, E71, E15, R89, R59, R39, R22, R20, R02, R00, YR16, YR15, YR12, G07, G03, YG13, YG00, Gelly Roll Sakura #5 Pen, Copic MultiLiner SP 0.5

Hearts: R37, R35

Butterflies: V15, V12, V00

Tiger’s Fur: Prismacolor Premier Pencils: Sienna Brown (PC945), Burnt Ochre (PC943), Orange (PC918)


Hope you like it and have a great week!

You can find more cards to inspire you at Dreamerland Crafts and Pointer Scrapbooking on the Facebook Fan pages from the rest of our design team.

You Got This!!


It’s Wednesday, and this week, I made a card using High Hopes Rubber Stamps Lasso Some Snow – TDG021  for the main image and Don’t Worry – FDG021 for the sentiment. We all need a little bit of encouragement every now and then and this little snowman is here to give us some.

To make my card this week, I began with a card base of Hammermill – Premium Colour 100 lb. cardstock, cut and scored to be 5.5″ x 4.25″.  I used Echo Park Paper Co. – My Favorite Winter cardstock cut to the same size as the base card for the background. I attached this to the base using double-sided tape. Using my Cuttlebug, a mixture of square dies from My Creative Time -Stitched Squares Inside and Out and Waffle Flower – Nesting Square dies, I die cut cardstock from Scrapbook.com Neutrals Smooth Cardstock and also Copic Marker X-Press It Blending Card. I applied double-sided tape to the back of the tan square and applied it directly to the background. U-Line double-sided tape was added to the back of the dark brown square and popped up onto the centre of the tan square.

With my MISTI and Memento – Tuxedo Black ink, I stamped the image onto the Copic Marker X-Press It Blending Card cardstock square and coloured it in with Copic markers. Gelly Roll Sakura #10 Pen was used to create the snow in the sky. Sakura Glaze – Black and Gelly Roll Sakura #5 Pen were used on the eyes of the snowman. I applied U-line douhble-sided tape to the back of the completed image and popped it up onto the centre of the dark brown square.

With my MISTI and Memento – Tuxedo Black ink, I stamped the sentiment onto Recollections – White cardstock and then die cut it out using my Cuttlebug and My Creative Time – Ribbon End Dies. I inked around the edges using Copic – E59 marker to give it a dark brown border. I used my knife to remove the double border from the piece left behind and then traced the shape of the ribbon onto the remaining piece of Scrapbook.com Neutrals Smooth Cardstock. I cut this out with my cutter and scissors. U-Line double-sided tape was applied to both pieces and the completed sentiment was popped up onto the card below the main image to complete the card.

Card Recipe:

Stamp: Lasso Some Snow – TDG021 (High Hopes Rubber Stamps)

Sentiment: Don’t Worry – FDG021 (High Hopes Rubber Stamps)

Inks: Memento – Tuxedo Black

Paper: Copic Marker X-Press It Blending Card, Hammermill – Premium Colour 100 lb., Echo Park Paper Co. – My Favorite Winter (6″ x 6″), Scrapbook.com – Neutrals Smooth Cardstock (5.5″ x 4.25″), Recollections – White cardstock

Die Cuts: My Creative Time -Stitched Squares Inside and Out, Waffle Flower – Nesting Square dies, My Creative Time – Ribbon End Dies

Tools: MISTI – Most Incredible Stamping Tool, U-Line double-sided tape, Gelly Roll Sakura #10 Pen, Gelly Roll Sakura #5 Pen, Sakura Glaze – Black, Cuttlebug

Image coloured with Copic Markers:

Snowman: B60, C9, C7, C5, C00, E49, YR18, YR16, YR12, Colorless Blender (Eyes – Sakura Glaze – Black, Gelly Roll Sakura #5 Pen)

Hats, Mitts and Scarf: B99, B977, B95

Coat: E51, E50, E37, E35, E34, E33, E31

Birds: E59, E37, E35

Fence: E29, E27, E25, E23, E21

Wheel and Rope: E77, E74, E47, E44, E43, Y35, YR31

Sky: B04, B02, B01, B00

Snow: B000, B60, C00, Colorless Blender, Stickles – Diamond

Hope you like it and have a fantastic week!

You can find lots of inspiration from the Design Team Divas at the High Hopes blog, and the High Hopes Rubber Stamps Facebook Fan page plus you can also follow us on
Instagram, Twitter and Pinterest.

Beautiful Day!!


It’s Wednesday, and this week, I made a card using High Hopes Rubber Stamps Winter Kitty – SDG006  for the main image and Beautiful Day – FDG013 for the sentiment. We just had a major snowfall over the last few days and this little kitty is all bundled up and ready to play!

Growing up we had a lot of snow during the winter and couldn’t wait to put on our mitts and snow boots and go out to play. We had huge snow banks in the schoolyard across the street and would toboggan down them or just slide down in our snow suits! LOL! It was sooooo much fun! Sometimes we even made big snow forts in the backyard with tables and chairs made out of ice and snow. We hardly spent anytime indoors and didn’t usually go back into the house until we had to or we were turning blue because it was so cold out, but even then we still wanted to continue playing outdoors. LOL!

To make my card this week, I began with a card base of Hammermill – Premium Colour 100 lb. cardstock, cut and scored to be 5.5″ x 4.25″.  I used Scrapbook.com – Rainbow Smooth Cardstock for the main background paper. It was already the same size as the base, so no cutting had to be done. To get more use out of the same paper, I had cut the oval frame using my Cuttlebug and Hero Arts – Infinity Die Ovals first. Then, I placed the Rainbow cardstock onto the card base using double-sized tape. I die cut the square background using My Creative Time -Stitched Squares Inside and Out and Pebbles – Winter Wonderland paper and the rectangle to the size of 4″ x 4″. The rectangle was cut from from the same paper pack to the size of 1.25″ x 4″. I inked around the edges of both shapes with a sponge dauber and Tim Holtz Distress Ink – Evergreen Bough. Using double-sided tape, I placed both shapes over the pink background and hid where I cut the oval with the square. I cut out a smaller oval using the same Hero Arts – Infinity Die Ovals and Copic Marker X-Press It Blending Card. I also cut out a 1.5″ circle using a circle punch. Lastly, I die cut the scalloped circle using WeR Memory Keepers – Quickutz Nesting Scallops dies and Hot Buy Craft Smart – Holiday Glitz Glitter Paper.

With my MISTI and Memento – Tuxedo Black ink, I stamped the image onto the Copic Marker X-Press It Blending Card cardstock oval and the sentiment onto the circle. I coloured in the image with Copic markers and then added some Ranger – Emboss It Pen Clear to the bottom of the oval and applied WOW! Sparkling Snow Embossing Glitter. I heat embossed this and added more embossing powder several times to create a thicker layer with my Marvy Uchida – Embossing Heat Tool. Then I added some Cosmic Shimmer Fluffy Stuff and heat embossed it as well to puff it up. Gelly Roll Sakura #10 Pen was used to create the snow in the sky. Sakura Glaze – Black and Gelly Roll Sakura #5 Pen were used on the eyes and nose of the cat.

I inked around the edges of the large pink oval and the circle with Tim Holtz Distress Ink – Picked Raspberry. I applied the coloured image directly to the pink oval and the sentiment circle to the scalloped circle using some liquid glue. Both shapes were then popped up onto the card using U-Line double-sided tape. To completed the card and add in some extra sparkle, I applied some YNS Gumdrops – Winter Wonderland to the background patterned paper.

Card Recipe:

Stamp: Winter Kitty – SDG006 (High Hopes Rubber Stamps)

Sentiment: Beautiful Day – FDG013 (High Hopes Rubber Stamps)

Inks: Memento – Tuxedo Black, Tim Holtz Distress Ink – Evergreen Bough, Tim Holtz Distress Ink – Picked Raspberry, Ranger – Emboss It Pen Clear

Paper: Copic Marker X-Press It Blending Card, Hammermill – Premium Colour 100 lb., Scrapbook.com – Rainbow Smooth Cardstock (4.25″ x 5.5″), Pebbles Winter Wonderland 6″ x 6″, Hot Buy Craft Smart – Holiday Glitz Glitter Paper 12″ x 12″

Die Cuts: My Creative Time -Stitched Squares Inside and Out, Hero Arts – Infinity Die Ovals, WeR Memory Keepers – Quickutz Nesting Scallops, 1.5″ Circle Punch

Tools: MISTI – Most Incredible Stamping Tool, U-Line double-sided tape, Gelly Roll Sakura #10 Pen, Gelly Roll Sakura #5 Pen, Sakura Glaze – Black, Cuttlebug, YNS Gumdrops – Winter Wonderland

Image coloured with Copic Markers:

Kitty: N7, N5, N3, R02, R00, RV66, RV63, RV55 (Eyes – Sakura Glaze – Black, Gelly Roll Sakura #5 Pen)

Sky: B05, B04, B02, Gelly Roll Sakura #10 Pen

Snow: WOW! Sparkling Snow Embossing Glitter, Cosmic Shimmer Fluffy Stuff, Marvy Uchida – Embossing Heat Tool

Hope you like it and have a fantastic week!

You can find lots of inspiration from the Design Team Divas at the High Hopes blog, and the High Hopes Rubber Stamps Facebook Fan page plus you can also follow us on
Instagram, Twitter and Pinterest.

Good Times!!


It’s Wednesday, and this week, I made a card using High Hopes Rubber Stamps Bird Song – TDG016  for the main image and Good Times – FDG014 for the sentiment. These little birdie friends know how to whistle a tune. Unfortunately, I myself never mastered how to whistle! I’ve tried over the years, but just can’t seem to do it. LOL!

To make my card this week, I began with a card base of Hammermill – Premium Colour 100 lb. cardstock, cut and scored to be 5.5″ x 4.25″.  I used Scrapbook.com – Brights Smooth Cardstock for the background paper. This paper is great because it’s already cut to size which makes it so easy. I applied it to the base using double-sided tape. Using my Cuttlebug and Your Next Die – Stitched Frame Snowfall Hill die set, I die cut the centre piece from Copic Marker X-Press It Blending Card and the frame from Crafter’s Companion – Luxury Cardstock – Gold.

With my MISTI and Memento – Tuxedo Black ink, I stamped the image onto the Copic Marker X-Press It Blending Card cardstock and the sentiment onto Recollections – White cardstock. I coloured in the image with Copic markers and then added some Stickles – Diamond and Stickles – Waterfall to the parts of the snow to make it sparkly. Gelly Roll Sakura #10 Pen was used to create the snow in the sky. To make the eyes stand out a little more, I used Sakura Glaze – Black and then added a white dot using Gelly Roll Sakura #5 Pen. Once the stickles were dry, I turned the coloured image and frame over and taped them together on the back with some Scotch tape to keep the 2 pieces together. U-line double-sided tape was then applied and I turned it over again and popped it up onto the card. The sentiment was die cut using my Cuttlebug and Essentials by Tattered Lace Dies – Easel Slider. I inked around the edges with Sharpie – Gold Medium Point – Water Based Paint pen, added U-Line double-sided tape to the top half of the sentiment and added it on top of the image. Lastly I added some YNS Gumdrops – White Sugar and Sparkle to complete the card.

Card Recipe:

Stamp: Bird Song – TDG016 (High Hopes Rubber Stamps)

Sentiment: Good Times – FDG014 (High Hopes Rubber Stamps)

Inks: Memento – Tuxedo Black

Paper: Copic Marker X-Press It Blending Card, Hammermill – Premium Colour 100 lb., Scrapbook.com – Brights Smooth Cardstock (4.25″ x 5.5″), Recollections – White, Crafter’s Companion – Luxury Cardstock – Gold

Die Cuts: Your Next Die – Stitched Frame Snowfall Hill, Essentials by Tattered Lace Dies – Easel Slider

Tools: MISTI – Most Incredible Stamping Tool, U-Line double-sided tape, Gelly Roll Sakura #10 Pen, Gelly Roll Sakura #5 Pen, Sakura Glaze – Black, Stickles – Diamond, Stickles – Waterfall, Cuttlebug, YNS Gumdrops – White Sugar and Sparkle

Image coloured with Copic Markers:

Bird1 and Scarf: R59, R39, R37, R35, R29, R27, BG09, BG09, BG05, BG02, BG01, BG000 (Eyes – Sakura Glaze – Black, Gelly Roll Sakura #5 Pen)

Bird2 and Scarf: Y17, Y15, Y13, Y11, Y02, Y00, BG72, BG57, BG49, BG32, BG11, Gelly Roll Sakura #5 Pen

Bird3 and Scarf: R56, R46, R37, R24, R22, C9, C7, C5, G16, G14, YG23, YG03

Beaks and Claws: YR18, YR14, YR12, Y19, Y08

Pine Needles: G29

Sky: B05, B04, B02, B01, Gelly Roll Sakura #10 Pen

Snow: C1, Stickles – Diamond, Stickles – Waterfall

Hope you like it and have a fantastic week!

You can find lots of inspiration from the Design Team Divas at the High Hopes blog, and the High Hopes Rubber Stamps Facebook Fan page plus you can also follow us on
Instagram, Twitter and Pinterest.

Friendship Warms The Heart!!


It’s Wednesday, and this week, I made a card using Friends Snooze – TDG013 by High Hopes Rubber Stamps for the main image and Friendship – FDG023 (High Hopes Rubber Stamps) for the sentiment. Pop on over to High Hopes Rubber Stamps and see all of the wonderful new images as we celebrate our Winter Friends Release!

To make my card this week, I began with a card base of Hammermill – Premium Colour 100 lb. cardstock, cut and scored to be 5.5″ x 4.25″.  I cut the background paper from American Crafts – Jack Frost to be the same size and attached it directly to the base using double-sided tape. Tim Holtz Distress Ink – Chipped Sapphire was used to ink around the outside of the card. Using my Cuttlebug, My Creative Time – Rectangle Frame Layers, My Creative Time – Rectangle Frame Dies, Gina Marie Designs – Nested Scalloped Stitched Rectangles, I die cut the Copic Marker X-Press It Blending Card, Scrapbook.com – Peppermint Smooth Cardstock and Crafter’s Companion – Luxury Cardstock – Ice Blue Pack. Using U-line double-sided tape, I popped up each of the layers onto the card base.

Using my MISTI and Memento – Tuxedo Black ink, I stamped the image onto Copic Marker X-Press It Blending Card cardstock and the sentiment onto Recollections – White cardstock. I coloured in the image with Copic markers and then added some Stickles – Diamond to the parts of the snow to make it sparkly. Gelly Roll Sakura #5 Pen was used to create a starry night sky. I added U-line double-sided tape to the completed image and popped it up onto the card. The sentiment was die cut using my Cuttlebug and Poppystamps – Christmas Quotes. I inked around the edges with Tim Holtz Distress Ink – Chipped Sapphire and glued it onto the top of the image at an angle to complete the card.

Card Recipe:

Stamp: Friends Snooze – TDG013 (High Hopes Rubber Stamps)

Sentiment: Friendship – FDG023 (High Hopes Rubber Stamps)

Inks: Memento – Tuxedo Black, Tim Holtz Distress Ink – Chipped Sapphire

Paper: Copic Marker X-Press It Blending Card, Hammermill – Premium Colour 100 lb., American Crafts – Jack Frost 6 x 6 in., Crafter’s Companion – Luxury Cardstock – Ice Blue Pack, Scrapbook.com – Peppermint Smooth Cardstock – 4.25″ x 5.5″, Recollections – White

Die Cuts: My Creative Time – Rectangle Frame Layers, My Creative Time – Rectangle Frame Dies, Poppystamps – Christmas Quotes, Gina Marie Designs – Nested Scalloped Stitched Rectangles

Tools: MISTI – Most Incredible Stamping Tool, U-Line double-sided tape, Gelly Roll Sakura #10 Pen, Gelly Roll Sakura #5 Pen, Sakura Glaze – Black, Stickles – Diamond, Cuttlebug

Image coloured with Copic Markers:

Bear and Scarf: C9, C7, C5, C4, C3, E27, E25, E23, BG09, BG05, BG02, BG01 (Eyes and Nose – Sakura Glaze – Black)

Bird, Scarf and Hat: R46, R22, R14, R08, YR18, YR15, BG72, BG57, BG32, BG11, Gelly Roll Sakura #5 Pen

Pine Needles: G29

Sky: B99, B97, B95, B93, Gelly Roll Sakura #5 Pen

Snow: B60, B0000, BV20, BG0000, Colorless Blender, Stickles – Diamond

Hope you like it and have a fantastic week!

You can find lots of inspiration from the Design Team Divas at the High Hopes blog, and the High Hopes Rubber Stamps Facebook Fan page plus you can also follow us on
Instagram, Twitter and Pinterest.

Christmas Wreath!!!


It’s Wednesday, and this week, I made a Christmas card using Wreath – TDG012 by High Hopes Rubber Stamps for the main image and Merry Christmas – FDG008 (High Hopes Rubber Stamps) for the sentiment. We love to decorate our home with Christmas wreaths outside and on our door! Do you decorate with Christmas wreaths too?

To make my card this week, I began with a card base of Hammermill – Premium Colour 100 lb. cardstock, cut and scored to be 5″ x 5″. I die cut Recollections – Burgundy to be the same size as the base and adhered it to the card using double-sided tape. DCWV – Holiday Cheer was cut to the size of 4.75″ x 4.75″ and a Sharpie – Medium Point Gold Water based paint was used to go around all of the edges. This was adhered to the base background using liquid glue. I die cut Copic Marker X-Press It Blending Card with my Cuttlebug and Crafting Desert Diva’s – Stitched in Circle Dies. With my MISTI and Memento – Tuxedo Black ink, I stamped the image onto the die cut and the sentiment onto Copic Marker X-Press It Blending Card cardstock. I coloured the image in with Copic markers and coloured in some of the berries with a Pental Sunburst Metalic Med Gel Pen – Gold. A Gelly Roll Sakura #5 Pen was used to add the little white dots on all of the red berries. Once the image was coloured in, I used the Sharpie – Medium Point Gold Water based paint to go around the scalloped part of the circle. I cut around the sentiment to the size of 1.25 x 2-1/8″ and then used a corner punch. Once again, I went around the edges with a Sharpie – Medium Point Gold Water based paint pen. I adhered the the finished image and sentiment to the base card using U-Line double-sided tape. Lastly, I applied Nuvo Crystal Drops – Autumn Red to complete the card.

Card Recipe:

Stamp: Wreath – TDG012 (High Hopes Rubber Stamps)

Sentiment: Merry Christmas – FDG008 (High Hopes Rubber Stamps)

Inks: Memento – Tuxedo Black

Paper: Copic Marker X-Press It Blending Card, Hammermill – Premium Colour 100 lb., DCWV – Holiday Cheer (6″ x 6″), Recollections – Burgundy

Die Cut: Crafting Desert Diva’s – Stitched in Circle Dies (Retired)

Nuvo Crystal Drops: Autumn Red

Tools: MISTI – Most Incredible Stamping Tool, U-Line double-sided tape, Gelly Roll Sakura #5 Pen, Sharpie – Medium Point Gold Water based paint

Image coloured with Copic Markers:

Wreath: G99, G21, YG67, YG17, R39, R27, R22, E27, E25, E23, G99, Pental Sunburst Metalic Med Gel Pen – Gold, Gelly Roll Sakura #5 Pen

Background: BG000, BG0000, Sharpie – Medium Point Gold Water based paint

Hope you like it and have a fantastic week!

You can find lots of inspiration from the Design Team Divas at the High Hopes blog, and the High Hopes Rubber Stamps Facebook Fan page plus you can also follow us on
Instagram, Twitter and Pinterest.

Wish Upon A Star!!


Today, I’m sharing a card using Dreamerland Crafts stamps called Being With Each Other – D17011.  This boy and his little kitty are enjoying the moment and wishing upon a star!

To make this card I used a base of 5.5″ x 4.25″ using Hammermill – Premium Colour 100 lb. I stamped the image using my MISTI and Memento – Tuxedo Black ink onto Copic Marker X-Press It Blending Card which was cut to the size of 5-1/8″ x 3-7/8″. I coloured in the image with Copic Markers and added some stars in the sky using Gelly Roll Sakura #5 Pen, Gelly Roll Sakura #8 Pen and Gelly Roll Stardust – Clear pen.  I adhered the completed image to the base card using double-sided tape.

Card Recipe:

Stamp: Being With Each Other – D17011 – Dreamerland Crafts

Inks: Memento – Tuxedo Black

Paper: Copic Marker X-Press It Blending Card, Hammermill – Premium Colour 100 lb.

Tools: MISTI – Most Incredible Stamping Tool, Gelly Roll Sakura #5 Pen, Gelly Roll Sakura #8 Pen and Gelly Roll Stardust – Clear

Image coloured with Copic Markers:

Skin: E21, E11, E00, E000, R30, R22, R20,

Hair: E47, E44, E43, E41, Sakura Glaze – Black – Eyes

Sweater: BG72, BG57, BG32, BG11, BG09, BG05, BG02, BG01, R46, R14, R08

Jeans: B26, B23, B21

Boots: E27, E25, E23, E21

Kitten: T7, T5, T3, R02

Grass: G99, YG67, YG17, G21

Night Sky and Moon: B99, B97, B95, B60, C7, C2, C1, C0, C00, BV23, BV20, Y000

Hope you like it and have a great week!

You can find more cards to inspire you at Dreamerland Crafts and Pointer Scrapbooking on the Facebook Fan pages from the rest of our design team.