Tag Archive | Gina Marie Designs – Loopy Oval

Winter Friends!!


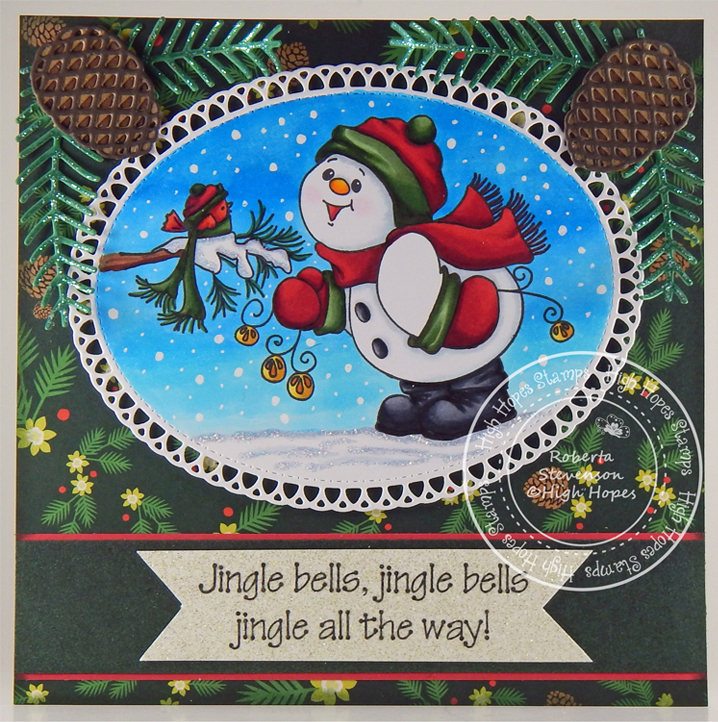
It’s Wednesday, and this week, I made a Christmas card using High Hopes Rubber Stamps Winter Friends – TT048 for the main image and Jingle All the Way – H040, for the sentiment. Snowmen are one of my favourite images to colour and how adorable is this happy snowman singing to his little friend?

To make my card this week, I began with a card base of 6″ x 6″ using AC Cardstock – White. I adhered American Crafts – “Kringle and Co” 6 x 6 in. cardstock to the base front. Red and green cardstock were cut to the sizes of 6″ x 1.25″ and 6″ x 1-1/8″ from some spare paper I had. I adhered the green to the red using double-sided tape and some glue to allow me to centre it. The combined strip was put through a Xyron Create a Sticker to keep it flat. I added this combined strip to the card approximately a .25″ up from the bottom. Tim Holtz Distress Ink – Rustic Wilderness was used to ink around all of the edges of the card and it was set aside to dry.

Using my Cuttlebug and paper from Copic Marker X-Press It Blending Card, I die cut the frame with Gina Marie Designs – Loopy Oval die cuts. The image was stamped onto the die cut using my MISTI and Memento – Tuxedo Black ink. I coloured in the image and then added the snow in the sky using a Gelly Roll Sakura #10 Pen. Stickles – Crystal was added to the snow on the ground and along the branches to give it some sparkle.  I set the image to the side to allow the Stickles time to dry.

I cut a piece of Recollections Christmas Ink Jet Printable Glitter Paper to the size of 4″ x 1″. Using my MISTI once again, I stamped the sentiment onto it using Memento – Tuxedo Black ink and then cut a fish tail on each end. U-Line double sided tape was added to the back of the sentiment and then it was popped up and centred in between the red and green stripe. U-Line double-sided tape was added to the back of the image and it was popped up onto the card above the sentiment once the Stickles had dried. Lastly, I die cut 2 pinecones and some pine leaves using my Cuttlebug and dies from Stampin’ UP! – Pretty Pines Thinlets die set. Liquid glue was used to pieced them altogether. I adhered these to the 2 upper corners of the card and then applied some Stickles – Crystal to the leaves to finish off the card.

Card Recipe:

Stamps: Winter Friends – TT048 (High Hopes Rubber Stamps)

Sentiment: Jingle All the Way – H040 (High Hopes Rubber Stamps)

Inks: Memento – Tuxedo Black, Tim Holtz Distress Ink – Rustic Wilderness

Paper: Copic Marker X-Press It Blending Card, AC Cardstock – White, American Crafts – “Kringle and Co” 6 x 6 in. (15.2 cm x 15.2 cm), Recollections Christmas Ink Jet Printable Glitter Paper

Die Cuts: Gina Marie Designs – Loopy Oval, Stampin’ UP! – Pretty Pines Thinlets (141851)

Tools: MISTI – Most Incredible Stamping Tool, U-Line double-sided tape, Stickles – Crystal, Cuttlebug, Xyron Create a Sticker

Image coloured with Copic Markers:

Snowman: BV20, B0000, YR68, Y38, Y18, R29, R24, RV00, Colorless Blender

Snowman Hat, Mittens and Scarf: G99, GY67, YG63, YG61, R59, R37, R35

Snowman Boots and Buttons: C9, C7, C5, C3

Bird: R46, R14, R08, Y17

Bird Hat and Scarf: G99, YG67, YG63, R59, R37, R35

Bells: YR27, YR23, Y15, Y11, Y00

Tree Branch and Pines: E29, E25, E23, G49

Snow: BV20, B0000, Colorless Blender, Gelly Roll Sakura #10 Pen, Stickles – Crystal

Sky: B04, B02, B01, B00

Hope you like it and have a fantastic week!

You can find lots of inspiration from the Design Team Divas at the High Hopes blog, and the High Hopes Rubber Stamps Facebook Fan page plus you can also follow us on
Instagram, Twitter and Pinterest.

Welcome The New Couple!!


Today, I’m sharing a Wedding card that I made for my cousin who recently got married using Dreamerland Crafts stamps called Welcome The New Couple – D18017 We wish them a very long and happy marriage as they begin their new journey together as one.

To make this card I used a base of 5.5″ x 4.25″ using Hammermill – Premium Colour 100 lb. cardstock. I die cut Copic Marker X-Press It Blending Card using my Anna Griffin Empress Mini Machine and Gina Marie Designs – Loopy Oval. The image was then stamped onto this die cut using my MISTI, Memento – Tuxedo Black ink and Welcome The New Couple – D18017 – Dreamerland Crafts stamp. I coloured in the image using copic markers and created the background. For the sentiment, I first ran all of the pieces of cardstock through my Xyron Create a Sticker. Then, using my Anna Griffin Empress Mini Machine and dies from PaperCrafter Today – 15 Die Cut Sentiment Set, I die cut the “Congratulations” 2 times from plain white cardstock and 1 time from Recollections – Matte Gold Foil cardstock. I then pieced them all together to give an embossing effect. I applied U-Line double-side tape to the back of the coloured image and popped it up on top of the base card. Lastly, I attached the sentiment to complete the card.

Card Recipe:

Stamps: Welcome The New Couple – D18017 – Dreamerland Crafts

Inks: Memento – Tuxedo Black

Paper: Copic Marker X-Press It Blending Card, Recollections – Matte Gold Foil cardstock, Hammermill – Premium Colour 100 lb.

Die Cuts: Gina Marie Designs – Loopy Oval, PaperCrafter Today – 15 Die Cut Sentiment Set

Tools: MISTI – Most Incredible Stamping Tool, Anna Griffin Empress Mini Machine, U-Line double-sided tape, Xyron Create a Sticker

Image coloured with Copic Markers:

Skin: E21, E11, E00, E000, R30, R30, R20

Hair: E47, E44, E43, E08, YR18, YR16, YR1

Dress and Shirt: BV20, Colorless Blender

Pants: T6, T4, T2

Shoes: 100, T9, T7, T5

Flowers and Greenery: G99, YG67, YG63, YG61, R37, R35, RV63, RV55

Sky and Clouds: B02, B01, B00, B000, B000, BV20, C00, Colorless Blender

Ground: YG25, YG23, YG11

Hope you like it and have a great week!

You can find more cards to inspire you at Dreamerland Crafts and Pointer Scrapbooking on the Facebook Fan pages from the rest of our design team.

Wishing You All The Best!!


Today, I’m sharing a Christmas card using Dreamerland Crafts stamps called Wishing You All The Best – D20010.  This little girl is on her way to bring you some Christmas Cheer!

To make this card I used a base of 6″ x 6″ using AC Cardstock – White. I cut the background paper to the same size using Recollections – Glisten and Glow paper and then using a Sharpie – Gold Medium Point – Water Based Paint pen, I outlined all sides. This was added directly to the base card using double-sided tape. Using my Cuttlebug and dies from Gina Marie Designs – Loopy Oval, the frame was cut out of Copic Marker X-Press It Blending Card. I stamped the image using my MISTI and Memento – Tuxedo Black ink onto the die cut and then using the Sharpie – Gold Medium Point – Water Based Paint pen, I inked around all of the outside edges. I coloured the image in with Copic markers and then applied Ranger – Emboss It Pen Clear to the fur trims for the hat and clothing. I applied WOW! Sparkling Snow Embossing Glitter to the inked areas and then heat embossed everything with my Marvy Heat Embossing Tool. Using 3M double-sided tape, I popped up the oval onto the main background. To finish off the card, I applied some Stickles – Golden Rod to the centres of some of the larger snowflakes.

Card Recipe:

Stamp: Wishing You All The Best – D20010 – Dreamerland Crafts

Inks: Memento – Tuxedo Black, Ranger – Emboss It Pen Clear

Paper: Copic Marker X-Press It Blending Card, Recollections – Glisten and Glow (6″ x 6″), AC Cardstock – White

Die Cuts: Gina Marie Designs – Loopy Oval

Stickles: Golden Rod

Embossing Powder: WOW! Embossing Glitter – White Puff Twinkle

Tools: MISTI – Most Incredible Stamping Tool, Cuttlebug,  Marvy Heat Embossing Tool, 3M VHB – 2 sided tape, Sharpie – Gold Medium Point – Water Based Paint

Image coloured with Copic Markers:

Skin: E21, E11, E00, E000, R30, R22, R20

Hair: E47, E44, E43

Clothing and Hat: R59, R37, R35, B70, C1

Boots: E27, E25, E23, E21

Flowers and Leaves: G99, YG67, YG17, YG11, G21, R46, R14, R08, Y18

Bow: BG09, BG05, BG02, BG01

Basket: E57, E55, E53, E51

Shadow: Y15, Y13, Y11

Hope you like it and have a great week!

You can find more cards to inspire you at Dreamerland Crafts and Pointer Scrapbooking on the Facebook Fan pages from the rest of our design team.

Birthday Presents and Cake!!


Sharing a birthday card that I made for a friend using a digital image from Polkadoodles called Cake Time Digi – Winnie Celebrations 2. I really love this awesome collection.

To make the card, I first imported the image and sentiment into Microsoft Word and then printed everything out onto Copic Marker X-Press It Blending Card using my HP Printer using High Quality Grayscale. I found this to be the best setting as it doesn’t smudge when you colour. Next, I used Gina Marie Designs – Loopy Oval dies to die cut the image out. The image was coloured in with Copic markers.

Using Hot Buy – Recollections – Jewel Tones – 5.5″ x 4.25″ cardstock as the base. I stamped the sentiment using Versa Fine – Onyx Black and Ranger – Clear Super Fine Detail embossing powder. Marvy Uchida – Embossing Heat Tool was used to heat the embossing powder. All of the edges of the card were inked with Tim Holtz Distress Ink – Picked Raspberry.

3M VHB – 2 sided tape was applied to the back of the die cut and attached directly to the base. Lastly to finish off the card, I added some Crafts – Rhinestone Stickers.

Card Recipe:

Stamp: Cake Time Digi – Winnie Celebrations 2 – Polkadoodles

Inks: HP Printer Grayscale, Tim Holtz Distress Ink – Picked Raspberry, Versa Fine – Onyx Black

Paper: Copic Marker X-Press It Blending Card, Hot Buy – Recollections – Jewel Tones

Die Cut: Gina Marie Designs – Loopy Oval

Embossing Powder: Ranger – Clear Super Fine Detail

Miscellaneous: Marvy Uchida – Embossing Heat Tool, 3M VHB – 2 sided tape, Crafts – Rhinestone Stickers

Image coloured with Copic Markers:

Skin: E21, E11, E00, E000, R22, R20

Hair: E47, E44, E43, E42

Dress and Shoes: B06, B04, B02, B01, RV66, RV63, RV55, RV52, E50, E30, Atyou Spica – Blossom – 14

Cake: RV55, RV02, RV00, E25, E23, G07, G02, Gelly Roll Sakura #5 Pen

Flowers in Hair: RV55, RV00, Y17, Y02, Y00

Presents: G02, G00, RV55, RV52, RV02, B02, Gelly Roll Sakura #10 Pen

Shadow: C3, C2, C1, Colorless Blender

Hope you like it and have a great week!