Today, I’m sharing a Christmas card that I made using Polkadoodles stamp called Delivering Candy – Winnie Angel. It’s hard to believe that Christmas is only a few days away. This little Christmas angel is all set to make someone’s Christmas very special.
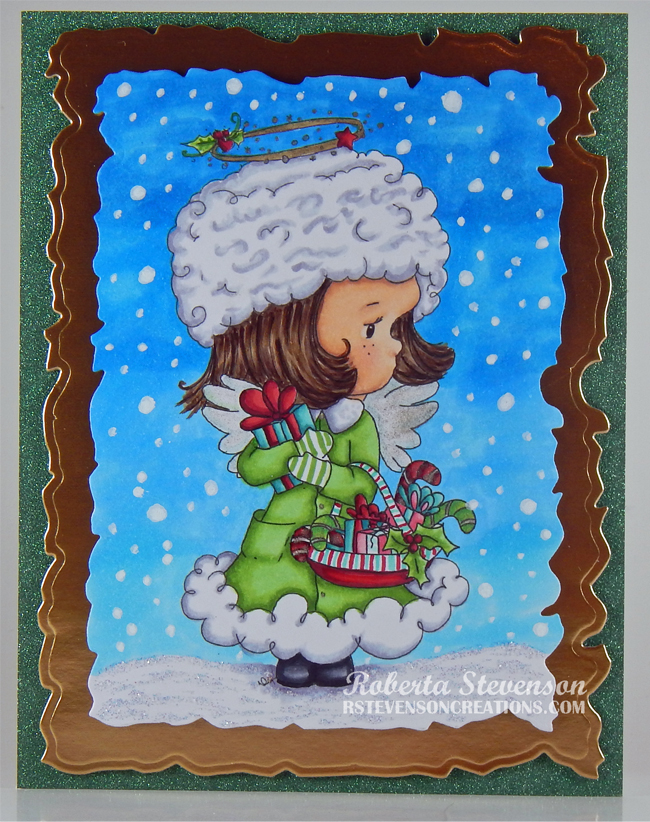
To create this card I began by making a base of 5.5″ x 4.25″ using Hammermill – Premium Colour 100 lb. cardstock. Hot Buy Craft Smart – Holiday Glitz Glitter Paper was cut to the same size and attached to the base card using double-sided tape. I imported the image into Microsoft Word and then printed it out using High Quality Grayscale onto Copic Marker X-Press It Blending Card cardstock. This stops the ink from smudging when you colour the image with your markers.
With my Cuttlebug, I die-cut the image and Recollections – Matte Gold Foil cardstock using Penny Black Creative Dies – Antique Frame. U-Line double-sided tape was attached to the larger die-cut and it was popped up onto the centre of the card. I coloured in the image using Copic markers and then added Stickles – Diamond to the snow on the bottom. With a UNIPosca PC-3M White marker, I created the snow in the sky. Wink of Stella – Clear was applied to the wings and the halo. Once the Stickles dried, I adhered the coloured image layer to the card using U-Line double-sided tape as well.
Card Recipe:
Stamp: Delivering Candy – Winnie Angel – Polkadoodles
Inks: High Quality Grayscale
Paper: Copic Marker X-Press It Blending Card, Hammermill – Premium Colour 100 lb., Hot Buy Craft Smart – Holiday Glitz Glitter Paper 12″ x 12″, Recollections – Matte Gold Foil cardstock
Die Cuts: Penny Black Creative Dies – Antique Frame 51-937
Tools and Miscellaneous: U-Line double-sided tape, Cuttlebug, UNIPosca PC-3M White marker, Wink of Stella – Clear, Stickles – Diamond
Image coloured with Copic Markers:
Skin: E21, E11, E04, E00, E000, R30, R20
Hair: E47, E44, E43, E42
Coat and Leaves: YG23, YG17, YG11
Wings: BG0000, BG000, BV0000, Y00
Purse, Candy Canes and Berries: R59, R39, R37
Candy Canes and Presents: R59, R39, R37, RV14, RV13, RV11, BG57, BG32, BG11, YG09, YG07, YG03
Boots: C9, C7, C5, C3
Halo: Y28
Sky: B05, B04, B02, B01
Shadows in Snow, Hat and Coat: BV20, B0000, Colorless Blender
Hope you like it and have a great week!