Tag Archive | CC Designs – Dragon Dreams Enamel Dots.

Baby Gnome!!


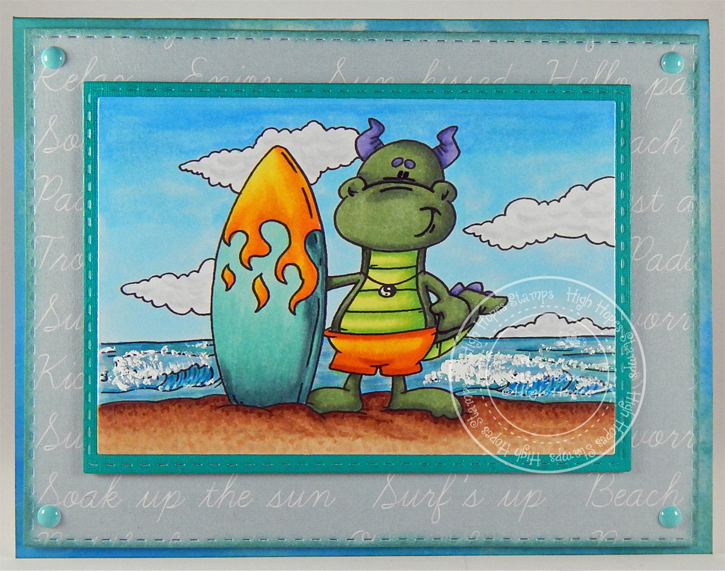
Sharing a card I made today using KLM Digital Design –  Baby Gnome from the new January 2022 release. Congrats to all of the families who received a new blessing into their lives this January and also to all of those future parents-to-be this year too!

I created the base using Hammermill – Premium Colour 100 lb. cardstock. I cut the paper to the size of 5.5″ x 4.25″. For the background, I used the same paper for the front and back. I first cut the Echo Park – Hello Baby – It’s a Girl cardstock to be the same size as the base card. Using my Cuttlebug and Art Impressions – Oval Double Stitched Dies, I cut an oval from the floral patterned side. I inked around the edges of the floral oval with Tim Holtz Distress Ink – Seedless Preserves and for the edges of the oval on the larger piece with the baskets showing, I applied Tim Holtz Distress Ink – Evergreen Bough. I taped the 2 pieces back to together using some Scotch Tape and then using double-sided tape, I applied the full background piece to the base card. I inked around the entire outer edges with the Tim Holtz Distress Ink – Seedless Preserves.

I imported the image into Microsoft Word and printed it out onto Copic Marker X-Press It Blending Card. The image was coloured in with Copic markers and then fussy cut with scissors. U-Line double sided tape was applied to the back of the image and it was popped up onto the card in the centre of the Oval. The sentiments were also brought into Microsoft Word and combined together. I created a rectangular shape and put it behind the type. I added an Aqua colour to fill in the background and then gave it a 4 pt border. Once it was printed out, I just cut around the edges of the rectangle with my cutter and then applied Tim Holtz Distress Ink – Evergreen Bough around the frame. I added some U-Line double sided tape and popped it up onto the bottom of the card. To finish everything off, I added in a few CC Designs – Dragon Dreams Enamel Dots.

Card Recipe:

Stamp and Sentiments: Baby Gnome – KLM Digital Designs

Inks: HP Printer Grayscale, Tim Holtz Distress Ink – Evergreen Bough, Tim Holtz Distress Ink – Seedless Preserves

Paper: Copic Marker X-Press It Blending Card, Hammermill – Premium Colour 100 lb., Echo Park – Hello Baby – It’s a Girl (6″x6″)

Die Cuts: Art Impressions – Oval Double Stitched Dies (5065)

Miscellaneous: U-Line – 2 sided tape, Cuttlebug, CC Designs – Dragon Dreams Enamel Dots

Image coloured with Copic Markers:

Skin: E21, E11, E04, E00, E000, R30, R20

Hat: V15, V12, V01, V000

Blanket and Bow: BG15, BG13, BG11, BG10

Hope you like it and have a great week!

You can find more cards to inspire you at KLM Designs, KLM Digital Design Team and KLM Digital Designs on the Facebook Fan page from the rest of our design team.

Good Times!!!


It’s Wednesday, and this week, I made a card using Joy Ride – TT002 by High Hopes Rubber Stamps for the main image and Good Times – GLL006 (High Hopes Rubber Stamps) for the sentiment. Christmas is always a wonderful time to gather with family and friends. Thinking of snow right now is also a way to cool down with all of this summer heat too! LOL!


To make my card this week, I began with a card base made from AC White Cardstock cut and scored to be 6″ x 6″. I chose Echo Park Paper Co. – My Favorite Winter (6″ x 6″) for my background paper and trimmed just a little off of the sides. Then, I used Tim Holtz Distress Ink – Blueprint Sketch and inked around all of the edges. I added some glue to the back of the paper and applied it to the base card. Using My Creative Time -Stitched Squares Inside and Out, I die cut a larger square from Recollections – Burgundy cardstock and a smaller square from Copic Marker X-Press It Blending Card. I inked around the edges of the larger square with Tim Holtz Distress Ink – Aged Mahagony and applied 3M VHB – 2 sided tape to the back of it and applied to the background. I die cut the sentiment label with My Creative Time – Stitched Rectangular Frames Dies and More. The image and sentiment were then applied using my MISTI and Memento – Tuxedo Black ink. I applied Stickles – Unicorn around the edges of the label and set it aside to dry.

I coloured in the image with copic markers. Then I added Stickles – Eucalyptus to the lady’s cuff and collar and Stickles – Crystal to her hat and pompom. For the man, I applied Nuvo Glitter Accents – Fresh Snowfall to his hat and pompom. Lastly, I added some Brutus Monroe – Snow Paste using a spatula to the bottom outer edge of the image to represent a snow bank on the side of the road. Using a Gelly Roll Sakura #10 Pen, Gelly Roll Sakura #5 Pen, Glitter Glue Pen and DecoArt Glamour Dust, I created the snowy background. Gelly Roll Sparkle Pen was used to colour in the Holly on the wreath.

Once everything on the image was dry, I applied some glue to the back of it and applied it directly on top of the larger square. I applied some glue and some 3M VHB – 2 sided tape to the sentiment and applied that on an angle at the top of the card. I only put the tape in a few spots so that it would be the same height as the image. To finish off the card, I added some CC Designs – Dragon Dreams Enamel Dots on to the sentiment and some sequence.

Card Recipe:

Stamp: Joy Ride – TT002 (High Hopes Rubber Stamps)

Sentiment: Good Times – GLL006 (High Hopes Rubber Stamps)

Inks: Memento – Tuxedo Black, Tim Holtz Distress Ink – Aged Mahagony, Tim Holtz Distress Ink – Blueprint Sketch

Paper: Copic Marker X-Press It Blending Card, AC White Cardstock, Echo Park Paper Co. – My Favorite Winter (6″ x 6″), Recollections – Burgundy

Die Cuts: My Creative Time -Stitched Squares Inside and Out, My Creative Time – Stitched Rectangular Frames Dies and More

Stickles: Eucalyptus, Crystal, Unicorn, Nuvo Glitter Accents – Fresh Snowfall

Paste: Brutus Monroe – Snow Paste

Tools: MISTI – Most Incredible Stamping Tool, 3M VHB – 2 sided tape, Gelly Roll Sparkle Pen, Gelly Roll Sakura #10 Pen, Gelly Roll Sakura #5 Pen, Glitter Glue Pen, CC Designs – Dragon Dreams Enamel Dots.

Image coloured with Copic Markers:

Skin: E21, E11, E00, E000, R30, R20

Hair: E15, Y38, Y21, YR23, E29, E25, E23, E21

Hats, Jacket, Wreath: R59, R37, R35

Mitts, Jacket and Tie: G28, G24, G21

Pants: W9, W7, W5

Boots and Gloves: E27, E25, E23, E21

Bike and Wheels: C9, C7, C5, C4, C3, C2, C1, Y17, Y11, Y08, R59, R37, R35

Holly: G14, G07, YG03

Puffs of Smoke: B60, C1, C00

Sky: B99, B97, B39, B37, B29, B28, B26

Road: T7, T5, T3

Hope you like it and have a fantastic week!

You can find lots of inspiration from the Design Team Divas at the High Hopes blog, and the High Hopes Rubber Stamps Facebook Fan page plus you can also follow us on
Instagram, Twitter and Pinterest.

Just a Note!!


Sharing a card I made today using KLM Digital Designs – Birdhouse #1 from the new June release for the image and sentiment. This image also comes with 2 other sentiments: “Welcome To The Neighbourhood” and “Thinking of You”.

To make the card, I first imported the image and the sentiment into Microsoft Word. I printed out the image and sentiment onto Copic Marker X-Press It Blending Card and a second copy of the image onto copy paper using my HP Printer. I coloured in the image with Copic markers and then fussy cut around the image on the copy paper to create a mask using my Brother Scan and Cut.

The rectangles were die cut using My Creative Time – Rectangle Frame Dies and My Creative Time – Rectangle Frame Layers. I fussy cut around the sentiment and inked around the yellow rectangle and sentiment with Tim Holtz Distress Ink – Fossilized Amber. I placed the mask over the coloured image and added in my clouds using some stencils that I created previously using Avery Elle – Pierced Clouds Die (D-05-01) and Tim Holtz Distress Ink – Salty Ocean. Tim Holtz Distress Ink – Mowed Lawn was added for the base background of the lawn.

To assemble the card, I began with a base card of The Paper Studio – Primary Simply Solids (4.25″ x 5.5″). I ran all of the elements through my Xyron Creative Station to create stickers out of them and so that they would lay completely flat when assembled. I added all of the layers directly to the base card. To finish it off, I added some CC Designs – Dragon Dreams Enamel Dots.

Card Recipe:

Stamp and Sentiment: Birdhouse #1 – KLM Digital Designs

Inks: HP Printer Grayscale, Tim Holtz Distress Ink – Salty Ocean, Tim Holtz Distress Ink – Mowed Lawn, Tim Holtz Distress Ink – Fossilized Amber

Paper: Copic Marker X-Press It Blending Card, The Paper Studio – Primary Simply Solids (4.25″ x 5.5″)

Dies: Avery Elle – Pierced Clouds Die (D-05-01)

Miscellaneous: Xyron Creative Station, CC Designs – Dragon Dreams Enamel Dots, Cuttlebug

Image coloured with Copic Markers:

Birdhouse: V09, V06, V04, Y17, Y15, Y11, E39, E35, E33

Flower and Leaves: YG17, YG03, YG01, V04, V01, Y15

Planter and Dirt: E59, E57, E55, E53, E25, E23, E21, C7, C5, C3, C1

Pole: E39, E37, E35

Grass: YG17, YG13, YG11

 Hope you like it and have a great week!

You can find more cards to inspire you at KLM Designs, KLM Digital Design Team and KLM Digital Designs on the Facebook Fan page from the rest of our design team.

Surfin’ Dudley!


It’s Wednesday, and this week, I used High Hopes Stamps’ image Surf Scene Dudley – S244. I’ve seen surfers in action while travelling the world, but have never gone on one myself. Who knows, maybe someday???? Dudley, sure looks happy sporting his vacation pose. LOL!

Using my MISTI and Memento – Tuxedo Black ink, I stamped the image onto Copic Marker X-Press It Blending Card. I coloured in the image with Copic markers and used Copic – Opaque White to create the splash on the waves. My Creative Time – Rectangle Frame Dies and My Creative Time – Rectangle Frame Layers were both used to die cut the coloured image and background papers. The edges were inked around with Tim Holtz Distress Ink – Evergreen Bough. The image was then attached to the Aqua background using double-sided tape.

To assemble the card, I began with a base card of Hot Buy – Cards and Envelopes (5.5″ x 4.25″). I popped up the 2 backgrounds with 3M VHB – 2 sided tape and attached them both to the base card. Lastly, I added some pop-dots from CC Designs – Dragon Dreams Enamel to finish it off.

Card Recipe:

Stamp: Surf Scene Dudley – S244 (High Hopes Rubber Stamps)

Inks: Memento – Tuxedo Black, Tim Holtz Distress Ink – Evergreen Bough

Paper: Copic Marker X-Press It Blending Card, DCWV – Coastal – 12″ x 12″, Hot Buy – Recollections – Jewel Tones, Hot Buy – Cards and Envelopes (5.5″ x 4.25″)

Die Cuts: My Creative Time – Rectangle Frame Dies, My Creative Time – Rectangle Frame Layers

Tools: MISTI – Most Incredible Stamping Tool, Cuttlebug, 3M VHB – 2 sided tape, CC Designs – Dragon Dreams Enamel Dots

Images coloured with Copic Markers:

Dragon: G94, G82, G46, YG07, YG03, YG00, BV04, BV02, BV01 (Eyes – Sakura Glaze – Black)

Bathing Suit: YR18, YR16, Y08

Surf Board: BG72, BG57, BG32, BG11, YR16, YR14, Y08, Y04

Water: BG70, BG32, BG11, B93, B91, B52, B41, B06, B04, B02, B01, (Copic – Opaque White)

Sky: B02, B01, B00, B000

Sand: E37, E35, E33, E31

Clouds: BG70, C1, C00, Colorless Blender

Hope you like it and have a fantastic week!

You can find lots of inspiration from the Design Team Divas at the High Hopes blog, and the High Hopes Rubber Stamps Facebook Fan page plus you can also follow us on
Instagram, Twitter and Pinterest.

Happy Birthday Gnome


It’s Wednesday, and this week, I used Balloon Gnome – SLF016 (High Hopes Rubber Stamps) for the main image and Mini Sentiment Set #1 – HLL001 (High Hopes Rubber Stamps) for the sentiment from the new release this month. The mini sentiment comes with 3 more sayings as well, which means you can use this little gnome to make a variety of different cards for multiple occasions. I chose to make a birthday card this time.

To make my card this week, I started out with a simple white card sized at 5.5″ x 4.25″. Then I used Doodlebug Design Inc. – Fairy Tales paper to create my background rectangles. To do this, I used my Cuttlebug and die cuts from My Creative Time – Rectangle Frame Dies and My Creative Time – Rectangle Frame Layers. Then I used Tim Holtz Distress Ink – Wilted Violet and Tim Holtz Distress Inks – Peacock Feathers to ink around the edges of the frames. I layered the first 2 layers directly onto the base and also glued the 2 smaller rectangles together. Then I popped up the smaller rectangles with 3M VHB – 2 sided tape.

I stamped the image and sentiment onto Copic Marker X-Press It Blending Cardstock and then coloured it in with Copic markers. Once completed, I used my Brother Scan and Cut to cut around the image. Then I popped up the image with the 3M VHB – 2 sided tape as well.

To finish the card off, I added some bling using Kraftin Kimmie – Summer Dots,  Kraftin Kimmie – Festive Dots and CC Designs – Dragon Dreams Enamel Dots.

Card Recipe:

Stamp: Balloon Gnome – SLF016 (High Hopes Rubber Stamps)

Sentiment: Mini Sentiment Set #1 – HLL001 (High Hopes Rubber Stamps)

Inks: Memento – Tuxedo Black, Tim Holtz Distress Ink – Wilted Violet, Tim Holtz Distress Inks – Peacock Feathers

Paper: Copic Marker X-Press It Blending Card, Doodlebug Design Inc. – Fairy Tales (6″ x 6″)

Die Cuts: My Creative Time – Rectangle Frame Dies, My Creative Time – Rectangle Frame Layers

Tools: MISTI – Most Incredible Stamping Tool, Cuttlebug, 3M VHB – 2 sided tape, Kraftin Kimmie – Summer Dots, Kraftin Kimmie – Festive Dots, CC Designs – Dragon Dreams Enamel Dots, Brother Scan and Cut

Image coloured with Copic Markers:

Skin: E21, E11, E04, E00, E000, R22, R20

Beard: W5, W4, W3, W2, W1, W0, W00

Hat and Outfit: BG45, BG18, BG15, V17. V5, V12, V09

Shoes: E27, E25, E23, E21

Balloon: Y08, Y06, Y02, Y000

Hope you like it and have a fantastic week!

You can find lots of inspiration from the Design Team Divas at the High Hopes blog, and the High Hopes Rubber Stamps Facebook Fan page plus you can also follow us on
Instagram, Twitter and Pinterest.