Tag Archive | Avery Elle – Pierced Clouds Die (D-05-01)

Fishing Gnome!


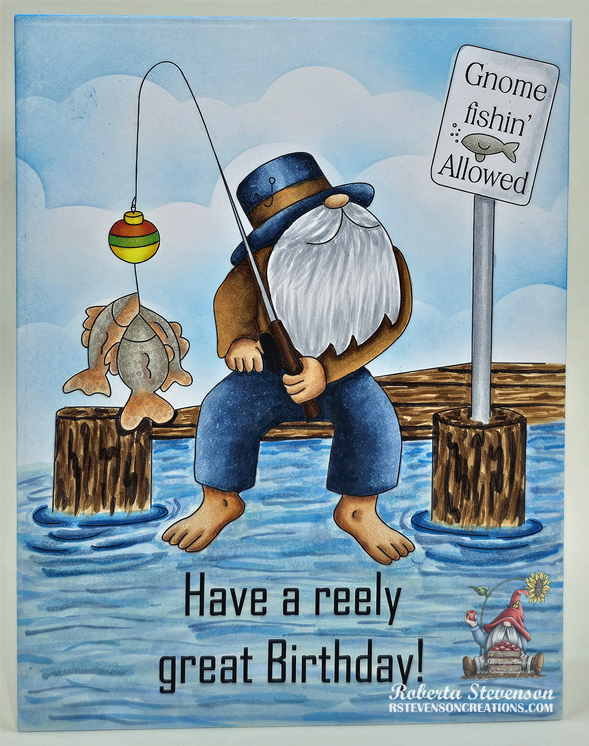
Today I’m sharing a Birthday card using KLM Digital DesignFisherman Gnome from the new April 2024 release that I made for my dad. This image also comes with 2 more sentiments, “May all your fishes come true” and “…I’m hooked on you”. My dad loves fishing and goes every chance he gets!

The image and sentiment were imported into Microsoft Word and printed out onto Copic Marker X-Press It Blending Card. I had created a 5.5″ x 4.25 frame around the image before printing it out with a HP Printer. I also printed out a second image onto plain photocopy paper and fussy cut around it. I attached the mask that I had created out of the plain paper over top of the coloured image. Using some stencils that I had created previously with Avery Elle – Pierced Clouds Dies and Tim Holtz Distress Ink – Salty Ocean, I created the clouds with a blender brush.

The image was coloured in with the Copics listed below and then attached to the base card.

Card Recipe:

Stamp and Sentiment:  KLM Digital DesignFisherman Gnome

Inks: HP Printer Grayscale, Tim Holtz Distress Ink – Salty Ocean

Paper: Copic Marker X-Press It Blending Card, Hammermill – Premium Cardstock 110 lb.

Dies \ Stencil: Avery Elle – Pierced Clouds Die (D-05-01)

Image coloured with Copic Markers:

Skin: E21, E11, E04, E00, E000

Beard: C3, C2, C1,C0

Jeans and Hat: B99, B97, B95, B91

Shirt: E57, E55, E53

Dock: E79, E57, E53, E23

Fish: YR61, YR02, YR00, R02, W3, W2, W1, Y35, E93

Pole and Sign: C2, C1,C0, C00, W3, W2, W1, Colorless Blender

Fishing Rod and Ball: E27, E25, E23, YR09, YR07, YR04, YG07, YG06, YG03, Y08, Y06, Y04

Water: B93, B91, B45, B41, B32, B05, B02, BG10

Hope you like it and have a great week!

You can find more cards to inspire you at KLM Designs, KLM Digital Design Team and KLM Digital Designs on the Facebook Fan page from the rest of our design team.
Happy Chinese New Year Dragon 2024!!!


Today I’m sharing Chinese New Year cards I created for my friends and some co-workers using Whimsy StampsBirfday Party Dragons – DP1055, Craftin Desert Diva’s Dragon Festival Stamps (Retired),  SVG Year of the Dragon Alphabet by Sarah Christie and  Gina Marie Designs – Ric Rac Nested Circle Dies.

The same procedure below was used to create 10 semi-identical cards.

Recollections – Christmas Cards and Envelopes Set cardstock was used to create a 6.5″ x 5″ card base. Using my MISTI Craftin Desert Diva’s Dragon Festival Stamps and VersaMark ink, I stamped the dragons and sentiment at the top of the card and then embossed the ink with Ranger Super Fine Gold Embossing powder. This was then heat embossed with Marvy Uchida – Embossing Heat Tool. The MISTI really helped speed up this process because once I had positioned the stamps for the first card on the MISTI, I just had to keep adding and stamping each additional card.

For the next step, I die cut all of my gold scallops using Recollections – Matte Gold Foil cardstock and Copic Marker X-Press It Blending Card using my Cuttlebug and Gina Marie Designs – Ric Rac Nested Circle Dies. I stamped out one more image onto a piece of Post-It Note paper and fussy cut around it to create a mask. The mask was  applied over top of the dragon image. Next using a blender brush, Tim Holtz Distress Ink – Salty Ocean and stencils made from Avery Elle – Pierced Clouds Die (retired), I created the cloudy background sky. Once this was completed, I coloured in the image with the Copic markers listed below. U-Line Double-Sided Foam Tape was applied to the backs of each of the scallops. I applied the gold and coloured pieces together and then popped them up onto the centre of the cards.

Lastly, I used a freebie from Extraordinarychaos –  SVG Year of the Dragon Alphabet by Sarah Christie. I was so happy when I had seen this, as I knew I just had to used it on my cards this year. I uploaded the .SVG file into Cricut Design space and sized the numbers. The numbers were cut out on my Cricut Explore using Recollections – Matte Gold Foil cardstock. The die cut numbers were applied with glue and attached to the each of the cards to finish them off.

Card Recipe:

Stamps: Whimsy StampsBirfday Party Dragons – DP1055, Craftin Desert Diva’s Dragon Festival Stamps (Retired)

Inks: Memento – Tuxedo Black, VersaMark, Tim Holtz Distress Ink – Salty Ocean

Paper: Copic Marker X-Press It Blending Card, Recollections – Christmas Cards and Envelopes Set, Recollections – Matte Gold Foil cardstock

Dies: SVG Year of the Dragon Alphabet by Sarah ChristieGina Marie Designs – Ric Rac Nested Circle Dies, Avery Elle – Pierced Clouds Die (D-05-01) (Retired)

Embossing Powder: Ranger Super Fine Gold Embossing powder

Miscellaneous: MISTI – Most Incredible Stamping Tool, Marvy Uchida – Embossing Heat Tool, U-Line Double-Sided Foam Tape

Dragon: YR24, YR23, YR21, R56, R39, R37, R35

Balloons: YR24, YR23, YR21, YR20, R37, R27, R24

Hope you like it and have a great week!

Flower Pot Gnome – Girl!


Today I’m sharing a Thank You card using KLM Digital DesignFlower Pot Gnome – Girl from the new February 2024 release. This image also comes with 2 more sentiments, “You are loved” and “Carry on with courage“.

The image and sentiment were imported into Microsoft Word and printed out onto Copic Marker X-Press It Blending Card. I had created a 5.5″ x 4.25 frame around the image before printing it out with a HP Printer. I also printed out a second image onto plain photocopy paper and fussy cut around it. The image was coloured in with the Copics listed below and then I attached the mask that I had created out of the plain paper over top of the coloured image. Using some stencils that I had created previously with Avery Elle – Pierced Clouds Dies and Tim Holtz Distress Ink – Salty Ocean, I created the clouds with a blender brush. Once this was done, I coloured in the grass. The image was then cut to the size of 5.5″ x 4.25 and attached with double-sided tape to a card base of the same size using Hammermill – Premium Cardstock 110 lb.

Card Recipe:

Stamp and Sentiment:  KLM Digital DesignFlower Pot Gnome – Girl

Inks: HP Printer Grayscale, Tim Holtz Distress Ink – Salty Ocean

Paper: Copic Marker X-Press It Blending Card, Hammermill – Premium Cardstock 110 lb.

Dies: Avery Elle – Pierced Clouds Die (D-05-01)

Image coloured with Copic Markers:

Skin: E21, E11, E04, E00, E000

Hair: E08, YR18, YR16, YR12

Jeans and Hat: B26, B23, B21

Shoes: E27, E25, E23, E21

Shirt: BG72, BG57, BG32, BG11

Flower Pot, Flowers, Leaves: E13, E09, E08, V04, V01, V000, Y17, Y04, G16, YG25, YG23

Grass: G16, YG25, YG23, YG03, YG01

Hope you like it and have a great week!

You can find more cards to inspire you at KLM Designs, KLM Digital Design Team and KLM Digital Designs on the Facebook Fan page from the rest of our design team.

Flower Pot Gnome!


Today I’m sharing a card using KLM Digital DesignFlower Pot Gnome from the new January 2024 release. This image also comes with 2 more sentiments, “Something about you made me feel a little more alive and a far less lost” and “You will forever be my always”. I love these sentiments because they can be used for Valentine’s Day, anniversaries or just to say “I love you”.

The image and sentiment were imported into Microsoft Word and printed out onto Copic Marker X-Press It Blending Card. I had created a 5.5″ x 4.25 frame around the image before printing it out with a HP Printer. I also printed out a second image onto plain photocopy paper and fussy cut around it. The image was coloured in with the Copics listed below and then I attached the mask that I had created out of the plain paper over top of the coloured image. Using some stencils that I had created previously with Avery Elle – Pierced Clouds Dies and Tim Holtz Distress Ink – Salty Ocean, I created the clouds with a blender brush. Once this was done, I coloured in the grass. The image was then cut to the size of 5.5″ x 4.25 and attached with double-sided tape to a card base of the same size using Hammermill – Premium Cardstock 110 lb.

Card Recipe:

Stamp and Sentiment:  KLM Digital DesignFlower Pot Gnome

Inks: HP Printer Grayscale, Tim Holtz Distress Ink – Salty Ocean

Paper: Copic Marker X-Press It Blending Card, Hammermill – Premium Cardstock 110 lb.

Dies: Avery Elle – Pierced Clouds Die (D-05-01)

Image coloured with Copic Markers:

Skin: E21, E11, E04, E00, E000

Beard: E08, YR18, YR16, YR12

Jeans and Hat: B26, B23, B21

Shoes: E27, E25, E23, E21

Shirt: BG72, BG57, BG32, BG11

Letter: C1, C00, Colorless Blender

Flower Pot, Ribbon, Flowers, Wrapping and Leaves: E95, E25, E19, E17, E16, E13, V04, V01, V000, Y17, Y15, Y08, Y04

Grass: G16, YG25, YG23, YG21, YG03, YG01

Hope you like it and have a great week!

You can find more cards to inspire you at KLM Designs, KLM Digital Design Team and KLM Digital Designs on the Facebook Fan page from the rest of our design team.

Hero Dad!


Today I’m sharing a Father’s Day card using KLM Digital DesignWheelbarrow Gnome from the new April 2023 release. This image also comes with 2 more sentiments, “Dad, you’re someone to look up to no matter how tall I grow!” and “Any man can be a Father, but it takes someone special to be a Dad”. I know that my dad will always be my hero no matter how old I get. 🙂

Hammermill – Premium Colour 100 lb. cardstock was used to create a 5.5″ x 5.5″ card base. Using my Cuttlebug and My Creative Time -Stitched Squares Inside and Out dies, I die cut a 5″ x 5″ square out of Recollections – Black cardstock and a 4″ x 4″ square out of Copic Marker X-Press It Blending Card. The black square was applied directly to the base card using double-sided tape.

The image and sentiment were imported into Microsoft Word and printed out onto Copic Marker X-Press It Blending Card prior to me cutting out the 4″ square. The image was coloured in with Copic markers. I decided I wanted some puffy clouds, so I printed out the image again, but this time it was printed onto regular copy paper and then I fussy cut around the top part of it. It was placed over top of the coloured image with some washi tape to secure it in place. I took another piece of paper and created a wavy background and placed that down over the image too! Then, with Tim Holtz Distress Ink – Salty Ocean and a blender brush, I proceeded to create the cloudy sky using a stencil that I had made earlier using Avery Elle – Pierced Clouds Dies. Once the sky was complete, I added in the dirt path and the farm field to finish off the image. U-Line double-sided tape was added to the back of the completed coloured image and it was popped up onto card to finish it off.

Card Recipe:

Stamp and Sentiment:  Wheelbarrow Gnome – KLM Digital Designs

Inks: HP Printer Grayscale. Tim Holtz Distress Ink – Salty Ocean

Paper: Copic Marker X-Press It Blending Card, Hammermill – Premium Colour 100 lb., Recollections – Black cardstock

Dies: My Creative Time -Stitched Squares Inside and Out, Avery Elle – Pierced Clouds Die (D-05-01)

Miscellaneous: U-Line double-sided tape, Cuttlebug, Blending Brush

Image coloured with Copic Markers:

Skin: E21, E11, E00, E000

Beard: E29, E27, E25, E23

Hats and Boots: C8, C6, C4, C2

Shirts: BG72, BG57, BG32, BG11

Jeans: B26, B23, B21, E23

WheelBarrow: C10, C8, C6, C3, C2, C1, R56, R37, R35, E29, E25, E23

Lawn \ Farm Field: YG25, YG23, YG21, YG17, YG13, YG03, YG01

Dirt Path: E37, E35, E33, E31

Hope you like it and have a great week!

You can find more cards to inspire you at KLM Designs, KLM Digital Design Team and KLM Digital Designs on the Facebook Fan page from the rest of our design team.

American Flag Gnome


Today is Thursday and I’m sharing an American Celebration card using KLM Digital DesignAmerican Flag Gnome from the new April 2023 release. This image also comes with 2 more sentiments, “Let Freedom Ring” and “Home of The Brave – America”.

Hammermill – Premium Colour 100 lb. cardstock was used to create a 5.5″ x 4.25″ card base. I found some navy blue cardstock with stars from my scrap stash and thought it went perfect with this card. I cut it to be the same size as the base and adhered it directly to base card. Tim Holtz Distress Ink – Chipped Sapphire and a finger dauber were used to ink around all of the edges of the card.

The image and sentiment were imported into Microsoft Word and printed out onto Copic Marker X-Press It Blending Card and 1 extra copy of the image was printed onto plain copy paper to be used for masking later. With my Cuttlebug, I die cut the image using My Creative Time – Rectangle Frame Layers. The image was coloured in with Copic Markers listed below. I fussy cut around the image that I had cut out from the plain copy paper and adhered it to the card with some Washi tape as a mask.

Using a blender brush, I created the clouds in the sky with Avery Elle – Pierced Clouds Die (D-05-01) which I had die cut to create stencils. The lawn was created using a blender brush, Tim Holtz Distress Ink – Mowed Lawn and Lawn Fawn – Slimline Hillside Stencils. I also used the stencils to be a mask for adding in the pathway using a blender brush and Krafty Kolours – Sandy Shores.

Once all of the background was completed, I removed the mask from the image and created a shadow under the gnome using Copic markers E33, E31 and E30. Some of the hills were made a little bit darker using Copic marker G20.

I added U-Line double-sided tape to the back of the coloured image then popped it up onto card.

Card Recipe:

Stamp and Sentiment:  American Flag Gnome – KLM Digital Designs

Inks: HP Printer Grayscale, Tim Holtz Distress Inks – Salty Ocean, Krafty Kolours – Sandy Shores, Tim Holtz Distress Ink – Chipped Sapphire, Tim Holtz Distress Ink – Mowed Lawn

Paper: Copic Marker X-Press It Blending Card, Hammermill – Premium Colour 100 lb.

Dies: My Creative Time – Rectangle Frame Layers, Avery Elle – Pierced Clouds Die (D-05-01)

Stencils: Lawn Fawn – Slimline Hillside Stencils

Miscellaneous: U-Line double-sided tape, Cuttlebug, Blending Brushes

Image coloured with Copic Markers:

Skin: E21, E11, E04, E00, E000

Beard: E29, E27, E25, E23

Hat: R59, R37, R35

Clothing: B39, B37, B29

Boots: E49, E35, E34, E31, C9, C7, C5, C4

Flag: R59, R37, R35, B39, B37, B29

Path: E33, E31, E30 and Krafty Kolours – Sandy Shores for base

Hope you like it and have a great week!

You can find more cards to inspire you at KLM Designs, KLM Digital Design Team and KLM Digital Designs on the Facebook Fan page from the rest of our design team.

The Best Dirt!


It’s Wednesday, and this week, I made a card using High Hopes Rubber Stamps Gordon Groundhog – R123 for the image and The Best Dirt – F221 for the sentiment. My husband loves gardening and this makes me think of him! LOL! We have a few little squirrels that like to raid his garden, eat the tomatoes and dig up the potatoes. Luckily, my husband is good natured and says he can’t get mad at them for what comes natural. We call our back yard the Stevenson’s oasis for wild animals. We have bunnies, squirrels, racoons, possums and a mole that seem to like our vegetables and sometimes we’ve even caught them sleeping up on the furniture under the Gazebo. My husband has now installed a backyard web cam so that we can now capture some of what goes on at night while we are sleeping.

To make my card this week, I began with a card base of Hammermill – Premium Colour 100 lb., cut and scored to be 5.5″ x 4.25″. Echo Park – New Day Beautiful Blooms Paper was cut to be the same size as the base and applied using double-sided tape. Tim Holtz Distress Ink – Mowed Lawn and a finger dauber were used to ink around all of the edges of the card. Anna Griffin Empress Mini Cutting Machine and My Favourite Things Die-Namics – Single Stitch Line Rounded Rectangle Frames were used to die cut Stampin’ UP! – Regals Designer Series Paper, Copic Marker X-Press It Blending Card and Hammermill – Premium Colour 100 lb. cardstock.

The clouds in the sky were created using the inner part of the die-cut from the Hammermill – Premium Colour 100 lb. cardstock and a mid-size Gina K Designs Blender Brush, Tim Holtz Distress Ink – Salty Ocean and stencils that I created using Avery Elle – Pierced Clouds Die. Once this was done, I used regular tape to piece the outer die cut from the Stampin’ UP! – Regals Designer Series Paper and the clouds piece together from the back side. I stamped the image onto the inner frame of the Copic Marker X-Press It Blending Card using Memento – Tuxedo Black ink and my MISTI. Once the image was coloured, it was fussy cut around the top part of the image. I applied U-Line double-sided tape to the image and background pieces that I had joined together and popped them both up onto the card.

The sentiment was also stamped using my MISTI onto the same cardstock and then cut with a small cutting device. I ran this through my Xyron Create a Sticker and adhered it to Recollections – Black cardstock. Once again, I cut around the sentiment, leaving a slim border. U-Line double-sided tape was applied to the back of this and it was popped up onto the card. Lastly, to finish it off, I added some Doodlebug Design Inc. Braddies with Glue Dots – Mini.

Card Recipe:

Stamps: Gordon Groundhog – R123 (High Hopes Rubber Stamps)

Sentiment: The Best Dirt – F221 (High Hopes Rubber Stamps)

Inks: Memento – Tuxedo Black, Tim Holtz Distress Ink – Mowed Lawn, Tim Holtz Distress Ink – Salty Ocean

Die Cuts: My Favourite Things Die-Namics – Single Stitch Line Rounded Rectangle Frames, Avery Elle – Pierced Clouds Die (D-05-01)

Paper: Copic Marker X-Press It Blending Card, Hammermill – Premium Colour 100 lb., Stampin’ UP! – Regals Designer Series Paper Stack (12″ x 12″), Echo Park – New Day Beautiful Blooms (12″ x 12″), Recollections – Black

Embellishments: Doodlebug Design Inc. Braddies – Bubble Blue Blossoms and Tangerine Blossoms

Tools: MISTI – Most Incredible Stamping Tool, U-Line double-sided tape, Anna Griffin Empress Mini Machine, Glue Dots – Mini, Xyron Create a Sticker, Sakura Glaze – Black

Image coloured with Copic Markers:

Groundhog: E29, E27, E25, E23, (Nose and Eyes – Sakura Glaze – Black)

Jeans: B26, B23, B21, E31

Hard Hat: Y17, Y15, Y08

Dirt, Stones, Stem and Grasses: E37, E35, E33, E31, W7, W5, W3, YG23, YG17, YG11, YG09

Flower: E15, Y38, Y35, Y32, Y17, Y08

Hope you like it and have a fantastic week!

Check out more adorable images at High Hopes Rubber Stamps!

You can find lots of inspiration from the Design Team Divas at the High Hopes blog, and the High Hopes Rubber Stamps Facebook Fan page plus you can also follow us on
Instagram, Twitter and Pinterest.

Flying By!!


Today, I’m sharing a card using Dreamerland Crafts stamps called Off To A Flying Start – D16003. We have had a lot of pilots in our family in the past and still do. I’ve had the precious opportunity of flying in a small 2 seater plane that my dad and uncle had built years ago and also being allowed into the cockpit of an Air Canada plane on our honeymoon flight in both directions over 30 years ago when it was still possible to this. On the flight home there was an electrical storm. This was so awesome to see. These are experiences that I will never forget as I loved every moment.

To make this card I used a base of 5.5″ x 4.25″ using Hammermill – Premium Colour 100 lb. cardstock. Copic Marker X-Press It Blending Card was cut to the same size as the base and Dreamerland image Off To A Flying Start – D16003 was stamped using my MISTI and Memento – Tuxedo Black ink. The image was stamped a second time onto some plain paper and then fussy cut to create a mask. I coloured in the image using Copic markers. The mask created earlier was then put over top of the coloured image and I applied some Post-It tape along the bottom to hold it into place. Using some stencils that I had previously created using Avery Elle – Pierced Clouds Die, multiple blue Tim Holtz Distress inks listed below and a Picket Fence – Blending Brush, I created the cloudy background. Then, I applied the grass using Copic markers. The coloured image was then put back into my MISTI and using Versa Fine – Onyx Black to stamp the sentiment Sky’s The Limit by Kraftin’ Kimmie. Ranger Embossing Powder White – Extra Fine Detail was applied and heated with Marvy Uchida – Embossing Heat Tool. I applied double-side tape and attached it to the base card to finish it off.

Card Recipe:

Stamps: Off To A Flying Start – D16003 – Dreamerland Crafts

Sentiment: Sky’s The Limit – Kraftin’ Kimmie

Inks: Memento – Tuxedo Black, Versa Fine – Onyx Black, Tim Holtz Distress Ink – Salty Ocean, Tim Holtz Distress Inks – Broken China, Tim Holtz Distress Inks – Tumbled Glass

Paper: Copic Marker X-Press It Blending Card, Hammermill – Premium Colour 100 lb.

Die Cuts \ Stencils: Avery Elle – Pierced Clouds Die (D-05-01) (Created stencils from dies)

Embossing Powder: Ranger Embossing Powder White – Extra Fine Detail

Tools: MISTI – Most Incredible Stamping Tool, Picket Fence – Blending Brush, Marvy Uchida – Embossing Heat Tool

Image coloured with Copic Markers:

Skin: E21, E11, E04, E00, E000, R30, R24, R22, R20

Hair: E47

Jacket and Hat: E89, E87, E84

Pants: E47, E44, E43

Boots and Mitts: E27, E25, E23, E21

Scarf: E50, E40, E31, E30

Goggles: W6, W3, B00

Wings: E33, E31, E30

Grass: YG17, YG13, YG03, YG01

Hope you like it and have a great week!

You can find more cards to inspire you at Dreamerland Crafts and Pointer Scrapbooking on the Facebook Fan pages from the rest of our design team.

Owl Always Be Here!!


Come and check us out on Passionate Paper Creations & Friends FB group
as we are currently sponsoring KLM Designs for the month of December.

If you are a member of Passionate Paper Creations & Friends FB group
you can go to the top of the page and get a shopping discount.
Not a Member? Come Join! https://bit.ly/2VwG9iz.

We are a fun loving group with a lot of inspiration.

*******************************************************

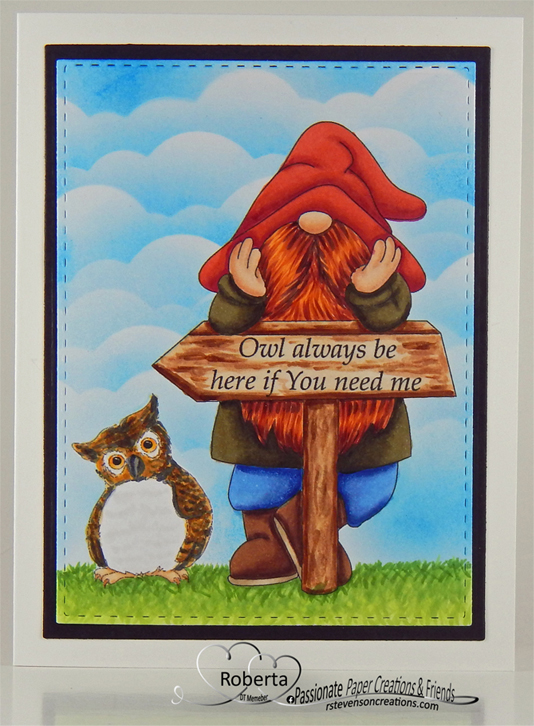
Thank you KLM Designs for sponsoring us. Today, I’m sharing a card I made using a combination of KLM Designs –  Owl and Sentiments and RoadSign Gnome. I really love your adorable images and working with them.

To make this card, I first imported the image and sentiment into Microsoft Word and printed them out onto Copic Marker X-Press It Blending Card. My Creative Time – Rectangle Frame Dies were used to die cut the image and My Creative Time – Rectangle Frame Layers were used to cut the black frame. The image was coloured in with Copic markers. Then I printed out the images again and fussy cut them to create masks. I applied them over top of the coloured images and applied the clouds in the background using Tim Holtz Distress Ink – Salty Ocean and cloud stencils I had created from Avery Elle – Pierced Clouds Die (D-05-01).  The base was created with Hammermill – Premium Colour 100 lb. cardstock cut and folded to the size of 5.5″ x 4.25″. I attached the black cardstock and completed image to the base using double-sided tape.

Card Recipe:

Stamp and Sentiment:  Owl and Sentiments – KLM Digital Designs, RoadSign Gnome – KLM Digital Designs

Inks: HP Printer Grayscale, Tim Holtz Distress Ink – Salty Ocean

Paper: Copic Marker X-Press It Blending Card, Hammermill – Premium Colour 100 lb., Recollections – Black cardstock

Die Cuts: My Creative Time – Rectangle Frame Dies, My Creative Time – Rectangle Frame Layers, Avery Elle – Pierced Clouds Die (D-05-01)

Image coloured with Copic Markers:

Skin: E21, E11, E00, E000

Beard: E18, E08, YR18, YR14

Shirt: E89, E87, E84

Jeans: B26, B23, B21

Boots: E43, E42, E41, E27, E25, E23

Hat: R46, R14, R08

Post: E37, E35, E33, E30

Owl: E57, E55, E53, E51, E50, YR24, Y26, Y38, Y35, Y32, Y23, C9, C7, C5, C4, C3, W0, W00

Grass: YG17, YG13, YG03, YG01

Hope you like it and have a great week!

You can find more cards to inspire you at KLM Designs, KLM Digital Design Team, KLM Digital Designs and Passionate Paper Creations & Friends FB group
on the Facebook Fan page from the rest of our design team.


Work Hard, Dream Big!!


Check out the sale for KLM Digital Designs Clear Stamps
going on now while supplies last! Just click on the link provided or go here: https://klmdigitaldesign.com.

Today, I’m sharing a card I made using KLM Digital Designs –  Office Gnome from the new November release. This image also comes with 2 more sayings: “You got this!” and “Strive for progress, not perfection”. This card would also be great for someone you know just starting a new position or a recent graduate as well.

To make the card, I started with a base created with Hammermill – Premium Colour 100 lb. cardstock cut and folded to the size of 5.5″ x 4.25″. I taped off the top of the card with some Post-It Note tape and inserted the Heffy Doodle – Cityscape stencil over top of the bottom half of the card. I taped off the bottom of the stencil and the sides to keep it place. Using multiple Picket Fence – Blending Brushes, I added in the buildings using Memento – Gray Flannel, Memento – London Fog and Tim Holtz Distress Ink – Hickory Smoke. I removed the stencil and reapplied it over the card, this time using the stencil to cover the buildings. I re-applied the tape to the bottom of the stencil to keep it in place. Using stencils that I had previously created using Avery Elle – Pierced Clouds Die, I applied the clouds in using Tim Holtz Distress Ink – Fossilized Amber, Picked Raspberry and Salty Ocean with Picket Fence – Blending Brushes. I removed the stencil and turned it around. This time using Tim Holtz Distress Ink – Hickory Smoke to add in the windows on the buildings along with just a touch of Tim Holtz Distress Ink – Fossilized Amber. I moved the tape up to where the buildings ended on the bottom and once again placed it across the card. This time, I used Tim Holtz Distress Ink – Black Soot. The background was now complete.

The image and sentiment were both imported into Microsoft Word and printed out onto Copic Marker X-Press It Blending Card. I used my Brother Scan and Cut to die cut the image with a small margin around it. This was coloured in with Copic markers. My Cuttlebug, My Creative Time – Rectangle Frame Dies and My Creative Time – Rectangle Frame Layers were used to die cut the sentiment and black cardstock. U-Line double-sided tape was applied to the backs of the images and 2 die cuts to pop-up them all up onto the finished background to complete the card.

Card Recipe:

Stamp and Sentiment:  Office Gnome – KLM Digital Designs

Inks: HP Printer Grayscale, Memento – Gray Flannel, Memento – London Fog, Tim Holtz Distress Ink – Hickory Smoke, Fossilized Amber, Picked Raspberry, Salty Ocean, Black Soot

Paper: Copic Marker X-Press It Blending Card, Hammermill – Premium Colour 100 lb.

Die Cuts: My Creative Time – Rectangle Frame Dies, My Creative Time – Rectangle Frame Layers, Avery Elle – Pierced Clouds Die (D-05-01)

Stencil: Heffy Doodle – Cityscape

Miscellaneous: U-Line – 2 sided tape, Picket Fence – Blending Brushes, U-Line double-sided tape

Image coloured with Copic Markers:

Skin: E21, E11, E00, E000

Beard and Hair: E47, E44, E43, E41

Dress Shirt: B45, B39, B37, C1, C0, C00

Pants: T7, T5, T3

Hat: C9, C7, C5, C3

Boots: C9, C7, C5, C3, C0

Tie: R24, B37, C2

Brief Case: E29, E27, E25, E23, E21

Shadow: C2, C1, C0

Hope you like it and have a great week!

You can find more cards to inspire you at KLM Designs, KLM Digital Design Team and KLM Digital Designs on the Facebook Fan page from the rest of our design team.

Dreams!!


Sharing a card I made today using KLM Digital Designs –  Alexbay Lighthouse from the new October release. This image also comes with 2 more sayings: “Today is all about you” and “Happy Anniversary”.

To make the card, I first imported the image and sentiment into Microsoft Word and printed them out onto Copic Marker X-Press It Blending Card. My Creative Time – Rectangle Frame Dies were used to die cut the image. The image was coloured in with Copic markers and the clouds were created with Tim Holtz Distress Ink – Salty Ocean and stencils that I created using Avery Elle – Pierced Clouds Dies. Double-sided tape was used to attach it to the base card of Hammermill – Premium Colour 100 lb. cardstock cut and folded to the size of 5.5″ x 4.25″.

Card Recipe:

Stamp and Sentiment:  Alexbay Lighthouse – KLM Digital Designs

Inks: HP Printer Grayscale, Tim Holtz Distress Ink – Salty Ocean

Paper: Copic Marker X-Press It Blending Card, Hammermill – Premium Colour 100 lb.

Die Cuts: My Creative Time – Rectangle Frame Dies, Avery Elle – Pierced Clouds Die (D-05-01)

Miscellaneous: 3M VHB – 2 sided tape, Picket Fence Studio Blender Brush

Image coloured with Copic Markers:

Lighthouse: R59, R37, R35, C1, C0, Y02, Y00, Y000

Building: R59, R37, R35, C3, C2, C1, C0, E17, E15, E13

Steps: C5, C3, C1

Rocks : E74, E71, E70, W5, W3, W1

Water: BG10, BG02, BG01, BG000, B02, B01, B00, B000

Sky: B000, B0000, Tim Holtz Distress Ink – Salty Ocean

Hope you like it and have a great week!

You can find more cards to inspire you at KLM Designs, KLM Digital Design Team and KLM Digital Designs on the Facebook Fan page from the rest of our design team.

Good Things To Come!!


Sharing a card I made today using KLM Digital Designs – Jumping Gnome for the main image and Thumbs Up Gnome for the sentiment from the new September release.

To make the card, I first imported the image and sentiment into Microsoft Word and printed them out onto Copic Marker X-Press It Blending Card. I die-cut the image using Creative Expression Craft Dies by Sue Wilson – Noble Dies – Double Pierced Squares – Set B. The image was coloured in with Copic markers. I printed out the black and white image again onto regular photocopy paper and used by Brother Scan and Cut to die cut the image to use as a mask. I created the grass background and then attached the mask to the coloured image. A combination of Avery Elle – Pierced Clouds Die (D-05-01) which I created stencils from and Tim Holtz Distress Ink – Salty Ocean and Tim Holtz Distress Inks – Tumbled Glass were used to create the clouds in the sky. I accidentally used too much ink for the one cloud, so I decided to cover it up by creating a few trees in the background.

For the base card, I used Hammermill – Premium Colour 100 lb. cardstock and cut it and scored it to be 5.5″ x 5.5″.  Using double-sided tape, I attached the coloured image to some black cardstock and then used my trimmer to create a small border. I then added double-sided tape to the back of the black cardstock and adhered it directly to the base to finish off my card.

Card Recipe:

Stamp and sentiment: Jumping Gnome – KLM Digital Designs, Thumbs Up Gnome – KLM Digital Designs

Inks: HP Printer Grayscale, Tim Holtz Distress Ink – Salty Ocean, Tim Holtz Distress Inks – Tumbled Glass

Paper: Copic Marker X-Press It Blending Card, Hammermill – Premium Colour 100 lb., Black Cardstock

Die Cuts: Avery Elle – Pierced Clouds Die (D-05-01), Creative Expression Craft Dies by Sue Wilson – Noble Dies – Double Pierced Squares – Set B

Miscellaneous: Brother Scan and Cut

Image coloured with Copic Markers:

Skin and Mouth: E21, E11, E00, E000, R26, R24

Beard: E47, E45, E43

Jeans and Hat: B26, B23, B21

Shirt: E89, E87, E84

Shoes: E27, E25, E23

Grass: YG17, YG13, YG03, YG01

Trees: YG67, YG63, R25

Hope you like it and have a great week!

You can find more cards to inspire you at KLM Designs, KLM Digital Design Team and KLM Digital Designs on the Facebook Fan page from the rest of our design team.

The Happy Couple!!


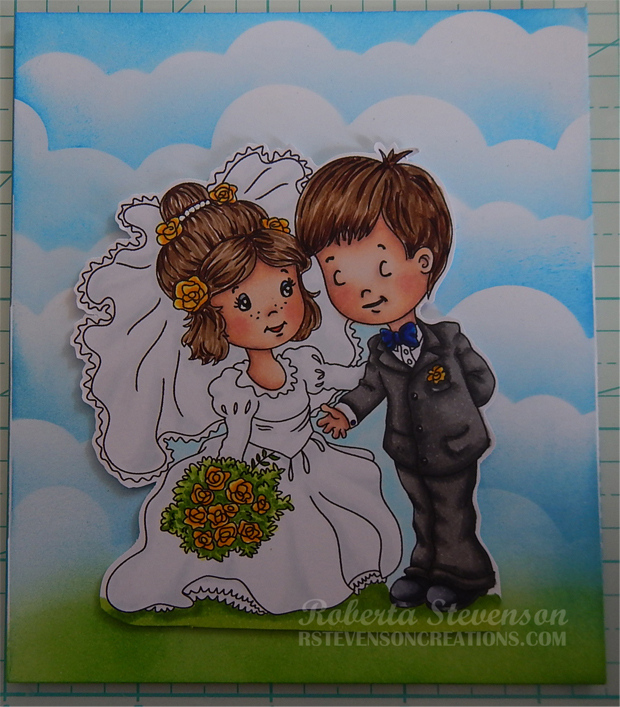
Today, I’m sharing a card that I made using the image from The Paper Shelter called The Happy Couple. I made this card for a colleague who was married recently. Here’s wishing the happy couple a very long and happy marriage!


To make the card, I first imported the image into Microsoft Word and then printed it out on my HP Printer using High Quality Grayscale. The image was printed onto Copic Marker X-Press It Blending Card. I coloured in the image using Copic markers and then fussy cut around it.

Using my Cuttlebug, Spellbinders – S6-138 dies, and I die cut Hammermill – Premium Colour 100 lb. 5 times for the layers and twice for the sides. For the front of the card, I die cut Crafts Pearl Papers – 02-3081416 with the same dies. For the grass, I die-cut Lawn Fawn – Shadow Box Card Park Add-On and Lawn Fawn – Simple Grassy Hillsides using Momenta – Cardstock. Lastly, I die-cut the flag banner using Crafter’s Companion – Luxury Cardstock – Navy Blue and Craftin Desert Diva’s – Flag Banner Dies and the sentiment was die cut 5 times with Hammermill – Premium Colour 100 lb. cardstock and once with Hot Buy Craft Smart – Holiday Glitz Glitter Paper using PaperCrafter Today – 15 Die Cut Sentiment Set.

For the back panel using stencils I had made previously out of Avery Elle – Pierced Clouds Dies, I coloured in the sky using Tim Holtz Distress Ink – Salty Ocean and Tim Holtz Distress Inks – Broken China. Tim Holtz Distress Ink – Mowed Lawn was used to colour in the grass. The card was now ready to put together. I started with the coloured background and added the coloured image to it using 3M VHB – 2 sided tape.

This was adhered to the side panels using double-side tape on both sides.  Working from back to front, I added on the next layer and applied the grass die cut to front of the layer. This was put through the tabs on the side. I added in the next layers in the same manner. A layer with more grass was added to the 4th layer. I added in the next layer and then for the very front I once again cut off the tabs on both sides and then attached it to the sides using double-sided tape. The banner was then added using glue. The paper for the sentiment had been put through my Xyron Creative Station prior to cutting it. This made it easy to peel of the back of the stickers for each layer and assembling them on top of each other. I used the white layers for the bottom of the sentiment and for the final piece, I used the gold. A small jewel dot was used to finish off the dotted “i”.

Card Recipe:

Stamp: The Happy Couple (The Paper Shelter)

Inks: HP Printer Grayscale, Tim Holtz Distress Ink – Salty Ocean, Tim Holtz Distress Inks – Broken China, Tim Holtz Distress Ink – Mowed Lawn

Paper: Copic Marker X-Press It Blending Card, Hammermill – Premium Colour 100 lb., Crafter’s Companion – Luxury Cardstock – Navy Blue, Crafts Pearl Papers – 02-3081416, Momenta – Cardstock, Hot Buy Craft Smart – Holiday Glitz Glitter Paper 12″ x 12″

Die Cuts: Lawn Fawn – Shadow Box Card Park Add-On, Lawn Fawn – Simple Grassy Hillsides, Spellbinders – S6-138, Craftin Desert Diva’s – Flag Banner Dies, PaperCrafter Today – 15 Die Cut Sentiment Set, Avery Elle – Pierced Clouds Die (D-05-01)

Miscellaneous: 3M VHB – 2 sided tape, Xyron Creative Station

Image coloured with Copic Markers:

Skin: E21, E11, E00, E000, R22, R20, B23, B21, Eyes (Gelly Roll Sakura #8 Pen, Sakura Glaze – Black)

Hair: E47, E44, E43, E41

Dress: BG70, C00, Colorless Blender

Suit and Tie: T7, T5, T3, B69, B39, B24

Flowers and Greenery: YG17, YG11, YG03, YG01. Y35, Y08, Y02, Y00

Shoes: C8, C7, C5, C3

Hope you like it and have a great week!

Smell The Flowers!!!


It’s Wednesday, and this week, I made a card using Tink Picking Posies – T027 by High Hopes Rubber Stamps for the main image and Smell The Flowers – G189 (High Hopes Rubber Stamps) for the sentiment. Most of the flowers are now in full bloom. It’s so wonderful to see all of the beautiful colours and smell the wonderful aromas of the flowers in our garden. So happy that my husband has such a green thumb and loves gardening!

To make my card this week, I stamped my image and sentiment using my MISTI and Memento – Tuxedo Black ink onto Copic Marker X-Press It Blending Cardstock. I stamped the image a second time onto plain copy paper and fussy cut around it to create a mask. My Creative Time – Rectangle Frame Dies and My Creative Time – Rectangle Frame Layers were used to cut out the sentiment and background layer. I coloured in the image using Copic markers and then put my mask over top of the coloured image. Using stencils that I had created earlier with Avery Elle – Pierced Clouds Dies (D-05-01), I inked in the clouds using Tim Holtz Distress Ink – Salty Ocean. Once this was done, I removed the mask.

To assemble my card, I started with a base using Hot Buy – Cards and Envelopes (5.5″ x 4.25″). I ran the coloured image through my Xyron Create a Sticker and applied it to the black cardstock. 3M VHB – 2 sided tape, was applied to the back of the black frame and then it was attached directly to the base.

Card Recipe:

Stamp: Tink Picking Posies – T027 (High Hopes Rubber Stamps)

Sentiment: Smell The Flowers – G189 (High Hopes Rubber Stamps)

Inks: Memento – Tuxedo Black, Tim Holtz Distress Ink – Salty Ocean

Paper: Copic Marker X-Press It Blending Card, Black Cardstock, Plain Copy Paper (Mask)

Die Cuts: My Creative Time – Rectangle Frame Dies, My Creative Time – Rectangle Frame Layers, Avery Elle – Pierced Clouds Die (D-05-01)

Tools Miscellaneous: MISTI – Most Incredible Stamping Tool, Xyron Create a Sticker, Cuttlebug

Image coloured with Copic Markers:

Skunk: 100, C9, C7, C5, R30, R20, Colorless Blender, (Eyes and Nose – Sakura Glaze – Black)

Flowers: RV09, RV06, Y17, Y15, Y11, Y08, V04, V01

Leaves: G28, G24, G21

Grass: YG17, YG13, YG03, YG01

Sky: B00 to fill in white spots

Hope you like it and have a fantastic week!

You can find lots of inspiration from the Design Team Divas at the High Hopes blog, and the High Hopes Rubber Stamps Facebook Fan page plus you can also follow us on
Instagram, Twitter and Pinterest.

Just a Note!!


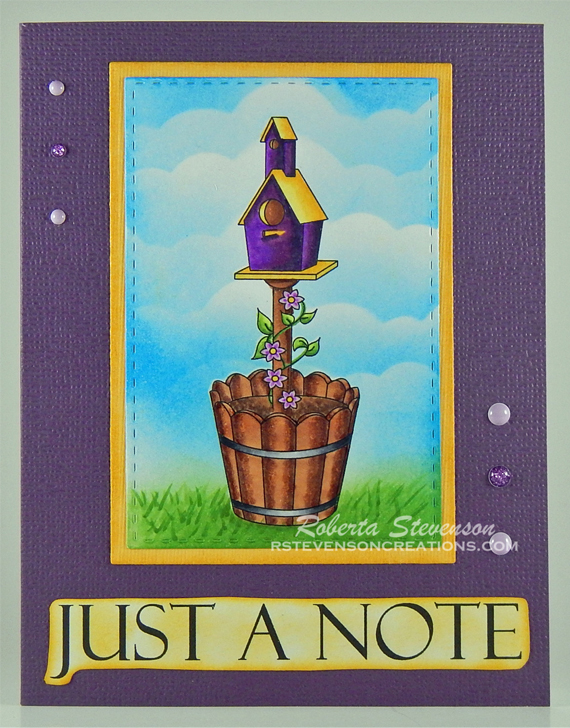
Sharing a card I made today using KLM Digital Designs – Birdhouse #1 from the new June release for the image and sentiment. This image also comes with 2 other sentiments: “Welcome To The Neighbourhood” and “Thinking of You”.

To make the card, I first imported the image and the sentiment into Microsoft Word. I printed out the image and sentiment onto Copic Marker X-Press It Blending Card and a second copy of the image onto copy paper using my HP Printer. I coloured in the image with Copic markers and then fussy cut around the image on the copy paper to create a mask using my Brother Scan and Cut.

The rectangles were die cut using My Creative Time – Rectangle Frame Dies and My Creative Time – Rectangle Frame Layers. I fussy cut around the sentiment and inked around the yellow rectangle and sentiment with Tim Holtz Distress Ink – Fossilized Amber. I placed the mask over the coloured image and added in my clouds using some stencils that I created previously using Avery Elle – Pierced Clouds Die (D-05-01) and Tim Holtz Distress Ink – Salty Ocean. Tim Holtz Distress Ink – Mowed Lawn was added for the base background of the lawn.

To assemble the card, I began with a base card of The Paper Studio – Primary Simply Solids (4.25″ x 5.5″). I ran all of the elements through my Xyron Creative Station to create stickers out of them and so that they would lay completely flat when assembled. I added all of the layers directly to the base card. To finish it off, I added some CC Designs – Dragon Dreams Enamel Dots.

Card Recipe:

Stamp and Sentiment: Birdhouse #1 – KLM Digital Designs

Inks: HP Printer Grayscale, Tim Holtz Distress Ink – Salty Ocean, Tim Holtz Distress Ink – Mowed Lawn, Tim Holtz Distress Ink – Fossilized Amber

Paper: Copic Marker X-Press It Blending Card, The Paper Studio – Primary Simply Solids (4.25″ x 5.5″)

Dies: Avery Elle – Pierced Clouds Die (D-05-01)

Miscellaneous: Xyron Creative Station, CC Designs – Dragon Dreams Enamel Dots, Cuttlebug

Image coloured with Copic Markers:

Birdhouse: V09, V06, V04, Y17, Y15, Y11, E39, E35, E33

Flower and Leaves: YG17, YG03, YG01, V04, V01, Y15

Planter and Dirt: E59, E57, E55, E53, E25, E23, E21, C7, C5, C3, C1

Pole: E39, E37, E35

Grass: YG17, YG13, YG11

 Hope you like it and have a great week!

You can find more cards to inspire you at KLM Designs, KLM Digital Design Team and KLM Digital Designs on the Facebook Fan page from the rest of our design team.

Happy Birthday MVP!!!


It’s Wednesday, and this week, I made a masculine card using Touchdown Trevor – R027 by High Hopes Rubber Stamps for the main image and Happy Birthday MVP – G174 (High Hopes Rubber Stamps) for the sentiment. Both of my brothers were All Stars when they played Football in High-School a long time ago. Sports were always a big part of our lives growing up and for a lot of our family, they still are!!!

To make my card this week, the image and sentiment were both stamped using my MISTI and Memento – Tuxedo Black ink. I used my Brother Scan and Cut to die cut the image and then I coloured it in with Copic markers. For the background, I used my Cricut Explore to die cut the football and goal post using Hammermill – Premium Colour 100 lb. paper with an image from 3 Birds – Life’s a A Party. Using pre-cut stencils for clouds, I used Tim Holtz Distress Ink – Salty Ocean and a Picket Fence – Blending Brush to create them. I added in the grass with a Picket Fence – Blending Brush, finger dauber and Tim Holtz Distress Ink – Mowed Lawn. Black, brown and yellow cardstock were added behind the cut-out. The sentiment was cut with my cutter and the corners were snipped off with scissors. To give it an edge, I went around the cut sentiment with Copic marker – E23.

To assemble the card, I used The Paper Studio – Primary Simply Solids (4.25″ x 5.5″) for the base. 2-sided tape was applied to the back of the coloured background image and it was attached directly to the base. 3M VHB – 2 sided tape was attached to the back of the coloured image and back of sentiment and applied to the top of the card.

Card Recipe:

Stamp: Touchdown Trevor – R027 (High Hopes Rubber Stamps)

Sentiment: Happy Birthday MVP – G174 (High Hopes Rubber Stamps)

Inks: Memento – Tuxedo Black, Tim Holtz Distress Ink – Salty Ocean and Tim Holtz Distress Ink – Mowed Lawn

Paper: Copic Marker X-Press It Blending Card, Hammermill – Premium Colour 100 lb., The Paper Studio – Primary Simply Solids (4.25″ x 5.5″), Yellow Cardstock, Black Cardstock, Brown Cardstock

Cricut Die Cuts: 3 Birds – Life’s a A Party

Stencil: Avery Elle – Custom Steel Dies – Made in the USA – D-05-01 PiercedCloudsDie , Whimsy Stamps – Grass and Cloud Edger Die Set (Used both to create stencils)

Tools: MISTI – Most Incredible Stamping Tool, Picket Fence – Blending Brush, 3M VHB – 2 sided tape, Brother Scan and Cut, Cricut Explore

Image coloured with Copic Markers:

Skin: E21, E11, E04, E00, E000, R30, R20

Hair: E47, E44, E43, E40

Browns: E29, E27, E25, E23

Gold: E15, Y35, Y108, YR24

Pants: C1, C0, C00, Colorless Blender

Hope you like it and have a fantastic week!

You can find lots of inspiration from the Design Team Divas at the High Hopes blog, and the High Hopes Rubber Stamps Facebook Fan page plus you can also follow us on
Instagram, Twitter and Pinterest.

Rabbits Story Time!!


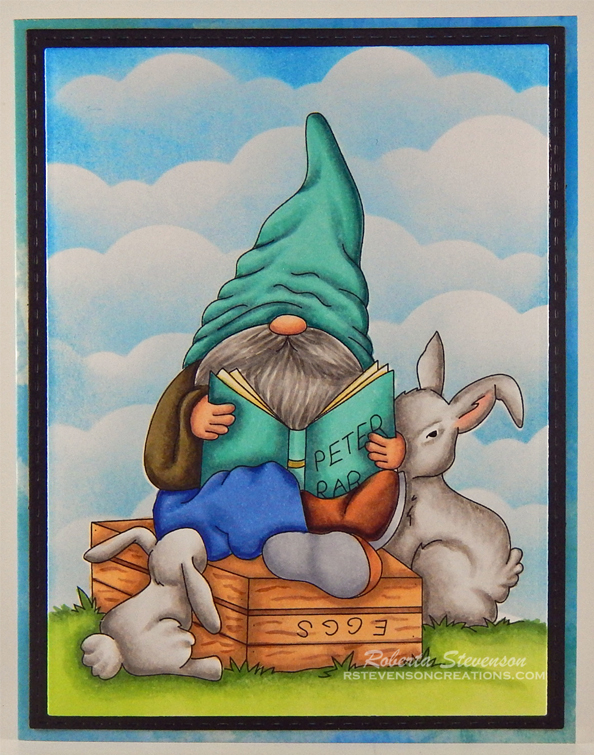
Sharing a card I made today using KLM Digital Designs – Reading Gnome with Rabbits from the new June release. I think this image is such a peaceful scene. These little rabbits are really interested in the story about their cousin Peter Rabbit. We have a little family of wild rabbits that have adopted our backyard yard. I wonder if they’d sit close to me while I read to them. LOL!

To make the card, I first imported the image into Microsoft Word and printed it out onto Copic Marker X-Press It Blending Card and copy paper using my HP Printer. Using my Cuttlebug, My Creative Time – Rectangle Frame Dies and My Creative Time – Rectangle Frame Layers, I die cut black cardstock and the image. I coloured in the image with Copic markers and I created the cloud background using Tim Holtz Distress Ink: Salty Ocean, Broken China, Tumbled Glass with a mixture of cloud stencils I created using Avery Elle – PiercedCloudsDie. I had used my Brother Scan and Cut to create the mask to put over the image while I created the clouds.

To assemble the card, I used Hot Buy – Cards and Envelopes cardstock (5.5″ x 4.25″) for the base. Using double-sided tape, I attached the coloured image and black layer to the base card.

Card Recipe:

Stamp: Reading Gnome with Rabbits – KLM Digital Designs

Inks: HP Printer Grayscale, Tim Holtz Distress Ink – Salty Ocean, Tim Holtz Distress Inks – Broken China, Tim Holtz Distress Inks – Tumbled Glass

Paper: Copic Marker X-Press It Blending Card, Hot Buy – Cards and Envelopes (5.5″ x 4.25″), Black cardstock

Die Cuts Stencils: Avery Elle – Pierced Clouds Die (D-05-01), My Creative Time – Rectangle Frame Dies, My Creative Time – Rectangle Frame Layers

Miscellaneous: Picket Fence – Blending Brush

Image coloured with Copic Markers:

Skin: E21, E11, E04, E00, E000

Beard: W5, W4, W3, W2, W1, W00

Shirt: E89, E87, E84

Jeans: B26, B23, B21

Boots: E27, E25, E23, E21, C3, C2, C1, C0

Book and Hat: BG72, BG57, BG32, BG11, YR30, Y000

Rabbits: W3, W2, W1, W0, W00, R30, R20

Egg Box: E57, E55, E53, E51

Grass: YG17, YG13, YG03, YG01

Hope you like it and have a great week!

You can find more cards to inspire you at KLM Designs, KLM Digital Design Team and KLM Digital Designs on the Facebook Fan page from the rest of our design team.

Seas The Day!!


Sharing a card I made today using KLM Digital Designs – Boating Gnome from the new June release. This stamp comes with 2 other sentiments, “It’s a boat time” and “You float my boat”. There’s nothing like getting up early in the morning and rowing a boat along a shore seeing the wildlife when you go camping. It’s so peaceful and serene.

To make the card, I first imported the image into Microsoft Word and printed it out onto Copic Marker X-Press It Blending Card and copy paper using my HP Printer. Using my Cuttlebug, My Creative Time – Rectangle Frame Dies and My Creative Time – Rectangle Frame Layers, I die cut red, blue cardstock and the image. I coloured in the image with Copic markers and I created the cloud background using Tim Holtz Distress Ink: Salty Ocean, Broken China, Tumbled Glass with a mixture of cloud stencils I created using Avery Elle – PiercedCloudsDie. I had used my Brother Scan and Cut to create the mask to put over the image while I created the clouds.

To assemble the card, I used Hot Buy – Cards and Envelopes cardstock (5.5″ x 4.25″) for the base. I attached the coloured image to the blue layer using double-sided tape. 3M VHB – 2 sided tape was applied to backs of the red and blue rectangles and attached directly to the base.

Card Recipe:

Stamp: Boating Gnome – KLM Digital Designs

Inks: HP Printer Grayscale, Tim Holtz Distress Ink – Salty Ocean, Tim Holtz Distress Inks – Broken China, Tim Holtz Distress Inks – Tumbled Glass

Paper: Copic Marker X-Press It Blending Card, Hot Buy – Cards and Envelopes (5.5″ x 4.25″), Red cardstock, Blue cardstock

Die Cuts Stencils: Avery Elle – Pierced Clouds Die (D-05-01), My Creative Time – Rectangle Frame Dies, My Creative Time – Rectangle Frame Layers

Miscellaneous: 3M VHB – 2 sided tape, Cuttlebug, Brother Scan and Cut, Picket Fence – Blending Brush

Image coloured with Copic Markers:

Skin: E21, E11, E00, E000

Beard: E47, E44, E43, E42

Hat and Glasses: R29, R27, R24, R22, C5

Bathing Suit: B79, B69, B66

Boat and Oar: E39, E37, E35, E34, E33, E31, E30, E29, E27, E25, E23, E21, WR27, R24, R17

Water: BG70, B93, B91, B52, B41, B06, B02, B01, B000

Hope you like it and have a great week!

You can find more cards to inspire you at KLM Designs, KLM Digital Design Team and KLM Digital Designs on the Facebook Fan page from the rest of our design team.

Feel Good!!


Today, I’m sharing a card that I made using Dreamerland Crafts stamps called Having You Around – D19078 for the main image and sentiment. There’s nothing like the love between a boy and his faithful companion. They become best friends as they both grow older together!!!

To make this card I used a base card of 5.5″ x 4.25″ using Hammermill – Premium Colour 100 lb. cardstock. I also cut a panel the same size out of Copic Marker X-Press It Blending Card. I used this to create my background using stencils I created to make clouds by Avery Elle – Pierced Clouds Die (D-05-01) and inks listed below by Tim Holtz. Copic markers were used to colour in the water and I used My Favourite Things – Slimline Grassy Edges Stencil as a guide for the grass on the bottom of the card. Using my MISTI and Versa Fine – Onyx Black ink, I stamped the sentiment and then embossed the ink with Ranger – Clear Super Fine Detail embossing powder. This was heat set with Marvy Uchida – Embossing Heat Tool. I used double-sided tape and attached my background panel to the base card.

Using my Cuttlebug and dies from Studio Light – Wonderful Autumn, I cut the trees and landscape out of Copic Marker X-Press It Blending Card. Using my Copic markers, I coloured these in as well. Then I layered them on top of each other and used glue to adhere them to the coloured background.

Next, using my MISTI and Memento – Tuxedo Black ink, I stamped the main image onto Copic Marker X-Press It Blending Cardstock and coloured it in with Copic markers. I fussy cut around the image by hand and used a black marker to go around all of the edges. 3M VHB – 2 sided tape was applied to the back of the image and it was placed on top of the background to finish off the card.

Card Recipe:

Stamp and Sentiment: Having You Around – D19078 – Dreamerland Crafts

Inks: Memento – Tuxedo Black, Tim Holtz Distress Ink – Salty Ocean, Tim Holtz Distress Inks – Broken China, Versa Fine – Onyx Black

Paper: Copic Marker X-Press It Blending Card, Hammermill – Premium Colour 100 lb.

Die Cuts: Studio Light – Wonderful Autumn – StencilWA311, Avery Elle – Pierced Clouds Die (D-05-01)

Stencil: My Favourite Things – Slimline Grassy Edges Stencil (ST-151)

Embossing Powder: Ranger – Clear Super Fine Detail

Tools: MISTI – Most Incredible Stamping Tool, Cuttlebug, Picket Fence Studio Blender Brushes, Marvy Uchida – Embossing Heat Tool

Image coloured with Copic Markers:

Skin: E21, E11, E00, E000, R22, R20

Hair: E47, E44, E43, E40

Shirt and Hat: E89, E87, E84, R24

Jeans:  B26, B23, B21

Dog: E55, E53, E51

Boat: E49, E27, E25, E23, E21

Trees: E25, E23, G99, G94, G82

Grass: YG17, YG13, YG03, YG01

Water: B93, B91, B52, B41, B06, B04, B02, B01, B000

Hope you like it and have a great week!

You can find more cards to inspire you at Dreamerland Crafts and Pointer Scrapbooking on the Facebook Fan pages from the rest of our design team.

Sunshine and Seashells!!


Sharing a card I made today using KLM Digital Designs – Seascape Gnome from the May releases. This image also comes with 2 more sentiments, “Seas Every Opportunity” and “Be Shore of Yourself”! I don’t know about you, but I love walking along a beach to collect seashells. It’s always so much fun!

To make the card, I first imported the image into Microsoft Word and printed it out onto Copic Marker X-Press It Blending Card and a second copy onto regular copy paper using my HP Printer. Using my Brother Scan and Cut, I cut out the image from the copy paper. I used this as a mask to put over my main image. With the mask in place, I used Tim Holtz Distress Inks: Salty Ocean, Broken China and Tumbled Glass along with cloud stencils I had created using Avery Elle – Pierced Clouds Die (D-05-01) set.

Once this was completed, I removed the mask and began to colour in the water and sand. It was now time to colour my gnome. I unfortunately colured the first layer for the bottom of the beard blue, thinking it was part of the robe he was wearing. Uggggh! I didn’t want to start over, so I just finished colouring the mustache with my Copic markers and then tried to see if I could use the same colours to colour over the blue. It  didn’t quite work out a 100%, so I decided to use my PrismaColor Pencils to colour over top of the Copic markers. This seemed to fix it. I moved on to finish the rest of image.

After I was satisfied with the colouring of the image, I trimmed it down to 5.25″ x 4″. I applied double-sided tape to the back of the image and adhered it to a card base of 5.5″ x 4.25″ to complete my card.

Card Recipe:

Stamp: Seascape Gnome – KLM Digital Designs

Inks: HP Printer Grayscale, Tim Holtz Distress Inks: Salty Ocean, Broken China and Tumbled Glass

Paper: Copic Marker X-Press It Blending Card, Hot Buy – Cards and Envelopes (5.5″ x 4.25″)

Die Cut Stencils: Avery Elle – Pierced Clouds Die (D-05-01)

Image coloured with Copic Markers:

Skin: E21, E11, E00, E000

Beard: E49, E47, E44, E43, E40, PrismaColor Pencils – Gingeroot (PC1084), Dark Brown (PC946), Sandbar Brown (PC1094), Cream (PC914)

Clothing: B16, B04, B02, B01

Hat: B16, B04, B02, B01, BG53, BG49, BG45, BG02, BG01, BG000, Smooch – Pool

Sand: E37, E35, E33, E31

Water: BG70, B93, B91, B52, B41, B02, B01, B000, BG11, BG10

Starfish: YR31, YR09, YR04

Conch: YR31, YR21, YR20, R00, R000

Seashell: YR02, YR01, YR00, YR000

Pail: BG53, BG49, BG45, Pental Sunburst Metalic Med Gel Pen

Lettering: Atyou Spica – Lemon (05)

Hope you like it and have a great week!

You can find more cards to inspire you at KLM Designs, KLM Digital Design Team and KLM Digital Designs on the Facebook Fan page from the rest of our design team.