Tag Archive | Farm

You Got This!!


It’s Wednesday, and this week, I made a card using High Hopes Rubber Stamps Lasso Some Snow – TDG021  for the main image and Don’t Worry – FDG021 for the sentiment. We all need a little bit of encouragement every now and then and this little snowman is here to give us some.

To make my card this week, I began with a card base of Hammermill – Premium Colour 100 lb. cardstock, cut and scored to be 5.5″ x 4.25″.  I used Echo Park Paper Co. – My Favorite Winter cardstock cut to the same size as the base card for the background. I attached this to the base using double-sided tape. Using my Cuttlebug, a mixture of square dies from My Creative Time -Stitched Squares Inside and Out and Waffle Flower – Nesting Square dies, I die cut cardstock from Scrapbook.com Neutrals Smooth Cardstock and also Copic Marker X-Press It Blending Card. I applied double-sided tape to the back of the tan square and applied it directly to the background. U-Line double-sided tape was added to the back of the dark brown square and popped up onto the centre of the tan square.

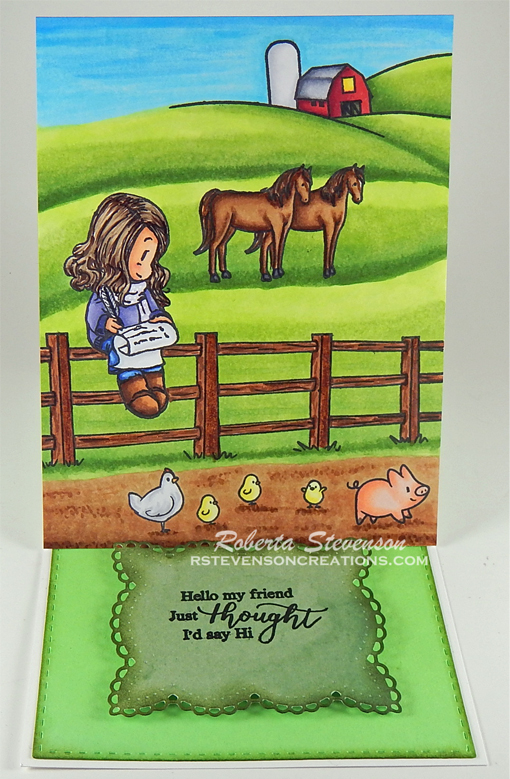
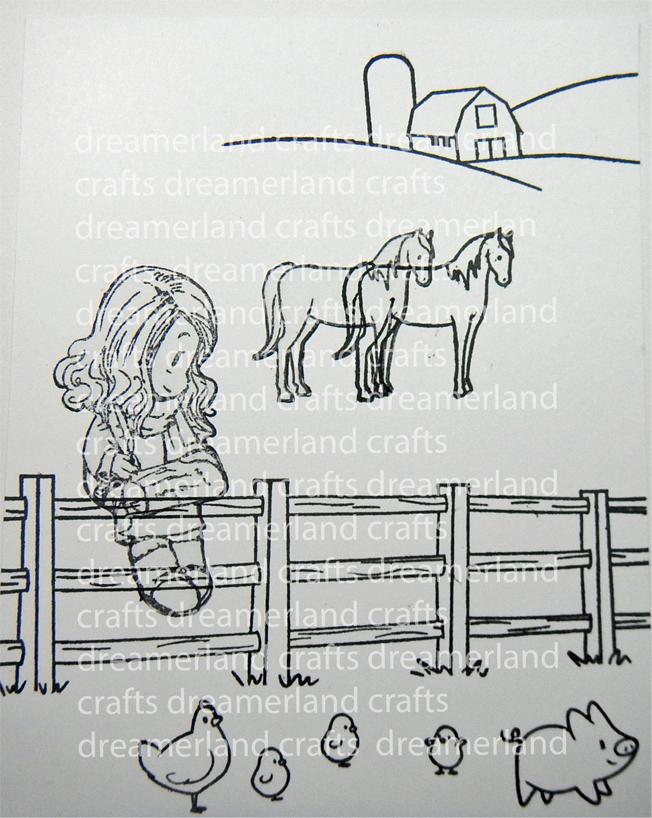
With my MISTI and Memento – Tuxedo Black ink, I stamped the image onto the Copic Marker X-Press It Blending Card cardstock square and coloured it in with Copic markers. Gelly Roll Sakura #10 Pen was used to create the snow in the sky. Sakura Glaze – Black and Gelly Roll Sakura #5 Pen were used on the eyes of the snowman. I applied U-line douhble-sided tape to the back of the completed image and popped it up onto the centre of the dark brown square.

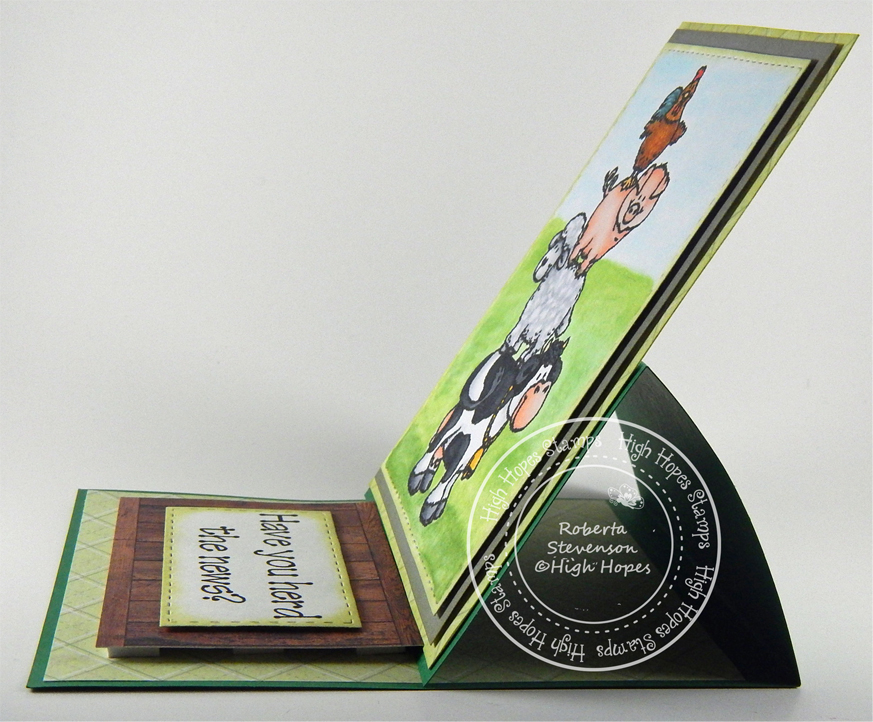
With my MISTI and Memento – Tuxedo Black ink, I stamped the sentiment onto Recollections – White cardstock and then die cut it out using my Cuttlebug and My Creative Time – Ribbon End Dies. I inked around the edges using Copic – E59 marker to give it a dark brown border. I used my knife to remove the double border from the piece left behind and then traced the shape of the ribbon onto the remaining piece of Scrapbook.com Neutrals Smooth Cardstock. I cut this out with my cutter and scissors. U-Line double-sided tape was applied to both pieces and the completed sentiment was popped up onto the card below the main image to complete the card.

Card Recipe:

Stamp: Lasso Some Snow – TDG021 (High Hopes Rubber Stamps)

Sentiment: Don’t Worry – FDG021 (High Hopes Rubber Stamps)

Inks: Memento – Tuxedo Black

Paper: Copic Marker X-Press It Blending Card, Hammermill – Premium Colour 100 lb., Echo Park Paper Co. – My Favorite Winter (6″ x 6″), Scrapbook.com – Neutrals Smooth Cardstock (5.5″ x 4.25″), Recollections – White cardstock

Die Cuts: My Creative Time -Stitched Squares Inside and Out, Waffle Flower – Nesting Square dies, My Creative Time – Ribbon End Dies

Tools: MISTI – Most Incredible Stamping Tool, U-Line double-sided tape, Gelly Roll Sakura #10 Pen, Gelly Roll Sakura #5 Pen, Sakura Glaze – Black, Cuttlebug

Image coloured with Copic Markers:

Snowman: B60, C9, C7, C5, C00, E49, YR18, YR16, YR12, Colorless Blender (Eyes – Sakura Glaze – Black, Gelly Roll Sakura #5 Pen)

Hats, Mitts and Scarf: B99, B977, B95

Coat: E51, E50, E37, E35, E34, E33, E31

Birds: E59, E37, E35

Fence: E29, E27, E25, E23, E21

Wheel and Rope: E77, E74, E47, E44, E43, Y35, YR31

Sky: B04, B02, B01, B00

Snow: B000, B60, C00, Colorless Blender, Stickles – Diamond

Hope you like it and have a fantastic week!

You can find lots of inspiration from the Design Team Divas at the High Hopes blog, and the High Hopes Rubber Stamps Facebook Fan page plus you can also follow us on
Instagram, Twitter and Pinterest.

Just a Note To Say!!


Today, I’m sharing an inspirational card that I made using Dreamerland Crafts stamps called Farm 01 – D20017 and Just A Note To Say – DCS17038 for the main images and Mix and Match Clear Stamps – DCS19093 for the sentiment.

Above is a close-up of the card. Below is the card opened.

To make this card I used a base card of 11″ x 4.25″ using Hammermill – Premium Colour 100 lb. cardstock. I scored it at 2.75″ and 5.5″ to create an easel card. I stamped the fence, horses, pig and girl onto Inkadoo Stamping Mask Paper and fussy cut around them. Then I placed them onto Copic Marker X-Press It Blending Card cut at 5.5″ x 4.25″ for placement.

I removed the fence and using my MISTI and Memento – Tuxedo Black ink, I stamped the girl. I placed the girl mask over top of the stamped girl image and then stamped the fence, chicks, pig and farm house and fields. I stamped a horse and then placed the horse mask over it and stamped a second horse. Next, I removed the masks from the scene. I coloured all of the images and background in with Copic markers. I added double sided tape to the bottom portion of the easel card and attached the coloured image.

My Creative Time – Rectangle Frame Dies were used create the base background and Gina Marie Designs – Petite Looped Lace Rectangle dies were used to create the base for the sentiment. I stamped the sentiment using my MISTI and Versa Fine – Onyx Black ink. I added Ranger – Clear Super Fine Detail embossing powder and then heat embossed the powder with Marvy Uchida – Embossing Heat Tool. Tim Holtz Distress Ink – Peeled Paint ink was used to ink around the edges of both die cuts.

To complete the card, the large rectangle was added directly to the card using double-sided tape and 2 layers of 3M VHB – 2 sided tape were added to the back of the sentiment die cut and attached to the base card background.

Card Recipe:

Stamps: Farm 01 – D20017 (Dreamerland Crafts); Just A Note To Say – DCS17038 (Dreamerland Crafts)

Sentiment: Mix and Match Clear Stamps – DCS19093 (Dreamerland Crafts)

Inks: Memento – Tuxedo Black, Versa Fine – Onyx Black, Tim Holtz Distress Inks – Peeled Paint

Embossing Powder: Ranger – Clear Super Fine Detail embossing powder

Paper: Copic Marker X-Press It Blending Card, Hammermill – Premium Colour 100 lb., Momenta – Cardstock

Die Cut: Gina Marie Designs – Petite Looped Lace Rectangle, My Creative Time – Rectangle Frame Dies

Tools: MISTI – Most Incredible Stamping Tool, Cuttlebug, Marvy Uchida – Embossing Heat Tool, 3M VHB – 2 sided tape, Inkadoo Stamping Mask Paper

Image coloured with Copic Markers:

Skin: E000, E00, E04, E11, E21, R22, R20

Hair:  E47, E44, E43

Blouse and Scarf: V28, BV13, BV11, BV04, BV01, BV00, BV0000, Gelly Roll Sakura #8 Pen

Pants: B26, B23, B21

Boots: E27, E25, E23, E21

Feather and Paper: C7, C1, C0, C00

Horses: E59, E49, E37, E35, E33, E31, C7, C5

Pig: R20, R000, E93, E47

Chicken and Chicks: Y04, Y02, Y00, C2, C1, C00, YR12, R17

Barn and Silo: R39, R37, R35, Y08, Y04, C7, C5, C1, C0

Fence: E59, E27, E25, E23, E21

Grass: YG17, YG13, YG03, YG01

Sky: B02, B01, B00, B000, B0000, Colorless Blender

Ground: E37, E35, E33, E31

Hope you like it and have a great week!

You can find more cards to inspire you at Dreamerland Crafts and Pointer Scrapbooking on the Facebook Fan pages from the rest of our design team.

Have You Herd The News???


It’s Wednesday, and this week, I couldn’t wait to colour up this super adorable image called Funny Farm – T065 by High Hopes Rubber Stamps.  I also thought that the sentiment – Have You Herd The News – G080 (High Hopes Rubber Stamps) was perfect for these little characters. Their facial expressions, just make you wonder what it is that is so secret that they can’t wait to tell you!! Hmmmm! Could it be a birthday surprise, or maybe a new baby is coming? or someone is retiring??? or someone just graduated???? This combo could be use for so many possibilities and that is why it was so much fun to play with.

Above is the card from the front angle and below is the card from the top angle.

To make my card this week, I started off with a green cardstock base of 5.5″ x 11″. Then I scored it at 5.5″ and 2.75″ on one side from the edge to make it a pop-up card. I also cut another piece of cardstock at about 4-1/8″ x 5.25″. I added some patterned paper from DCWV – Fashion District to this piece and to the inside bottom of the card, cut to the same size. Next, used My Mind’s Eye – Lost & Found paper cut at 3.75″ x 5″ which I popped up with 3M VHB – 2 sided tape. Before attaching the background papers, I edged around them with Tim Holtz Distress Ink – Shabby Shutters.

I die-cut the main image out of Copic Marker X-Press It Blending Card using my Cricut and Your Next Stamp – Stitched Rectangle Die Set. Then I stamped the image using my MISTI and Memento – Tuxedo Black ink. After that, I coloured in the image using Copic markers. For the background, I used a new technique that I learned. First I used a Q-Tip to moisten the background with some Copic Colorless Blender and then I used a mixture of Copic Re-inkers listed below with a Q-Tip to create the sky and grass. Love this technique, as it is quick and easy. After colouring the image, I inked around the edges with the same Tim Holtz ink and then popped up the image using some 3M VHD – 2 sided tape.

I die cut the sentiment using the same die set that I used for the main image and then stamped the sentiment with Memento – Tuxedo Black Ink. I mounted it with 3M VHB – 2 sided tape onto Joy Crafts – Artist Trading Card Wood Texture cardstock. Then, I popped up the entire base background and sentiment with Forever in Time – Pop-Dot Adhesives onto the inside base of the card.

I attached the finished image that was mounted onto the background papers onto the lower half of the card that had been scored at 2.75″ earlier, leaving the top half empty.

Card Recipe:

Stamp:  Funny Farm – T065  (High Hopes Rubber Stamps)

Sentiment: Have You Herd The News – G080 (High Hopes Rubber Stamps)

Inks: Memento – Tuxedo Black, Tim Holtz Distress Ink – Shabby Shutters

Paper: Copic Marker X-Press It Blending Card, DCWV – Fashion District (6×6″, 15.2×15.2cm), Joy Crafts – Artist Trading Card – Wood Texture (2-3/8×3-3/8″ – 85mm x 60mm), My Mind’s Eye – Lost & Found (6×6″)

Die Cuts: Your Next Stamp – Stitched Rectangle Die Set (YNSD214)

Tools: MISTI – Most Incredible Stamping Tool, Cuttlebug, 3M VHB – 2 sided tape, Forever in Time – Pop-Dot Adhesives

Image coloured with Copic Markers:

Pig: E93, E44, E43, E40, R20, R000, R00

Sheep: C5, C3, C1, C0, B60

Cow: R20, R02, R00, R000, E93, C10, C9, C8, C6, C5, C3, C2, C1, Y17, Y15, Y13, Colorless Blender

Rooster: E99, E97, E23, E09, R24, BG53, BG78, BG75, BG72, Y06, YR21

Sky: B000, B00, Colorless Blender

Grass: YG17, YG13, YG11, Colorless Blender

Hope you like it and have a fantastic week!

You can find lots of inspiration from the Design Team Divas at the High Hopes blog, and the High Hopes Rubber Stamps Facebook Fan page plus you can also follow us on
Instagram, Twitter and Pinterest.

Check out the High Hopes Website for something else to give you a big smile!

Over on the High Hopes Website there is a Store Wide sale, save 20% off right now when you use the coupon Code Love at the checkout!