Tag Archive | Momenta – Cardstock

Wedding Cake!


Today I’m sharing a Wedding card using KLM Digital DesignWedding Cake from the new March 2024 release. This image also comes with 2 more sentiments, “Wishing you both a lifetime of everlasting love and happiness!” and “To love, laughter, and happily everafter”.

The image and sentiment were imported into Microsoft Word and printed out onto Copic Marker X-Press It Blending Card. Using a Cuttlebug and dies, Recollections – Matte Gold Foil cardstock was die cut using Creative Expressions by Sue Wilson – Shadow Box Collection- Stitched Lattice Frames and My Creative Time – Rectangle Frame Layers. Momenta – Cardstock was also die cut with the larger layer die. The image was coloured with Copics listed below and then fussy cut. A black marker was then applied all around the edges of the image. The sentiment was fussy cut and applied to Recollections – Matte Gold Foil cardstock and then fussy cut again leaving a small border.

The card was now ready to assemble. I began with a card base of 5.5″ x 4.25″ using Hammermill – Premium Cardstock 110 lb. cardstock. Liquid glue was applied to the background pieces and they were applied directly to the purple die cut to join all of the background pieces together. The finished piece was centred directly onto the card base using double-sided tape. U-Line Double-Sided Foam Tape was applied to the sentiment and cake and both were popped up onto the card.

Card Recipe:

Stamp and Sentiment:  KLM Digital DesignWedding Cake

Inks: HP Printer Grayscale

Paper: Copic Marker X-Press It Blending Card, Hammermill – Premium Cardstock 110 lb., Recollections – Matte Gold Foil cardstock, Momenta – Cardstock

Dies: Creative Expressions by Sue Wilson – Shadow Box Collection- Stitched Lattice Frames, My Creative Time – Rectangle Frame Layers

Miscellaneous: U-Line Double-Sided Foam Tape

Image coloured with Copic Markers:

Leaves: G16, YG25, YG23

Flowers: YR23, Y15, Y11, Y00, RV69, RV66, RV55, RV0000, V17, V15, V12

Cake: C1, C0,  C00

Hope you like it and have a great week!

You can find more cards to inspire you at KLM Designs, KLM Digital Design Team and KLM Digital Designs on the Facebook Fan page from the rest of our design team.

Workout Wheelie!!


Sharing a birthday card I made using Art Impressions Workout Gal Wheelie  for the main image and sentiment. My colleague loves to workout and I thought this would be a fun card to make for her. There is a tab on the inside of the card which makes the wheels turn as she pedals.

To make my card, I began with a card base of Hammermill – Premium Colour 100 lb. cardstock, cut and scored to be 5.5″ x 4.25″. Using my Cuttlebug and Gina Marie Designs – Nested Scalloped Stitched Rectangles, I die cut Scrapbook.com – Rainbow Smooth cardstock. Then, using my Cuttlebug again and this time Momenta – Cardstock, I die cut the inside rectangle with My Creative Time – Rectangle Frame Layers.

Using my MISTI and Memento – Tuxedo Black ink, I stamped the image onto Copic Marker X-Press It Blending Card cardstock. The image was coloured in with Copic markers and then die cut with the dies that came with the stamp set.  The backgrounds and base card were also die cut to match where the wheel would be turning. Using double-sided tape, the 2 large die cuts were attached to the base card centering the holes for each of them. The brads were inserted into the holes of the die cuts for the body and wheel assembly. This was glued onto the background rectangle. I positioned the sentiments around the image using a MISTI and Versa Fine – Onyx Black ink. They were embossed using my Marvy Uchida – Embossing Heat Tool and Ranger – Clear Super Fine Detail embossing powder.  Lastly, a 1/4″ foam circle was attached to the wheel from inside the card and the cover circle and tab were added to it. This mechanism allows the card holder to turn the wheel. So much fun!

Card Recipe:

Stamp and Sentiment: Workout Gal Wheelie  (Art Impressions) (Retired)

Inks: Memento – Tuxedo Black, Versa Fine – Onyx Black

Paper: Copic Marker X-Press It Blending Card, Hammermill – Premium Colour 100 lb., Scrapbook.com – Rainbow Smooth Cardstock (4.25″ x 5.5″), Momenta – Cardstock

Dies: Gina Marie Designs – Nested Scalloped Stitched Rectangles, My Creative Time – Rectangle Frame Layers

Embossing Powder: Ranger – Clear Super Fine Detail embossing powder

Tools: MISTI – Most Incredible Stamping Tool, Cuttlebug, Marvy Uchida – Embossing Heat Tool

Image coloured with Copic Markers:

Skin: E21, E11, E04, E00, E000, R46, R89, R83, R22, R20

Hair: E47, E44, E43

Outfit: Y38, RV66, RV55, RV52, BG72, BG57, BG32, BG11

Headband and Slipper: RV66, RV55, RV52, N2, N1, N0

Towel: BG09, BG05, BG02, BG01, Y38, Y35, Y32

Earing, Glasses and Mirror: BG72, BG57, BG32

Bike, Pedal and Wheel: W9, W7, W5, C5, C4, C3, C1

Wine Glass: R89, R85, R59, R56, BG0000

Hope you like it and have a great week!

Fido’s Hallowe’en


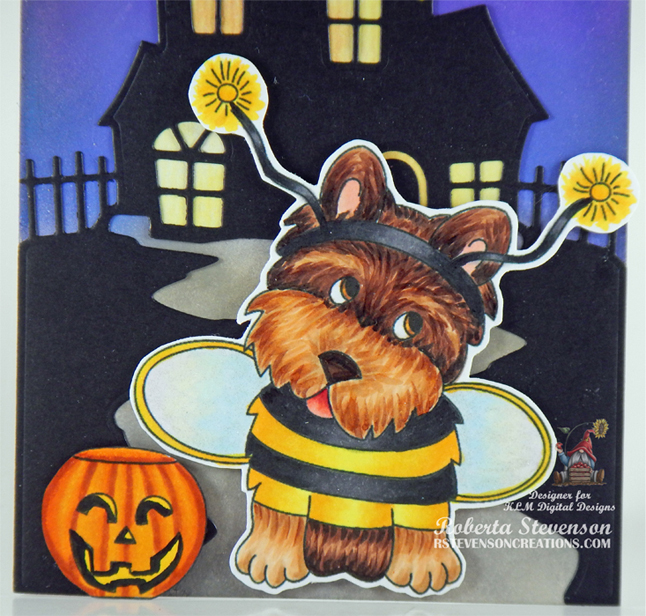
Sharing a Hallowe’en slim line card I made today using KLM Digital DesignFido – Hallowe’en Freebie from the new October 2022 release.  Fido is all set for Trick or Treating with his little “Bee” outfit. Do you dress up your pets for Hallowe’en too?

To make my card this week, I started with a 7″ x 7″ card base using Hammermill – Premium Colour 100 lb. cardstock. I scored this at 3.5″, so that the final card base measured 3.5″ x 7″. To create my background, I die cut the haunted house and path using an Anna Griffin Empress Mini cutting Machine, Recollections – Black cardstock and Say It With Stamps – #6 Haunted House Coverplate Die. The little bats were cut from the same die set at the same time. For the yellow behind the windows I cut a solid piece using Momenta – Cardstock. I glued this into place on the back of the die cut using liquid glue. I love how the Momenta paper had the colour variations of yellow. Using the die cut as a reference as to where to place the background colours, I applied a mixture of Tim Holtz Distress Oxide inks for the sky listed below and Tim Holtz Distress Inks for the path with Gina K. Designs blending brushes. Once the background was coloured in, I applied glue to the back of the die cut and adhered it to the card. Using the same cutting machine again, I die cut the sentiments 3 times using scrap pieces of orange and black cardstock which I had run through my Xyron Create a Sticker first so that it would be easier to attach them on top of each other later. I pieced them all together and attached them to the card. The 3 bats were then placed around the sentiment.

The image was imported into Microsoft Word and printed out onto Copic Marker X-Press It Blending Card. The images were coloured in and then Wink of Stella – Clear was applied to the wings to make them sparkly.  Both images were fussy cut and U-Line double-sided tape was applied to both and they were popped up onto the card to finish it off.

Card Recipe:

Stamp:  Fido – Hallowe’en Freebie – KLM Digital Designs

Inks: HP Printer Grayscale, Tim Holtz Distress Ink – Pumice Stone, Hickory Smoke, Tim Holtz Distress Oxide Ink – Wilted Violet, Seedless Preserves, Villainous Potion, Faded Jeans, Blueprint Sketch, Black Soot

Paper: Copic Marker X-Press It Blending Card, Hammermill – Premium Colour 100 lb., Recollections – Black cardstock, Momenta – Cardstock

Die Cuts: Say It With Stamps – #6 Haunted House Coverplate Die, Halloweeen – MSPCI

Miscellaneous: U-Line double-sided tape, Anna Griffin Empress Mini Machine, Xyron Create a Sticker, Gina K. Designs blending brushes, Wink of Stella – Clear

Image coloured with Copic Markers:

Dog: E55, E53, E51, E50, E49, E47, E29, E27, E25, E23, R30, R29, R24, R20, C00, Colorless Blender

Costume and Wings: Y17, Y15, Y08, Y04, 100, N0, N7, N5, B0000, BG0000, Y0000, RV0000, Wink of Stella – Clear

Pumpkin: YR18, YR16, YR14, YR12, Y08, C9

Sky: Tim Holtz Distress Oxide Ink – Wilted Violet, Seedless Preserves, Villainous Potion, Faded Jeans, Blueprint Sketch, Black Soot

Pathway: Tim Holtz Distress Ink – Pumice Stone, Hickory Smoke

Hope you like it and have a great week!

You can find more cards to inspire you at KLM Designs, KLM Digital Design Team and KLM Digital Designs on the Facebook Fan page from the rest of our design team.

You Are Perfect!!


Sharing a card I made today using KLM Digital Design –  Frog Prince from the new April 2022 release. This image also comes with 2 more sentiments, “Let your tale come true” and “Sometimes you gotta kiss a frog to find a prince”.

I created a 6″ x 6″ card base using AC Cardstock – White. Using my Cuttlebug and Craftin Desert Diva’s – Inside Scalloped Squares die cut, I die cut Momenta – Cardstock. I imported the image and sentiment into Microsoft Word and printed them out onto Copic Marker X-Press It Blending Card. The image was coloured in with Copic markers and then I cut out the whole piece to the size of 4.5″ x 4.5″. I applied liquid glue to the backing of the Scalloped die cut to the stitched border and then placed it over top of my coloured image. U-Line double-sided tape was applied to the backing and it was popped up onto the base card. I added in some gems from “Say it in Crystals” onto the crown and then finished off the card with some dots from Your Next Stamp – Watermelon Party Sparkly Gumdrops.

Card Recipe:

Stamp and Sentiment:  Frog Prince – KLM Digital Designs

Inks: HP Printer Grayscale

Paper: Copic Marker X-Press It Blending Card, Momenta – Cardstock, AC Cardstock – White

Dies: Craftin Desert Diva’s – Inside Scalloped Squares (retired)

Miscellaneous: U-Line – 2 sided tape, Gelly Roll Sakura #10 Pen, Sakura Glaze – Black, Your Next Stamp – Watermelon Party Sparkly Gumdrops

Image coloured with Copic Markers:

Frog: BG99, G19, G17, G14, YG17, YG06, YG03, YG00, YG0000, E81, C1, C0 (Eyes: Sakura Glaze – Black, Gelly Roll Sakura #10 Pen)

Crown: E15, R39, R29, R27, R24, Y35, Y06, YR35, C1, C0

Shadow: B00, Colorless Blender

Hope you like it and have a great week!

You can find more cards to inspire you at KLM Designs, KLM Digital Design Team and KLM Digital Designs on the Facebook Fan page from the rest of our design team.

Ellie & Friends!!


It’s Wednesday, and this week, I made an Easter card using High Hopes Rubber Stamps Ellie & Friends – TDG025 for the image and Happy Easter! – F096 for the sentiment. We are celebrating our new “Spring Fever Release” this month and who couldn’t love this adorable image!

To make my card this week, I began with a card base of AC Cardstock – White, cut and scored to be 6″ x 6″. I cut the flower cardstock from Echo Park – Welcome Easter at 6″ x 1.75″ and Lawn Fawn – Watercolor Wishes Rainbow paper to 6″ x 4.5″. I applied double-side tape and adhered both pieces directly to the base. Tim Holtz Distress Ink – Wilted Violet ink was used to ink around all of the edges of the base card. Using My Creative Time -Stitched Squares Inside and Out and my Cuttlebug, I die cut Momenta – Cardstock and inked around the edges with Tim Holtz Distress Ink – Fossilized Amber. 3M double-sided tape was applied to the back of this and it was popped up onto the base card.

Using PinkFresh Studios – Essentials: Blanket Stitched Square Die Set and my Cuttlebug, I die cut Copic Marker X-Press It Blending Card. I stamped the main image onto this die cut and sentiment onto Copic Marker X-Press It Blending Card using my MISTI and Memento – Tuxedo Black. The image was coloured in with Copic Markers and then U-Line double-side tape was applied to the back of it. This was popped up over top of the yellow square.

I fussy cut around the sentiment and inked around the edges with Tim Holtz Distress Ink – Wilted Violet. I ran it through my Xyron Create a Sticker and applied it to the Momenta – Cardstock and fussy cut around it again. I applied Scrapbook Adhesives – 3D Foam Strips to the back of the sentiment layers and added it to the bottom right of the card. Lastly, I added in 3 DoodleBug Design Inc. – Sprinkles Spring Assortment to complete the card.

Card Recipe:

Stamps: Ellie & Friends – TDG025 (High Hopes Rubber Stamps)

Sentiment: Happy Easter! – F096 (High Hopes Rubber Stamps)

Inks: Memento – Tuxedo Black, Tim Holtz Distress Ink – Wilted Violet, Tim Holtz Distress Ink – Fossilized Amber

Paper: Copic Marker X-Press It Blending Card, Lawn Fawn – Watercolor Wishes Rainbow – 6″ x 6″, Echo Park – Welcome Easter (6″ x 6″), Momenta – Cardstock, AC Cardstock – White

Die Cuts: My Creative Time -Stitched Squares Inside and Out, PinkFresh Studios – Essentials: Blanket Stitched Square Die Set

Tools: MISTI – Most Incredible Stamping Tool, U-Line double-sided tape, 3M double-sided tape, Cuttlebug, Xyron Create a Sticker, DoodleBug Design Inc. – Sprinkles Spring Assortment, Scrapbook Adhesives – 3D Foam Strips

Image coloured with Copic Markers:

Elephant: C5, C3, C2, C1, R30, R20

Chicks: E53, E50, E15, YR31, YR18, YR14, Y21, Y08, Y14, Y08

Flowers, Stems and Leaves: V09, V06, V04, V01, Y17, Y13, G85, G43

Eggs: Y17, Y13, Y04. BG15, BG13, BG11, BG10, V17, V15, V12, B04, B02, B01, RV66, RV55, RV13, RV11, RV10

Sky: B60, B02, B01, B00, B000, C1, Colorless Blender

Grass: G14, YG23, YG11, YG03, YG01

Hope you like it and have a fantastic week!

Check out more adorable images in the new “Spring Fever Release” at High Hopes Rubber Stamps!

You can find lots of inspiration from the Design Team Divas at the High Hopes blog, and the High Hopes Rubber Stamps Facebook Fan page plus you can also follow us on
Instagram, Twitter and Pinterest.

Dancing Gnome!!


Sharing a card I made today using KLM Digital Designs –  Dancing Girl Gnome from the new November release. This image also comes with 2 more sayings: “Chin up princess or the crown slips” and “Happy Birthday”.

The base was created with Hammermill – Premium Colour 100 lb. cardstock cut and folded to the size of 5.5″ x 4.25″. I printed out Nana Vics Digitals – Ballerina #2 Digital Paper and cut it to size using My Creative Time – Rectangle Frame Dies. I inked around the edges with Tim Holtz Distress Ink – Wilted Violet and then adhered it to the base using double-sided tape and some glue. Stickles – Purple was added around all of the edges of the patterned paper background. I imported the image and sentiment into Microsoft Word and printed them out onto Copic Marker X-Press It Blending Card. My Creative Time – Stitched Zig Zag Ties and my Cuttlebug were used to die cut the sentiment and Tim Holtz Distress Ink – Wilted Violet was used to ink around all of the edges. The image was coloured in with Copic markers and then fussy cut with scissors and outlined around the edges with a black marker. I ran this through my Xyron Creative Station and applied it to Momenta – Cardstock. Once again, I fussy cut around the image and then ran it through my Xyron Creative Station. This time, the image was placed onto black cardstock. I fussy cut around it and then added U-Line double-sided tape to the back of the image and sentiment. Both the image and the sentiment were then popped up onto the card. I added in a few Kraftin Kimmie – Festive Dots to finish off the card.

Card Recipe:

Stamp and Sentiment:  Dancing Girl Gnome – KLM Digital Designs

Inks: HP Printer Grayscale, Tim Holtz Distress Ink – Wilted Violet

Paper: Copic Marker X-Press It Blending Card, Hammermill – Premium Colour 100 lb., Momenta – Cardstock, Nana Vics Digitals – Ballerina #2 Digital Paper

Die Cuts: My Creative Time – Rectangle Frame Dies, My Creative Time – Stitched Zig Zag Ties

Miscellaneous: U-Line – 2 sided tape, Stickles – Purple, Kraftin Kimmie – Festive Dots, Xyron Creative Station

Image coloured with Copic Markers:

Skin: E21, E11, E04, E00, E000, R30, R20

Hair: E18, E08, YR18, YR14

Dress, Hat and Shoes: B69, V17, V15, V12

Blouse: Y18, Y15, Y13, Y11

Shadow: C2, C1, C0

Hope you like it and have a great week!

You can find more cards to inspire you at KLM Designs, KLM Digital Design Team and KLM Digital Designs on the Facebook Fan page from the rest of our design team.

Be Thankful!!


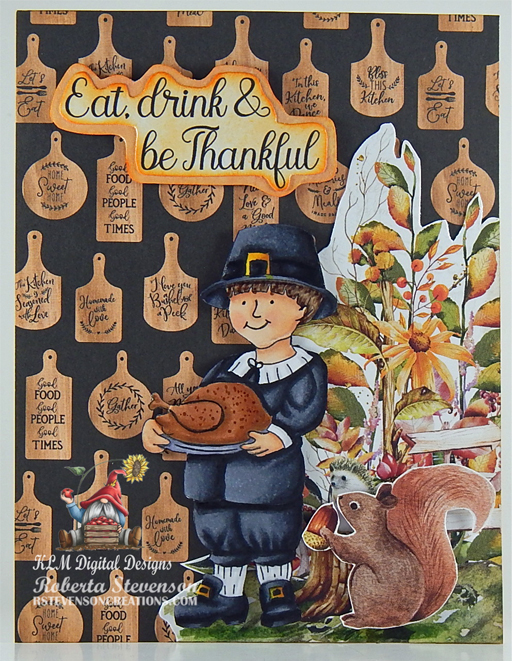
Sharing a card I made today using KLM Digital Designs – Pilgrim Boy from the new September release. This image also comes with 2 other sentiments “Happy Harvest” and “It’s turkey time”.  Canadian Thanksgiving is coming up soon and I’m looking forward to having a nice big turkey! Yum! Yum!

To make the card, I first imported the image and sentiment into Microsoft Word and printed them out onto Copic Marker X-Press It Blending Card. The image was coloured in with Copic markers and then fussy cut. I used a black marker to ink around the edges of the image.

For the base card, I used Hammermill – Premium Colour 100 lb. and cut it and scored it to be 5.5″ x 4.25″. Echo Park Paper Co. – Farmhouse Kitchen paper was cut to the same size as the base and applied using double-sided tape. I fussy cut P13 – The Four Seasons – Autumn paper and applied it to the left corner using double-sided tape and glue. I thought the little squirrel was adorable, so from the same paper pack, I fussy cut around it too. The sentiment was fussy cut and inked around the edges with Tim Holtz Distress Ink – Carved Pumpkin. I then ran this through my Xyron Create a Sticker and attached it to Momenta – Cardstock. Once again, I fussy cut around it and applied Tim Holtz Distress Ink – Carved Pumpkin around the edges. The images and sentiment were then all popped up on the card using 3M VHB – 2 sided tape. To finish off the card, I edged around all sides using Tim Holtz Distress Ink – Vintage Photo.

Card Recipe:

Stamp and sentiment: Pilgrim Boy – KLM Digital Designs

Inks: HP Printer Grayscale, Tim Holtz Distress Ink – Carved Pumpkin, Tim Holtz Distress Ink – Vintage Photo

Paper: Copic Marker X-Press It Blending Card, Hammermill – Premium Colour 100 lb., P13 – The Four Seasons – Autumn (6″ x 6″), Echo Park Paper Co. – Farmhouse Kitchen (6″ x 6″), Momenta – Cardstock

Miscellaneous: Xyron Create a Sticker, 3M VHB – 2 sided tape

Image coloured with Copic Markers:

Skin: E21, E11, E00, E000

Hair: E47, E45, E43

Clothing, Hat and Shoes: C10, C8, C7, C6, C5, C4, 100

Buckles: E15, Y35, Y17, Y08

Turkey: E99, E37, E35, E33

Hope you like it and have a great week!

You can find more cards to inspire you at KLM Designs, KLM Digital Design Team and KLM Digital Designs on the Facebook Fan page from the rest of our design team.
Time For Warm Socks!!


I’m so happy to join the team of PPCF designers! Today is day 3 of our event for sponsoring CCDesigns on Passionate Paper Creations and Friends FB Group. The card I’m featuring for this event is the New Socks Clear Stamp Set.

To make the card, I began with the base 12″ x 6″ of AC White Cardstock. This was scored at 6″ x 9″ to create an easel card. Closed, the card measures 6″ x 6″. I cut Hammermill – Premium 100 Colour cardstock 6″ x 6″ and coloured in the flooring and base boards with Copic markers.  For the background wall, I cut Momenta – Cardstock to the size of 6″ x 5.5″. I created the large window using Paper Roses – Victorian Window die, my Cuttlebug and Hammermill – Premium Colour 100 lb. paper. I traced around the die and then manually cut the background from Pebbles – Home for Christmas paper pad. I did the same procedure for cutting Judi-Kins Embossable Window Plastic. I glued the plastic window to the die cut and added Stickles – Diamond to the back of the window along the frames. Once the Stickles was dry, I added some trees from Make Special Cards XMas 2015 – Issue 3 to the back of the plastic window and glued the snowy background onto the plastic window and frame to complete the scene.  This was attached directly to the wall background using glue.

The characters were coloured with Copic markers and I added 3M double-sided tape to the back of the images after fussy cutting around them to pop them up on the page. Using the same paper that I used for the wall background, I cut to be 4″ x 1.75″ and popped up onto the bottom half of the base card using 3M double-sided tape (2 layers). The sentiment was cut to 3-13/16″ x 1-9/16″ and attached directly to the previous cut. To complete the card, the 6″ x 6″ scene was attached to the bottom half of the 3″ score previously done. The edges of the green paper were inked with Tim Holtz Distress Ink – Rustic Wilderness.

Card Recipe:

Stamp and Sentiments: New Socks Clear Stamp Set – CC Designs

Paper: Copic Marker X-Press It Blending Card, Hammermill – Premium Colour 100 lb., AC White Cardstock, Pebbles – Home for Christmas paper pad – 36 papers- 6 x 6 in (15.2 x 15.2 cm), Momenta – Cardstock, Judi-Kins Embossable Window Plastic 4.25″ x 5.5″

Die Cut: Paper Roses – Victorian Window – 17388

Miscellaneous: Cuttlebug, 3M double-sided tape, Stickles – Diamond

Image coloured with Copic Markers:

Bear: E53, E29, E27, E25, E23, E21

Sweater and Socks: B37, B14, B12, R59, R37, R35

Bunny: B60, C2, C1, C0, C00, R30, R20

Sweater and Socks: BG09, BG05, BG02, BG01, Y17, Y15, Y02, YG05, YG03, YG01

If you are a member of Passionate Paper Creations and Friends FB Group
you can go to the top of the page and get a shopping discount.
If you are not a member just click join. We are a fun loving group with a lot of inspiration.

Hope you like it and have a great week!

Think Snow!!!


It’s Wednesday, and this week, I made a card using Snowman Stumble – TT014 by High Hopes Rubber Stamps for the main image and Think Snow 2 – FF047 (High Hopes Rubber Stamps) for the sentiment. I grew up skating at the outdoor rink directly across the street from my house. We couldn’t wait to get home from school and throw on our skates. The rinks were always full of children from the neighbourhood. We would either play rink games or hockey. I think there was a rink every couple of blocks. As soon as we’d finish eating, we were back on the ice again. Our parents were always yelling at us to come inside at the end of the day. How times have changed. LOL!

To make my card this week, I began with a card base made from Hammermill – Premium Colour 100 lb. cut and scored to be 5.5″ x 4.25″. My Cuttlebug and My Creative Time – Rectangle Frame Dies were used to die cut Hot Buy Craft Smart – Holiday Glitz Glitter Paper to be the same size as the base card. With a Picket Fence – Blending Brush and a mixture of Tim Holtz Distress Ink – Blueprint Sketch and Tim Holtz Distress Ink – Salty Ocean, I created the background sky. I applied this directly to the glitter background paper. Once this was done, I applied this directly to the base using double-sided tape. Next, Nellie’s Choice – Nature Scene Dies – NSD001 – Mountains were used to die cut the tree scenery using Momenta – Cardstock and using a small dauber I added in some darker touches of green using Tim Holtz Distress Inks – Peeled Paint. The pond was die cut using Whimsy Stamps – Wavy Nested Frame Dies Set and Copic Marker X-Press It Blending Card. I inked the image and sentiment using my MISTI and Memento – Tuxedo Black. Lastly, I die cut the sentiment using Joy Crafts – Labels and Tags and inked around the edges with my Picket Fence – Blending Brush and the ink that was still on it from doing the sky.

I coloured in the image with Copic markers and added in some highlights on the skate blades with Pental Sunburst Metalic Med Gel Pen. I inked the image a second time onto the Hot Buy Craft Smart – Holiday Glitz Glitter Paper for the snowman body and fussy cut around it. Once it was coloured in with Copics, I ran it through my Xyron Create a Sticker and attached it to the base stamped image.

The card was now ready to assemble. Part of the pond was cut off at the top before it was attached it to the sparkly background using glue and double-sided tape. Next, I added some 3M VHB – 2 sided tape to the back of the trees and applied it over top of where the sky ended and the pond met. To create the snow around the pond and in between the trees, pond and snow, I used Cosmic Shimmer Fluffy Stuff and added some DecoArt Glamour Dust while it was still wet. Marvy Uchida – Embossing Heat Tool was used to heat the liquid and make it puff up to look like fluffy snow. I added some Stickles – Diamond to the pompom. Using a Gelly Roll Sakura #10 Pen and Sharpie Water Based Paint – White – Extra Fine Point pen, I created the snow in the sky. Lastly, to finish off the card, I added 3M VHB – 2 sided tape to the sentiment and applied it to the card.

Card Recipe:

Stamp: Snowman Stumble – TT014 (High Hopes Rubber Stamps)

Sentiment: Think Snow 2 – FF047 (High Hopes Rubber Stamps)

Inks: Memento – Tuxedo Black, Tim Holtz Distress Ink – Blueprint Sketch, Tim Holtz Distress Ink – Salty Ocean, Tim Holtz Distress Inks – Peeled Paint

Paper: Copic Marker X-Press It Blending Card, Hammermill – Premium Colour 100 lb., Momenta – Cardstock, Hot Buy Craft Smart – Holiday Glitz Glitter Paper 12″ x 12″

Die Cuts: My Creative Time – Rectangle Frame Dies, Nellie’s Choice – Nature Scene Dies – NSD001 – Mountains, Whimsy Stamps – Wavy Nested Frame Dies Set (WSD382), Joy Crafts – Labels and Tags

Stickles: Diamond

Tools: MISTI – Most Incredible Stamping Tool, 3M VHB – 2 sided tape, Gelly Roll Sakura #10 Pen, Sharpie Water Based Paint – White – Extra Fine Point, DecoArt Glamour Dust, Cosmic Shimmer Fluffy Stuff, Marvy Uchida – Embossing Heat Tool, Cuttlebug, Picket Fence – Blending Brush, Pental Sunburst Metalic Med Gel Pen, Xyron Create a Sticker

Image coloured with Copic Markers:

Snowman: B60, R30, R20, YR21, YR16, YR15, Colorless Blender

Hat: BG72, BG57, BG32, BG11, Gelly Roll Sakura #10 Pen

Mitts and Skates: C3, C2, C1, C00, BG09, BG05, BG02, BG01

Ice: B00, B000, B000

Hope you like it and have a fantastic week!

You can find lots of inspiration from the Design Team Divas at the High Hopes blog, and the High Hopes Rubber Stamps Facebook Fan page plus you can also follow us on
Instagram, Twitter and Pinterest.

The Happy Couple!!


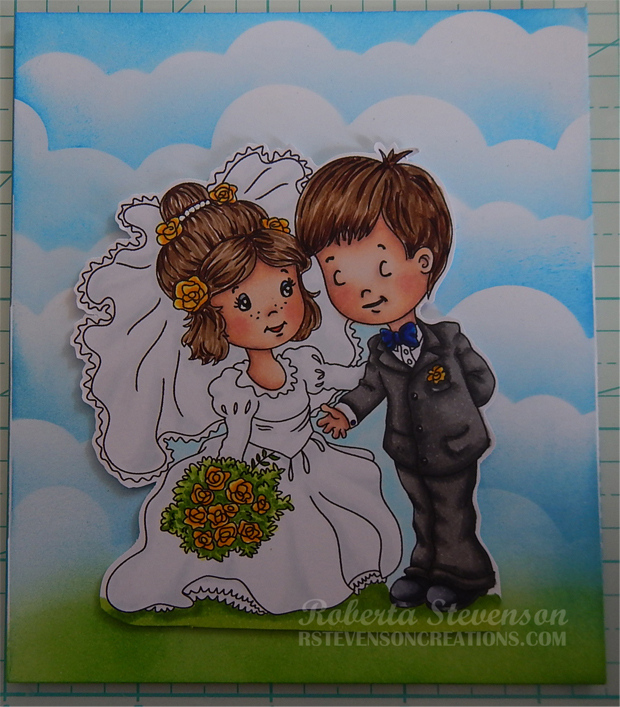
Today, I’m sharing a card that I made using the image from The Paper Shelter called The Happy Couple. I made this card for a colleague who was married recently. Here’s wishing the happy couple a very long and happy marriage!


To make the card, I first imported the image into Microsoft Word and then printed it out on my HP Printer using High Quality Grayscale. The image was printed onto Copic Marker X-Press It Blending Card. I coloured in the image using Copic markers and then fussy cut around it.

Using my Cuttlebug, Spellbinders – S6-138 dies, and I die cut Hammermill – Premium Colour 100 lb. 5 times for the layers and twice for the sides. For the front of the card, I die cut Crafts Pearl Papers – 02-3081416 with the same dies. For the grass, I die-cut Lawn Fawn – Shadow Box Card Park Add-On and Lawn Fawn – Simple Grassy Hillsides using Momenta – Cardstock. Lastly, I die-cut the flag banner using Crafter’s Companion – Luxury Cardstock – Navy Blue and Craftin Desert Diva’s – Flag Banner Dies and the sentiment was die cut 5 times with Hammermill – Premium Colour 100 lb. cardstock and once with Hot Buy Craft Smart – Holiday Glitz Glitter Paper using PaperCrafter Today – 15 Die Cut Sentiment Set.

For the back panel using stencils I had made previously out of Avery Elle – Pierced Clouds Dies, I coloured in the sky using Tim Holtz Distress Ink – Salty Ocean and Tim Holtz Distress Inks – Broken China. Tim Holtz Distress Ink – Mowed Lawn was used to colour in the grass. The card was now ready to put together. I started with the coloured background and added the coloured image to it using 3M VHB – 2 sided tape.

This was adhered to the side panels using double-side tape on both sides.  Working from back to front, I added on the next layer and applied the grass die cut to front of the layer. This was put through the tabs on the side. I added in the next layers in the same manner. A layer with more grass was added to the 4th layer. I added in the next layer and then for the very front I once again cut off the tabs on both sides and then attached it to the sides using double-sided tape. The banner was then added using glue. The paper for the sentiment had been put through my Xyron Creative Station prior to cutting it. This made it easy to peel of the back of the stickers for each layer and assembling them on top of each other. I used the white layers for the bottom of the sentiment and for the final piece, I used the gold. A small jewel dot was used to finish off the dotted “i”.

Card Recipe:

Stamp: The Happy Couple (The Paper Shelter)

Inks: HP Printer Grayscale, Tim Holtz Distress Ink – Salty Ocean, Tim Holtz Distress Inks – Broken China, Tim Holtz Distress Ink – Mowed Lawn

Paper: Copic Marker X-Press It Blending Card, Hammermill – Premium Colour 100 lb., Crafter’s Companion – Luxury Cardstock – Navy Blue, Crafts Pearl Papers – 02-3081416, Momenta – Cardstock, Hot Buy Craft Smart – Holiday Glitz Glitter Paper 12″ x 12″

Die Cuts: Lawn Fawn – Shadow Box Card Park Add-On, Lawn Fawn – Simple Grassy Hillsides, Spellbinders – S6-138, Craftin Desert Diva’s – Flag Banner Dies, PaperCrafter Today – 15 Die Cut Sentiment Set, Avery Elle – Pierced Clouds Die (D-05-01)

Miscellaneous: 3M VHB – 2 sided tape, Xyron Creative Station

Image coloured with Copic Markers:

Skin: E21, E11, E00, E000, R22, R20, B23, B21, Eyes (Gelly Roll Sakura #8 Pen, Sakura Glaze – Black)

Hair: E47, E44, E43, E41

Dress: BG70, C00, Colorless Blender

Suit and Tie: T7, T5, T3, B69, B39, B24

Flowers and Greenery: YG17, YG11, YG03, YG01. Y35, Y08, Y02, Y00

Shoes: C8, C7, C5, C3

Hope you like it and have a great week!

Hearts Warm!!!


It’s Wednesday, and this week, I made a card using Toasting Marshmallows – T026 by High Hopes Rubber Stamps for the main image and Hearts Warm – G063 (High Hopes Rubber Stamps) for the sentiment. This image brings back so many memories of going camping and sitting around the campfire roasting marshmallows. I gave my image coloured marshmallows, because growing up they were always my favourite! LOL!

To make my card this week, I started with a base of 6″ x 6″ using Recollections – Black cardstock. I taped Echo Park – Star Stencil on top of the cardstock and applied several Cosmic Shimmer – Opal Blaze Polishes using a spatula to create the nice starry background. I wanted my scene to look like the friends were in the woods, so I die cut some trees of various sizes using Nellie’s Choice – Nature Scene Dies – NSD001 – Mountains and Momenta – Cardstock. Once I die cut the trees, I added some Tim Holtz Distress Ink – Forest Moss and Tim Holtz Distress Inks – Peeled Paint to add some more colour to them. Then, I ran the trees through my Xyron Create a Sticker to make it easier to apply them later. I felt the scene also needed a moon, so I die cut one using Nellie’s Choice – Nature Scene Dies – NSD002 – Sky and then coloured it in and added 3M VHB – 2 sided tape to the back of it and set everything aside.

I stamped my image and sentiment using my MISTI and Memento – Tuxedo Black ink onto Copic Marker X-Press It Blending Cardstock. I fussy cut around the top part of the image and then used a ruler to know where to cut the remainder of the bottom piece with my cutter. I coloured in the image using Copic markers and then used a black marker to go around all of the fussy cut part of the image and Copic marker – YG67 was used to go around the edges of the grassy area. For the sentiment, I used My Creative Time – Rectangle Frame Dies and My Creative Time – Rectangle Frame Layers to cut out the sentiment and background layer. I ran the sentiment through my Xyron Create a Sticker and applied it directly to the outer frame.

My card was now ready to assemble. I first adhered my starry background to a card base of AC – White cardstock sized at 6″ x 6″ using double-sided tape. Then, I used my coloured image to help me with the placement of where the trees would go. Since, I had already made stickers out of my trees, this was a fairly easy process. Once I was satisfied with their positioning, I applied 3M VHB – 2 sided tape, to the back of the coloured image and sentiment frame and attached them directly to the base card. Lastly, I attached the moon to complete the scene.

Card Recipe:

Stamp: Toasting Marshmallows – T026 (High Hopes Rubber Stamps)

Sentiment: Hearts Warm – G063 (High Hopes Rubber Stamps)

Inks: Memento – Tuxedo Black, Tim Holtz Distress Inks – Peeled Paint, Tim Holtz Distress Ink – Forest Moss

Paper: Copic Marker X-Press It Blending Card, Recollections – Black Cardstock, AC Cardstock – White, Momenta – Cardstock

Die Cuts: Nellie’s Choice – Nature Scene Dies – NSD001 – Mountains, Nellie’s Choice – Nature Scene Dies – NSD002 – Sky, My Creative Time – Rectangle Frame Dies, My Creative Time – Rectangle Frame Layers

Stencil: Echo Park – Star Stencil (6″ x 6″)

Cosmic Shimmer: Opal Blaze Polish – Sapphire Grape, Sunset Orange, Pink Blueberry, Turquoise Peach

Tools Miscellaneous: MISTI – Most Incredible Stamping Tool, Xyron Create a Sticker, Cuttlebug, Spatula

Image coloured with Copic Markers:

Beaver: E99, E97, E11, E07, (Eyes – Sakura Glaze – Black)

Moose: E53, E51, E50, E35, E34, E33, E31, R30, R20, Colorless Blender, (Eyes – Sakura Glaze – Black)

Bear: E53, E51, E50, E47, E44, E43, E42, (Eyes and Nose – Sakura Glaze – Black)

Skunk: C10, T6, T4, C1, C00, R30, R20, Colorless Blender, (Eyes and Nose – Sakura Glaze – Black)

Logs: E29, E27, E25, E23, E21

Marshmallows: YR00, R30, G20, Y11

Fire and Glow: YR09, YR04, Y08, Y02, Y00

Grass: YG67, YG63, YG45, YG17, YG13, YG03, YG01

Moon: BV20, C1, C00, Y000, Colorless Blender

Hope you like it and have a fantastic week!

You can find lots of inspiration from the Design Team Divas at the High Hopes blog, and the High Hopes Rubber Stamps Facebook Fan page plus you can also follow us on
Instagram, Twitter and Pinterest.

Just a Note To Say!!


Today, I’m sharing an inspirational card that I made using Dreamerland Crafts stamps called Farm 01 – D20017 and Just A Note To Say – DCS17038 for the main images and Mix and Match Clear Stamps – DCS19093 for the sentiment.

Above is a close-up of the card. Below is the card opened.

To make this card I used a base card of 11″ x 4.25″ using Hammermill – Premium Colour 100 lb. cardstock. I scored it at 2.75″ and 5.5″ to create an easel card. I stamped the fence, horses, pig and girl onto Inkadoo Stamping Mask Paper and fussy cut around them. Then I placed them onto Copic Marker X-Press It Blending Card cut at 5.5″ x 4.25″ for placement.

I removed the fence and using my MISTI and Memento – Tuxedo Black ink, I stamped the girl. I placed the girl mask over top of the stamped girl image and then stamped the fence, chicks, pig and farm house and fields. I stamped a horse and then placed the horse mask over it and stamped a second horse. Next, I removed the masks from the scene. I coloured all of the images and background in with Copic markers. I added double sided tape to the bottom portion of the easel card and attached the coloured image.

My Creative Time – Rectangle Frame Dies were used create the base background and Gina Marie Designs – Petite Looped Lace Rectangle dies were used to create the base for the sentiment. I stamped the sentiment using my MISTI and Versa Fine – Onyx Black ink. I added Ranger – Clear Super Fine Detail embossing powder and then heat embossed the powder with Marvy Uchida – Embossing Heat Tool. Tim Holtz Distress Ink – Peeled Paint ink was used to ink around the edges of both die cuts.

To complete the card, the large rectangle was added directly to the card using double-sided tape and 2 layers of 3M VHB – 2 sided tape were added to the back of the sentiment die cut and attached to the base card background.

Card Recipe:

Stamps: Farm 01 – D20017 (Dreamerland Crafts); Just A Note To Say – DCS17038 (Dreamerland Crafts)

Sentiment: Mix and Match Clear Stamps – DCS19093 (Dreamerland Crafts)

Inks: Memento – Tuxedo Black, Versa Fine – Onyx Black, Tim Holtz Distress Inks – Peeled Paint

Embossing Powder: Ranger – Clear Super Fine Detail embossing powder

Paper: Copic Marker X-Press It Blending Card, Hammermill – Premium Colour 100 lb., Momenta – Cardstock

Die Cut: Gina Marie Designs – Petite Looped Lace Rectangle, My Creative Time – Rectangle Frame Dies

Tools: MISTI – Most Incredible Stamping Tool, Cuttlebug, Marvy Uchida – Embossing Heat Tool, 3M VHB – 2 sided tape, Inkadoo Stamping Mask Paper

Image coloured with Copic Markers:

Skin: E000, E00, E04, E11, E21, R22, R20

Hair:  E47, E44, E43

Blouse and Scarf: V28, BV13, BV11, BV04, BV01, BV00, BV0000, Gelly Roll Sakura #8 Pen

Pants: B26, B23, B21

Boots: E27, E25, E23, E21

Feather and Paper: C7, C1, C0, C00

Horses: E59, E49, E37, E35, E33, E31, C7, C5

Pig: R20, R000, E93, E47

Chicken and Chicks: Y04, Y02, Y00, C2, C1, C00, YR12, R17

Barn and Silo: R39, R37, R35, Y08, Y04, C7, C5, C1, C0

Fence: E59, E27, E25, E23, E21

Grass: YG17, YG13, YG03, YG01

Sky: B02, B01, B00, B000, B0000, Colorless Blender

Ground: E37, E35, E33, E31

Hope you like it and have a great week!

You can find more cards to inspire you at Dreamerland Crafts and Pointer Scrapbooking on the Facebook Fan pages from the rest of our design team.

Time to Smell the Flowers!


It’s Wednesday, and this week, I used Daffodil Bunny – SLF006 (High Hopes Rubber Stamps) for the main image from the new August 2020 release and Smell The Flowers – G189 (High Hopes Rubber Stamps) for the sentiment. This adorable little bunny is taking time out to smell the flowers. We have a really nice garden of flowers that my husband takes care of. I’m not a green thumb at all. LOL! It’s always nice to take a moment and enjoy the beauty of them.

To make my card this week, I started out with a simple white card base, sized at 6″ x 6″. The base background was also cut at 6″ x 6″ using Craft Consortium – Cottage Garden paper and then inked around the edges with Tim Holtz Distress Ink – Fossilized Amber. I just thought this paper went so well with this adorable image. I added the 2 colours of ribbon with some 2-sided tape and then adhered the entire background paper to the base with 2-sided tape.

The scalloped circle and inside image circle were both die cut using my Cuttlebug and Craftin Desert Diva’s Stitched in Circle Dies. The circle in between the 2 of them was die cut with Lifestyle Crafts Cutting Dies – Nesting Circles. The edges of the large scalloped circle were inked with Tim Holtz Distress Ink – Picked Raspberry. For the sentiment, My Creative Time – Rectangle Frame Dies were used. The die was larger in depth, so I just die cut one side and then turned it around and only put it part way through my Cuttlebug to cut the other edge. It too, was then inked around the edges with Tim Holtz Distress Ink – Fossilized Amber. The image was coloured with Copic Markers.

To assemble the remainder of the card, the mid circle was attached directly to the large scalloped circle and then popped up with 3M VHB – 2 sided tape. The image and sentiment were popped up on top with 3M VHB – 2 sided tape as well.

Card Recipe:

Stamp: Daffodil Bunny – SLF006 (High Hopes Rubber Stamps)

Sentiment: Smell The Flowers – G189 (High Hopes Rubber Stamps)

Inks: Memento – Tuxedo Black, Tim Holtz Distress Ink – Fossilized Amber, Tim Holtz Distress Ink – Picked Raspberry

Paper: Copic Marker X-Press It Blending Card, Momenta – Cardstock, Crafts Sparkling Stickers – 02-3068629, Craft Consortium – Cottage Garden 6″x6″

Die Cuts: Craftin Desert Diva’s Stitched in Circle Dies, Lifestyle Crafts Cutting Dies – Nesting Circles, My Creative Time – Rectangle Frame Dies

Tools: MISTI – Most Incredible Stamping Tool, Cuttlebug, 3M VHB – 2 sided tape

Image coloured with Copic Markers:

Bunny: E37, E35, E34, E33, E31, E30, R11, R02, R000

Bow: RV19, RV17, RV13

Grass and Greenery for Plants: BG99, BG97, G21, YG17, YG13, YG07, YG03, YG01

Daffodil: E15, Y38, Y18, Y04

Clouds and Sky: B60, B01, B00, B000, B0000, C0, Colorless Blender

Hope you like it and have a fantastic week!

You can find lots of inspiration from the Design Team Divas at the High Hopes blog, and the High Hopes Rubber Stamps Facebook Fan page plus you can also follow us on
Instagram, Twitter and Pinterest.


Beautiful Mindset


Today I’m sharing a CAS card that I made using  Nesting Bird (KLM Digital Designs).  This image from KLM Digital Designs new August release comes with 3 beautiful sentiments “Create Your Own Sunshine” and “Hope You Have A Beautiful Day” and the one I’ve featured with my card. These sentiments and stamp could be used for an Inspirational or Birthday Card! I just love the feeling of peace that this image gives me.

The image and sentiment were printed out with my HP Printer onto Copic Marker X-Press It Blending Card using High Quality Grayscale. This prevents the image from smearing when you go to colour it in. The image and sentiment were die cut with my Cutttlebug and dies from Essentials by Tattered Lace Dies – Easel Slider. The base of the card is 5.5″ x 5.5″. I cut some Momenta – Cardstock at the same size. To go around the background paper and die cuts, a Sharpie – Gold Medium Point – Water Based Paint marker was used. This helps give the illusion that it is mounted on gold paper. I adhered the background directly to the base card with glue so that I could move it into place easier.

The image was coloured in with Copic markers and for the eye of the bird a Sakura Glaze – Black pen was used. Then, the completed image was glued directly on top of the background. The sentiment was popped up with 3M VHB – 2 sided tape. To finish off the card, some Kraftin’ Kimmie – Rainy Day Dots were added.

Card Recipe:

Stamp and Sentiment: Nesting Bird (KLM Digital Designs)

Inks: HP Printer High Quality Grayscale, Sharpie – Gold Medium Point – Water Based Paint, Sakura Glaze – Black

Paper: Copic Marker X-Press It Blending Card, Momenta – Cardstock

Die Cuts: Essentials by Tattered Lace Dies – Easel Slider

Miscellaneous: Kraftin’ Kimmie – Rainy Day Dots, 3M VHB – 2 sided tape, Cuttlebug

Image coloured with Copic Markers:

Flowers: BV17, BV13, BV11, BV000, E15, Y38, Y18, Y04

Leaves: BG99, BG93, G21, YG23

Bird: E99, E97, YR20, YR16, YR15, YR12, Y32, B39, B14, B12, B06, B05, BG01, C8, C5, C3, C1, C0, Rubbing Alcohol, Q-Tip

Background: Y00, Y000, Colorless Blender

Hope you like it and have a great week!

You can find more cards to inspire you at KLM Designs, KLM Digital Design Team and KLM Digital Designs on the Facebook Fan page from the rest of our design team.

Butterfly Hi!


It’s Wednesday, and this week, I used Butterfly Chick – SLF007 (High Hopes Rubber Stamps) for the main image from the new August 2020 release and Flutter’in By – F004 (High Hopes Rubber Stamps) for the sentiment. This little butterfly has decided to take a moment to say “Hi” to this adorable little chick. Have you taken a moment to call someone and just “Hi” today?

To make my card this week, I started out with a simple white card base, sized at 6″ x 6″. I used the retired die cuts from Craftin Desert Diva’s – Inside Scalloped Squares and a mixture of Momenta – Cardstock and American Crafts – Basics paper for my background. The same die cut was also used to cut the Copic Marker X-Press It Blending Cardstock. The Copic paper was then stamped on with my MISTI and Memento – Tuxedo Black ink. I coloured in the image with Copic markers.

For the assembly of the card, I first placed down the large background using 2-sided tape. Then I added in the 1st yellow inset using glue as it was easier to move around and get it into place. Lastly, I added in the last inset for the large scalloped square. For the smaller square, the coloured image and yellow cardstock were turned over and then taped together with some Scotch Tape. Then 3M VHB – 2 sided tape was used to pop it up into the centre of the larger square.

The sentiment was stamped with Memento – Tuxedo Black and then die cut with My Creative Time – Rectangle Frame Dies. Tim Holtz Distress Ink – Fossilized Amber was used to go around all of the edges. Then the sentiment was also popped up with 3M VHB – 2 sided tape.

To finish off the card I added on some butterflies and also a few Kraftin’ Kimmie – Polar Dots in a few places.

Card Recipe:

Stamp: Butterfly Chick – SLF007 (High Hopes Rubber Stamps)

Sentiment: Flutter’in By – F004 (High Hopes Rubber Stamps)

Inks: Memento – Tuxedo Black, Tim Holtz Distress Ink – Fossilized Amber

Paper: Copic Marker X-Press It Blending Card, Momenta – Cardstock, American Crafts – Basics (6″x6″, 15.2cmx15.2cm)

Die Cuts: Craftin Desert Diva’s – Inside Scalloped Squares, My Creative Time – Rectangle Frame Dies

Tools: MISTI – Most Incredible Stamping Tool, Cuttlebug, 3M VHB – 2 sided tape, Kraftin’ Kimmie – Polar Dots, Butterfly Stickers – 02-3051386

Image coloured with Copic Markers:

Chick and Bow: Y17, Y15, Y13, YR18, YR16, YR14, YR12, B18, B16, B14, BV00, BV000

Grass: YG17, YG13, YG03, YG01

Butterfly: E79, E77, E71, B18, B16, B14, BV08, V05, V04, Black (100), Gelly Roll Sakura #8 Pen

Clouds and Sky: B60, B01, B00, B000, B0000, C0, Colorless Blender

Hope you like it and have a fantastic week!

You can find lots of inspiration from the Design Team Divas at the High Hopes blog, and the High Hopes Rubber Stamps Facebook Fan page plus you can also follow us on
Instagram, Twitter and Pinterest.


Simple Pleasures of Life


Today I’m sharing Friends with Nature (KLM Digital Designs) image and sentiments from KLM Digital Designs new release.  Sometime we have to just sit back and relax and enjoy the beauty of nature surrounding us. That’s what these 2 little friends are doing on this bright summer’s day.

The main image and sentiment were printed onto Copic Marker X-Press It Blending Card using a HP Printer. The main image was coloured in with Copic markers. Then a second image image was printed out onto regular copy paper and my Brother Scan and Cut was used to cut directly around the image so that it could be used as a mask. I have a magnetic cutting board, so I placed the close-cropped image overtop of my coloured image with small magnets. Then a cloud stencil, which I had created using Avery Elle’s Pierced Clouds Die and Tim Holtz Distress Ink – Salty Ocean was used to create the clouds in the blue sky. After colouring the grass, a little piece of rag and some rubbing alcohol were used to create the texture in the grass. Once the colouring was completed, a Pigma Micron 005 black marker was used to outline the main image and make the lines a little thicker.

For the main background, I used a white card base of 6″ x 6″. Momenta – Cardstock was used for the main background, cut at the same size as the base and then inked all around the 4 edges with Kraftin’ Kimmie – Purple Pansy Ink. Then a purple ribbon was added. The background paper was then mounted onto the base card using 2-sided tape.

For the sentiment, I used My Creative Time – More Stitched Edges and Cuttlebug to die cut around it. I die-cut the coloured image with My Creative Time -Stitched Squares Inside and Out. Then both the sentiment and the coloured image were edged around on all sides using a Sharpie – Gold Medium Point – Water Based Paint to give the illusion that it was mounted onto gold paper.

Both the image and sentiments were popped up with 3M VHB – 2 sided tape to complete the card.

Card Recipe:

Stamp and Sentiment: Friends with Nature (KLM Digital Designs) Stamp comes with 3 separate sentiments.

Inks: HP Printer Grayscale, Tim Holtz Distress Ink – Salty Ocean, Kraftin’ Kimmie – Purple Pansy Ink

Paper: Copic Marker X-Press It Blending Card, Momenta – Cardstock, AC White cardstock

Die Cuts: Avery Elle – Custom Steel Dies – Made in the USA – D-05-01 PiercedCloudsDie, My Creative Time -Stitched Squares Inside and Out, My Creative Time – More Stitched Edges

Tools: 3M VHB – 2 sided tape, Brother Scan and Cut, Sharpie – Gold Medium Point – Water Based Paint, Pigma Micron 005 black marker, Cuttlebug

Image coloured with Copic Markers:

Skin: E000, E00, E04, E11, E21

Hat and Shirt: E47, E44, E43, E41

Pants: B26, B23, B21

Blouse and Socks: V25, V22, V20, V17

Shoes: BV17, BV13, BV11, BV01, BV00, BV000, C2, C1, C0

Bird: YR12, B16, B14, B12, B000, BG000, PrismaColor Premier White Pencil (PC938)

Grass: YG17, YG13, YG03, YG01, Piece of cloth and Rubbing Alcohol for texture

Hope you like it and have a great week!

You can find more cards to inspire you at KLM Designs, KLM Digital Design Team and KLM Digital Designs on the Facebook Fan page from the rest of our design team.

Super Tall Cake!


Welcome Back Dreamerland Craft Fans!

Today, I’m sharing a card that I made using Dreamerland Crafts Clear Stamps  Super Tall Cake – D19017 for the main image and Birthday Sentiments – Set 002 (DS163007) for the sentiment!  This adorable little bear made a cake for someone very special! Hmmm! I wonder who that could be. LOL!

To make the card I first die cut Copic Marker X-Press It Blending Card with Craftin Desert Diva’s – Inside Scalloped Squares. Then using my MISTI and Memento – Tuxedo Black ink, I stamped the image onto the paper. I coloured in the image using Copic markers.

Next I cut out used some tape to inlay the image back into the frame that I had previously die cut to make it one piece again. I also die cut the yellow and aqua paper with the same die cut twice. Then I used the yellow to be the inlay for the aqua frame and taped it back together on the reverse. After that, I used my MISTI and Versa Fine – Onyx Black to apply the sentiment. The sentiment was then embossed with Ranger – Clear Super Fine Detail embossing powder and heated up using Marvy Uchida – Embossing Heat Tool.

Next, I edged around the borders of both frames with Tim Holtz Distress Ink – Evergreen Bough. I ran the base frame through Xyron Creative Station to make it into a sticker and so that the entire frame would lay flat. I mounted this onto 5″ x 5″ white cardstock. Then I popped up the smaller frame and image using 3M VHB – 2 sided tape.

Card Recipe:

Stamp: Super Tall Cake – D19017 (Dreamerland Crafts Clear Stamps)

Sentiments: Birthday Sentiments – Set 002 (DS163007) (Dreamerland Crafts Clear Stamps)

Inks: Memento – Tuxedo Black, Versa Fine – Onyx Black, Tim Holtz Distress Ink – Evergreen Bough

Embossing Powder: Ranger – Clear Super Fine Detail embossing powder

Paper: Copic Marker X-Press It Blending Card, Momenta – Cardstock, Recollections – Blue Ombre Cardstock, Recollections – White Cardstock

Die Cuts: Craftin Desert Diva’s – Inside Scalloped Squares

Tools: MISTI – Most Incredible Stamping Tool, Cuttlebug, 3M VHB – 2 sided tape, Marvy Uchida – Embossing Heat Tool, Xyron Creative Station

Image coloured with Copic Markers:

Bear: E53, E51, E50, E37, E35, E33, E31, R30, R22, R20, R02

Hat, Apron and Cart: C3, C2, C1, C0, Colorless Blender

Cake: E29, E27, E25, E23, B04, B02, Y35, Y08

Tablecloth: Mitts and Boots: B04, B02, B000

Icing: BG49, BG45, BG11

Bunny: C3, C1, C0, R22, R20

Whistle: G17, G14

Base: E15, E13, E11

Background: Y19, Y18, Y15, Y11


Hope you like it and have a great week!

You can find more cards to inspire you at Dreamerland Crafts on the Facebook Fan page from the rest of our design team.

It’s Pasture Birthday!


Welcome One Crazy Stamper Fans!

It’s Wednesday, and I’m back to share a card that I made using Farmer Clem (High Hopes Rubber Stamps) on the front of the card and Charlie Party Cow (High Hopes Rubber Stamps) on the inside. A friend asked me to create her a belated birthday card for her farmer friend and I thought this made the perfect combination to do it.

I coloured in Farmer Clem (High Hopes Rubber Stamps) and then fussy cut around him and popped him up on the front of the card. All of the sentiments were created in Microsoft Word and then printed out on my printer. Details are below.


For the inside of my card, I stamped the Charlie Party Cow (High Hopes Rubber Stamps) twice and then fussy cut around both of the cows to make it look like they had a party going on. I popped up the one cow image to give the scene a little bit of depth.

Card Recipe:

Stamps: Farmer Clem (High Hopes Rubber Stamps),  Charlie Party Cow (High Hopes Rubber Stamps)

Paper: Doodle Bug Designs Inc. – Down on the Farm – 6″ x 6″ paper pad, Momenta – Cardstock, Copic Marker X-Press It Blending Card, Blue Cardstock

Die Cuts: My Creative Time – Bunch of Fun Circle Dies, Creative Expression Craft Dies by Sue Wilson – Noble Dies – Double Pierced Squares – Set B

Inks: Tim Holtz Distress Ink – Barn Door, Tim Holtz Distress Ink – Blueprint Sketch, Tim Holtz Distress Inks – Peeled Paint, Memento – Tuxedo Black

Miscellaneous: Cuttlebug, MISTI – Most Incredible Stamping Tool

Skin: E000, E00, E21, E04, E11, R22, R20

Hair, Eyebrows and Mustache: C5, C3, C0

Overalls: B37, B24, B23, E15, Y38, Y34, Y17

Shirt: R17, R24, R39, R27, R29, G07, YG17

Scarf: R29, R27, R24, R17, R14

Hat: E15, Y38, Y35, Y17, R229, R27, R24, R17

Boots: E42, E33, E25, E79, E77, E74

Pitchfork: C5, C3, C1, E79, E77, E15

Cows: C10, C8, C6, C3, C1, C0, Colourless Blender, R02, R01, R20, R32, R30, E43, E42, E41

Hat, Confetti: R17, R14, G17, G14, V06, V05, B24, Y19

Balloons:

Yellow: Y09, Y06, Y04, Y02, Y00

Purple: V06, V05, V04, V02, V000

Green: G17, G14, YG41, G00

Background – Spectrum Noir TB3

Sentiments: Microsoft Word – Font Cooper Black, Point Size 20 and 28

Hope you like it and have a fantastic week!

You can find lots of inspiration from the Design Team Divas at the One Crazy Stamper blog, and the One Crazy Stamper Facebook Fan page plus you can also follow us on Instagram, Twitter and Pinterest.

Have a Honey of a Day!


Welcome OCS Fans!

Today is Wednesday and I’m back to share this adorable little bear thoroughly enjoying his honey! The stamp I’m featuring today is called Favourite Honey Bear (High Hopes Rubber Stamps) and the sentiment is Honey of a Day (High Hopes Rubber Stamps)!

He’s having a “Honey of a Day” and I hope you do too!

Card Recipe:

Stamps: Favourite Honey Bear (High Hopes Rubber Stamps) – S500, Honey of a Day (High Hopes Rubber Stamps) – G061

Copic Markers:

Bear: E79, E37, E35, E33, E31, E53, E51, E50, R22, R20, R01

Honey and Jar: Y38, Y18, Y17, Y35, YR21, Y11, R27, RR4

Flowers: BV04, BV01, BV000, Y35, YR21, Y11, G17, G14, G07

Inks: Tim Holtz Ranger Distress Ink – Broken China, Tim Holtz Distress Ink – Mowed Lawn, Tim Holtz Distress Inks – Ground Espresso, Tim Holtz Distress Ink – Wild Honey, Memento – Tuxedo Black, Versamark

Embossing Powder: Ranger Embossing Powder White – Extra Fine Detail

Die Cuts: Lawn Fawn – Grassy Hillside Borders, My Creative Time -Stitched Squares Inside and Out, My Creative Time – Scalloped Stitched Oval Dies

Background Paper: Bee Digital Paper – DigitalDesignsand Art, Pebbles – “Home Grown” 6 x 6 in. (15.2 cm x 15.2 cm), Momenta – Cardstock, Recollections – Brown

You can find lots of inspiration from the Design Team Divas at the One Crazy Stamper blog, and the One Crazy Stamper Facebook Fan page plus you can also follow us on Instagram, Twitter and Pinterest.


Beautiful Blooms


Hi There! Here is the card that I made with the new Kraftin’ Kimmie – Beautiful Blooms set.


I also used the new Kraftin’ Kimmie Purple Pansy and Kraftin’ Kimmie Lovely Lagoon inks to acentuate the veins in the leaves and petals in the flowers. Also around the borders of the card and die cut. Sentiment is from Kraftin’ Kimmiee – Tweetie Pies.

Background Paper: K&C Company – Susan Winget Specialty Paper – SW Botanical. Inked around card with Kraftin’ Kimmie Lovely Lagoon ink.

Die Cuts: Creative Expression – Craft Dies by Sue Wilson – Noble Dies – Double Pierced Ovals

Used my MISTI – Most Incredible Stamping Tool to stamp all of the images.

Centre flower was stamped with Versamark ink and then embossed with Adirondack Eggplant Embossing Powder.

Top and bottom flowers added in Kraftin’ Kimmie Purple Pansy in spots onto Momenta – Cardstock, then stamped with Versamark ink and embossed with Ranger – Clear Super Fine Detail embossing powder. Next I inked over the entire flowers with Kraftin’ Kimmie Purple Pansy!

For all of the leaves and stems, stamped the images onto Momenta – Cardstock, then stamped with Versamark ink and embossed with Ranger – Clear Super Fine Detail embossing powder. Next I inked over the entire flowers with Kraftin’ Kimmie Purple Pansy! All of the leaves were inked over with Kraftin’ Kimmie Lovely Lagoon. Just loved how the veins in the leaves turned out once I did that.

For the shaker portion, I used Judi-Kins Embossable Window Plastic 4.25 x 5.5 inches and a little bit of Martha Stewart Sour Apple, Limeade Glitter and Craftin Desert Diva’s Skyfall sequence.

Pearls – Crafts Pearl Halves 02-3019843

Hope you like it!