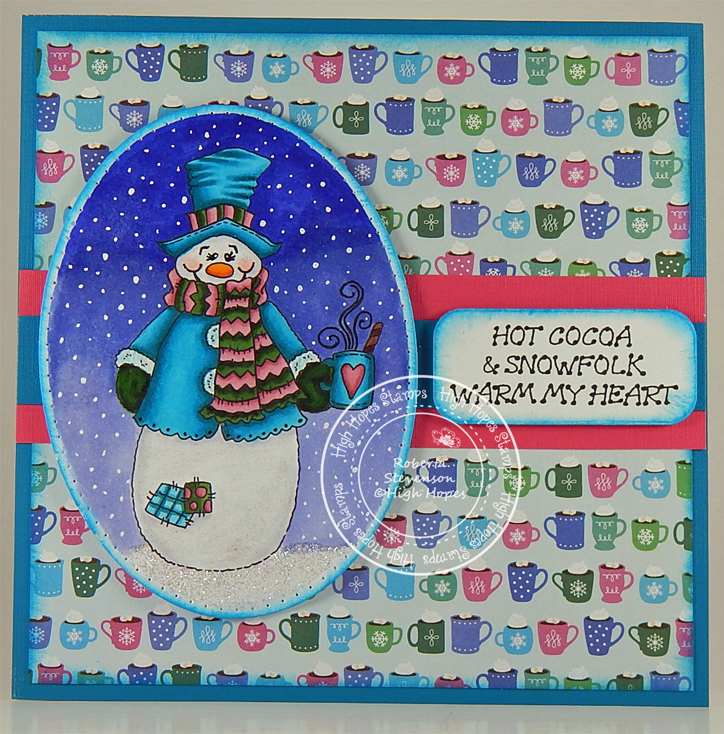
Tag Archive | Recollections – White Cardstock

Sparkle & Cheer!!


It’s Wednesday, and this week, I made a Christmas slim-line card using High Hopes Rubber Stamps Christmas Gofer – TDG003 for the image and Sparkle & Cheer – LDG001 for the sentiment. This little gofer is all set to start decorating his tree for Christmas. With all of this heat right now, snow is sounding pretty good to cool off a bit. LOL!

To make my card this week, I began with a card base of Hammermill – Premium Colour 100 lb. cardstock, cut and scored to be 4″ x 8″. I cut the background to be the same size using Creative Memories – Glacier paper and adhered it to the base card using double-sided tape. I die cut Recollections – White Cardstock and Signature Collection by Sara Davies – Glittering Snowflakes cardstock using my Anna Griffin Empress Mini Machine and My Favourite Things – Die-namics – Elegant Rectangle Stax dies. I stamped the sentiment onto the white cardstock using Memento – Tuxedo Black ink and my MISTI. Using my die cutting machine again and Waffle Flower – Nesting Square dies, I die cut Copic Marker X-Press It Blending Card. I stamped the image onto it using Memento – Tuxedo Black ink and my MISTI.

The image was coloured in with Copic markers and then I added snow to the sky using a Gelly Roll Sakura #10 Pen. For the hat trim and pop-pom, I added Cosmic Shimmer Fluffy Stuff and heated it with my Marvy Uchida – Embossing Heat Tool to puff up the liquid. I put a little bit of Stickles – Diamond onto my finger and dabbed it across the trim and pom-pom to give them an extra bit of sparkle. Lastly, I added some Stickles – Diamond to the snow. When the Stickles was all dry, I adhered the image to Signature Collection by Sara Davies – Glittering Snowflakes cardstock with double-sided tape and some glue. Using my cutter, I cut a slim border around the image. I ran the sentiment through my Xyron Creative Station and adhered it to the larger die cut. U-line double-sided tape was added behind the 2 pieces and they were both popped up onto the card. Lastly, to finish the card off, I added a few YNS Gumdrops – White Sugar and Sparkle to both sides of the sentiment.

Card Recipe:

Stamp: Christmas Gofer – TDG003 (High Hopes Rubber Stamps)

Sentiment: Sparkle & Cheer – LDG001 (High Hopes Rubber Stamps)

Inks: Memento – Tuxedo Black

Paper: Copic Marker X-Press It Blending Card, Hammermill – Premium Colour 100 lb., Creative Memories – Glacier Paper Pack 12″ x 12″, Signature Collection by Sara Davies – Glittering Snowflakes, Recollections – White Cardstock

Die Cuts: My Favourite Things – Die-namics – Elegant Rectangle Stax – MFT-1268, Waffle Flower – Nesting Square dies

Tools: MISTI – Most Incredible Stamping Tool, Anna Griffin Empress Mini Machine, U-Line double-sided tape, Cosmic Shimmer Fluffy Stuff, Marvy Uchida – Embossing Heat Tool, Gelly Roll Sakura #10 Pen, Stickles – Diamond, YNS Gumdrops – White Sugar and Sparkle, Xyron Creative Station

Image coloured with Copic Markers:

Gofer: E49, E47, E27, E25, E23, E21, R30, R20

Hat and Scarf: BG09, BG05, BG02, BG01, C2, C1, C00, Cosmic Shimmer Fluffy Stuff, Stickles – Diamond

Baubles: R59, R37, R35, YG17, YG09, YG07, YG05, C3, C2, C0

Snow: B60, B00, Stickles – Diamond

Sky: B99, B97, B95, B93, B91

Hope you like it and have a fantastic week!

You can find lots of inspiration from the Design Team Divas at the High Hopes blog, and the High Hopes Rubber Stamps Facebook Fan page plus you can also follow us on
Instagram, Twitter and Pinterest.

You Got This!!


It’s Wednesday, and this week, I made a card using High Hopes Rubber Stamps Lasso Some Snow – TDG021  for the main image and Don’t Worry – FDG021 for the sentiment. We all need a little bit of encouragement every now and then and this little snowman is here to give us some.

To make my card this week, I began with a card base of Hammermill – Premium Colour 100 lb. cardstock, cut and scored to be 5.5″ x 4.25″.  I used Echo Park Paper Co. – My Favorite Winter cardstock cut to the same size as the base card for the background. I attached this to the base using double-sided tape. Using my Cuttlebug, a mixture of square dies from My Creative Time -Stitched Squares Inside and Out and Waffle Flower – Nesting Square dies, I die cut cardstock from Scrapbook.com Neutrals Smooth Cardstock and also Copic Marker X-Press It Blending Card. I applied double-sided tape to the back of the tan square and applied it directly to the background. U-Line double-sided tape was added to the back of the dark brown square and popped up onto the centre of the tan square.

With my MISTI and Memento – Tuxedo Black ink, I stamped the image onto the Copic Marker X-Press It Blending Card cardstock square and coloured it in with Copic markers. Gelly Roll Sakura #10 Pen was used to create the snow in the sky. Sakura Glaze – Black and Gelly Roll Sakura #5 Pen were used on the eyes of the snowman. I applied U-line douhble-sided tape to the back of the completed image and popped it up onto the centre of the dark brown square.

With my MISTI and Memento – Tuxedo Black ink, I stamped the sentiment onto Recollections – White cardstock and then die cut it out using my Cuttlebug and My Creative Time – Ribbon End Dies. I inked around the edges using Copic – E59 marker to give it a dark brown border. I used my knife to remove the double border from the piece left behind and then traced the shape of the ribbon onto the remaining piece of Scrapbook.com Neutrals Smooth Cardstock. I cut this out with my cutter and scissors. U-Line double-sided tape was applied to both pieces and the completed sentiment was popped up onto the card below the main image to complete the card.

Card Recipe:

Stamp: Lasso Some Snow – TDG021 (High Hopes Rubber Stamps)

Sentiment: Don’t Worry – FDG021 (High Hopes Rubber Stamps)

Inks: Memento – Tuxedo Black

Paper: Copic Marker X-Press It Blending Card, Hammermill – Premium Colour 100 lb., Echo Park Paper Co. – My Favorite Winter (6″ x 6″), Scrapbook.com – Neutrals Smooth Cardstock (5.5″ x 4.25″), Recollections – White cardstock

Die Cuts: My Creative Time -Stitched Squares Inside and Out, Waffle Flower – Nesting Square dies, My Creative Time – Ribbon End Dies

Tools: MISTI – Most Incredible Stamping Tool, U-Line double-sided tape, Gelly Roll Sakura #10 Pen, Gelly Roll Sakura #5 Pen, Sakura Glaze – Black, Cuttlebug

Image coloured with Copic Markers:

Snowman: B60, C9, C7, C5, C00, E49, YR18, YR16, YR12, Colorless Blender (Eyes – Sakura Glaze – Black, Gelly Roll Sakura #5 Pen)

Hats, Mitts and Scarf: B99, B977, B95

Coat: E51, E50, E37, E35, E34, E33, E31

Birds: E59, E37, E35

Fence: E29, E27, E25, E23, E21

Wheel and Rope: E77, E74, E47, E44, E43, Y35, YR31

Sky: B04, B02, B01, B00

Snow: B000, B60, C00, Colorless Blender, Stickles – Diamond

Hope you like it and have a fantastic week!

You can find lots of inspiration from the Design Team Divas at the High Hopes blog, and the High Hopes Rubber Stamps Facebook Fan page plus you can also follow us on
Instagram, Twitter and Pinterest.

Hot Cocoa and Snowfolk!!!


It’s Wednesday, and this week, I made a card using Snowman Cup Of Love – S149 by High Hopes Rubber Stamps for the main image and Dot Warm Heart – G117 (High Hopes Rubber Stamps) for the sentiment. Hot chocolate is one of my favourite drinks during cold winter days. It looks like it is for this snowman too!

To make my card this week, I began with a card base of AC Cardstock – White cut and scored to be 6″ x 6″. I cut the background paper from Hot Buy – Recollections – Jewel Tones cardstock to the same size as the base and used double-side tape to apply it directly to it. Pebbles – Winter Wonderland paper was cut to the size of 5.75″ x 5.75″ and inked around the edges using Tim Holtz Distress Ink – Mermaid Lagoon. I applied this directly to the main background using double-sided tape. I cut 2 more strips from the Hot Buy – Recollections – Jewel Tones paper at 6″ x 1.5″ and 6″ x .75″ and applied them midway across the card using double-sided tape.

The image and sentiment were stamped using my MISTI and Memento – Tuxedo Black ink. I die-cut the sentiment using my Cuttlebug and Hero Arts – Infinity Dies – Rounded Rectangle and inked around the edges with Tim Holtz Distress Ink – Mermaid Lagoon. This was popped up on the card using 3M double-sided tape. The image was die cut with Creative Expression Craft Dies by Sue Wilson – Noble Dies – Double Pierced Ovals and inked around the edges with Tim Holtz Distress Ink – Mermaid Lagoon. I coloured in the image in with Copic markers and popped it up on the card using 3M double-sided tape. Lastly, I added some Clear Glitter Glue to the bottom of the snowman to create some snow. You can’t see it in this picture, but I also added Wink of Stella – Clear to make the snowman sparkle too!

Card Recipe:

Stamp: Snowman Cup Of Love – S149 (High Hopes Rubber Stamps)

Sentiment: Dot Warm Heart – G117 (High Hopes Rubber Stamps)

Inks: Memento – Tuxedo Black, Tim Holtz Distress Ink – Mermaid Lagoon

Paper: Copic Marker X-Press It Blending Card, AC Cardstock – White, Hot Buy – Recollections – Jewel Tones, Pebbles – Winter Wonderland 6″ x 6″

Die Cuts: Hero Arts – Infinity Dies – Rounded Rectangle (DI465), Creative Expression Craft Dies by Sue Wilson – Noble Dies – Double Pierced Ovals

Tools: MISTI – Most Incredible Stamping Tool, 3M – 2 sided tape, Sakura Glaze – Black Pen, Gelly Roll Sakura #8 Pen, Cuttlebug, Wink of Stella – Clear

Image coloured with Copic Markers:

Eyes: Sakura Glaze – Black Pen, Gelly Roll Sakura #8 Pen

Snowman: YR18, YR16, YR12, B60, C1, C0, C00, Colorless Blender

Hat, Scarf, Mitts, Coat, Patches and Cup: BG09, BG05, BG02, BG01, G99, YG67, YG17, R85, R83, R81

Cinnamon Stick: E27, E23

Background: G43, G40, G12

Snow: Clear Glitter Glue

Hope you like it and have a fantastic week!

You can find lots of inspiration from the Design Team Divas at the High Hopes blog, and the High Hopes Rubber Stamps Facebook Fan page plus you can also follow us on
Instagram, Twitter and Pinterest.

Winter Fun!!!


It’s Wednesday, and this week, I made a card using Bearly Swooshin’ – T202 by High Hopes Rubber Stamps for the main image and Roundin’ Up – G190 (High Hopes Rubber Stamps) for the sentiment. Winter was always a fun time for me growing up. We had so many outdoor rinks and played so many winter sports. I tried X-Country skiing, but in no way would ever attempt downhill skiing, I was dangerous enough on X-Cross Country skis. I wonder it that’s why everyone I ever went skiing with would only go once with me. LOL!

To make my card this week, I began with a card base of AC Cardstock – White cut and scored to be 6″ x 6″. I cut the background paper from Recollections – Burgundy cardstock to the same size as the base and used double-side tape to apply it directly to it. Photo-Play – O Canada 2 – Ice Rink paper was cut to the size of 5.75″ x 5.75″ and inked around the edges using Tim Holtz Distress Ink – Rustic Wilderness. I applied this directly to burgundy background using double-sided tape. Using Hero Arts – Infinity Dies – Rounded Rectangle dies and my Cuttlebug, I die cut the following: Copic Marker X-Press It Blending Card, Recollections – Burgundy cardstock, AC – Green Cardstock and Recollections – White cardstock.

The image and sentiment were stamped using my MISTI and Memento – Tuxedo Black ink. I coloured in the image with Copic markers and used a Gelly Roll Sakura #8 Pen to create the snow in the sky and whites of the bear’s eyes. Sakura Glaze – Black Pen was used for the eyes and nose. Just love the embossed look those 2 pens give to an image. Lastly, I added some Stickles – Diamond and some Clear Glitter glue for the snow. Once the glitter was all dry, I attached the finished image to the burgundy rounded rectangle with 3M VHB double-sided tape to pop it up. Then, I applied 3M double-sided tape onto the back of the larger rectangle to pop it up on the pictured background. The sentiment was inked with Tim Holtz Distress Ink – Rustic Wilderness and I ran it through my Xyron Create a Sticker and placed it on top of the small green rectangle. I added 3 layers of the 3M VHB – 2 sided tape to the one side to pop it up and some glue and placed it on top of the popped-up coloured image. Lastly, to complete the card, I added some YNS Gumdrops.

Card Recipe:

Stamp: Bearly Swooshin’ – T202 (High Hopes Rubber Stamps)

Sentiment: Roundin’ Up – G190 (High Hopes Rubber Stamps)

Inks: Memento – Tuxedo Black, Tim Holtz Distress Ink – Rustic Wilderness

Paper: Copic Marker X-Press It Blending Card, AC Cardstock – White, Photo-Play – O Canada 2 – Ice Rink (12″ x 12″), Recollections – Burgundy, AC – Green Cardstock and Recollections – White Cardstock

Die Cuts: Hero Arts – Infinity Dies – Rounded Rectangle (DI465)

Tools: MISTI – Most Incredible Stamping Tool, 3M – 2 sided tape, Sakura Glaze – Black Pen, Gelly Roll Sakura #8 Pen, Xyron Create a Sticker, 3M VHB – 2 sided tape, YNS Gumdrops, Cuttlebug

Image coloured with Copic Markers:

Eyes: Sakura Glaze – Black Pen, Gelly Roll Sakura #8 Pen

Bear: E47, E44, E43

Hat, Scarf, Mitts and Bindings: R59, R37, R35, C1, C0, C00, Colorless Blender

Skis, Goggles and Poles: B99, B95, B93, B91, B00, 100, T6

Background: G43, G40, G12

Snow: Stickles – Diamond, Clear Glitter Glue

Hope you like it and have a fantastic week!

You can find lots of inspiration from the Design Team Divas at the High Hopes blog, and the High Hopes Rubber Stamps Facebook Fan page plus you can also follow us on
Instagram, Twitter and Pinterest.

Wishing You the Sweetest Things!


Welcome Back Dreamerland Craft Fans!

Today, I’m sharing Dreamerland Craft Stamps Coordinating Die & Clear Stamp Package (D172906) for Character Stamp D172006 Love The Music From My Guitar and Love The Music From My Guitar – D172006! This little boy loves his guitar and all of the animals love his music.

To make his card, I stamped all of the images using my MISTI, Memento – Tuxedo Black ink and Copic Marker X-Press It Blending Card. I coloured in all of the images using Copic markers and then used my Cuttlebug and all of the die cuts from Coordinating Die & Clear Stamp Package (D172906) for Character Stamp D172006 Love The Music From My Guitar (Dreamerland Crafts Clear Stamps). I also die cut the sentiment at the same time and stamped it with Versa Fine – Onyx Black and then heat embossed it using Marvy Uchida – Embossing Heat Tool and Ranger – Clear Super Fine Detail embossing powder..

I was now ready to do the background. To achieve this I cut several die cuts using Monte Mart A4 Watercolour Book paper, Lawn Cuts – Simple Stitched Hillside Borders – Lawn Fawn and Your Next Stamp – Stitched Rectangle Die Set (YNSD214).

For the sky I used several Tim Holtz Blue inks in various shades listed below using a stencil that I had created from Avery Elle – Custom Steel Dies – Made in the USA – D-05-01 PiercedCloudsDie. For the grass I used various shades of Tim Holtz green inks – (see below).

I ran all of the die cuts and the back 2 layers of grass through Xyron Creative Station. Then I set them all aside.

I was now ready to assemble my card. I layered the first 2 die cuts onto the main die cut and then popped up the bottom grass cut with 3M VHB – 2 sided tape. I then added on the characters that I made stickers out of for easy assembly. I popped up the upper half of the little dog with 3M VHB – 2 sided tape. Once the scene was completed I mounted it onto 5.25″ x 4.25″ white cardstock.

Card Recipe:

Stamps and Sentiment: Coordinating Die & Clear Stamp Package (D172906) for Character Stamp D172006 Love The Music From My Guitar (Dreamerland Crafts Clear Stamps), Love The Music From My Guitar – D172006 (Dreamerland Crafts)

Inks: Memento – Tuxedo Black, Versa Fine – Onyx Black

Clouds: Tim Holtz Distress Ink – Blueprint Sketch, Tim Holtz Distress Ink – Salty Ocean, Tim Holtz Distress Inks – Broken China

Grass: Tim Holtz Distress Ink – Mowed Lawn, Tim Holtz Distress Ink – Bundled Sage, Tim Holtz Distress Ink – Twisted Citron, Tim Holtz Distress Inks – Peeled Paint

Embossing Powder: Ranger – Clear Super Fine Detail embossing powder

Paper: Copic Marker X-Press It Blending Card, Mont Mart A4 Watercolour Book paper – Acid Free – 190 GSM, Recollections – White Cardstock

Die Cuts:  Your Next Stamp – Stitched Rectangle Die Set (YNSD214), Coordinating Die & Clear Stamp Package (D172906) for Character Stamp D172006 Love The Music From My Guitar (Dreamerland Crafts Clear Stamps), Avery Elle – Custom Steel Dies – Made in the USA – D-05-01 PiercedCloudsDie

Tools: MISTI – Most Incredible Stamping Tool, Cuttlebug, 3M VHB – 2 sided tape, Marvy Uchida – Embossing Heat Tool

Image coloured with Copic Markers:

Skin: E000, E00, E04, E11, E21, R22, R20

Hair: E47, E44, E43

Shirt: BG49, BG45, BG34

Pants: B26, B23, B21

Guitar: E99, E97, E93, E51, E35, E33, E31, YR27

Bird: B04, B02, B00, Y38

Dog: E35, E34, E33, E31

Rabbit: C7, C5, C3, R30, R02

Cat: W9, W7, W5

Pig: E93,E04, R20, R00, R000, E44, E04

Background: B04, B02, B00

Hope you like it and have a great week!

You can find more cards to inspire you at Dreamerland Crafts on the Facebook Fan page from the rest of our design team.