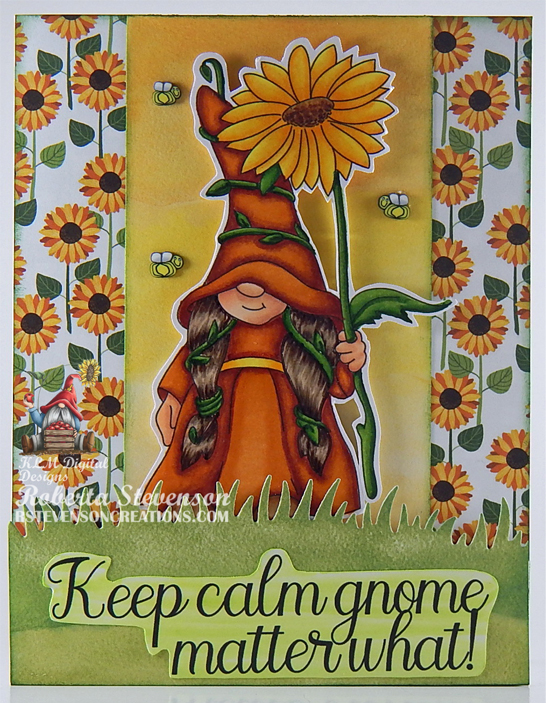
Tag Archive | Lawn Fawn – Simple Grassy Hillsides

Better Late Than Never!!


Sharing a birthday card I made today using KLM Digital Design –  Stanley The Snail from the new May 2022 release. This image also comes with 2 more sentiments, “You snailed it!” and “Thanks SLOW much!”  Love this sentiment “Better late than never!” as it could be used for so many different occasions.

Using Hammermill – Premium Colour 100 lb. cardstock, I created a base card of 5.5″ x 4.25″. Using Tim Holtz Distress Ink – Salty Ocean, I created the clouds with Lawn Fawn Cuts – Cloudy Stencil directly on the base card. With the dies from Lawn Fawn – Simple Grassy Hillsides and Lawn Fawn – Watercolor Wishes Rainbow paper, I die cut 3 lawn cuts using my Anna Griffin Empress Mini Machine.

I imported the image and sentiment into Microsoft Word and printed them out onto Copic Marker X-Press It Blending Card. The image was coloured in with Copic markers. Using scissors, I fussy cut around the coloured image and inked around the edges with a black marker. I cut the sentiment with my cutter and added U-Line double sided tape to it and popped it up onto the smallest lawn cut.

The card was now ready to assemble. I added U-Line double-sided tape to each layer of grass. I added a second layer of U-Line double sided tape to the middle layer. I used my fussy cut image to determine where the lawn cuts would be positioned and then popped up each layer onto the base. I applied some glue to the back of the image on the bottom only and adhered it to the card between the 2nd and 3rd layer of grass. I felt like the card still needed something, so I added 3 lady bugs from Forever In Time – Ladybug Gems and a butterfly from Doodlebug Design Inc. – Plum Butterflies Braddies to finish off my card.

Card Recipe:

Stamp and Sentiment:  Stanley the Snail – KLM Digital Designs

Inks: HP Printer Grayscale, Tim Holtz Distress Ink – Salty Ocean

Paper: Copic Marker X-Press It Blending Card, Hammermill – Premium Colour 100 lb., Lawn Fawn – Watercolor Wishes Rainbow – 6″ x 6″

Die: Lawn Fawn – Simple Grassy Hillsides

Stencil: Lawn Fawn Cuts – Cloudy Stencil

Miscellaneous: U-Line – 2 sided tape, Anna Griffin Empress Mini Machine, Doodlebug Design Inc. – Plum Butterflies Braddies, Forever In Time – Ladybug Gems

Image coloured with Copic Markers:

Snail: E84, E81, E44, E43, E42, E41, E39, E37, E35, E34, E33, E31, E30, E29, E27, E25, E23, E21, Y38

Hope you like it and have a great week!

You can find more cards to inspire you at KLM Designs, KLM Digital Design Team and KLM Digital Designs on the Facebook Fan page from the rest of our design team.

So Mushroom In My Heart!!


Sharing a card I made today using these adorable images from Sweet Sentiment- Internet Troll. He’s in the mood for love, are you?

For the base card, I used AC Cardstock – White and cut it and scored it to be 6″ x 6″. I die cut Craft Consortium – It’s Snome Time paper and Recollections – Red cardstock using my Couture Creations – Go Power and Emboss and Creative Expression Craft Dies by Sue Wilson – Noble Dies – Double Pierced Squares – Set B. The grass was cut with the same cutting machine, green cardstock and Lawn Fawn – Simple Grassy Hillsides die cut. I ran the grass through the die cut machine again using the same size square that I had used for the smaller mushroom background. Tim Holtz Distress Ink – Pine Needles was applied around the edges of the smaller mushroom square. Using double-sided tape, I applied the larger mushroom background directly to the base card. The lawn was layered and applied to the small mushroom square. The red square and smaller mushroom square were both applied to ivory cardstock using double-sided tape. Using my cutter, I cut around the edges leaving a small border. The red and ivory square were then applied directly to the base background using double-sided tape. The mushroom square, grass, ivory square combo were popped up onto the red square using 3M double-sided tape.

Copic Marker X-Press It Blending Card was used for the images and sentiment. The images were coloured in with Copic markers. I fussy cut around all of the images and sentiment and inked around the sentiment with Tim Holtz Distress Ink – Pine Needles. Using glue, I adhered the images to the mushroom background and in between the grass. The sentiment was popped up using 3M double-sided tape onto the card to finish it off.

Card Recipe:

Stamps and sentiment: Internet Troll – Sweet Sentiments

Inks: Tim Holtz Distress Ink – Pine Needles

Paper: Copic Marker X-Press It Blending Card, Craft Consortium – It’s Snome Time (6″ x 6″), Recollections – Red, Ivory cardstock, AC Cardstock – White

Die Cuts: Creative Expression Craft Dies by Sue Wilson – Noble Dies – Double Pierced Squares – Set B, Lawn Fawn – Simple Grassy Hillsides

Miscellaneous: Couture Creations – Go Power and Emboss, 3M double-sided tape

Image coloured with Copic Markers:

Skin: E21, E11, E00, E000, R30, R20, R01, R00, R000

Eyes: YG67, YG63, YG61,

Hair: C5, C3, C1

Clothing: B26, B23, B21, E43, E42, E41

Hat and Patch: BG72, BG57, BG32, BG11

Walking Stick: E49, E37, E35, E34

Mushrooms: E42, E40, E09, E08, E0000, BV31, R08

Hope you like it and have a great week!

Come and check us out on Passionate Paper Creations & Friends FB group
as we are currently sponsoring Sweet Sentiment until Saturday, October 16, 2021.

If you are a member of Passionate Paper Creations & Friends FB group
you can go to the top of the page and get a shopping discount.

If you are not a member just click join. We are a fun loving group with a lot of inspiration.

Woodland Gnome!!


Sharing a card I made today using KLM Digital Designs – Woodland Gnome Girl from the new August release. This little gnome is keeping calm even with little bees flying around. I know if it was me, I’d be running for cover. LOL!


This image also comes with 2 other sentiments, “You gno-me too well” and “Just because”.

To make the card, I first imported the image and sentiment into Microsoft Word and printed them out onto Copic Marker X-Press It Blending Card. Using by Brother Scan and Cut, I cut around the image leaving a small white border. The image was coloured in with Copic markers. For the base card, I used Hammermill – Premium Colour 100 lb. and cut it to be 5.5″ x 4.25″. PhotoPlay – Gnome for the Holidays Thanksgiving paper was cut to the same size as the base and attached using double-sided tape. Lawn Fawn – Watercolor Wishes Rainbow paper was cut to the size of 5.5″ x 2.5″ and glued onto the sunflower paper in the centre. The image was popped up and placed onto the centre of the yellow background paper. Using my Cuttlebug, die cut from Lawn Fawn – Simple Grassy Hillsides and Lawn Fawn – Watercolor Wishes Rainbow paper, I cut the grass. I fussy cut around the printed sentiment and used Copic YGO1 to fill in the background and to go around the fussy cut. I ran this piece through my Xyron Create a Sticker because I wanted the sentiment to lay nice and flat on the grass background. The grass was then centred and popped up on the card. All of the background layers were inked with Tim Holtz Distress Ink – Rustic Wilderness before placing them onto the card. Lastly, to complete the card I added in a few bees from Sprinkletz Embellishments – Bubble Bees.

Card Recipe:

Stamp and sentiment: Woodland Gnome Girl – KLM Digital Designs

Inks: HP Printer Grayscale, Tim Holtz Distress Ink – Rustic Wilderness

Paper: Copic Marker X-Press It Blending Card, Hammermill – Premium Colour 100 lb., PhotoPlay – Gnome for the Holidays Thanksgiving, Lawn Fawn – Watercolor Wishes Rainbow – 6″ x 6″

Die Cut: Lawn Fawn – Simple Grassy Hillsides

Miscellaneous: Xyron Create a Sticker, Cuttlebug, Sprinkletz Embellishments – Bumble Bees (NK137), Brother Scan and Cut

Image coloured with Copic Markers:

Skin: E21, E11, E00, E000

Hair: E47, E45, E43, E42, E41

Dress and Hat: E08, YR18, YR14, YR12

Shoes: E39, E37, E35, E34, E33, E31, E30

Sunflower: YG67, YG23, YG17, Y17, Y15, Y02, E47, E37, E35, E31

Hope you like it and have a great week!

You can find more cards to inspire you at KLM Designs, KLM Digital Design Team and KLM Digital Designs on the Facebook Fan page from the rest of our design team.

The Happy Couple!!


Today, I’m sharing a card that I made using the image from The Paper Shelter called The Happy Couple. I made this card for a colleague who was married recently. Here’s wishing the happy couple a very long and happy marriage!


To make the card, I first imported the image into Microsoft Word and then printed it out on my HP Printer using High Quality Grayscale. The image was printed onto Copic Marker X-Press It Blending Card. I coloured in the image using Copic markers and then fussy cut around it.

Using my Cuttlebug, Spellbinders – S6-138 dies, and I die cut Hammermill – Premium Colour 100 lb. 5 times for the layers and twice for the sides. For the front of the card, I die cut Crafts Pearl Papers – 02-3081416 with the same dies. For the grass, I die-cut Lawn Fawn – Shadow Box Card Park Add-On and Lawn Fawn – Simple Grassy Hillsides using Momenta – Cardstock. Lastly, I die-cut the flag banner using Crafter’s Companion – Luxury Cardstock – Navy Blue and Craftin Desert Diva’s – Flag Banner Dies and the sentiment was die cut 5 times with Hammermill – Premium Colour 100 lb. cardstock and once with Hot Buy Craft Smart – Holiday Glitz Glitter Paper using PaperCrafter Today – 15 Die Cut Sentiment Set.

For the back panel using stencils I had made previously out of Avery Elle – Pierced Clouds Dies, I coloured in the sky using Tim Holtz Distress Ink – Salty Ocean and Tim Holtz Distress Inks – Broken China. Tim Holtz Distress Ink – Mowed Lawn was used to colour in the grass. The card was now ready to put together. I started with the coloured background and added the coloured image to it using 3M VHB – 2 sided tape.

This was adhered to the side panels using double-side tape on both sides.  Working from back to front, I added on the next layer and applied the grass die cut to front of the layer. This was put through the tabs on the side. I added in the next layers in the same manner. A layer with more grass was added to the 4th layer. I added in the next layer and then for the very front I once again cut off the tabs on both sides and then attached it to the sides using double-sided tape. The banner was then added using glue. The paper for the sentiment had been put through my Xyron Creative Station prior to cutting it. This made it easy to peel of the back of the stickers for each layer and assembling them on top of each other. I used the white layers for the bottom of the sentiment and for the final piece, I used the gold. A small jewel dot was used to finish off the dotted “i”.

Card Recipe:

Stamp: The Happy Couple (The Paper Shelter)

Inks: HP Printer Grayscale, Tim Holtz Distress Ink – Salty Ocean, Tim Holtz Distress Inks – Broken China, Tim Holtz Distress Ink – Mowed Lawn

Paper: Copic Marker X-Press It Blending Card, Hammermill – Premium Colour 100 lb., Crafter’s Companion – Luxury Cardstock – Navy Blue, Crafts Pearl Papers – 02-3081416, Momenta – Cardstock, Hot Buy Craft Smart – Holiday Glitz Glitter Paper 12″ x 12″

Die Cuts: Lawn Fawn – Shadow Box Card Park Add-On, Lawn Fawn – Simple Grassy Hillsides, Spellbinders – S6-138, Craftin Desert Diva’s – Flag Banner Dies, PaperCrafter Today – 15 Die Cut Sentiment Set, Avery Elle – Pierced Clouds Die (D-05-01)

Miscellaneous: 3M VHB – 2 sided tape, Xyron Creative Station

Image coloured with Copic Markers:

Skin: E21, E11, E00, E000, R22, R20, B23, B21, Eyes (Gelly Roll Sakura #8 Pen, Sakura Glaze – Black)

Hair: E47, E44, E43, E41

Dress: BG70, C00, Colorless Blender

Suit and Tie: T7, T5, T3, B69, B39, B24

Flowers and Greenery: YG17, YG11, YG03, YG01. Y35, Y08, Y02, Y00

Shoes: C8, C7, C5, C3

Hope you like it and have a great week!