Tag Archive | Gina K Designs – Glitz Glitter Gel – Iridescent

Time to Celebrate!!


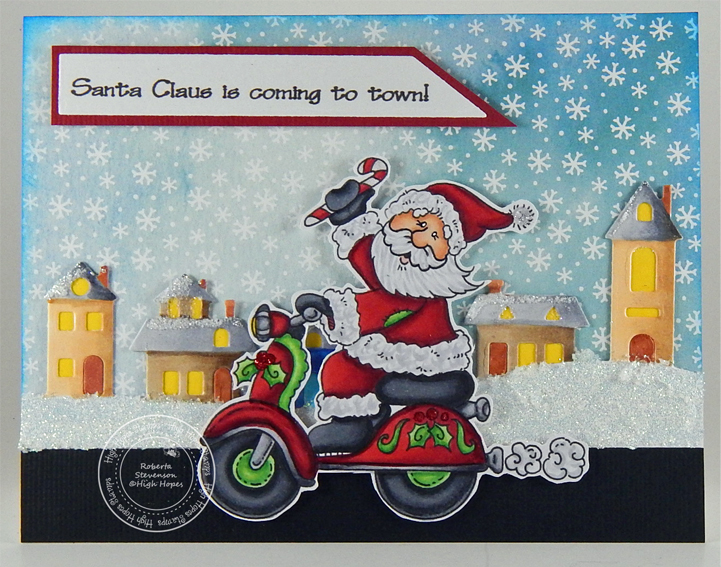
Today, I’m sharing a Christmas card using Dreamerland Crafts stamps called Let’s Celebrate – D19074 for the main image and Christmas Snow Scene – M18313 for the background. For the sentiment, I used Holiday Sentiments Set 001 – D163001


To make this card I used a base of 5.5″ x 4.25″ using Hammermill – Premium Colour 100 lb. cardstock. My Cuttlebug and My Creative Time – Rectangle Frame Layers Die were used to die-cut Copic Marker X-Press It Blending Cardstock. Using the background stamps, I stamped the background using my MISTI and Memento – Summer Sky ink. I coloured in the sky, trees and house with Copic markers and then added some snow using Gelly Roll Sakura #8 Pen. Once this was done, I added Gina K Designs – Glitz Glitter Gel – Iridescent to the remainder of the die cut for the sparkling snow. I added a little bit more where the boys feet would land and set it aside to dry. Once again, I used my MISTI and Memento – Tuxedo Black ink and stamped the main images. I coloured them in with Copic markers and then applied Ranger – Emboss It Pen Clear to the fur trims for the hats and clothing. I applied WOW! Sparkling Snow Embossing Glitter to the inked areas and then heat embossed everything with my Marvy Heat Embossing Tool. For the pompoms, I applied Cosmic Shimmer Fluffy Stuff and then heat embossed the liquid for it to puff up. For the present, I added some gold swirls using a Pental Sunburst Metalic Med Gel Pen. Then I fussy cut around the images leaving a thin white border. I stamped the sentiment using my MISTI and Lawn Fawn – Peacock Ink on to the base card. Then I stamped it again, this time using Versamark ink and then added Ranger – Clear Super Fine Detail embossing powder and heat embossed it.

The card was now ready to assemble. Using double-sided tape, I attached the background to the scalloped border. I added 3M double-sided tape to the back of the scalloped border and popped it up onto the base card. Using 3M double-sided tape, I popped up the main image and present onto the background. A little more of the Stickles – Diamond was added to snow where his feet are to complete the card.

Card Recipe:

Stamps: Let’s Celebrate – D19074 – Dreamerland Crafts, Christmas Snow Scene – M18313 – Dreamerland Crafts

Sentiment: Holiday Sentiments Set 001 – DS163001 – Dreamerland Crafts

Inks: Memento – Tuxedo Black, Versamark, Lawn Fawn – Peacock Ink, Memento – Summer Sky ink

Paper: Copic Marker X-Press It Blending Card, Hammermill – Premium Colour 100 lb., Hot Buy – Recollections – Jewel Tones

Die Cuts: My Creative Time – Rectangle Frame Layers, Gina Marie Designs – Nested Scalloped Stitched Rectangles

Stickles: Diamond

Embossing Powder: WOW! Sparkling Snow Embossing Glitter, Cosmic Shimmer Fluffy Stuff, Ranger – Clear Super Fine Detail embossing powder

Tools: MISTI – Most Incredible Stamping Tool, Cuttlebug,  Marvy Heat Embossing Tool, Sakura Glaze – Black, Gelly Roll Sakura #8 Pen, Gelly Roll Sakura #5 Pen, 3M VHB – 2 sided tape and Pental Sunburst Metalic Med Gel Pen

Image coloured with Copic Markers:

All Eyes and Small Noses:  Sakura Glaze – Black pen, Gelly Roll Sakura #5 Pen

Skin: E21, E11, E00, E000, R30, R22, R20

Hair: E47, E44, E43

Clothing and Hat: B37, B14, B12

Mitts: YG67, YG63, YG61

Boots: C8, C6, C4, C2, C1

Bear: E57, E55, E53, E51

Pig: E95, E93, R00, R000

Rabbit: C2, C1, C00, R30, R20

Present and Bow: BG09, BG05, BG02, BG01, E15, Y38, Y15, Y08

House: E40, E41, E30, E18, E15, Y04

Trees: G99, G21, YG67, YG17

Sky: B04, B02, B01, B00

Hope you like it and have a great week!

You can find more cards to inspire you at Dreamerland Crafts and Pointer Scrapbooking on the Facebook Fan pages from the rest of our design team.

Santa’s Coming!!!


It’s Wednesday, and this week, I made a card using Motorin’ By Santa – T094 by High Hopes Rubber Stamps for the main image and Coming To Town – G271 (High Hopes Rubber Stamps) for the sentiment. Santa’s motoring through town to bring everyone some Christmas Cheer!

To make my card this week, I began with a card base of Hammermill – Premium Colour 100 lb. cardstock, cut and scored to be 5.5″ x 4.25″. I cut the background paper from Stampin’ Up – Snowflake Splendor Designer Series Paper to be the same size as the base and inked around the edges using Tim Holtz Distress Ink – Salty Ocean. I applied this directly to the base card using double-sided tape. AC – Black cardstock was cut to 5.5″ x .75″ and adhered to the bottom using double-sided tape. I die cut the village using my Cutttlebug, Hammermill – Premium Colour 100 lb. cardstock and Village Edges dies from Elizabeth Craft Designs. I coloured in the homes and put some yellow cardstock behind for the windows. Then I took the little doors, coloured them in and inset them back into the die cuts. Once this was done, I added Gina K Designs – Glitz Glitter Gel – Iridescent to the hills and Stickles – Diamond to the roof tops.

With my MISTI and Memento – Tuxedo Black ink, I stamped both the image and the sentiment onto Copic Marker X-Press It Blending Card. I coloured in the image with Copic markers and then I fussy cut around it. I added Stickles – Xmas Red to the Holly on the motorbike and Stickles – Diamond to the pop pom on Santa’s hat. Using my Cuttlebug, I die cut the sentiment using Whimsy Stamps – Quick Strips Die Set. I ran this through my Xyron Create a Sticker and placed it on some red cardstock. Then using my cutter, I cut around it leaving a slim border.

Once everything was dry, it was time to assemble the remainder of the card. I applied the houses directly to the base over top of the road. The Santa image and sentiment were both popped up onto the background using 3M double-sided tape.

Card Recipe:

Stamp: Motorin’ By Santa – T094 (High Hopes Rubber Stamps)

Sentiment: Coming To Town – G271 (High Hopes Rubber Stamps)

Inks: Memento – Tuxedo Black, Tim Holtz Distress Ink – Salty Ocean

Paper: Copic Marker X-Press It Blending Card, Hammermill – Premium Colour 100 lb., AC – Black, Stampin’ Up – Snowflake Splendor Designer Series Paper (12″ x 12″)

Die Cuts: Elizabeth Craft Designs – 1691 – Village Edges, Whimsy Stamps – Quick Strips Die Set – WSD330

Stickles: Xmas Red and Diamond

Tools: MISTI – Most Incredible Stamping Tool, 3M – 2 sided tape, Gina K Designs – Glitz Glitter Gel – Iridescent, Xyron Create a Sticker

Image coloured with Copic Markers:

Eyes: Sakura Glaze – Black Pen, Gelly Roll Sakura #5 Pen

Skin: E21, E11, E00, E000, R30, R20

Santa Hat, Clothing: R59, R37, R35

Mitts, Seat, Boots and Wheels: C8, C6, C4

Santa’s Beard, Trim and Smoke: C2, C1, C0

Motorcycle, Decorations, Wheel Hubs and Fenders: R59, R37, R35, G14, YG23, YG11, C8, C6, C5, C4, C3, C2, C1, Y08

Houses: C5, C4, C3, C1, C0, E55, E53, E51, E50, E44, E43, E41, E15, E13, BV25, BV13, BV11, BV02, B26, B24, B23

Hope you like it and have a fantastic week!

You can find lots of inspiration from the Design Team Divas at the High Hopes blog, and the High Hopes Rubber Stamps Facebook Fan page plus you can also follow us on
Instagram, Twitter and Pinterest.

Baking Snowman!!


Sharing a card I made today using KLM Digital Designs – Baking Snowman from the July release. This image comes with 3 sentiments. I’ve used 1 on my card, but you also have the choice of  “Lovin’ from the oven” and “Wishing you a delicious Holiday”. Christmas at our house always had so many wonderful aromas from my mom baking all kinds of Christmas goodies for everyone!

To make the card, I first imported the image and sentiment into Microsoft Word and printed it out onto Copic Marker X-Press It Blending Card. I die the image and frame using my Cuttlebug and Creative Expression Craft Dies by Sue Wilson – Paper Cuts Collection – Christmas Feast dies. I coloured the image in with Copic markers and then added in the snowflakes for the sky with Gelly Roll Sakura #10 Pen. Black PrismaColor Premier Pencil was used to outline parts of the image. Gina K Designs – Glitz Glitter Gel – Iridescent was added below the snowman to create the sparkling snow and the image was set aside to dry.

The frame for the sentiment die was cut twice using Gina Marie Designs – Nested Scalloped Stitched Rectangles. A cutter was used to remove the frame from the one that contained the sentiment. The edges were then inked with Tim Holtz Distress Ink – Barn Door. Viva Decor – Inka-Gold – Yellowgold was applied to the other 2 frames and then once it was dry, a paper towel was used to buff them up and give the gold some shine. The sentiment was then applied directly to the small frame using double-sided tape.

The card was now ready to assemble. Hammermill – Premium Colour 100 lb. was used to create the card base. It was sized at 8-5/8″ x 7¼” and then scored at 3-5/8″. I used my Couture Creations – Go Power and Emboss to die cut Hot Buy Craft Smart – Holiday Glitz Glitter Paper using PinkFresh Studio Essentials – Slim Stitched Rectangle Dies. The dimensions were the same as the base card. Using glue, I applied the large rectangle die-cut directly to the base card. Next, I used the outside frame for the snowman as a guide to where to place the coloured image. I removed the image and applied glue to the back of it and set it back inside the frame. Once the image was glued down to the base, I added glue to the back of the frame and moved it into place around the coloured image to complete the puzzle. 3M VHB – 2 sided tape was added to the back of the frame for the sentiment and it was added directly to the glitter paper. Lastly, to finish off my card, I removed the button parts from the backs of the buttons from Dress It Up – Holiday Collection – Christmas Cookies using my Tim Holtz scissors and pliers.  Mini Glue Dots were applied to the backs of each of the buttons and they were applied directly to the glitter paper.

Card Recipe:

Stamp and sentiment: Baking Snowman – KLM Digital Designs

Inks: HP Printer Grayscale, Tim Holtz Distress Ink – Barn Door

Paper: Copic Marker X-Press It Blending Card, Hammermill – Premium Colour 100 lb., Hot Buy Craft Smart – Holiday Glitz Glitter Paper 12″ x 12″

Die Cut: Creative Expression Craft Dies by Sue Wilson – Paper Cuts Collection – Christmas Feast, Gina Marie Designs – Nested Scalloped Stitched Rectangles, PinkFresh Studio Essentials – Slim Stitched Rectangle Dies

Miscellaneous: Viva Decor – Inka-Gold – Yellowgold, Gina K Designs – Glitz Glitter Gel – Iridescent, Dress It Up – Holiday Collection – Christmas Cookies, Gelly Roll Sakura #10 Pen, 3M VHB – 2 sided tape, Min Glue Dots – 3/16″, Cuttlebug, Couture Creations – Go Power and Emboss

Image coloured with Copic Markers:

Snowman: B60, C1, C00

Apron: G99, G21, YG67, YG17

Hat: BV20, C0, C00

Gingerbread: E35, E33, E31, R35, YG17, Gelly Roll Sakura #10 Pen

Rolling Pin: E43, E42, E40

Sky: B37, B14, B12

Snow: Gina K Designs – Glitz Glitter Gel – Iridescent

Hope you like it and have a great week!

You can find more cards to inspire you at KLM Designs, KLM Digital Design Team and KLM Digital Designs on the Facebook Fan page from the rest of our design team.