Today I’m sharing a Birthday card using Craftin’ Desert Divas – Chef Trolls (Retired) stamp and sentiments that I made for my mom last month! She has always loved to bake, so I thought these were the perfect little images for her.
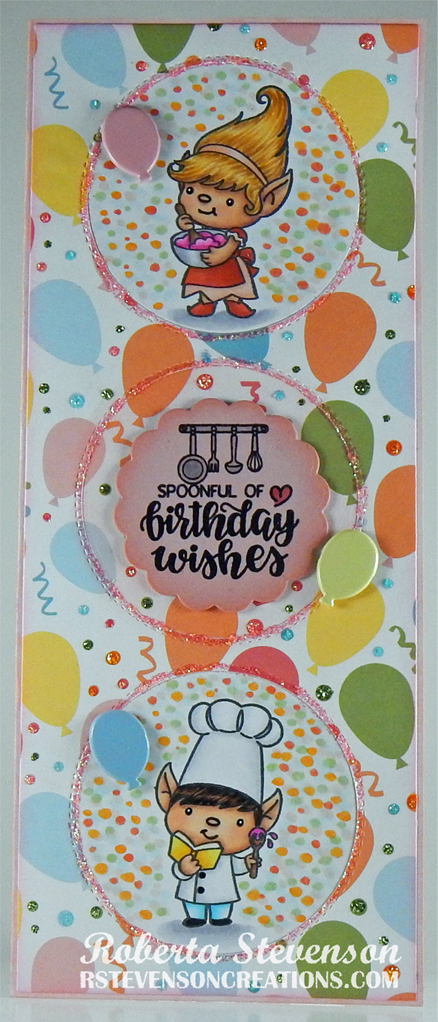
With a Cuttlebug and Photo-Play – Circle Windows Etched Dies, I die cut Copic Marker X-Press It Blending Card cardstock and Echo Park – Birthday Girl – Bouncing Balloons cardstock. With some scrap paper, I die cut the floral scalloped circle using dies from the same set.
I created a base card to the size of 8.5″ x 3.5″ using Hammermill – Premium Cardstock 110 lb. cardstock. The edges of the the scalloped circle and patterned die cut were inked with a finger dauber and Tim Holtz Distress Ink – Saltwater Taffy. Tim Holtz Distress Ink – Kitsch Flamingo and a finger dauber were used to ink all of the edges of the large patterned die cut and then it was attached directly to the base card using liquid glue.
Using my MISTI and Memento – Tuxedo Black ink, the images were stamped onto the Copic Marker X-Press It Blending Card cardstock circles. These were coloured in with Copic markers listed below and then applied to the base card using liquid glue. The sentiment was applied to the scalloped circle using a MISTI and Versa Fine – Onyx Black ink. Ranger – Clear Super Fine Detail embossing powder was applied to the ink and heat embossed with a Marvy Uchida – Embossing Heat Tool. I applied the circle from the base card into the centre circle using liquid glue and then applied some Tim Holtz Distress Ink – Saltwater Taffy around the circle. U-Line Double-Sided Foam Tape was applied to scalloped circle and 3 balloon brads and they were all popped up onto the card. Lastly, using various Stickles listed below, I added some sparkle to the small dots on the patterned paper to finish it off.
Image coloured with Copic Markers:
Card Recipe:
Stamps and Sentiments: Craftin’ Desert Divas – Chef Trolls (Retired)
Inks: Memento – Tuxedo Black, Versa Fine – Onyx Black, Tim Holtz Distress Ink – Saltwater Taffy, Tim Holtz Distress Ink – Kitsch Flamingo
Paper: Copic Marker X-Press It Blending Card, Echo Park – Birthday Girl – Bouncing Balloons, Hammermill – Premium Cardstock 110 lb
Embossing Powder: Ranger – Clear Super Fine Detail embossing powder
Die Cut: Photo-Play – Circle Windows Etched Dies (#SIS2379)
Stickles: Grapefruit, Orange Peel, Cool Mint, Sea Glass and Seafoam
Miscellaneous: Marvy Uchida – Embossing Heat Tool, MISTI – Most Incredible Stamping Tool, U-Line Double-Sided Foam Tape
Image coloured with Copic Markers:
Skin: E21, E11, E04, E00, E000
Eyes: Sakura Glaze – Black, Gelly Roll Sakura #5 Pen
Utensils: N2, C3, C1
Boy
Hair: E57, E49, E47
Chef Hat and Shirt: C2, C1, C00, Colorless Blender
Pants: BG01, BG000
Shoes and Buttons: 100, Sakura Glaze – Black
Book: YR30, Y17, Y15, Y13
Girl
Hair: E50, E35, YR31, YR24
Apron and Shoes: R17, R14, R08, R05, C2
Dress: R12. R11, R00
Icing: RV06, RV04, RV02
Spoons: E25, E23
Bowl: C3, C2, C1, Colorless Blender
Background: R11, R05, G43, YR16, BG000
Hope you like it and have a great week!


