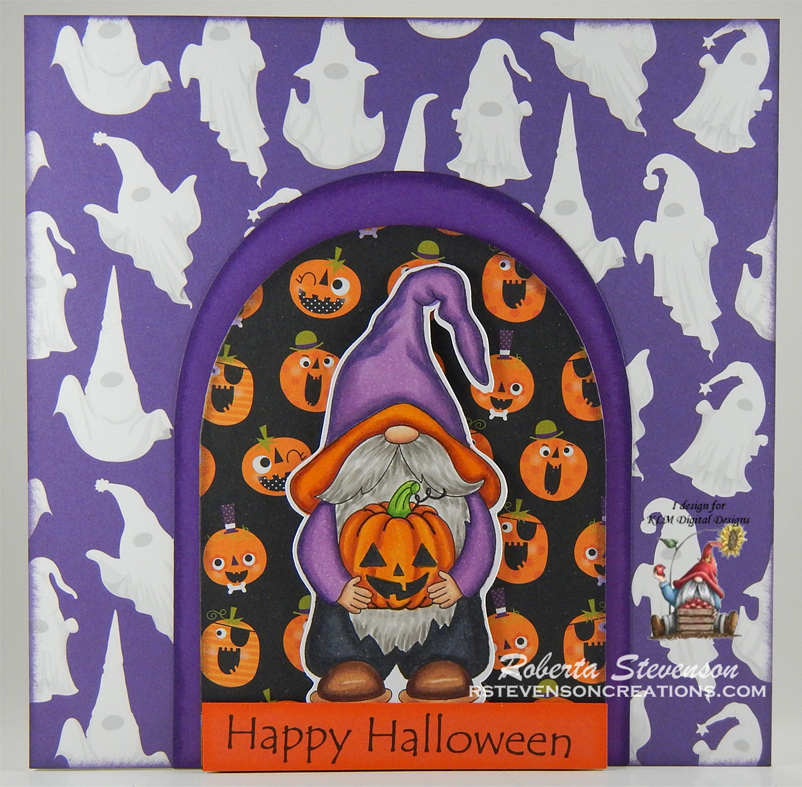
Today I’m sharing a Hallowe’en card using KLM Digital Design – Graveyard Gnome – Vampire from the new September 2023 release. This image also comes with 2 more sentiments, “Can’t wait to hang with our fang gang!” and “Happy Halloween, My creepy little friend”.

Hammermill – Premium Colour 100 lb. cardstock was used to create a 5.25″ x 5.5″ card base. Recollections – Black cardstock was cut to the same size and adhered directly to the base using double-sided tape.
The image and sentiment were imported into Microsoft Word and printed out onto Copic Marker X-Press It Blending Card cardstock. I printed out an extra copy of the image onto regular copy paper as well and fussy cut around it so that I could use it as a mask for later. I also cut a 2″ circle from a piece of Post-It Note so that I could use both pieces as a mask.
The image was coloured in with Copic markers. With the reverse mask from the circle, I placed it over top of the image and drew in the moon, using the mask as a guide. I added in the features of the moon with Copic markers and then blended everything together with a Copic Colorless Blender. I was now ready to do my background.
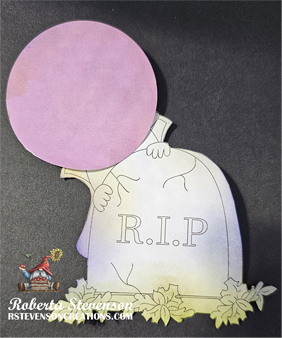
I took the mask that I created earlier of the image and placed it over top of the coloured image. Next, I tood the circle that I created from the Post-It Note and placed it over top of the image mask. This allowed me to cover both the moon and the image. With Washi Tape, I covered the bottom part above the sentiment. With multiple blending brushes and Tim Holtz Distress Inks listed below, I created the glow of the moon and the sky. Tim Holtz Distress Ink – Carved Pumpkin and Tim Holtz Distress Ink – Spiced Marmalade were combined to turn the sentiment orange. Once this was completed I moved the Washi Tape so that it covered the sentiment. This time, I blended in the green Tim Holtz Distress Inks with a blending brush. I decided I wanted a little more depth to the greens, so I removed all of the masks, but kept the Washi Tape on. Using Copic markers, I created a few more shadows in the grass.
I removed the Washi Tape and attached the finished image to the base card. Some extra bats in the sky were added using Class A’ Peel Stickers from Stampendous! Crystal Stickles was applied to the small moon on the hat and the hat band. Finally, some little stars were added into the sky using a White PrismaColor Premiere Pencil to complete the card.
Card Recipe:
Stamp and Sentiment: Graveyard Gnome – Vampire – KLM Digital Designs
Inks: HP Printer Grayscale, Tim Holtz Distress Ink – Black Soot, Tim Holtz Distress Ink – Fossilized Amber, Carved Pumpkin, Spiced Marmalade, Villainous Potion, Dusty Concord, Chipped Sapphire, Mowed Lawn, Peeled Paint
Paper: Copic Marker X-Press It Blending Card, Hammermill – Premium Colour 100 lb., Recollections – Black cardstock
Miscellaneous: Blending Brushes
Image coloured with Copic Markers:
Skin: E21, E11, E04, E00, E000
Beard: E47, E44, E43, E41
Hat, Cape and Small Moon: V17, V15, V12, Y17, Y15, Y11, R59, R37, R35
Bat: BV29, BV25, BV23
Gravestone: W5, W3, W1, W0
Leaves: YR27, YR24, YR23, YR15, YR12, Y17, Y04, R39, R02,
Grass: YG25, YG23, YG17, YG13, YG03
Moon: E41, E40, Y11, Y000, Colorless Blender
Hope you like it and have a great week!
You can find more cards to inspire you at KLM Designs, KLM Digital Design Team and KLM Digital Designs on the Facebook Fan page from the rest of our design team.