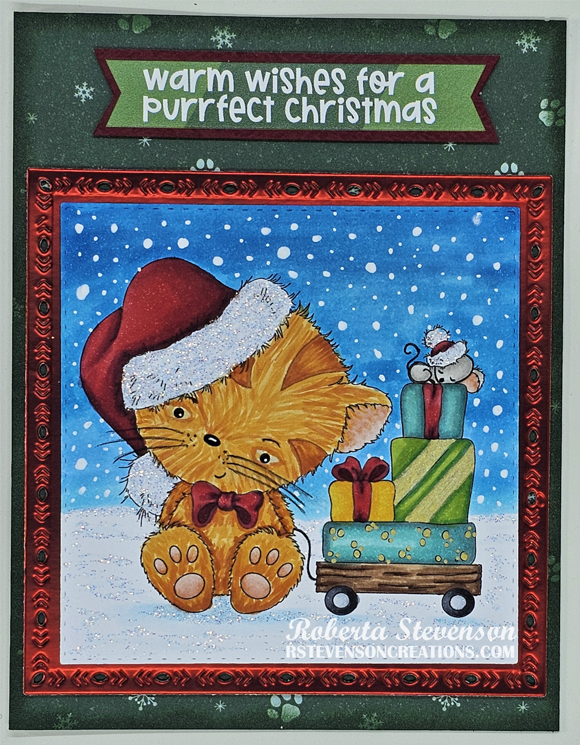
Tag Archive | Copic

Sweet As Candy Canes!


Today I’m sharing a Christmas card that I made using KLM Digital DesignsCandy Cane Gnome II from the new October 2024 Release. This image also comes with 2 more sentiments, “Sugar & Stripes and everything nice!” and “Cane you believe it’s Christmas?”.

The base card was created to the size of 4.25″ x 5.5″ out of Hammermill – Premium 110 lb. cardstock. I had some dark green cardstock in my stash and decided to cut it to the same size as the base and glue it on. I loved the beautiful patterned paper from Craft Smith – Peppermint Twist and thought it went great with the image, so I cut that to be 4.25″ x 4.25″. The edges were inked around with Tim Holtz Distress Inks – Festive Berries and it was adhered to the centre of the card. AC Premium Candy Cane Ribbon was applied to the top and bottom of the card using double-sided tape.

The image and sentiment were printed out with my HP Printer onto Copic Marker X-Press It Blending Card using High Quality Grayscale and the image was coloured in with Copic markers listed below. Clear – Wink of Stella was then applied over all of the candy cane to make it sparkle. Both the image and the sentiment were fussy cut leaving a small white border around the image. The sentiment was coloured with YG61 Copic marker and then edged with a finger dauber and Tim Holtz Distress Ink – Rustic Wilderness.

The card was now ready to assemble. U-Line Double-Sided Foam Tape was applied to the image and sentiment and they were popped up onto the card. To finish it off 3 candy canes were added from Eyelet Outlet & Brads – Candy Cane using 2 layers of U-Line Double-Sided Foam Tape after I had removed the back tabs from them.

Card Recipe:

Stamp and Sentiment: KLM Digital DesignsCandy Cane Gnome II

Inks: HP Printer High Quality Grayscale, Tim Holtz Distress Ink – Rustic Wilderness, Tim Holtz Distress Inks – Festive Berries

Paper: Copic Marker X-Press It Blending Card, Hammermill – Premium Cardstock 110 lb., Craft Smith – Peppermint Twist (6″x6″), Green Cardstock

Miscellaneous: U-Line Double-Sided Foam Tape, AC Premium Ribbon, Eyelet Outlet & Brads – Candy Cane, Clear – Wink of Stella

Image coloured with Copic Markers:

Skin: E21, E11, E04, E00, E000

Beard and Hair:  C5, C4, C3, C2, C1

Hat and Pants: R46, R14, R08

Mittens and Leaves: G99, YG67, YG63, YG61

Candy Cane: R46, R14, R08, C1, C0, Colorless Blender

Shoes: 100, C9, C7, C5, C4, C2

Berries: R89, R37

Hope you like it and have a great week!

You can find more cards to inspire you at KLM Designs, KLM Digital Design Team and KLM Digital Designs on the Facebook Fan page from the rest of our design team.

Harvest Blessings!


Today I’m sharing a Thanksgiving card using KLM Digital DesignHarvest Gnome II from the new October 2024 release that I made. This image also comes with 2 more sentiments, “Leaves are falling, Autumn is calling” and “Pumpkin Kisses and Harvest Wishes”. I’d like to wish everyone a wonderful Canadian Thanksgiving this coming weekend!

I began with a 5.5″ x 4.25″ base card using Hammermill – Premium 110 lb. Cardstock. The image and sentiment were imported into Microsoft Word and printed out onto Copic Marker X-Press It Blending Card. The image was coloured in with Copic markers and then I printed it out a second time onto regular copy paper and fussy cut around the top part of the image. I used this as a mask on the card. Using cloud stencils that I had created previously out of Avery Elle – Pierced Clouds Dies, I created the clouds using a blending brush and Tim Holtz Distress Ink – Salty Ocean. I trimmed the image down to be the same size as the base and adhered it to the card using liquid glue.

Card Recipe:

Stamp and Sentiment:  KLM Digital DesignHarvest Gnome II

Inks: HP Printer Grayscale, Tim Holtz Distress Ink – Salty Ocean

Paper: Copic Marker X-Press It Blending Card, Hammermill – Premium Cardstock 110 lb.

Dies \ Stencils: Avery Elle – Pierced Clouds Die (D-05-01)

Image coloured with Copic Markers:

Skin: E21, E11, E04, E00, E000

Beard: YR18, YR16, YR12, E08

Shirt: E89, E87, E84, E81

Hat and Jeans: B99, B97, B95, B91

Boot: E35, E33, E31, E27, E25, E23

Apples and Leaves: G16, YG67, YG63, YG61, YG25, YG23, YG21, YG05, YG03, YG01, R39, R27, R24, R22

Pumpkins: YR18, YR16, YR12, Y08, E08, E89, E87, E84

Crate: E59, E57, E55, E53

Grass: YG67, YG25, YG23, YG13, YG11

Hope you like it and have a great week!

You can find more cards to inspire you at KLM Designs, KLM Digital Design Team and KLM Digital Designs on the Facebook Fan page from the rest of our design team.

Fa La La La!


Today I’m sharing a Christmas card that I made using KLM Digital DesignsWindow Kitty from the new September 2024 Release.

The base card was created to the size of 4.25″ x 5.5″ out of Hammermill – Premium 110 lb. cardstock. Tim Holtz Distress Ink – Evergreen Bough was applied around the outside edges with a finger dauber and a blender brush was used to apply ink around the inner edges of the card base.

The image was printed out with my HP Printer onto Copic Marker X-Press It Blending Card using High Quality Grayscale. With a Cuttlebug, Sizzix Rounded Tags were used to die cut the image and Recollections – Black cardstock. The image was coloured in with Copic markers and a Prismacolor Premier black pencil was used to add in some finer fur lines, the whiskers and to blacken around the mouth, nose and eyes.

The card was now ready to assemble. U-Line Double-Sided Foam Tape was applied to the image and large rounded tag. Both were applied together and popped up onto the card. A sentiment from Creative Expressions – Wordies Sentiment Sheets – Traditional Christmas was cut out and adhered to the card using Scrapbook Adhesives – 3D Foam Strips. Lastly, the snow flakes were added with a Gelly Roll Sakura #10 Pen.

Card Recipe:

Stamp and Sentiment: KLM Digital DesignsWindow Kitty

Inks: HP Printer High Quality Grayscale, Tim Holtz Distress Ink – Evergreen Bough

Paper: Copic Marker X-Press It Blending Card, Hammermill – Premium Cardstock 110 lb., Recollections – Black cardstock

Die Cuts: Sizzix Rounded Tags – 8 dies

Miscellaneous: U-Line Double-Sided Foam Tape, Creative Expressions – Wordies Sentiment Sheets – Traditional Christmas (CEW008), Gelly Roll Sakura #10 Pen, Scrapbook Adhesives – 3D Foam Strips

Image coloured with Copic Markers:

Cat: BV29, BV25, C4, W9, R89, R59, R56, R46, R29, R27, R24, R02, R01, R00

Brick Wall and Mortar: E19, E17, E13, C5, C3, C1

Drapes: BG72, BG57, BG32, BG11

Floor and Wall: E29, E27, E25, E23, Y17, Y15, C3, C1, R27

Window, Window Sill and Window Frame: BG000, C9, C7

Hope you like it and have a great week!

You can find more cards to inspire you at KLM Designs, KLM Digital Design Team and KLM Digital Designs on the Facebook Fan page from the rest of our design team.

Owl – Holidays!


Today I’m sharing a Christmas card that I made using KLM Digital DesignsOwl – Santa Hat from the new September 2024 Release. This image also comes with 2 other sentiments, “Merry Christmas” and “Owl I want for Christmas is you” besides the sentiment that I have used one this card.

The base card was created to the size of 4.25″ x 5.5″ out of Hammermill – Premium 110 lb. cardstock. Light Blue cardstock and Recollections – Christmas Snow Globe Vellum were cut to the same size as the base. The blue cardstock was attached with double-sided tape and the vellum was attached over top of this with liquid glue. The glue was only applied to the bottom of the vellum and then behind some snowflakes where the glue would not show. Lawn Fawn – Sparkle Cardstock in “Pixie Dust” was cut to the size of 4.25″ x 1.5″ and then cut with scissors to create the wavy ground. This was popped up onto the vellum using U-Line Double-Sided Foam Tape. Trees were then added under the hill that were created at an earlier time using my Cricut Explore and .svg files from Miss Kate Cuttables – Snowy Tree using liquid glue.

The image and sentiment were printed out with my HP Printer onto Copic Marker X-Press It Blending Card using High Quality Grayscale and coloured in with Copic markers, then fussy cut. Sakura Glaze – Black pen was used to apply the dot in the eye and a black marker was used to go around the entire out-line of the owl. Cosmic Shimmer Fluffy Stuff was then applied to the hat fringe and pompom. A Marvy Uchida – Embossing Heat Tool was used to heat the liquid to create the fluff effect. Using my finger, I dabbed Stickles – Diamond over the top of the fluff on the hat and pompom.  Stickles – Diamond was also applied to the tops of the snow pieces on the trees.

Once the Stickles dried, 2 layers of U-Line Double-Sided Foam Tape and some liquid glue were applied to the back of the image and 1 layer was applied to the sentiment. Both items were popped up onto the card. Lastly, Recollections – Snowflake Specialty Polyester Glitter was placed onto the card to hide where the glue seeped through the Vellum.

Card Recipe:

Stamp and Sentiment: KLM Digital DesignsOwl – Santa Hat

Inks: HP Printer High Quality Grayscale

Paper: Copic Marker X-Press It Blending Card, Hammermill – Premium Cardstock 110 lb., Light Blue Cardstock, Recollections – Christmas Snow Globe Vellum (12″x12″), Lawn Fawn – Sparkle Cardstock in “Pixie Dust” (8.5″ x 11″)

Die Cuts: Miss Kate Cuttables – Snowy Tree (10342) (.svg)

Miscellaneous: Sakura Glaze – Black pen, U-Line Double-Sided Foam Tape, Cosmic Shimmer Fluffy Stuff, Recollections – Snowflake Specialty Polyester Glitter, Stickles – Diamond

Image coloured with Copic Markers:

Owl: Y38, Y35, Y17, Y13, E79, E53, E51, E50, E25, E23, E21, B39, B37, W9, W7,

Hat: BG09, BG05, BG02, BG01

Hope you like it and have a great week!

You can find more cards to inspire you at KLM Designs, KLM Digital Design Team and KLM Digital Designs on the Facebook Fan page from the rest of our design team.

Floral Horseshoe – Pansies


Today I’m sharing a CAS card that I made using KLM Digital DesignsFloral Horseshoe – Pansy from the new September 2024 Release.

The base card was created to the size of 4.25″ x 5.5″ out of Hammermill – Premium 110 lb. cardstock. Cuttlebug Embossing Folder – Swiss dots and a Cuttlebug were used to create the background on Hammermill – Premium Colour 100 lb. cardstock, cut to the size of 4″ x 5.25″. This was popped up onto the base card using U-Line Double-Sided Foam Tape.

The image was printed out with my HP Printer onto Copic Marker X-Press It Blending Card using High Quality Grayscale and coloured in with Copic markers, then fussy cut. A Sakura Glaze – Black pen was used to apply the dot in the eye. Recollections – Purple Passions paper was cut to the size of 4″ x .75″. U-Line Double-Sided Foam Tape was applied to this and it was centred and popped up onto the Swiss Dots background. Crafter’s Companion Luxury Cardstock – Silver  was die cut 3 times using a Cutttlebug and “Good Luck” die from PaperCrafter Today – 15 Die Cut Sentiment Set. I glued the die cuts together with liquid glue to give them an embossed look and then glued them to the sentiment strip. Lastly, Kraftin’ Kimmie – Dazzling Dots were applied around the sentiment to finish off the card.

Card Recipe:

Stamp and Sentiment: KLM Digital DesignsFloral Horseshoe – Pansy

Inks: HP Printer High Quality Grayscale

Paper: Copic Marker X-Press It Blending Card, Hammermill – Premium Cardstock 110 lb., Recollections – Purple Passions 8.5″ x 11″, Crafter’s Companion Luxury Cardstock – Silver – 8.5 x 11″

Embossing Folder: Cuttlebug Embossing Folder – Swiss dots

Die Cuts: PaperCrafter Today – 15 Die Cut Sentiment Set

Miscellaneous: Sakura Glaze – Black pen, U-Line Double-Sided Foam Tape, Kraftin’ Kimmie – Dazzling Dots

Image coloured with Copic Markers:

Horseshoe: C5, C3, C2, C1

Flowers: E15, Y17, Y15, Y11, Y08, V17, V12, V09, V000, RV14, RV13, RV11, RV000

Bird: E99, E97, YR20, YR16, YR15, YR12, Y32, B39, B14, B12, B06, B05, B000, BG01, C7

Hope you like it and have a great week!

You can find more cards to inspire you at KLM Designs, KLM Digital Design Team and KLM Digital Designs on the Facebook Fan page from the rest of our design team.

Kick Your Feet Up!


Today I’m sharing a birthday card that I made for my husband’s birthday back in August. Image and sentiment is from Art ImpressionsSit Back Laugh Lines – 5421.

My Creative TimeRectangle Frame Die was used to die cut the rectangle out of Copic Marker X-Press It Blending Card using a Cuttlebug. The image was then stamped onto the paper using a MISTI and Memento – Tuxedo Black ink. It was coloured in with the Copic markers listed below and then adhered to some blue cardstock using liquid glue. I cut around the image rectangle leaving a thin border and then repeated the process with black cardstock. The sentiment was stamped with Versa Fine – Onyx Black ink  onto blue cardstock and then Ranger – Clear Super Fine Detail embossing powder was applied. A Marvy Uchida – Embossing Heat Tool was used to heat emboss the powder. This was fussy cut and adhered to black cardstock using liquid glue.

The base of the card was created using a 5.5″ x 4.25″ base made from Hammermill – Premium Cardstock 110 lb.cardstock. I applied birthday patterned paper to the base which was cut to the same size and the edges were inked with Tim Holtz Distress Ink – Faded Jeans. I centred the layered coloured image rectangle onto the card using liquid glue and then popped up the sentiment using U-Line Double-Sided Foam Tape in the top left corner to complete the card. Inside the card were more fun sentiments regarding getting older. LOL!

My husband loved it and I hope you do to!

Card Recipe:

Stamp and Sentiments:  Art ImpressionsSit Back Laugh Lines – 5421

Inks: Memento – Tuxedo Black, Versa Fine – Onyx Black, Tim Holtz Distress Ink – Faded Jeans

Paper: Copic Marker X-Press It Blending Card, Hammermill – Premium Cardstock 110 lb., Recollections – Black, Miscellaneous blue and patterned paper from stash

Dies: My Creative TimeRectangle Frame Dies

Embossing Powder: Ranger – Clear Super Fine Detail embossing powder

Miscellaneous: Marvy Uchida – Embossing Heat Tool, MISTI – Most Incredible Stamping Tool, U-Line Double-Sided Foam Tape

Image coloured with Copic Markers:

Skin: E21, E11, E00, E000, R22, R20

Hair: E35, E34, E31

Jeans: B99, B97, B95, B91

Shirt: B04, B02, B01, B00

Chair and Slippers: E79, E74, E29, E27, E25, E23, C5, C3

Remote: N7, N4, N2

Socks: C5, C3, C2, C1, Colorless Blender

Wall: R89, R59, R39, C3, C2, C1, Colorless Blender

Floor: E39, E37, E35, E33

Hope you like it and have a great week!

Monster-ous Birthday Wishes!


Today I’m sharing a birthday card that I made using the image and colouring class from Kit and ClowderBonus Class – July – August 2024 – Cute Monster. Had so much fun with this class learning how to blend colours and make spiky fur!

The image was printed onto Copic Marker X-Press It Blending Card using a HP printer set to High Quality Grayscale at the size of 3.75″ x 3.24″. It was coloured in using the instructional video from Alyce from Kit and Clowder and then fussy cut.  The cut image was applied to Recollections – Black cardstock and fussy cut again. The sentiment from Your Next Stamp – Silly Monsters was applied using Ranger Embossing Powder White – Extra Fine Detail and VersaMark ink onto Recollections – Black cardstock. A MISTI was used to get a clear stamped image. The embossing powder was heat embossed with a Marvy Uchida – Embossing Heat Tool. The sentiment was then fussy cut.

A card base at the size of 5.5″ x 4.25″ using Hammermill – Premium Cardstock 110 lb. cardstock was created. Tim Holtz Distress Inks – Peacock Feathers was applied all around the inside edges of the card with a blender brush. The patterned monster paper from Forever In Time – Party Monsters Perfect Prints was cut to the size of 5-3/8″ x 4-1/8″ and Tim Holtz Distress Inks – Shaded Lilac was applied all around the edges using a blender brush and finger dauber. This was adhered directly to the base using liquid glue. U-Line Double-Sided Foam Tape was applied to the monster and the sentiment and both were popped up onto the centre of the card. Lastly, Kraftin’ Kimmie – Underwater Dots and Stickles – Diamond were applied to the finished card to add some bling.

Card Recipe:

Stamp: Kit and ClowderBonus Class – July – August 2024 – Cute Monster class image

Sentiment: Your Next Stamp – Silly Monsters (CYNS047) – Retired

Inks: HP High Quality Grayscale, VersaMark, Tim Holtz Distress Inks – Peacock Feathers, Tim Holtz Distress Inks – Shaded Lilac

Paper: Copic Marker X-Press It Blending Card, Hammermill – Premium Cardstock 110 lb., Recollections – Black, Forever In Time – Party Monsters Perfect Prints

Embossing Powder: Ranger Embossing Powder White – Extra Fine Detail

Miscellaneous: Marvy Uchida – Embossing Heat Tool, MISTI – Most Incredible Stamping Tool, U-Line Double-Sided Foam Tape, Kraftin’ Kimmie – Underwater Dots, Stickles – Diamond

Hope you like it and have a great week!

Pilgrim Gnome!


Today I’m sharing a Thanksgiving card using KLM Digital DesignPilgrim Gnome from the new August 2024 release that I made. This image also comes with 2 more sentiments, “There is always something to be thankful for” and “Oh my gourd, you’re handsome”. Canadian Thanksgiving is only a couple of months away, time to start preparing now!

The image and sentiment were imported into Microsoft Word and printed out onto Copic Marker X-Press It Blending Card. The image was coloured in with Copic markers and then fussy cut leaving a thin white border. I wanted the image to stand out on the card, so I attached the image to Recollections – Black cardstock and repeated the process. The sentiment was trimmed down to 3.75″ x  1″. The edges were inked with Tim Holtz Distress Ink – Aged Mahogony and Tim Holtz Distress Ink – Fossilized Amber. The sentiment was attached to Recollections – Black cardstock using liquid glue and trimmed down to 3-7/8″ x 1-1/8″.

The card was now ready to assemble.  I began with a 5.5″ x 4.25″ base card using Hammermill – Premium Cardstock 110 lb.. Thanksgiving paper was trimmed to be the same size as the base and was attached with liquid glue. Tim Holtz Distress Ink – Aged Mahogony and a finger dauber were used to ink around all of the edges of the card. U-Line Double-Sided Foam Tape was applied to both the image and sentiment and both were popped up onto the card.

Card Recipe:

Stamp and Sentiment:  KLM Digital DesignPilgrim Gnome

Inks: HP Printer Grayscale, Tim Holtz Distress Ink – Aged Mahagony, Tim Holtz Distress Ink – Fossilized Amber

Paper: Copic Marker X-Press It Blending Card, Hammermill – Premium Cardstock 110 lb., Recollections – Black

Miscellaneous: U-Line Double-Sided Foam Tape

Image coloured with Copic Markers:

Skin: E21, E11, E00, E000, R22, R20

Hair and Beard: YR68, YR31, YR18, Y38

Man’s Top and Socks: E79, E59, E57, E55

Man’s Pants: W5, W3, W1

Shoes, Man’s Hat and Belt: W9, W7, W5, W1

Hat Band: C5, C3, C1

Buckles: E15, Y28, YR24, YR23

Hope you like it and have a great week!

You can find more cards to inspire you at KLM Designs, KLM Digital Design Team and KLM Digital Designs on the Facebook Fan page from the rest of our design team.

Floral Horseshoe – Cosmos


Today I’m sharing a CAS card that I made using KLM Digital DesignsFloral Horseshoe – Cosmos from the new August 2024 Release.

The image was printed out with my HP Printer onto Copic Marker X-Press It Blending Card using High Quality Grayscale. This prevents the image from smearing when you go to colour it in. The image was coloured in with Copic markers and then cut to the size of 4″ x 5.25″. The base card was cut to the size of 4.25″ x 5.5″ out of Hammermill – Premium 110 lb. cardstock . A Sharpie – Gold Medium Point – Water Based Paint marker was used to go around the image and the base card. The image was then adhered to the base card with liquid glue. YNS Gumdrops were applied to finish the card off!

Card Recipe:

Stamp and Sentiment: KLM Digital DesignsFloral Horseshoe – Cosmos

Inks: HP Printer High Quality Grayscale, Sharpie – Gold Medium Point – Water Based Paint, Sakura Glaze – Black

Paper: Copic Marker X-Press It Blending Card, Hammermill – Premium Cardstock 110 lb.

Miscellaneous: YNS Gumdrops

Image coloured with Copic Markers:

Horseshoe: C5, C3, C2, C1

Flowers: BV17, BV13, BV11, BV000, E15, Y38, Y18, Y04

Leaves: BG99, BG93

Bird: E99, E97, YR20, YR16, YR15, YR12, Y32, B39, B14, B12, B06, B05, BG01, C7

Hope you like it and have a great week!

You can find more cards to inspire you at KLM Designs, KLM Digital Design Team and KLM Digital Designs on the Facebook Fan page from the rest of our design team.

Retired – Bye Bye!


I finished my last day of work on Friday, August 16, 2024. My official date will be Saturday, September 14, 2024 as I tacked on my vacation pay on the end. 🙂
My co-workers gave me an amazing retirement party and parting gifts and we all had a wonderful time. I shall cherish the memories for a long time to come.

Today I’m sharing a retirement card that I made for my co-workers who were on my immediate Systems Administrator’s team and also the Networking team whom I had worked closely with over the last 13.5 years. Each of the card fronts were created using various stamps from Art ImpressionsPack Your Bags Set.

With My Creative Time dies listed below, a Cuttlebug and papers from Copic Marker X-Press It Blending Card, I die cut the rectangles and ovals. Hammermill – Premium Colour 100 lb. paper was used to die cut the circles. Recollections – Midnight Navy Cardstock was then cut into rectangles 3-7/8″ x 2-5″8″. Using my Cricut and Cricut Design Space, I measured the circle die cut and oval die cut and then created my own solid cuts. To do this I used some white plain printer paper until I was satisified with the cut, then I set the device to cut out 19 of each out of the Recollections – Midnight Navy Cardstock.

The images were stamped onto Copic Marker X-Press It Blending Card with Memento – Tuxedo Black ink and a MISTI. The MISTI was so perfect to use because I made 19 cards in total, so I just positioned the stamps once and then kept substituting the die cut papers until I was done. This made the stamping so easy. I used the same process for the sentiment, except I chose to use Versa Fine – Majestic Blue this time.

The images were coloured in with the Copics listed below. Once all of the images were coloured and the sentiments were stamped, I assembled the 2 pieces for each shape together with liquid glue and set them aside.

The bases of the cards were created using a 5.5″ x 4.25″ base made from Hammermill – Premium Cardstock 110 lb.cardstock. Papers from Creative Memories and PhotoPlay listed below were then cut to the size of 5.25″ x 4″ each. The edges were then inked with Tim Holtz Distress Ink – Chipped Sapphire.

To assemble the card, I used liquid glue to attach the background papers and each of the shapes. These were all adhered to each card. To create the notes on the inside, I used Microsoft Office Word and created 4 sentiments per 11″ x 8.5″ sheet of landscaped paper by creating text boxes at the size of 5.25″ x 4″. Once they were all printed out, I just cut them to size and adhered them with double-sided tape.

Card Recipe:

Stamp and Sentiments:  Art ImpressionsPack Your Bags Set – 4392

Inks: Memento – Tuxedo Black, Versa Fine – Majestic Blue, Tim Holtz Distress Ink – Chipped Sapphire

Paper: Copic Marker X-Press It Blending Card, Hammermill – Premium Colour 100 lb., Hammermill – Premium Cardstock 110 lb., Creative Memories – Deep Blue Sea (12″x12″) Designer Pack, PhotoPlay – SetSail – Sail Away (12″x12″), PhotoPlay – Anchors Away – Sun Deck (12″x12″), Recollections – Midnight Navy Cardstock

Dies: My Creative TimeRectangle Frame Dies, My Creative Time Scalloped Stitched Oval Dies, My Creative Time – More Stitched Circles MCT-D136, Cricut, Cricut Design Space Shapes

Image coloured with Copic Markers:

Skin: E21, E11, E00, E000, R46, R20, R14, R08, YR02

Hair: E35, E34, E31

Clothing and Accessories: BG09, BG05, BG02, BG01, R46, R14, R08, G14, YG23, C2, C1

Glasses: N2, R39

Ship: C3, C2, C1, C0, C00, B29, B63, B28, B26, R46, R14, R08

Water: BG32, BG13, BG07, BG01, B02

Hope you like it and have a great week!

Thankful!!


Today I’m sharing a CAS card using KLM Digital DesignPilgrim Gnome – Girl image and sentiment from the new August 2024 release. This stamp also comes with 2 more sentiments, “Hello Pumpkin” and “Oh my gourd, your awesome”. Thanksgiving is not that far off, but as the sentiment says, even without the season, “There is always something to be thankful for”.

To create this card, I began with a 6″ x 6″ card base using AC Cardstock – White. Craft Consortium – Happy Harvest patterned paper was cut to the same size and adhered to the base using double-sided tape. I thought this paper was the perfect background for the new stamp and sentiment.

I printed out the main image and sentiment onto Copic Marker X-Press It Blending Card using an HP Printer. After colouring in the image with Copic markers listed below, I  fussy cut around it and the sentiment. The sentiment was put through a Xyron Create a Sticker and attached to Recollections black cardstock. Then I fussy cut around it again. With a black marker, I inked around the entire image to give it a solid black line. U-Line Double-Sided Foam Tape was applied to the backs of the image and sentiment and they were both popped up onto the card.

Card Recipe:

Stamp and Sentiment: KLM Digital DesignPilgrim Gnome – Girl

Inks: HP Printer Grayscale

Paper: Copic Marker X-Press It Blending Card, AC Cardstock – White, Craft Consortium – Happy Harvest (6″ x 6″), Recollections – Black cardstock

Tools: U-Line Double-Sided Foam Tape, Xyron Create a Sticker

Image coloured with Copic Markers:

Skin: E000, E00, E04, E11, E21, R22, R20

Hair: E47, E44, E43

Clothing: E08, YR18, YR14, YR12, E87, E84, E81

Shoes: C9, C7, C5, C3, YR23

Pie: C5, C3, C2, C1, E34, E33, E31, YR21

Flower: E49, E47, E15, YR24, YR23, E17, E15, E13

Hope you like it and have a great week!

You can find more cards to inspire you at KLM Designs, KLM Digital Design Team and KLM Digital Designs on the Facebook Fan page from the rest of our design team.

When Someone Means So Much!


Today I’m sharing a simple card using KLM Digital DesignPen Pal Gnome from the July 2024 release that I made. This image also comes with 2 more sentiments, “I miss you everyday, but today you get a card” and “Better than a text”.

To make this card, I began with Hammermill – Premium Cardstock 110 lb. cut to the size of 5.5″ x 4.25 for the base card.

The image and sentiment were imported into Microsoft Word and printed out onto Copic Marker X-Press It Blending Card and the image was coloured in with Copic markers listed below. For some finer lines for the feathers, Prismacolor Premiere pencils were added after doing the base with the Copic markers. The finished image and sentiment were cut down to the same size as the base and applied to the base card using double-sided tape.

Card Recipe:

Stamp and Sentiment:  KLM Digital DesignPen Pal Gnome

Inks: HP Printer Grayscale

Paper: Copic Marker X-Press It Blending Card, Hammermill – Premium Cardstock 110 lb.

Miscellaneous: Double-Sided Tape

Image coloured with Copic Markers:

Skin: E21, E11, E04, E00, E000

Beard: W3, W1, W00

Shirt: BG72, BG57, BG32, BG11

Hat and Pants: B99, B97, B95, B91

Shoes: E27, E25, E23

Feather and Ink: BV29, YR30, E40, E41, E42, E43, E44, (Prismacolor Premiere Pencils: PC1076, PC1074, PC1072)

Shadow: C2, C1, C0

Hope you like it and have a great week!

You can find more cards to inspire you at KLM Designs, KLM Digital Design Team and KLM Digital Designs on the Facebook Fan page from the rest of our design team.

Pansies Floral Basket!


Today I’m sharing a card using KLM Digital DesignFloral Basket – Pansies from the new July 2024 release. This stamp also comes with 2 other sentiments, “You Grow Girl!” and “Let me plant one on ya!“.

I began with a card base of 5.5″ x 4.25″ using Hammermill – Premium Cardstock 110 lb. cardstock. Recollections – Matte Gold Foil cardstock was cut to the same size and then adhered directly to the base using double-sided tape. Kate Knight – Spring Fling Designer Paper was cut to the size of 5.25″ x 4″. With a finger dauber and Tim Holtz Distress Ink – Prize Ribbon, I inked around  the outer edges. The finished piece was applied to the base using double-sided tape.

The image and sentiment were imported into Microsoft Word and printed out onto Copic Marker X-Press It Blending Card.  I wanted 2 of the top flowers to pop, so I cropped them in Microsoft Word and printed them out as well. Copics were used to colour in the image and then it was fussy cut leaving a thin white border around it. I applied this to Recollections – Black cardstock and then fussy cut again. This piece was then applied to Recollections – Matte Gold Foil cardstock and the fussy cut one last time. The sentiment was fussy cut and applied to Recollections – Matte Gold Foil cardstock and fussy cut again. With Recollections – Blue cardstock, I cut a piece to be the size of 5.25″ x 1.25″ and then inked around the edges with Tim Holtz Distress Ink – Prize Ribbon. From the Recollections – Matte Gold Foil cardstock, I cut 2 strips of 5.5″ x 1/8″.

The card was now ready to assemble. I applied U-Line Double-Sided Foam Tape to the finished image, sentiment and 2 flowers and positioned them to where I wanted then to go. With double-sided tape, I adhered the blue strip to the bottom of the card. Liquid glue was applied to the 2 thin gold strips and they were placed above and below the blue strip. The sentiment, flower basket and 2 flowers were then popped up onto the card. Lastly, I added in some bling using Buttons Galore & More – Blueberry gems.

Card Recipe:

Stamp and Sentiment:  KLM Digital DesignFloral Basket – Pansies

Inks: HP Printer Grayscale, Tim Holtz Distress Ink – Prize Ribbon

Paper: Copic Marker X-Press It Blending Card, Hammermill – Premium Cardstock 110 lb., Recollections – Matte Gold Foil cardstock, Kate Knight – Spring Fling Designer Paper Stack (Cardmaking & Papercraft 2012), Recollections – Blue cardstock

Miscellaneous: U-Line Double-Sided Foam Tape, Buttons Galore & More – Blueberry gems

Image coloured with Copic Markers:

Leaves: G16, YG25, YG23, YG21

Flowers: E15, Y17, Y15, Y11, Y08, V09, V06, V04, RV14, RV13, RV11, B79, B66, B63

Basket: YR27, YR24, YR23, YR21

Hope you like it and have a great week!

You can find more cards to inspire you at KLM Designs, KLM Digital Design Team and KLM Digital Designs on the Facebook Fan page from the rest of our design team.

Little Girl Gnome and Pup!


Today I’m sharing a card using KLM Digital DesignLittle Girl Gnome & Pup from the new June 2024 release that I made. This image also comes with 2 more sentiments, “you’re so doggone cute!” and “I wuff you”. All my life, I grew up with pets. They always brought so much joy and laughter to the home and were all so unique!

To make this card, I began with a 5.5″ x 4.25 base card using Hammermill – Premium Cardstock 110 lb.. Recollections – Black cardstock was cut to the same size as the base and was adhered to the card using double-sided tape. Hammermill – Premium Colour 100 lb. cardstock was cut to the same size as the base. I spritzed the front and back of the cardstock and then using Kraftin’ Kimmie – Pawprints 2 stencil, a rubber mat and my Cuttlebug, I embossed the paper. With the stencil still in place on the paper, using Tim Holtz Distress Ink – Black Soot and Tim Holtz Distress Inks – Candied Apple and small blending brushes, I inked the pawprints and hearts. Once this was done, I cut the paper to the size of 5-3/8″ x 4-1/8″ and adhered it to the black background using double-sided tape.

The image and sentiment were imported into Microsoft Word and printed out onto Copic Marker X-Press It Blending Card. The image and sentiment were coloured in with Copic markers. The freckles were applied to the cheeks using Gelly Roll Sakura #8 Pen and the eyes and nose for the dog were added using a Sakura Glaze – Black pen. Gelly Roll Sakura #8 Pen was applied for the dot in the eyes and accent on the nose for the dog.

My Creative Time -Stitched Squares Inside and Out was used to die cut the image. I applied a border around the image and sentiment using Recollections – Black cardstock. U-Line Double-Sided Foam Tape was applied to both the image and sentiment and they were centered on the card.

Card Recipe:

Stamp and Sentiment:  KLM Digital DesignLittle Girl Gnome & Pup

Inks: HP Printer Grayscale, Tim Holtz Distress Ink – Black Soot, Tim Holtz Distress Inks – Candied Apple

Paper: Copic Marker X-Press It Blending Card, Hammermill – Premium Cardstock 110 lb., Recollections – Black cardstock, Hammermill – Premium Colour 100 lb.

Dies: My Creative Time -Stitched Squares Inside and Out

Stencil: Kraftin’ Kimmie – Pawprints 2

Miscellaneous: Gelly Roll Sakura #8 Pen, Sakura Glaze – Black, U-Line Double-Sided Foam Tape

Image coloured with Copic Markers:

Skin: E21, E11, E00, E000, R30, R24

Hair: YR68, YR31, YR18, Y38

Dress and Hat: V17, V15, V12

Shirt: Y17, Y15, Y11

Shoes: E27, E25, E23

Puppy: YR27, YR24, YR23, YR21, R27, R24, R22

Sky: B60, B02, B01, B00, B000, C00, Colorless Blender

Grass: YG17, YG13, YG03, YG01

Hope you like it and have a great week!

You can find more cards to inspire you at KLM Designs, KLM Digital Design Team and KLM Digital Designs on the Facebook Fan page from the rest of our design team.

Floral Mug!


Today I’m sharing a card using KLM Digital DesignFloral Coffee Cup from the new June 2024 release. This stamp also comes with 2 other sentiments, “Wonderful in every way” and “Enjoy the little moments”. Love how this image can be used with so many wonderful sentiments to fit any occasion!

I began with a card base of 5.5″ x 4.25″ using Hammermill – Premium Cardstock 110 lb. cardstock. Hot Buy – Recollections – Jewel Tones was cut to the same size and then adhered directly to the base using double-sided tape. Momenta – Cardstock was also cut to the same size as the base and then Nuvo Glimmer Paste – Moonstone was applied to it using Kraftin’ Kimmie – Krafty Kaleidoscope stencil. I thought this gave it some nice added sparkle! Once it was all dry, I cut the paper to the size of 5.25″ x 4″. With a blending brush and Tim Holtz Distress Ink – Salvaged Patina, I inked around  the outer edges. The finished piece was applied to the background paper using double-side tape.

The image and sentiment were imported into Microsoft Word and printed out onto Copic Marker X-Press It Blending Card. Copics were used to colour in the image and then it was fussy cut.  U-Line Double-Sided Foam Tape was applied to the finished image and it was popped up onto the card.

Card Recipe:

Stamp and Sentiment:  KLM Digital DesignFloral Coffee Cup

Inks: HP Printer Grayscale, Tim Holtz Distress Ink – Salvaged Patina

Paper: Copic Marker X-Press It Blending Card, Hammermill – Premium Cardstock 110 lb., Momenta – Cardstock, Hot Buy – Recollections – Jewel Tones

Stencil: Kraftin’ Kimmie – Krafty Kaleidoscope

Miscellaneous: U-Line Double-Sided Foam Tape, Nuvo Glimmer Paste – Moonstone, Blending Brush

Image coloured with Copic Markers:

Leaves: G16, YG25, YG23, YG21

Flowers: E15, Y17, Y15, Y08, RV19, RV17, RV14, RV000

Mug: BG15, BG13, BG11,BG10

Hope you like it and have a great week!

You can find more cards to inspire you at KLM Designs, KLM Digital Design Team and KLM Digital Designs on the Facebook Fan page from the rest of our design team.

Father’s Day Fishing Gnome!


Today I’m sharing a Father’s Day card using PolkadoodlesFishing Gnome For Men – Bundle that I made for my dad who lives to fish! Happy Father’s Day to all of the father’s out there and I hope you all enjoy your special day!

In Microsoft Word, I created a 5.5″ x 5.5″ outline and then imported the background paper first. Next, I created another box as a guideline and inserted the image into it and centered it on the patterned paper. I then brought in the little bait box and sized it to fit next to the chair. Lastly, I inserted the sentiments from the same digital stamp set and changed the background on them to a blue, leaving the black outline around the text. I moved one sentiment to the top and the other to the bottom. Once I was satisfied on how everything looked, I printed it out onto Copic Marker X-Press It Blending Card with my HP Printer.

The image was coloured in with the Copics listed below and then attached to the base card of 5.5″ x 5.5″. Lastly, I added some stickles to the dragonflies wings to give them a little bit of added sparkle.

Card Recipe:

Stamp and Sentiment:  PolkadoodlesFishing Gnome For Men – Bundle

Inks: HP Printer, Tim Holtz Distress Ink – Faded Jeans

Paper: Copic Marker X-Press It Blending Card, Hammermill – Premium Cardstock 110 lb., Polkadoodles – Gnome Men Fishing – printable paper patterns

Image coloured with Copic Markers:

Skin: E21, E11, E04, E00, E000

Beard: E29, E25, E23, E21

Hat: B99, B97, B95, B91

Shoes: B99, B97, B95, B93, B91, N2, N1, N0

Shirt: B26, B23, B21

Cattails: E27, E25, E23

Fishing Rod and Ball: E59, E57, E55, YR09, YR07, YR04, YG07, YG06, YG03, Y08, Y06

Water: B24, BG13, BG11, BG10, BG02, BG01, BG000

Bag and Bait Box: E89, E87, E84, E81, C3, C2, C1

Grass and Leaves: G19, YG25, YG23, YG21

Chair: E49, E47, E44, E34

Dragonflies: BV00, BV000, BG10, Stickles – Diamond

Sky and Clouds: B01, B00, B000, B0000, BG70, C0, C00, Colorless Blender

Hope you like it and have a great week!

Also entered into
https://polkadoodle.blogspot.com/2024/06/wk-24-card-making-paper-craft-challenge.html

Enjoy The Little Moments


Today, I’m sharing a card using KLM Digital DesignFloral Branch Frames from the new June 2024 release and the sentiment from KLM Digital DesignFloral Coffee Cup. The floral frames stamp set comes with 4 beautiful floral frames to choose from. I love these frames because you can use them for so many different occasions.

Hammermill – Premium Cardstock 110 lb. was used to create a 5.5″ x 4.25″ card base. I cut Momenta – Cardstock paper to the same size for the background and applied it directly to the base using double-sided tape. With a Cuttlebug, I die cut the Lattice background using Pinkfresh Studio – Elongated Lattice die and Recollections white cardstock. Zig 2 way glue was applied to the back of the die cut and it was adhered to the base.

The image was imported into Microsoft Word and printed out onto Copic Marker X-Press It Blending Card. I coloured in the image with Copic markers listed below and then applied iCraft – deco foil adhesive pen around the circle frame border. Once the glue was dry, I rubbed on some gold foil from Prima (Rub-On) Foils – Jolly. This was my very first time trying this and I wasn’t quite satisfied as the border wasn’t completely smooth. I tested a small piece of paper on the side with some Zig 2 way glue with a finer point and waited for the glue to dry. I tried using the gold foil on this and saw that it worked. Yay! So once again, I repeated the process and went around the circle with the Zig glue this time and the rubbed the foil on to make the circle smoother. I will definitely be trying to use this technique more often now for sure.

The image was fussy cut and then popped up onto the card using U-Line Double-Sided Foam Tape. Lastly, to add a little bit of bling to the card, I applied some random Pixie Dust Glittered – YNS Gumdrops.

Card Recipe:

Stamp:  KLM Digital DesignFloral Branch Frames, KLM Digital DesignFloral Coffee Cup

Inks: HP Printer Grayscale

Paper: Copic Marker X-Press It Blending Card, Hammermill – Premium Cardstock 110 lb., Momenta – Cardstock, Recollections – White Cardstock

Dies: Pinkfresh Studio – Elongated Lattice

Miscellaneous: U-Line Double-Sided Foam Tape, Prima (Rub-On) Foils – Jolly, iCraft – deco foil adhesive pen, Zig 2 way glue, YNS Gumdrops – Pixie Dust Glittered, Uni Posca Pen – Yellow

Image coloured with Copic Markers:

Flower Top and Bottom: V17, V15, V12, V000, YR12, E15, Uni Posca Pen – Yellow

Centre Flower: V09, V06, V04, V000, YR12, E15, Uni Posca Pen – Yellow

Leaves: G16, YG25, YG23, YG21

Inner Circle Background: G000

Hope you like it and have a great week!

You can find more cards to inspire you at KLM Designs, KLM Digital Design Team and KLM Digital Designs on the Facebook Fan page from the rest of our design team.

Mandala #6 – Thank You


Today, I’m sharing a Thank You card using KLM Digital DesignMandala #6 from the new May 2024 release. I fell in love with this Mandala and thought it would make a great flower!

Hammermill – Premium Cardstock 110 lb. was used to create a 5.5″ x 4.25″ card base. I cut some designer paper that I had for the background and applied it directly to the base using double-sided tape. With a Cuttlebug, I die cut the trellis background using Recollections white cardstock and Pinkfresh Studio – Dotted Lattice die. The leaves were die cut from some scrap green cardstock and Spellbinders Cutting Dies – Southern Magnolia.

The image was imported into Microsoft Word and printed out onto Copic Marker X-Press It Blending Card. I coloured in the image with Copic markers listed below and then I fussy cut around it and using a bone folder, curved the petals. The Mandala was popped up onto the top part of the card using 2 layers of 3M Double-Sided Foam Tape in the centre.  I glued the leaves to the card under the mandala, but first I added a slight crease in each of them to round up the sides. To finish off the card, I used some ephemora and popped it up onto the card using U-Line Double-Sided Foam Tape. Lastly, I added a gem from Forever In Time – Goldent Sunset in the centre of the mandala and some additional gems on the card to give it a bit more sparkle!

Card Recipe:

Stamp:  KLM Digital DesignMandala #6

Inks: HP Printer Grayscale

Paper: Copic Marker X-Press It Blending Card, Hammermill – Premium Cardstock 110 lb., Floral Designer Paper, Green Cardstock, Recollections – White Cardstock

Dies: Pinkfresh Studio – Dotted Lattice, Spellbinders Cutting Dies – Southern Magnolia

Miscellaneous: 3M Double-Sided Foam Tape, Ephemera (Thank you), U-Line Double-Sided Foam Tape, Forever In Time – Golden Sunset gems

Image coloured with Copic Markers:

Mandala Centre: Y19, Y17, Y08

Mandala Inner Flower: RV19, RV17, RV14, RV000

Mandala Leaves: G16, YG25, YG23, YG21

Mandala Outer Petals: RV09, RV06, RV04, RV000

Hope you like it and have a great week!

You can find more cards to inspire you at KLM Designs, KLM Digital Design Team and KLM Digital Designs on the Facebook Fan page from the rest of our design team.

Cupcakes and Frosting!


Today I’m sharing a Birthday card using KLM Digital DesignFloral Cupcake Assortment from the new May 2024 release that I made. This image also comes with 2 more sentiments, “Happy Birthday Cupcake” and “Happiness is only a Cupcake away”, as well as 2 more cupcakes. This stamp set is amazing to create so many different card designs!

To make this card, I began with a 5″ x 5″ base card using Hammermill – Premium Cardstock 110 lb.. Doodlebug – hey cupcake designer paper was cut to 5″ x 5″ and then it was cut again to 4 x 1.25″ pieces. I applied double-sided tape and liquid glue to the individual pieces and then alternating each side adhered them each to the base card. Tim Holtz Distress Ink – Picked Raspberry was then applied to all of the edges around the card using a finger dauber.

The images and sentiment were imported into Microsoft Word and printed out onto Copic Marker X-Press It Blending Card. The images were coloured in with Copic markers. Using a Cuttlebug and Lifestyle Crafts Cutting Dies – Nesting Circles, I die cut each of the cupcakes out using 2.25″ circle die.  Using the finger dauber, I inked around all of the edges of the circles using Tim Holtz Distress Ink – Picked Raspberry. The sentiment was fussy cut and then adhered to black cardstock and fussy cut again.

U-Line Double-Sided Foam Tape was applied to all of the pieces and they were popped up onto the card. Lastly, Wink of Stella – Clear was applied to the frosting on the cupcakes.

Card Recipe:

Stamp and Sentiment:  KLM Digital DesignFloral Cupcake Assortment

Inks: HP Printer Grayscale, Tim Holtz Distress Ink – Picked Raspberry

Paper: Copic Marker X-Press It Blending Card, Hammermill – Premium Cardstock 110 lb., Doodlebug – hey cupcake (6″x6″) paper pad

Dies: Lifestyle Crafts Cutting Dies – Nesting Circles

Miscellaneous: Wink of Stella – Clear, U-Line Double-Sided Foam Tape

Image coloured with Copic Markers:

Cupcake Wrappers and Flower Centres: E15, Y19, Y17, Y08

Leaves: G16, YG25, YG23

Purple Flowers: V17, V15, V12

Red Violet Flower: RV69, RV66, RV63

Icing and Sparkles: Y02, Y00, Y000, Y25, RV17, V12

Shadow: BG000

Hope you like it and have a great week!

You can find more cards to inspire you at KLM Designs, KLM Digital Design Team and KLM Digital Designs on the Facebook Fan page from the rest of our design team.

Birthday Paw-ty!


Today I’m sharing a Birthday card using KLM Digital DesignLittle Boy Gnome & Pup from the new May 2024 release that I made. This image also comes with 2 more sentiments, “sit happens!” and “the journey of life is sweeter when travelled with a dog”.

To make this card, I began with a 5.5″ x 4.25 base card using Hammermill – Premium Cardstock 110 lb.. My Creative Time – Rectangle Frame Die Layers was used to die cut the balloon and party patterned paper from Doodlebug Design Inc. – Party Time paper pad. Tim Holtz Distress Ink – Faded Jeans was then applied to all of the edges around the die cuts. Next, Lawn Fawn – Simple Grassy Hillsides and the Rectangle Frames were used to cut the little bits of grass out of green cardstock.

The image and sentiment were imported into Microsoft Word and printed out onto Copic Marker X-Press It Blending Card. The image and sentiment were coloured in with Copic markers and then I added some extra fur onto the dog by applying PrismaColor Pencils. The freckles were applied to the cheeks using Gelly Roll Sakura #8 Pen. The sentiment was applied directly onto the base card on the inside using double-sided tape.

The card was now ready to put together. I applied the balloon patterened paper directly to the base card using double-sided tape. The lighter green grass was attached directly to the confetti die cut with double-sided tape. U-Line Double-Sided Foam Tape was applied to both the image and also the darker grass, as well as, the confetti die cut. These were all layered onto the centre front of the card.

Card Recipe:

Stamp and Sentiment:  KLM Digital DesignLittle Boy Gnome & Pup

Inks: HP Printer Grayscale, Tim Holtz Distress Ink – Faded Jeans

Paper: Copic Marker X-Press It Blending Card, Hammermill – Premium Cardstock 110 lb., Green cardstock, Doodlebug Design Inc. – Party Time (6″ x 6″)

Dies: Lawn Fawn – Simple Grassy Hillsides, My Creative Time – Rectangle Frame Die Layers – MCT-D274

Miscellaneous: Gelly Roll Sakura #8 Pen, U-Line Double-Sided Foam Tape

Image coloured with Copic Markers:

Skin: E21, E11, E04, E00, E000

Hair: YR27, YR24, YR23, YR21

Jeans and Hat: B99, B97, B95, B91

Shirt: BG72, BG57, BG32, BG11, C3, C2, C1 (Buttons)

Shoes: C9, C7, C5, C3, C2, C1

Puppy: YR27, YR24, YR23, YR21, R27, R24, R22

Hope you like it and have a great week!

You can find more cards to inspire you at KLM Designs, KLM Digital Design Team and KLM Digital Designs on the Facebook Fan page from the rest of our design team.