Today I’m sharing an interactive Christmas card that I made using Spellbinders – Dancin’ Gingerbread – S5-609 and Dancin’ Christmas Sentiments – STP-216. I could play with this card all day watching them swinging them back and forth! LOL!
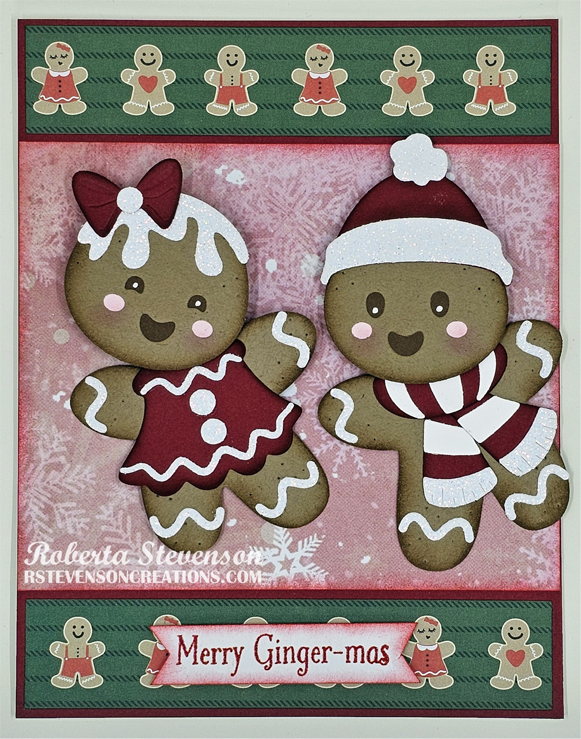
Love these fun dies and just had to try them out. Using the die cuts, I cut all of the body pieces for the Gingerbread man and woman using the dies and a Cuttlebug. Tim Holtz Distress Ink – Rusty Hinge was then applied all around the edges with a finger dauber. All of the reds were die cut using Recollections – Red cardstock and then inked around the edges with Tim Holtz Distress Ink – Aged Mahogony. Just to give the pieces a little depth. For the cheeks, I added a little bit of pink chalk to make them rosier. All of the sparkle white pieces were die cut using Lawn Fawn – Sparkle Cardstock in “Pixie Dust”. I really love the glitter of this paper. The scarf pattern pieces were die cut out of Hammermill – Premium Cardstock.
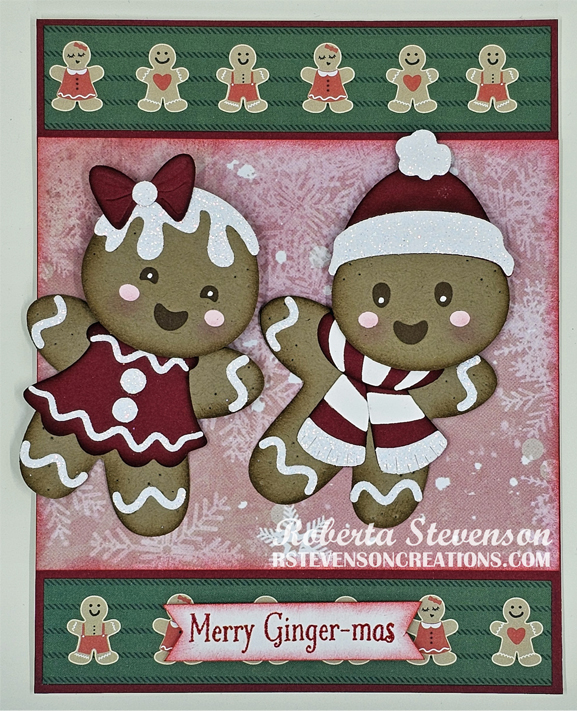
The base card was created to the size of 4.25″ x 5.5″ out of Hammermill – Premium 110 lb. cardstock. Recollections – Red cardstock was cut to the same size as the base. Next, I cut 2 pieces of Recollections – Holiday Basics paper to the size of 4-1/8″ x 7/8″ and applied these to the top and bottom of the card. The centre piece was cut to the size of 4.25″ x 3.5″ and then inked around the edges with a finger dauber and Tim Holtz Distress Ink – Worn Lipstick. All of the paper pieces were adhered to the base card using liquid glue.
The Gingerbread were assembled along with some small scraps used to create the cheeks and eyes. White Gelly Roll Sakura #10 Pen was applied to each of the eyes to give them a little more character. The swinging mechanism was applied to the backs of the Gingerbread and My Favourite Things – Spin & Slide Discs were attached to the card using liquid glue and double-sided tape.
Lastly, I stamped the sentiment onto Hammermill – Premium Cardstock with VersaMark ink and applied Ranger – Rich Red Embossing Powder to it. A Marvy Uchida – Embossing Heat Tool was applied to the powder to heat emboss it. This was cut down to 3-1/8″ x .75″ and both sides were notched with scissors and Tim Holtz Distress Ink -Worn Lipstick was applied around the edges with a finger dauber. U-Line Double-Sided Foam Tape was applied to the sentiment and it was popped up on the card to complete it.
Card Recipe:
Stamp Sentiment: Spellbinders – Dancin’ Christmas Sentiments – STP-216
Inks: Tim Holtz Distress Ink – Rusty Hinge, Tim Holtz Distress Ink – Aged Mahogony, Tim Holtz Distress Ink -Worn Lipstick, VersaMark
Paper: Hammermill – Premium Cardstock 110 lb., Recollections – Holiday Basics (12″ x 12″), Crafter’s Companion – Snowflake Swirls (12″ x 12″), Recollections – Red cardstock, Recollections Kraft Cardstock, Lawn Fawn – Sparkle Cardstock in “Pixie Dust” (8.5″ x 11″), scraps of pink and dark brown cardstock for cheeks, eyes and mouth
Die Cuts: Spellbinders – Dancin’ Gingerbread – S5-609
Embossing Powder: Ranger – Rich Red
Miscellaneous: U-Line Double-Sided Foam Tape, White Gelly Roll Sakura #10 Pen, My Favourite Things – Spin & Slide Discs, Marvy Uchida – Embossing Heat Tool
Hope you like it and have a great week!