It’s Wednesday, and this week, I made a Christmas card for some friends overseas using High Hopes Rubber Stamps Canadian Christmas Greeting – R048 for the main image and Merry Christmoose, Eh! for the sentiment. The trees were added in using High Hopes Rubber Stamps Evergreen Tree HLF001 and Evergreen Tree 2 HLF002.
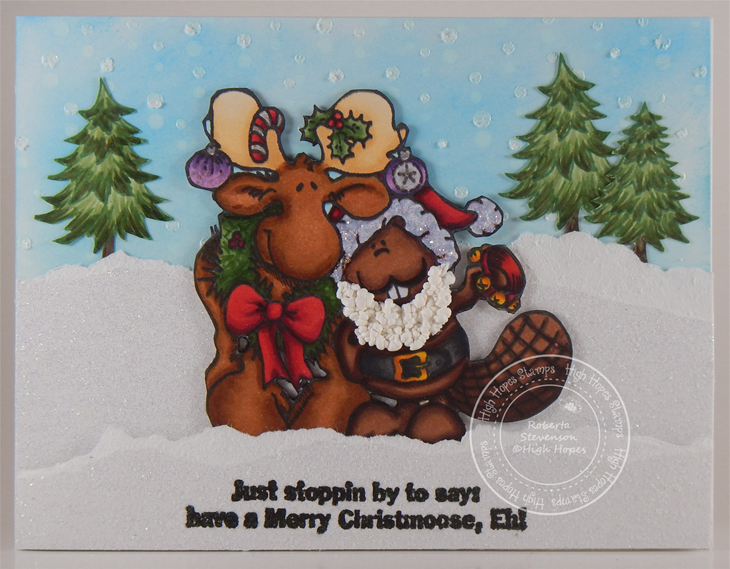
To make my card this week, I began with a card base of Hammermill – Premium Colour 100 lb. cardstock, cut and scored to be 5.5″ x 4.25″. The sky was added directly to the front of the base panel with a mixture of Tim Holtz Distress Inks – Salty Ocean, Tumbled Glass and Broken China and a Gina K. Designs blending brush. Lawn Fawn – Snowy Sky stencil and Stampin Up – Winter White were added next to create some falling snow in the background. Then, using the same stencil again, Brutus Monroe – Snow Paste was applied to add some glittering snowflakes. The sentiment was stamped onto Recollections Christmas Ink Jet Printable Glitter Paper using my MISTI and Memento – Tuxedo Black. The paper was then cut to be 5.5″ x 1″ and I tore along the top of the paper to create snow drifts. I did this once again with a larger size (5.5″ x 2.5″) to create some dimension. U-Line double-sided tape was added to both pieces, with a double-layer on the sentiment piece and they were both popped up onto the base card.
The images were stamped onto Copic Marker X-Press It Blending Card using my MISTI – Most Incredible Stamping Tool, Memento – Tuxedo Black for the main image and Memento – Cottage Ivy for the trees. After colouring the images, I fussy cut around all of them and popped up the main image behind the 1st snow hill. Liquid glue was applied behind the trees and they were tucked in behind the larger hill to complete the card.
Card Recipe:
Stamps: Canadian Christmas Greeting – R048 (High Hopes Rubber Stamps), Evergreen Tree HLF001 (High Hopes Rubber Stamps) and Evergreen Tree 2 HLF002 (High Hopes Rubber Stamps)
Sentiment: Merry Christmoose, Eh! (High Hopes Rubber Stamps)
Inks: Memento – Tuxedo Black, Memento – Cottage Ivy, Tim Holtz Distress Ink – Salty Ocean, Tim Holtz Distress Inks – Tumbled Glass, Tim Holtz Ranger Distress Ink – Broken China, Stampin Up – Winter White
Paper: Copic Marker X-Press It Blending Card, Hammermill – Premium Colour 100 lb., Recollections Christmas Ink Jet Printable Glitter Paper
Stencil: Lawn Fawn – Snowy Sky
Tools: MISTI – Most Incredible Stamping Tool, U-Line double-sided tape, Gelly Roll Sparkle Pen, Pental Sunburst Metalic Med Gel Pen – Silver, Cosmic Shimmer Fluffy Stuff
Image coloured with Copic Markers:
Moose: E53, E51, E50, E39, E37, E35, E34, E33, R30, Eyes (Sakura Glaze – Black)
Beaver: E49, E29, E27, E25, E23, Stickles – Diamond
Wreath, Holly Leaves and Bow: G99, YG67, YG63, YG61, R59, R37, R35
Belt: 100, T9, T7, T5, E15, Y38, Y35, Y15
Tambourine: E15, Y38, Y35, Y15, R59, R37, R35
Hat: R59, R37, R35, BV20, Colorless Blender, Stickles – Diamond
Baubles: V17, V15, V12, C3, C2, C0, Gelly Roll Sparkle Pen, Pental Sunburst Metalic Med Gel Pen – Silver, Stampin Up – Winter White, Brutus Monroe – Snow Paste
Candy Cane: R59, R37, R35, Gelly Roll Sparkle Pen
Beard: Cosmic Shimmer Fluffy Stuff
Sky: B99, B97, B95, B93, Brutus Monroe – Snow Paste, Stampin Up – Winter White
Hope you like it and have a fantastic week!
You can find lots of inspiration from the Design Team Divas at the High Hopes blog, and the High Hopes Rubber Stamps Facebook Fan page plus you can also follow us on
Instagram, Twitter and Pinterest.