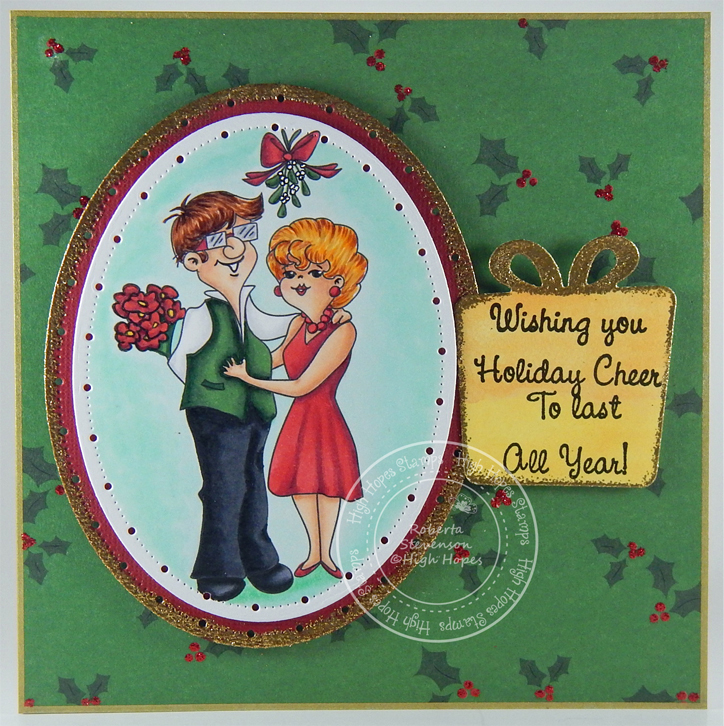
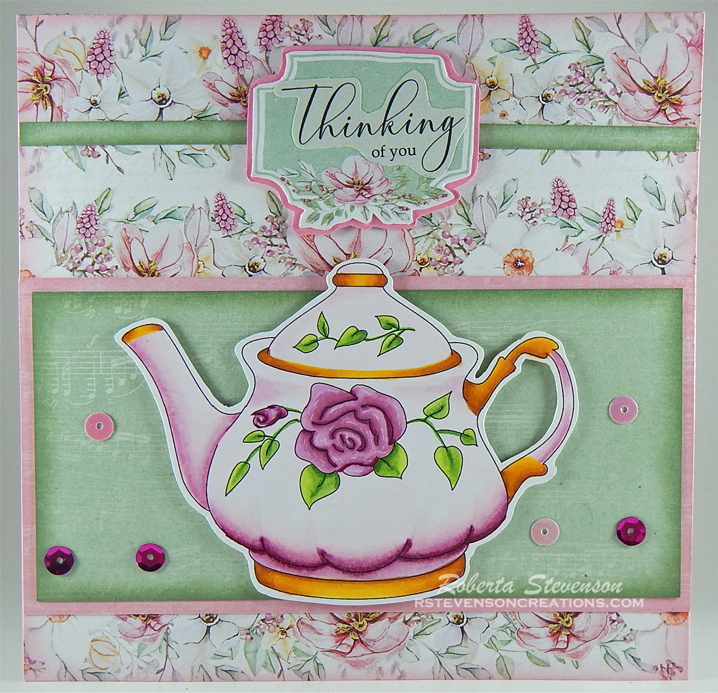
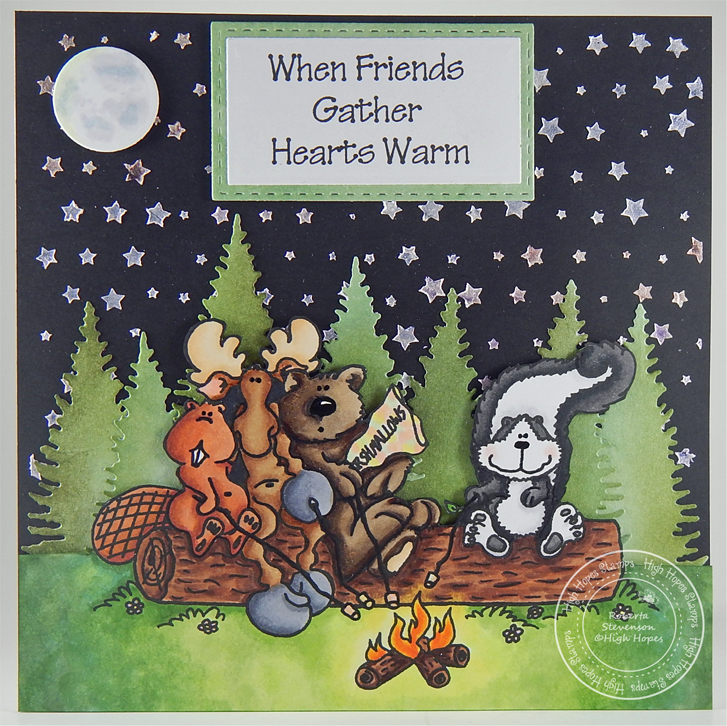
It’s Wednesday, and this week, I made a card using Joy Ride – TT002 by High Hopes Rubber Stamps for the main image and Good Times – GLL006 (High Hopes Rubber Stamps) for the sentiment. Christmas is always a wonderful time to gather with family and friends. Thinking of snow right now is also a way to cool down with all of this summer heat too! LOL!

To make my card this week, I began with a card base made from AC White Cardstock cut and scored to be 6″ x 6″. I chose Echo Park Paper Co. – My Favorite Winter (6″ x 6″) for my background paper and trimmed just a little off of the sides. Then, I used Tim Holtz Distress Ink – Blueprint Sketch and inked around all of the edges. I added some glue to the back of the paper and applied it to the base card. Using My Creative Time -Stitched Squares Inside and Out, I die cut a larger square from Recollections – Burgundy cardstock and a smaller square from Copic Marker X-Press It Blending Card. I inked around the edges of the larger square with Tim Holtz Distress Ink – Aged Mahagony and applied 3M VHB – 2 sided tape to the back of it and applied to the background. I die cut the sentiment label with My Creative Time – Stitched Rectangular Frames Dies and More. The image and sentiment were then applied using my MISTI and Memento – Tuxedo Black ink. I applied Stickles – Unicorn around the edges of the label and set it aside to dry.
I coloured in the image with copic markers. Then I added Stickles – Eucalyptus to the lady’s cuff and collar and Stickles – Crystal to her hat and pompom. For the man, I applied Nuvo Glitter Accents – Fresh Snowfall to his hat and pompom. Lastly, I added some Brutus Monroe – Snow Paste using a spatula to the bottom outer edge of the image to represent a snow bank on the side of the road. Using a Gelly Roll Sakura #10 Pen, Gelly Roll Sakura #5 Pen, Glitter Glue Pen and DecoArt Glamour Dust, I created the snowy background. Gelly Roll Sparkle Pen was used to colour in the Holly on the wreath.
Once everything on the image was dry, I applied some glue to the back of it and applied it directly on top of the larger square. I applied some glue and some 3M VHB – 2 sided tape to the sentiment and applied that on an angle at the top of the card. I only put the tape in a few spots so that it would be the same height as the image. To finish off the card, I added some CC Designs – Dragon Dreams Enamel Dots on to the sentiment and some sequence.
Card Recipe:
Stamp: Joy Ride – TT002 (High Hopes Rubber Stamps)
Sentiment: Good Times – GLL006 (High Hopes Rubber Stamps)
Inks: Memento – Tuxedo Black, Tim Holtz Distress Ink – Aged Mahagony, Tim Holtz Distress Ink – Blueprint Sketch
Paper: Copic Marker X-Press It Blending Card, AC White Cardstock, Echo Park Paper Co. – My Favorite Winter (6″ x 6″), Recollections – Burgundy
Die Cuts: My Creative Time -Stitched Squares Inside and Out, My Creative Time – Stitched Rectangular Frames Dies and More
Stickles: Eucalyptus, Crystal, Unicorn, Nuvo Glitter Accents – Fresh Snowfall
Paste: Brutus Monroe – Snow Paste
Tools: MISTI – Most Incredible Stamping Tool, 3M VHB – 2 sided tape, Gelly Roll Sparkle Pen, Gelly Roll Sakura #10 Pen, Gelly Roll Sakura #5 Pen, Glitter Glue Pen, CC Designs – Dragon Dreams Enamel Dots.
Image coloured with Copic Markers:
Skin: E21, E11, E00, E000, R30, R20
Hair: E15, Y38, Y21, YR23, E29, E25, E23, E21
Hats, Jacket, Wreath: R59, R37, R35
Mitts, Jacket and Tie: G28, G24, G21
Pants: W9, W7, W5
Boots and Gloves: E27, E25, E23, E21
Bike and Wheels: C9, C7, C5, C4, C3, C2, C1, Y17, Y11, Y08, R59, R37, R35
Holly: G14, G07, YG03
Puffs of Smoke: B60, C1, C00
Sky: B99, B97, B39, B37, B29, B28, B26
Road: T7, T5, T3
Hope you like it and have a fantastic week!
You can find lots of inspiration from the Design Team Divas at the High Hopes blog, and the High Hopes Rubber Stamps Facebook Fan page plus you can also follow us on
Instagram, Twitter and Pinterest.