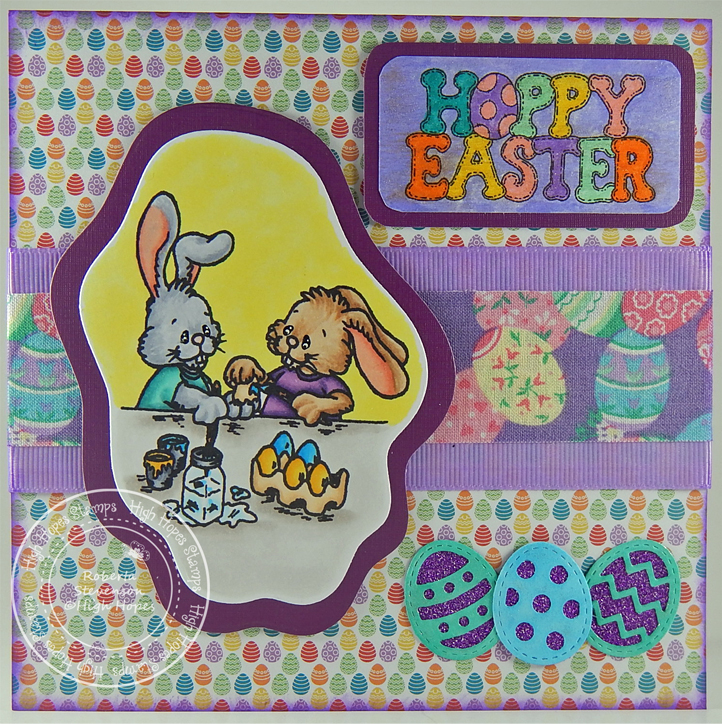
It’s Wednesday, and this week, I made an Easter card using Bunny Blooms – T063 by High Hopes Rubber Stamps for the main image and Script Easter Greetings – F093 (High Hopes Rubber Stamps) for the sentiment. Easter is almost here and this little bunny is about to brighten someone’s day!

To make my card this week, I started with Arches Watercolour Paper cut to 5.5″ x 4.25″. I ran this through my Cuttlebug using Tranquil Tulips Stencil from Simply Cards and PaperCraft. Next, I played with multiple Cosmic Shimmer products and spritzed some water to create this shimmery background. I let this dry overnight. I wanted the embossed tulips to show up more, so using a finger sponge, Tim Holtz Distress Ink – Wilted Violet was brushed over top of the raised edges. And of course, there is never enough shimmer so I added some Irridescent Glitter Dust spray as well. Then I glued this directly to the base card of Hammermill Premium 100 lb. Cardstock folded at 5.5″ x 4.25″. Lastly, I inked around the edges with the same ink.
The main image Bunny Blooms – T063 (High Hopes Rubber Stamps) and Script Easter Greetings – F093 (High Hopes Rubber Stamps) sentiment were stamped using my MISTI and Memento – Tuxedo Black ink onto Copic Marker X-Press It Blending Card. The main image and sentiment were coloured in with Copic Markers.
To assemble the remainder of my card, both the image and sentiment were attached to the background using 3M VHB – 2 sided tape. C.C. Designs – Dragon Dreams Enamel Dots were added to complete the card.
Card Recipe:
Stamp: Bunny Blooms – T063 (High Hopes Rubber Stamps)
Sentiment: Script Easter Greetings – F093 (High Hopes Rubber Stamps)
Inks: Memento – Tuxedo Black, Tim Holtz Distress Ink – Wilted Violet
Paper: Copic Marker X-Press It Blending Card, Arches Watercolour Paper, Hammermill Premium 100 lb. Cardstock
Stencil: Simply Cards and PaperCraft – Tranquil Tulips Stencil
Tools: MISTI – Most Incredible Stamping Tool, Cuttlebug, 3M VHB – 2 sided tape, Glitter Dust – Irridescent Spray, C.C. Designs – Dragon Dreams Enamel Dots
Image coloured with Copic Markers:
Bunny: E35, E34, E33, E31, E30, R30, R24, R20, Eyes (Sakura Glaze – Black)
Flowers and Leaves: V17, V15, V12, YR14, Y17, Y04, G17, G14, G07
Cosmic Shimmer: Pixi Powder: Purple Violet, Sun Yellow, Aubergine Dream, Purple Violet, Emerald Green, Pixie Sparkles: Groovy Grape, Pale Blush
Hope you like it and have a fantastic week!
You can find lots of inspiration from the Design Team Divas at the High Hopes blog, and the High Hopes Rubber Stamps Facebook Fan page plus you can also follow us on
Instagram, Twitter and Pinterest.