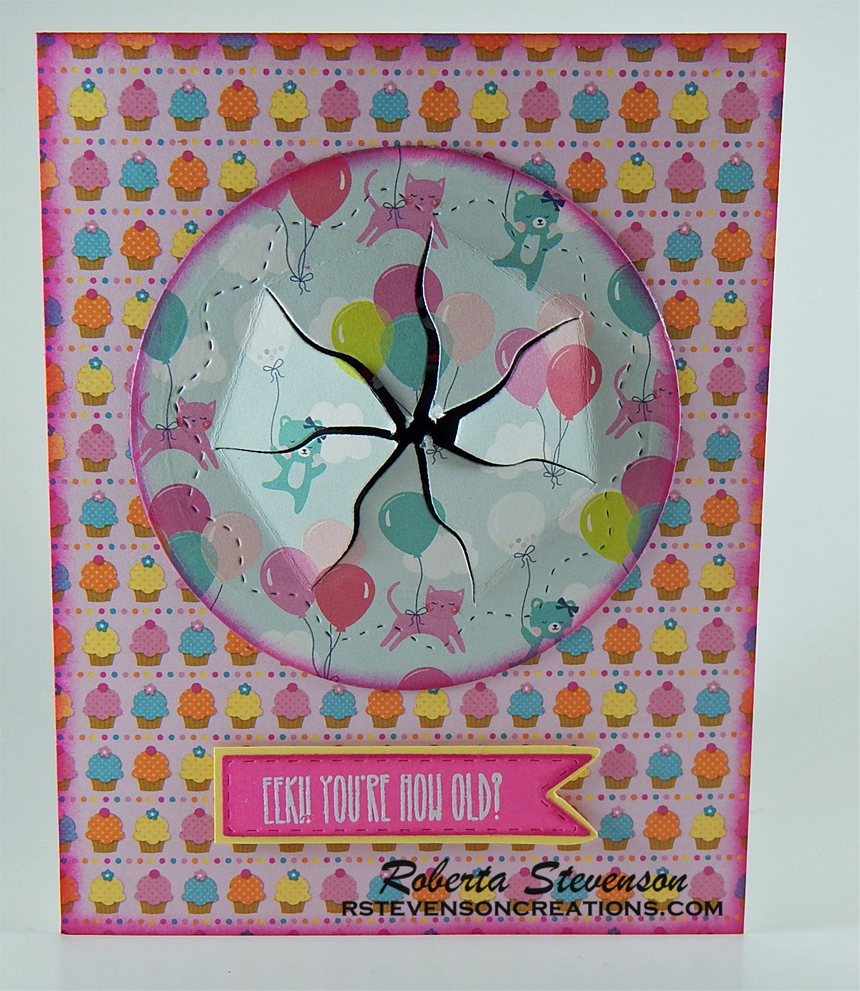
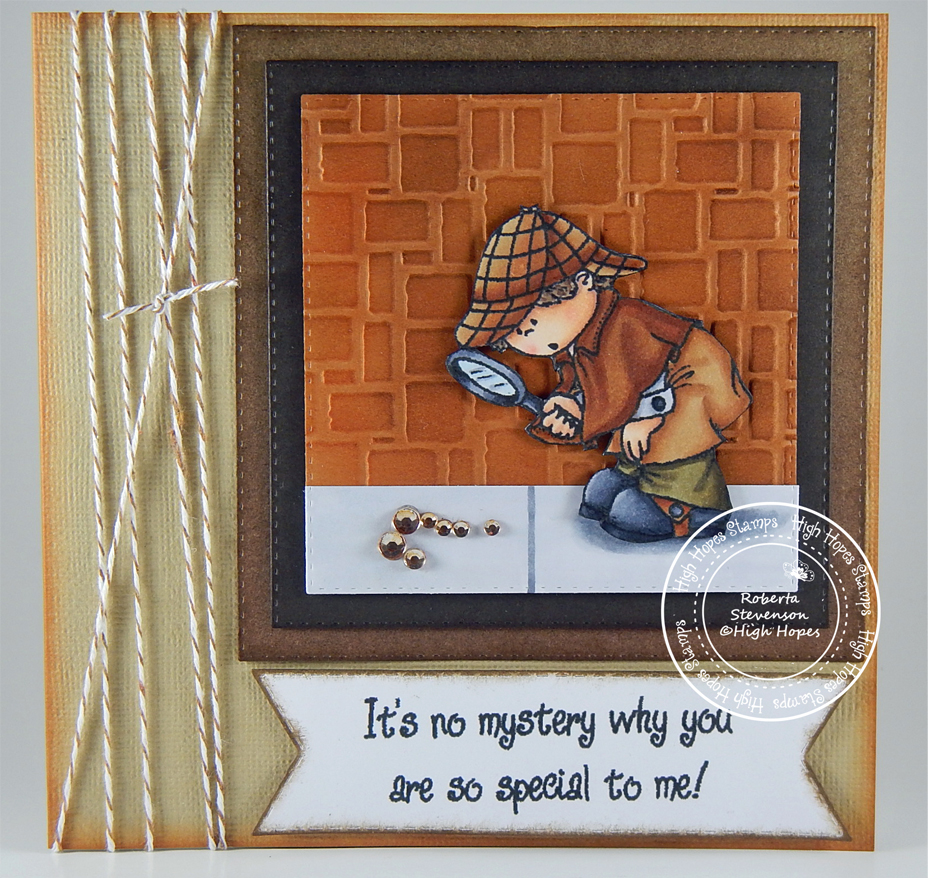
Hoppy Easter!


Welcome Back Dreamerland Craft Fans!

Today, I’m sharing a couple of images that I combined from Dreamerland Crafts stamps called Sending Love Flowers – D18002 and from their Mix and Match Set Mailbox and Wall – M18301. I thought this would make a great combo for a cheerful Easter card.

I made this card in stages. First I die-cut a 5″ x 5″ square out of Copic Marker X-Press It Blending Card using my Cuttlebug and My Creative Time – Stitched Squares Inside and Out. Then I stamped all of the images onto Inkadoo Stamping Mask Paper. Using Memento – Tuxedo Black ink and my MISTI, I stamped the Girl, bunnies and Bird House first. Then added the mask over top of them.

For the next stage, I stamped the wall. Then I added the mask over top of it as well.

Lastly, I stamped the foliage above the wall with Memento – Bamboo Leaves ink, removed all of the masks and then coloured in the entire image.

Once the image was coloured in, I added the sentiment and then mounted it onto the front of white cardstock cut to 5″ x 5″.

Card Recipe:

Stamps:  Sending Love Flowers – D18002 (Dreamerland Crafts), Mailbox and Wall – M18301 (Dreamerland Crafts)

Sentiment: Hoppy Friends (Kraftin Kimmie)

Inks: Memento – Tuxedo Black, Versa Fine – Onyx Black, Memento – Bamboo Leaves

Embossing Powder: Ranger – Clear Super Fine Detail embossing powder.

Paper: Copic Marker X-Press It Blending Card, White Card Stock

Die Cuts: My Creative Time – Stitched Squares Inside and Out

Tools: MISTI – Most Incredible Stamping Tool, Cuttlebug, Inkadoo Stamping Mask Paper

Image coloured with Copic Markers:

Skin: E000, E00, E04, E11, E21, R22, R20

Hair:  Y38, E15, Y21

Dress and Boot: V25, BV02, BV01, BV00, BV000

Rabbits: W3, W1, W0, R20, Colorless Blender, Sakura Glaze – Black

Basket: E44, E43, E41

Brick: E57, E35, E33, E09, TN2, TN0

Foliage: YG17, YG13, YG03, YG01

Flowers and Leaves: Y17, Y08, Y04, Y00, G17, G14, G07

Bird: BG07, BG05, BG02, YR12, Sakura Glaze – Black

Rocks: C7, C5, C3, C1

Birdhouse: R39, R29, R27, R24, E27, E25, E23

Sidewalk: C3, C2, C1, C0

Sky: B60, B01, B00, B000, B0000, C0, Colorless Blender

Hope you like it and have a great week!

You can find more cards to inspire you at Dreamerland Crafts and Pointer Scrapbooking on the Facebook Fan pages from the rest of our design team.

True Friends!


Welcome Back KLM Digital Designs Fans!

Today, I’m sharing a card that I made using Bunny and Butterfly Digital Stamp (KLM Digital Designs)! I fell in love with this beautiful image as soon as I saw it. I found this stamp to be so peaceful and serene and I love the sentiment that KLM Digital Designs created to go along with it.

To make the card, I printed out the image and sentiment with my HP printer using High Quality Grayscale onto Copic Marker X-Press It Blending Card. I found this is the best print setting so that your ink won’t smear when you start colouring. I die-cut the image with my Cuttlebug and My Creative Time -Stitched Squares Inside and Out and coloured it in using Copic markers. Next I mounted the image onto some purple cardstock and left a small border all around it. I cut the sentiment and did the same.

To complete the card, I used a white card base of 5.5″ x 4.25″ and used double-sided tape to mount the background paper from K&Company – Susan Wright – SW Botanical. I popped up the image and sentiment using 3M VHB – 2 sided tape and add some Kraftin’ Kimmie Pastel Krafty Dots.

Card Recipe:

Stamp and Sentiment: Bunny and Butterfly Digital Stamp (KLM Digital Designs)

Inks: HP Printer – Greyscale

Paper: Copic Marker X-Press It Blending Card, K&Company – Susan Wright – SW Botanical, Purple and White cardstock

Die Cuts: My Creative Time -Stitched Squares Inside and Out

Tools: Cuttlebug, 3M VHB – 2 sided tape, Kraftin’ Kimmie Pastel Krafty Dots

Image coloured with Copic Markers:

Bunny: W5, W3, W1, W0, RV32, R20, R11

Tulips, Leaves and Stems: G28, G24, G21, G12, V17, V15, V12, V01

Butterfly: E23, Y08, YR16, YR14, YR12

Background: B70, B01, B00, B000, B000, C0, Colorless Blender

Hope you like it and have a great week!

You can find more cards to inspire you at KLM DesignsKLM Digital Design Team and KLM Digital Designs on the Facebook Fan page from the rest of our design team.

Carrot Express!!!


It’s Wednesday, and Easter is quickly approaching. So for this week, I used Carrot Express – S055 (High Hopes Rubber Stamps) for the main image and Canadian Easter Greetings – H139 (High Hopes Rubber Stamps) for the sentiment.

To put this card together, I first die-cut some Copic Marker X-Press It Blending Card using my Cuttlebug and My Creative Time -Stitched Squares Inside and Out. Next, I stamped the image with Memento – Tuxedo Black ink using my MISTI to get a nice clean image. I put the die-cut back over the image again and used it for a template to get a nice clean white border. I created a mask out of the image and used the die-cut from Avery Elle – Custom Steel Dies – Made in the USA – D-05-01 PiercedCloudsDie and Tim Holtz Distress Ink – Salty Ocean to create the sky background.

I mounted the plaid paper from Recollections – Easter Paper onto a white card base of 5.5″ x 4.25″and then edged around the image and card with Tim Holtz Distress Inks and embossed the sentiment using Tim Holtz Distress Ink – Wilted Violet and VersaMark.

Lastly, I popped up the image onto the card using 3M – VHB 2-sided tape and added in some Kraftin’ Kimmie Pastel Krafty Dots.

Card Recipe:

Stamp: Carrot Express – S055 (High Hopes Rubber Stamps)

Sentiment: Canadian Easter Greetings – H139 (High Hopes Rubber Stamps)

Inks: Memento – Tuxedo Black, Tim Holtz Distress Ink – Wilted Violet, Tim Holtz Distress Inks – Shaded Lilac, VersaMark

Paper: Copic Marker X-Press It Blending Card, Recollections – Easter Paper

Embossing: Ranger – Clear Super Fine Detail embossing powder

Die Cuts: Avery Elle – Custom Steel Dies – Made in the USA – D-05-01 PiercedCloudsDie, My Creative Time -Stitched Squares Inside and Out

Tools: MISTI – Most Incredible Stamping Tool, Cuttlebug, 3M VHB – 2 sided tape, Kraftin’ Kimmie Pastel Krafty Dots

Image coloured with Copic Markers:

Rabbit: W5, W3, W1, R30, R02

Overalls: B26, B23, B21, R29, R27, R24

Carrots and Leaves: YR27, YR12, YR09, YR04, G14, G07, YG25, YG21

Wagon: E35, E33, E31, R29, R27, R24, W9, W7, W5, C2, C1, C0

Dirt: E37, E35, E33, E31

Hope you like it and have a fantastic week!

You can find lots of inspiration from the Design Team Divas at the High Hopes blog, and the High Hopes Rubber Stamps Facebook Fan page plus you can also follow us on
Instagram, Twitter and Pinterest.


Aged to Perfection!!!


Sharing a card today that I made using Big Birthday Wishes – SC0794 (AI Art Impressions) for both the image and sentiment.

To make this card, I used my MISTI to get a nice clean stamped image using Memento – Tuxedo Black and Copic Marker X-Press It Blending Card. Next I die-cut out the stamped image and background papers using my Cuttlebug and My Creative Time – Stitched Squares Inside and Out. I then inked around the edges using Tim Holtz Distress Ink – Picked Raspberry and Tim Holtz Distress Inks – Peacock Feathers.

I mounted the background paper from Doodle Bug Designs Inc. – Sugar Shoppe – 6″ x 6″ paper pad onto a card base of 5.5″ x 5.5″. Then, I popped up the next layer using 3M VHB – 2 sided tape. I mounted the main coloured image onto some Hotpink cardstock and then cut a narrow edge around it. Lastly, I popped up it up with 3M VHB – 2 sided tape.

Card Recipe:

Stamp and Sentiment: Big Birthday Wishes – SC0794 (AI Art Impressions)

Inks: Memento – Tuxedo Black, Versa Fine – Onyx Black, Tim Holtz Distress Ink – Picked Raspberry, Tim Holtz Distress Inks – Peacock Feathers

Embossing Powder: Ranger – Clear Super Fine Detail embossing powder

Paper: Copic Marker X-Press It Blending Card, Doodle Bug Designs Inc. – Sugar Shoppe – 6″ x 6″ paper pad, Hotpink cardstock

Die Cuts:  My Creative Time – Stitched Squares Inside and Out

Tools: MISTI – Most Incredible Stamping Tool, Cuttlebug, 3M VHB – 2 sided tape

Image coloured with Copic Markers:

Skin: E000, E00, E04, E11, E21, R22, R20

Hair: E47, E44, E43

Blouses, Earrings and Shoes: BG18, BG13, BG11, Y19, Y15, Y13

Pants: B26, B23, B21

Hats and Aprons:  BG13, BG11, RV04, RV02, C2, C1, C0, Colorless Blender

Cake: Y19, Y15, Y13, BG13, E29, E27, E25, R85, R83, R81

Candles: RV09, RV04

Cake Stand: E15, Y35, Y19

Background: B04, B02, B01, B00, N4, N2, N0

Hope you like it and have a great week!

Welcome Little One!


It’s Wednesday, and this week I used Stretch – R081 (High Hopes Rubber Stamps) for the main image and Welcome Little One Script – F239 (High Hopes Rubber Stamps) for the sentiment. This little giraffe is so adorable and sure to warm someone’s heart.

I decided to keep the card simple this week and stamped and coloured the image and then fussy cut around it. I layered all of the layers, except for the base with 3M VHB – 2 sided tape. I edged around all of the die cuts with Tim Holtz Distress Ink – Picked Rasberry. To finish off the card I added in a few hearts. The card base is 4.25″ x 5.5″.

Card Recipe:

Stamp:  Stretch – R081 (High Hopes Rubber Stamps)

Sentiment: Welcome Little One Script – F239 (High Hopes Rubber Stamps)

Inks: Memento – Tuxedo Black, Tim Holtz Distress Ink – Picked Rasberry

Paper: Copic Marker X-Press It Blending Card, Forever In Time – Baby Girl, Spare patterned papper

Die Cuts: My Creative Time – Scalloped Stitched Oval Dies.

Tools: MISTI – Most Incredible Stamping Tool, Cuttlebug, Kraftin Kimmie – Hearts Krafty Dots

Image coloured with Copic Markers:

Giraffe: E59, E57, E55, E50, E35, Y32, Y26, Y23, R30, R24, R20

Hope you like it and have a fantastic week!

You can find lots of inspiration from the Design Team Divas at the High Hopes blog, and the High Hopes Rubber Stamps Facebook Fan page plus you can also follow us on
Instagram, Twitter and Pinterest.


Happy St. Patrick’s Day!!


Let the Shenanigans Begin

Today, I’m sharing this fun Shamrock Gnome (KLM Digital Designs) who is enjoying his lucky 4-leaf clover!  My mom’s family is part Irish and so St. Patty’s Day is always celebrated in our home. Let’s hope this little Gnome spreads some luck for everyone.

I printed out the image with my HP Printer onto Copic Marker X-Press It Blending Card using Grayscale. Then I die cut the image with Your Next Stamp – Stitched Rectangle Die Set. I coloured in the image with Copic markers and then attached the die cut back over top of the image. This allowed me to create the background and leave a white border all around the image.

Next, I printed out both sentiments using Black ink only. I glued the background paper and ribbon onto a base of 4″ x 5.25″. I inked around the edges with Tim Holtz Distress Inks – Lucky Clover and then pasted everything onto a 4.25″ x 5.5″ card base. Lastly, I popped up the coloured image and sentiments with 3M VHB – 2 sided tape.

Card Recipe:

Stamp and Sentiments: Shamrock Gnome (KLM Digital Designs)

Inks: HP Printer Black and Grayscale, Tim Holtz Distress Inks – Lucky Clover

Paper: Copic Marker X-Press It Blending Card, Little Scraps of Heaven – Clover Paper

Die Cuts:  Your Next Stamp – Stitched Rectangle Die Set (YNSD214)

Tools: Cuttlebug, 3M VHB – 2 sided tape, Forever in Time- Color-Match Gems

Image coloured with Copic Markers:

Skin: E000, E00, E04, E11, E21, R22, R20

Hair and Beard: E18, E08, YR18, YR14

Hat: G17, G09, G07, YG09, C9, C7, C5, C2, E15, Y35, Y28, Y06

Jacket: G17, G14, G09, G07, G05, YG11, YG09

Pants: YG99, YG97, YG95, G94

Boots:  C9, C7, C5, C2

Clover:  G14, G07, G05, YG11

Sky and Rainbow: V15, RV17, R14, YR14, Y13, G14, B14, B04, B02, B01, B00, B000

Grass: YG17, YG13, YG03, YG01

Hope you like it and have a great week!

You can find more cards to inspire you at KLM Designs and KLM Digital Designs on the Facebook Fan page from the rest of our design team.

Eek! You’re How Old???


Today I’m sharing a birthday card that I made for my sister-in-law whose nickname is “Kitty”. I have a lot of fun trying to come up with new creations with cats for her birthday each year. This year, I decided to use Going Catty – DP1021 (Clearly Whimsy Stamps), for my main image on the front of the card. Shown below is how it looked before I placed the die cut from Peek A Boo Poppers (YNSD219) – (#Your Next Die) over top of it.

To create the die-cut, I first used Lifestyle Crafts Cutting Dies – Nesting Circles to cut out the main image and then again to cut out the pop-out die cut using Echo Park Paper Co. – Imagine That. I then added glue all around the outside of the circle and glued the two pieces together as shown below.

I created a card base 5.5″ x 4.25″ and then mounted paper from Doodle Bug Designs Inc. – Sugar Shoppe. I popped up the circle previously cut out with 3M VHB – 2 sided tape. I used the sentiment from the same Whimsy Stamp Set. I embossed it using VersaMark and Ranger Embossing Powder White – Extra Fine Detail. Then I cut it out using Ribbon End Dies – My Creative Time. Lastly, I edged around all of the edges using Tim Holtz Distress Ink – Picked Raspberry. Shown below is the card with the pop-up closed.

This is the front of the card with the pop-up open.

On the inside of the card, I used the image from Birthday Critters – 30-466 (Penny Black) and sentiment from
Whatnot Sentiments Set Twelve – CYNS638 (#Your Next Stamp).

All images were stamped onto Copic Marker X-Press It Blending Card using Memento – Tuxedo Black ink and my MISTI.

Card Recipe:

Stamps: Going Catty – DP1021  (Clearly Whimsy Stamps), Birthday Critters – 30-466 (Penny Black)

Sentiment: Going Catty – DP1021 (Clearly Whimsy Stamps), Whatnot Sentiments Set Twelve – CYNS638 (#Your Next Stamp)

Inks: Memento – Tuxedo Black, Tim Holtz Distress Ink – Picked Raspberry, Versa Fine – Onyx Black, VersaMark

Embossing Powder: Ranger Embossing Powder White – Extra Fine Detail, Ranger – Clear Super Fine Detail embossing powder

Paper: Copic Marker X-Press It Blending Card, Doodle Bug Designs Inc. – Sugar Shoppe – 6″ x 6″ paper pad, Echo Park Paper Co. – Imagine That 6″ x 6″

Die Cuts: Peek A Boo Poppers (YNSD219) – (#Your Next Die), Ribbon End Dies – My Creative Time, Lifestyle Crafts Cutting Dies – Nesting Circles

Tools: MISTI – Most Incredible Stamping Tool, Cuttlebug, 3M VHB – 2 sided tape, Marvy Uchida – Embossing Heat Tool

Image coloured with Copic Markers:

Cats: W9, W8, W6, W5, R30, R27, R24, R22, R02, Sakura Glaze – Black

Party Hat and Birthday Banner: BG13, BG11, YR16, YR12, RV66, RV63, Y17, Y08, BG05, BG02

Background: BG13, BG11, BG10

Hope you like it and have a great week!

You can find more cards to inspire you at Roberta Stevenson on my Facebook page.

Gone Fishing!


It’s Wednesday, and this week I used Anthony James – R022 (High Hopes Rubber Stamps) for the main image and Gone Fishing Sign – G103 (High Hopes Rubber Stamps) for the sentiment.

I come from a family that LOVES fishing. My dad has always loved fishing and now my older brother has fallen into his foot steps of loving to fish too. I remember going fishing with my dad and I thought I had a really, really big fish. We were all so excited until I pulled up a big chunk of grass reeds. LOL! The fish were jumping all around us, but we couldn’t seem to catch any that 1 day.

As soon as we were back on shore, you could see the huge fish playing all over the lake. I think they were just laughing at us. But I’m not a 100% sure. LOL!

To make the card, I first used Your Next Stamp – Stitched Rectangle Die Set (YNSD214) to cut out the main image from Copic Marker X-Press It Blending Card and My Creative Time – Stitched Squares Inside and Out to die cut the square out of some white cardstock. Then I used my MISTI and Memento – Tuxedo Black Ink to get a nice crisp image. I used various Copic markers listed below to colour in the image.

I decided to colour in the fish with PrismaColor pencils on the sentiment.

Next I ran both the coloured image and the sentiment through my Xyron Creative Station and placed both cuts over top of some green cardstock. Then I popped both up using 3M VHB – 2 sided tape.

The base of the card is 5.5″ x 5.5″. I edged around the card and sentiment with Tim Holtz Distress Ink – Bundled Sage. For a final touch, I added a little fish under the sentiment.

Card Recipe:

Stamp:  Anthony James – R022 (High Hopes Rubber Stamps)

Sentiment: Gone Fishing Sign – G103 (High Hopes Rubber Stamps)

Inks: Memento – Tuxedo Black, Tim Holtz Distress Ink – Bundled Sage

Paper: Copic Marker X-Press It Blending Card, ModaScrap – Under The Sea (6″ x 6″), Green cardstock

Die Cuts: Your Next Stamp – Stitched Rectangle Die Set (YNSD214), My Creative Time -Stitched Squares Inside and Out

Tools: MISTI – Most Incredible Stamping Tool, Cuttlebug, Xyron Creative Station, 3M VHB – 2 sided tape

Image coloured with Copic Markers:

Skin:  E21, E11, E04, E00, E000

Hair: E59, E57, E55

Overalls:  B26, B23, B21, E15, Y35, Y08

Shirt:  R27, R24, R22, G46, G43, G40, G24

Ball Cap: G82, G46, G43, G40, G28, G24, G21

Shoes: E39, E37, E35, E33, E31

Fishing Rod and Reel: R27, R24, R22, E39, E35, E31, G46, G40, G28, C3, C1

Fish:  RV21, R22, G46, G43, G40, G20

Ground: E37, E35, E33, E31

Sky: B02, B01, B00, B000

Sign: PrismaColor Pencils – Blush Pink (PC928), Sap Green Light (PC 120), Charteuse (PC989), Apple Green (PC912), Olive Green (PC911)

Hope you like it and have a fantastic week!

You can find lots of inspiration from the Design Team Divas at the High Hopes blog, and the High Hopes Rubber Stamps Facebook Fan page plus you can also follow us on
Instagram, Twitter and Pinterest.


Birthday Wishes!


Today I’m sharing a birthday card that I made for my mom using Yummy Cupcake Bunny (CYNS592) (#Your Next Stamp) on the front of the card and  Rosie Rabbit Gift (CYNS542) (#Your Next Stamp) on the inside of the card.

On the inside:

To make the card I stamped the images on to Copic Marker X-Press It Blending Card using Memento – Tuxedo Black and my MISTI – Most Incredible Stamping Tool to get a nice clean crisp image. After colouring the images, I fussy cut around them both. I then used My Creative Time – Scalloped Stitched Oval Dies to die cut an oval out of Doodle Bug Designs Inc. – Sugar Shoppe paper. I cut the remainder of the paper to be 4″ x 5.25″ and turned it over to the opposite side and mounted it onto a card base of 4.25″ x 5.5″. I used Tim Holtz Distress Ink – Picked Raspberry to ink around the edges.

For the sentiments I used Versa Fine Onyx Black and VersaMark ink and then embossed both with Ranger embossing powders listed below.

To complete the card, I mounted the bunny on the front with 3M VHB – 2 sided tape to pop it up as well as the sentiment.

Card Recipe:

Stamp and Sentiment: Yummy Cupcake Bunny (CYNS592) (#Your Next Stamp), Rosie Rabbit Gift (CYNS542) (#Your Next Stamp)

Inks: Memento – Tuxedo Black, Tim Holtz Distress Ink – Picked Raspberry, Versa Fine – Onyx Black, VersaMark

Embossing Powder: Ranger Embossing Powder White – Extra Fine Detail, Ranger – Clear Super Fine Detail embossing powder

Paper: Copic Marker X-Press It Blending Card, Doodle Bug Designs Inc. – Sugar Shoppe – 6″ x 6″ paper pad, Hot Pink cardstock

Die Cuts:  My Creative Time – Scalloped Stitched Oval Dies

Tools: MISTI – Most Incredible Stamping Tool, Cuttlebug, 3M VHB – 2 sided tape, Marvy Uchida – Embossing Heat Tool

Image coloured with Copic Markers:

Bunnies: E29, E27, E25, E23, R30, R02, R85, R83

Cupcake and Wrapper: BG18, BG15, BG11, BG10, YR18, YR16, RV09, RV04, RV02, RV00, E35, E33, E31

Presents and Ribbons: BG18, BG15, BG11, BG10, YR18, YR15, Y06, Y04, Y02, RV04, RV02, RV00

Background: B04, B02, B00

Hope you like it and have a great week!

You can find more cards to inspire you at Roberta Stevenson on my Facebook page.

Easter Masterpiece!


It’s Wednesday, and this week I used High Hopes Rubber Stamps Bunny Masterpiece – S063 for the main image and Egg-Stra Special -G243 for the sentiment. These little bunnies are getting prepared for Easter. I remember making painted eggs every year in the kitchen with my mom and brothers as a child. Do you have an Easter tradition of painting eggs too?

To create the card I coloured in the image and then popped it up using 3M VHB – 2 sided tape. I also popped up the sentiment. I found some old cardstock and cut out some of the little eggs and then edged around each of them with various Tim Holtz colours listed below. The card is 6″ x 6″.

Card Recipe:

Stamp:  Bunny Masterpiece – S063 (High Hopes Rubber Stamps)

Sentiment: Egg-Stra Special -G243 (High Hopes Rubber Stamps)

Inks: Memento – Tuxedo Black, Tim Holtz Distress Inks – Dusty Concord, Spun Sugar, Wilted Violet, Evergreen Bough, Shaded Lilac and Fossilized Amber

Paper: Copic Marker X-Press It Blending Card, Recollections – Blue Ombre Cardstock, Recollections – Purple Ombre Cardstock, Recollections – Easter Printed Cardstock

Die Cuts: My Creative Time -Stitched Squares Inside and Out

Tools: MISTI – Most Incredible Stamping Tool, Cuttlebug, 3M VHB – 2 sided tape

Image coloured with Copic Markers:

Bunnies: C3, C2, C1, C0, R30, R02, RV04

Overalls: B26, B23, B21, V09, V06, V04, BV04, BV02, BV01, BV000

Egg: Y08, Y06, Y02, BG13, BG11, BG10, RV04, RV02, RV00, G02, G00, G000, B41, B34, B32

Paintbrushes: N4, N0, E27, E23, BG13, BG11, BG10, B34, B41

Grass: G17, G14, G07

Sky: B02, B01, B00, B000

Hope you like it and have a fantastic week!

You can find lots of inspiration from the Design Team Divas at the High Hopes blog, and the High Hopes Rubber Stamps Facebook Fan page plus you can also follow us on
Instagram, Twitter and Pinterest.


Love Every Little Moment


Welcome Back Dreamerland Craft Fans!

Today, I’m sharing a card that I made using Mix and Match Clear Stamps (DC19095) (Dreamerland Crafts)!  Love the images for this stamp. There are so many different scenes that can be created. I chose to do a night scene with the 2 best friends sharing the serenity of the night sky.

To make this card, I first die cut some Bristol paper and then drew in the hills with light pencil and traced around the stamps to get the general idea of placement. I created a masked image of the bear and bunny using Inkadoo Stamping Mask Paper and Post-It Note for the hills and cut them both out. Next I erased all of the lines so that you could barely see them and stamped the bear and the bunny image directly onto the Bristol Paper. Next, I mounted the mask of the characters and hills that I had cut out previously over top of the stamped images so that they would be protected while I coloured in the sky.

To do the sky I used a mixture of Tim Holtz inks listed below and PrismaColor pencils. Then I blended all of the colours together using Gamsol and a blending paper stump. I repeated the process with the PrismaColor pencils several times.

Once the sky was completed, I removed the stencil for the grass and proceeded to colour it in using the same technique that I had used for the sky.

Lastly, I removed the mask for the bear and bunny and coloured them in. I added in some small trees using a Black Prismacolor pencil.

I popped my finished image, back into my MISTI again and stamped the sentiment using VersaMark. I also stamped in the stars in the sky and embossed everything with Ranger Embossing Powder White – Extra Fine Detail. I also used a brush and tapped some of the white embossing powder all over the sky. Then heated it with my Marvy Uchida – Embossing Heat Tool. Lastly, I stamped and embossed the seagulls using VersaFine – Onyx Black and Ranger – Clear Super Fine Detail embossing powder. I coloured them in using Black PrismaColor pencil and then added in some highlights on the wings.

I popped up the coloured image and blue cardstock with 3M VHB – 2 sided tape.

Card Recipe:

Stamp and Sentiment: Mix and Match Clear Stamps (DC19095) (Dreamerland Crafts)

Inks: Versa Fine – Onyx Black, Versa Mark, (Sky Base): Tim Holtz Distress Ink – Blueprint Sketch, Tim Holtz Distress Ink – Chipped Sapphire, Tim Holtz Distress Ink – Black Soot

Embossing Powder: Ranger Embossing Powder White – Extra Fine Detail, Ranger – Clear Super Fine Detail embossing powder.

Paper: Inkadoo Stamping Mask Paper, Blue and Green – Recollections paper, Bristol Paper

Die Cuts:  My Creative Time -Stitched Squares Inside and Out

Tools: MISTI – Most Incredible Stamping Tool, Cuttlebug, Marvy Uchida – Embossing Heat Tool, 3M VHB – 2 sided tape

Image coloured with PrismaColor Pencils:

Sky:  Indigo Blue (PC901), Indanthrone Blue (PC208), Violet Blue (PC933), Denim Blue (PC1101), Black (PC935)

Grass: Dark Green (PC908), Peacock Green (PC907), Marine Green (PC988), Grass Green (909)

Bear: Dark Brown (PC946), Dark Umber (PC947), Chocolate (PC1082), Burnt Ochre (PC943), Sienna Brown (PC945)

Rabbit: 30% Warm Grey (PC1052), 20% Warm Grey (PC1051), 10% Warm Grey (PC1050)

Seagull Wings Highlight: White (PC938), Denim Blue (PC933)

All colours were blended with paper stump and Gamsol blending fluid.

Hope you like it and have a great week!

You can find more cards to inspire you at Dreamerland Crafts on the Facebook Fan page from the rest of our design team.

My Heart Led Me To You!


Welcome Back KLM Digital Designs Fans!

Today, I’m sharing a simple card that I made using the stamp and sentiment from Lovebug Gnome (KLM Digital Designs)! This little gnome driving his car and the sentiments with this stamp could be used for Valentine’s Day, Anniversary or just as a note to let someone you really care about how much you love them!

Card Recipe:

Stamp and Sentiment: Lovebug Gnome (KLM Digital Designs)

Inks: HP Printer GrayScale

Paper: Copic Marker X-Press It Blending Card, Crafter’s Companion – Luxury Cardstock – Ice Blue Pack

Image coloured with Copic Markers:

Skin: E000, E00, E11, E21

Hair and Beard: W5, W3, W1

Hat: R29, R27, R35

Car:  B39, B37, B34, B32, B000, Y15, Y08, Y00, C9, C7, C5, C3, C2, C1

Balloons:  R81, R35, R29, R24, R00, R000, B34, B32, B000, B0000

Background: B0000, C2, C1, C0, Colorless Blender

Hope you like it and have a great week!

You can find more cards to inspire you at KLM Digital Designs on the Facebook Fan page from the rest of our design team.

Happy St. Paddy’s Day!


It’s Wednesday, and I’m back to share this adorable little Leprechaun who is happily sitting on his pot of gold. My grandmother was Irish and so I’ve been celebrating St. Patrick’s Day since I was a little girl. My mom decorates the entire house with Shamrocks and Leprechauns each year to celebrate the occasion. LOL!

To create this card I used Lucky’s Pot O’ Gold – P030 (High Hopes Rubber Stamps) for the main image and Fancy St. Paddy’s – G147 (High Hopes Rubber Stamps) for the sentiment.

I stamped the image and then used Copic markers to colour in the image. For the rainbow, I used a circle from the My Creative Time dies as a stencil and the chisel side of the markers. Once coloured, I mounted all of the various papers and layers onto 5.5″ x 4.25″ card base. The edges were inked with Tim Holtz Distress Ink – Mowed Lawn.

Card Recipe:

Stamp: Lucky’s Pot O’ Gold – P030 (High Hopes Rubber Stamps)

Sentiment: Fancy St. Paddy’s – G147 (High Hopes Rubber Stamps)

Inks: Memento – Tuxedo Black, Tim Holtz Distress Ink – Mowed Lawn

Paper: Copic Marker X-Press It Blending Card, Little Scraps of Heaven – Clover Paper, Hot Buy Craft Smart – Holiday Glitz Glitter Paper 12″ x 12″

Die Cuts: My Creative Time – Scalloped Stitched Oval Dies, My Creative Time – More Stitched Circles

Tools: MISTI – Most Incredible Stamping Tool, Cuttlebug

Image coloured with Copic Markers:

Skin: E21, E11, E04, E00, E000, R22, R20

Hair: YR16, YR14, YR12, YR09

Hat and Outfit:  G09, G07, G05, G03, YG09, YR12, YG21

Shoes: C9, C7, C5, C3, C1

Clover: YG25, YG23, YG21, YG17, YG13, YG11

Pot and Gold:  W9, W8, W7, W5, E15, Y28, Y35, Y17, Y06

Grass: G17, G14, G07

Background and Rainbow: V15, RV17, R14, YR14, Y13, G14, B14, B04, B02, B01, B00, B000

Hope you like it and have a fantastic week!

You can find lots of inspiration from the Design Team Divas at the High Hopes blog, and the High Hopes Rubber Stamps Facebook Fan page plus you can also follow us on
Instagram, Twitter and Pinterest.


Panda Party


Hi There! Today I’m sharing a card for my friend who absolutely LOVES Panda bears. Every year, I try to find a new panda image to make her card with and this year I used Party Like A Panda (Simon Says Stamps) to make this fun card.

I used my MISTI, Memento – Tuxedo Black ink and Copic Marker X-Press It Blending Card to get a nice clear image when interchanging the various stamps from this set. Then, I die cut the main image using Your Next Stamp – Stitched Rectangle Die Set. I coloured in the images with Copic Markers and then stamped the presents separately. After colouring the presents, I fussy cut around them and added them to the card. I inserted the image back into the MISTI and used Versa Fine – Onyx Black to stamp “Birthday” and Embossed with Ranger – Clear Super Fine Detail embossing powder.

Next I used a small stamping block and added in the extra confetti and coloured it in to complete the background. Lastly, I mounted the image with 3M VHB 2-sided tape onto a 5.5″ x 4.25″ Hot Pink cardstock base.

Card Recipe:

Stamp and Sentiments: Party Like A Panda (Simon Says Stamps)

Die Cut: Your Next Stamp – Stitched Rectangle Die Set (YNSD214)

Ink: Memento – Tuxedo Black, Versa Fine – Onyx Black

Paper: Copic Marker X-Press It Blending Card, Pink Cardstock

Embossing Powder: Ranger – Clear Super Fine Detail

Tools: MISTI – Most Incredible Stamping Tool, Cuttlebug, 3M VHB 2-sided tape, Marvy Uchida – Embossing Heat Tool

Images coloured with Copic Markers:

Panda Bears: W5, W3, W1, W0, E53, Sakura Glaze – Black

Balloons and Confetti: RV66, RV55, RV14, RV13, RV00, R81, V06, V04, V01, V000, BG57, BG53, B26, B24, B00, B000, G17, G14, G000, YG41

Cake and Icing: E29, E27, E25, E13, RV66, RV14, RV13, R81

Candles: R24, Y17, Y08, Y000, Y00, V04, V01

Plate: BV23, BV20, Colorless Blender

Hat: BG57, BG53, B26, B24, B21, B00

Horn: E15, Y35, Y17, Y08

Grass: G17, G14, G09, G07, YG41, YG23, YG21, YG13, YG11

Hope you like it and have a terrific week!

It’s No Mystery!


It’s Wednesday, and this week, I used Little Sleuth – R205 (High Hopes Rubber Stamps) for my main image and No Mystery – H204 (High Hopes Rubber Stamps). This little sleuth has uncovered the clue to why he is so in love with his special someone. This card could be used for Valentine’s Day, Anniversary or even a birthday!

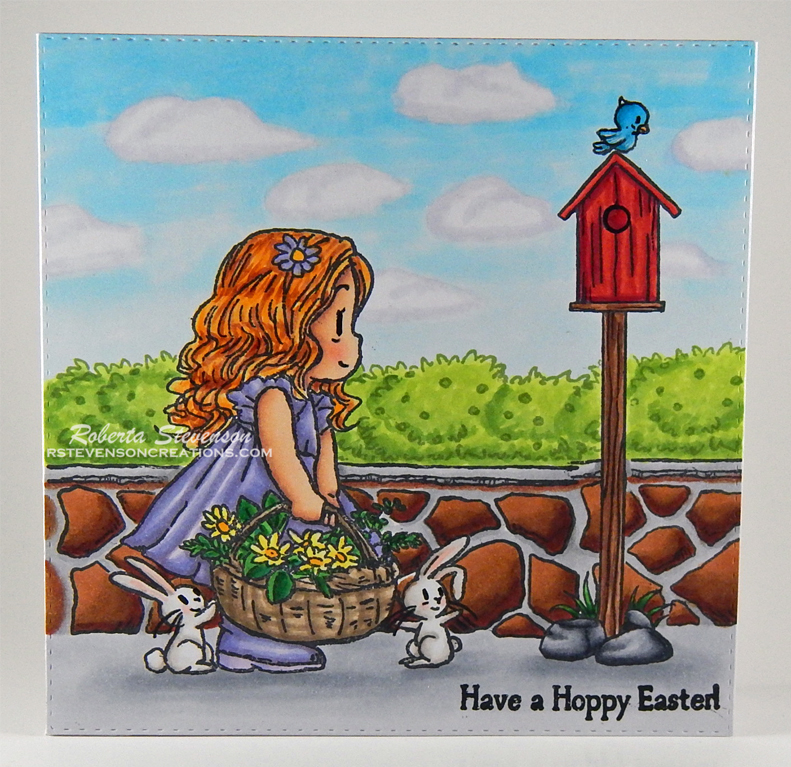
To make the background for the card, I die cut multiple squares using My Creative Time – Stitched Squares Inside and Out in various brown cardstock and some white Copic Marker X-Press It Blending Cardstock.

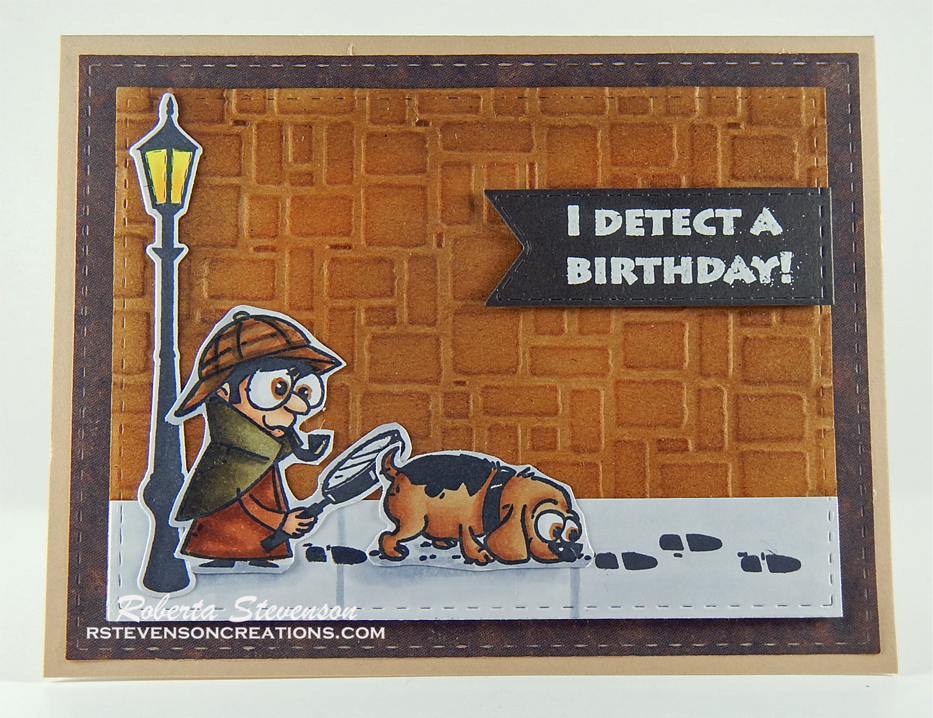
For the brick background, I used Darice – Brick Wall Embossing Folder and then various Tim Holtz inks listed below to give the different colours for the texture.
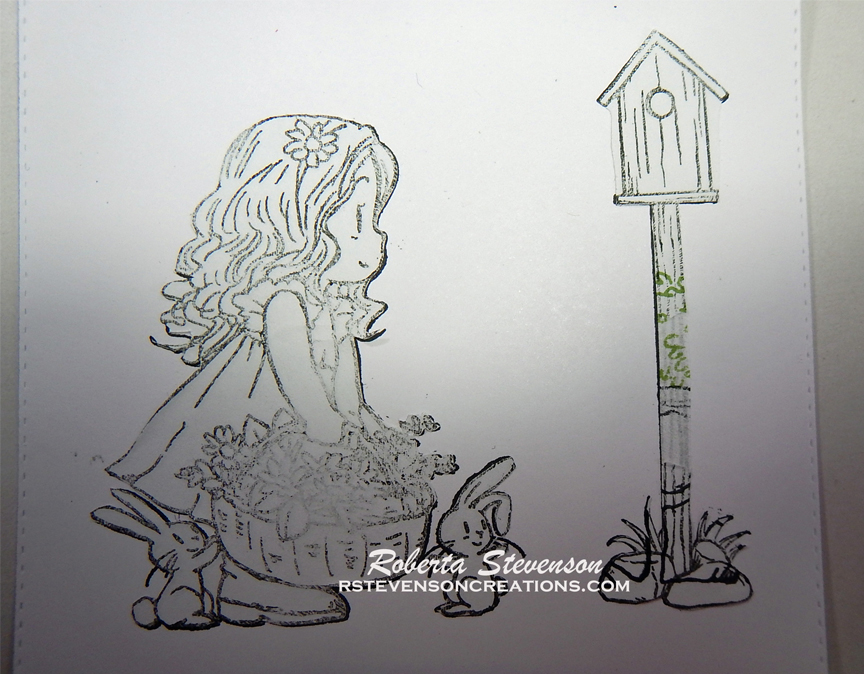
I coloured in the main image with Copic markers and then fussy cut around it and used a black marker to go around all of the edges.

I layered all of the pieces together using 3M VHB – 2 sided tape to pop them up and then 2-sided tape to mount the final square onto the 6″ x 6″ card base.

To finish off the card, I used some brown twine and criss-crossed it to make a little bow and added in the question mark using some clear gems that I coloured with E23.

Card Recipe:

Stamp: Little Sleuth – R205  (High Hopes Rubber Stamps)

Sentiment: No Mystery – H204 (High Hopes Rubber Stamps)

Inks: Memento – Tuxedo Black, Tim Holtz Distress Ink – Brushed Corduroy, Tim Holtz Distress Ink – Rusty Hinge, Tim Holtz Distress Ink – Vintage Photo, Tim Holtz Distress Ink – Walnut Stain

Paper: Copic Marker X-Press It Blending Card, Park Lane 50 pk 8.5”x11” Value Papers-Browns, AC Cardstock – Autumn

Die Cuts: My Creative Time -Stitched Squares Inside and Out, My Creative Time – Sentiment Label Dies

Embossing Folder: Darice – Brick Wall

Tools: MISTI – Most Incredible Stamping Tool, Cuttlebug, AC Premium Ribbon

Image coloured with Copic Markers:

Skin: E000, E00, E04, E11, E21, R22, R20

Hair: E47, E44, E43

Detective: E39, E37, E35, E34, E33, E31, E89, E87, E84, C10, C5, C3, C2, C1

Shoes and Magnifying Glass: C10, C8, C7, C5, C3, C2, C1, C0, B0000

Shadow and Sidewalk: C5, C3, C2, C1

Gemstones: E23

Hope you like it and have a fantastic week!

You can find lots of inspiration from the Design Team Divas at the High Hopes blog, and the High Hopes Rubber Stamps Facebook Fan page plus you can also follow us on
Instagram, Twitter and Pinterest.


Boys Are A Gift!


It’s Wednesday, and this week I made this adorable little boy monkey holding onto his favourite teddy bear called Boy Binky Monkey – Q118 (High Hopes Rubber Stamps) with Boys Are A Gift – J011 (High Hopes Rubber Stamps) for the sentiment. He’s holding onto his favourite little blanket! Did you have a favourite little toy or blanket that you carried everywhere with you as a child too?

I kept this card very simple this week. I stamped the images onto Copic Marker X-Press It Blending Card. Then I fussy cut around the image leaving a small white border. I die cut a large circle using My Creative Time – More Stitched Circles and then cut a few smaller circles from the same background paper. Finally, I popped up the image and the sentiment and add in a few gems to finish it off.

Card Recipe:

Stamp: Boy Binky Monkey – Q118  (High Hopes Rubber Stamps)

Sentiment: Boys Are A Gift – J011 (High Hopes Rubber Stamps)

Card Size:  5.5″ x 4.25″

Inks: Memento – Tuxedo Black

Paper: Copic Marker X-Press It Blending Card, Forever In Time – Baby Boy

Die Cuts: My Creative Time – More Stitched Circles MCT-D136

Tools: MISTI – Most Incredible Stamping Tool, Cuttlebug

Image coloured with Copic Markers:

Monkey: E79, E77, E74, E55, E53, E51

Shirt: B23, B21, B18

Blanket: B23, B21, B18, BG05, BG02

Bear: BG09, BG05, BG02, BG01, BG000

Soother: Y38, Y18, Y13

Shadow: C2, C1, C0

Hope you like it and have a fantastic week!

You can find lots of inspiration from the Design Team Divas at the High Hopes blog, and the High Hopes Rubber Stamps Facebook Fan page plus you can also follow us on
Instagram, Twitter and Pinterest.


Sending Smiles!


Spring is just around the corner!

It’s Wednesday, and for today’s card I used Andreas Kitties – R202 (High Hopes Rubber Stamps) for the main image and Sending Smiles – G276 (High Hopes Rubber Stamps) for the sentiment. This cheery little girl is hoping to bring smiles to everyone she knows and hopefully put a smile on your face too. She’s already for Spring! Are you??? I know I am. LOL!

To make this card, I started out with a 6″ x 6″ card base and then mounted the background onto the card. I cut the ovals and scalloped oval using my Cuttlebug and die cut from My Creative Time – Scalloped Stitched Oval Dies. The sentiment was cut out using My Creative Time – Ribbon End Dies.

For the main image, I used Copic markers to colour it all in. I fussy cut around the image and then traced around all of the edges using my black Copic marker. I edged around all of the borders of the die cuts with various Tim Holtz distress inks. I assembled the card using 3M VHB – 2 sided tape.

To add the last finishing touch to the card, I added in some flowers along the side and a pearl in the centre for all of the yellow flowers.

Card Recipe:

Stamp:  Andreas Kitties – R202 (High Hopes Rubber Stamps)

Sentiment: Sending Smiles – G276 (High Hopes Rubber Stamps)

Inks: Memento – Tuxedo Black, Tim Holtz Distress Ink – Fossilized Amber, Tim Holtz Distress Ink – Wilted Violet, Tim Holtz Distress Ink – Twisted Citron

Paper: Copic Marker X-Press It Blending Card, American Crafts – Dear Lizzy – Day Dreamer 6″x6″ (15.2×15.2cm), Forever in Time – Dandelion Wish SP344-23, Purple Cardstock, Stamperia – Lilac Flowers

Die Cuts: My Creative Time – Ribbon End Dies, My Creative Time – Scalloped Stitched Oval Dies

Tools: MISTI – Most Incredible Stamping Tool, Cuttlebug, Prima Flowers – Ameruse Pastel Mix, Recollections – Handmade Flowers

Image coloured with Copic Markers:

Skin: E21, E11, E04, E00, E000, R22, R20

Hair: E47, E44, E43

Blouse and Socks: Y08, Y04, Y00

Dress: V09, V06, V04, V01

Shoes: W9, W7, W6, W5, W3, W1

Cats: C7, C5, C3, W5, W3, W1, E27, E25, E23, R20

Straw Basket: E34, YR23, Y23, Y21

Hope you like it and have a fantastic week!

You can find lots of inspiration from the Design Team Divas at the High Hopes blog, and the High Hopes Rubber Stamps Facebook Fan page plus you can also follow us on
Instagram, Twitter and Pinterest.


Super Tall Cake!


Welcome Back Dreamerland Craft Fans!

Today, I’m sharing a card that I made using Dreamerland Crafts Clear Stamps  Super Tall Cake – D19017 for the main image and Birthday Sentiments – Set 002 (DS163007) for the sentiment!  This adorable little bear made a cake for someone very special! Hmmm! I wonder who that could be. LOL!

To make the card I first die cut Copic Marker X-Press It Blending Card with Craftin Desert Diva’s – Inside Scalloped Squares. Then using my MISTI and Memento – Tuxedo Black ink, I stamped the image onto the paper. I coloured in the image using Copic markers.

Next I cut out used some tape to inlay the image back into the frame that I had previously die cut to make it one piece again. I also die cut the yellow and aqua paper with the same die cut twice. Then I used the yellow to be the inlay for the aqua frame and taped it back together on the reverse. After that, I used my MISTI and Versa Fine – Onyx Black to apply the sentiment. The sentiment was then embossed with Ranger – Clear Super Fine Detail embossing powder and heated up using Marvy Uchida – Embossing Heat Tool.

Next, I edged around the borders of both frames with Tim Holtz Distress Ink – Evergreen Bough. I ran the base frame through Xyron Creative Station to make it into a sticker and so that the entire frame would lay flat. I mounted this onto 5″ x 5″ white cardstock. Then I popped up the smaller frame and image using 3M VHB – 2 sided tape.

Card Recipe:

Stamp: Super Tall Cake – D19017 (Dreamerland Crafts Clear Stamps)

Sentiments: Birthday Sentiments – Set 002 (DS163007) (Dreamerland Crafts Clear Stamps)

Inks: Memento – Tuxedo Black, Versa Fine – Onyx Black, Tim Holtz Distress Ink – Evergreen Bough

Embossing Powder: Ranger – Clear Super Fine Detail embossing powder

Paper: Copic Marker X-Press It Blending Card, Momenta – Cardstock, Recollections – Blue Ombre Cardstock, Recollections – White Cardstock

Die Cuts: Craftin Desert Diva’s – Inside Scalloped Squares

Tools: MISTI – Most Incredible Stamping Tool, Cuttlebug, 3M VHB – 2 sided tape, Marvy Uchida – Embossing Heat Tool, Xyron Creative Station

Image coloured with Copic Markers:

Bear: E53, E51, E50, E37, E35, E33, E31, R30, R22, R20, R02

Hat, Apron and Cart: C3, C2, C1, C0, Colorless Blender

Cake: E29, E27, E25, E23, B04, B02, Y35, Y08

Tablecloth: Mitts and Boots: B04, B02, B000

Icing: BG49, BG45, BG11

Bunny: C3, C1, C0, R22, R20

Whistle: G17, G14

Base: E15, E13, E11

Background: Y19, Y18, Y15, Y11


Hope you like it and have a great week!

You can find more cards to inspire you at Dreamerland Crafts on the Facebook Fan page from the rest of our design team.

Cupid Didn’t Miss!


Welcome Back KLM Digital Designs Fans!

KLM Digital Designs released some brand new stamps recently and today, I’m combining Cupid Gnome and Cupid! The sentiment is also a part of the Cupid set. I thought these 2 stamps worked so well together to create a little Valentine Card scene! Can you just feel the love???

I know Cupid Gnome sure didn’t miss when he shot the love arrow into my husband’s heart many years ago. I couldn’t ask for a better man. He’s definitely 1 in a million and I wouldn’t trade him for the world. LOL!

To make the card, I brought the digital images into Microsoft Word and arranged them using a 5.5″ x 4.25″ rectangle box as my guide. Then I printed out the image onto Copic Marker X-Press It Blending Card using Grayscale using my HP Printer. (Grayscale prevents the image from smudging when you go to colour.)

I coloured in the images and added some Clear – Wink of Stella to the wing. (It doesn’t show up in the picture.) Then I trimmed the coloured images and mounted them onto Recollections – Cranberry cardstock. Lastly, I added some little hearts that I had die-cut earlier. I also added a heart above the “i” in Cupid.

Card Recipe:

Stamp: Cupid Gnome (KLM Digital Designs), Cupid (KLM Digital Designs)

Sentiments: Cupid (KLM Digital Designs)

Ink: HP Printer – Grayscale

Paper: Copic Marker X-Press It Blending Card, Recollections – Cranberry cardstock

Die Cuts: Sizzix Framelets by Stephanie Barnard – 562676 – Hearts Dotted

Tools: Cuttlebug, Xyron Create-A-Sticker, Wink of Stella – Clear

Image coloured with Copic Markers:

Skin: E000, E00, E04, E11, E21, R22, R20

Hair and Beard: E35, E34, E33

Hat: R59, R37, R35, R24

Pants: G99, G94, YG63, YG61

Bow: E55, E53, E51

Angel Wings: BG10, BV00, RV00

Cloud: BV0000, B0000, C0, Colorless Blender

Background: B0000, B000, E34, E33, E31

Hope you like it and have a great week!

You can find more cards to inspire you at KLM Digital Designs on Facebook.

Wishing You the Sweetest Things!


Welcome Back Dreamerland Craft Fans!

Today, I’m sharing Dreamerland Craft Stamps Coordinating Die & Clear Stamp Package (D172906) for Character Stamp D172006 Love The Music From My Guitar and Love The Music From My Guitar – D172006! This little boy loves his guitar and all of the animals love his music.

To make his card, I stamped all of the images using my MISTI, Memento – Tuxedo Black ink and Copic Marker X-Press It Blending Card. I coloured in all of the images using Copic markers and then used my Cuttlebug and all of the die cuts from Coordinating Die & Clear Stamp Package (D172906) for Character Stamp D172006 Love The Music From My Guitar (Dreamerland Crafts Clear Stamps). I also die cut the sentiment at the same time and stamped it with Versa Fine – Onyx Black and then heat embossed it using Marvy Uchida – Embossing Heat Tool and Ranger – Clear Super Fine Detail embossing powder..

I was now ready to do the background. To achieve this I cut several die cuts using Monte Mart A4 Watercolour Book paper, Lawn Cuts – Simple Stitched Hillside Borders – Lawn Fawn and Your Next Stamp – Stitched Rectangle Die Set (YNSD214).

For the sky I used several Tim Holtz Blue inks in various shades listed below using a stencil that I had created from Avery Elle – Custom Steel Dies – Made in the USA – D-05-01 PiercedCloudsDie. For the grass I used various shades of Tim Holtz green inks – (see below).

I ran all of the die cuts and the back 2 layers of grass through Xyron Creative Station. Then I set them all aside.

I was now ready to assemble my card. I layered the first 2 die cuts onto the main die cut and then popped up the bottom grass cut with 3M VHB – 2 sided tape. I then added on the characters that I made stickers out of for easy assembly. I popped up the upper half of the little dog with 3M VHB – 2 sided tape. Once the scene was completed I mounted it onto 5.25″ x 4.25″ white cardstock.

Card Recipe:

Stamps and Sentiment: Coordinating Die & Clear Stamp Package (D172906) for Character Stamp D172006 Love The Music From My Guitar (Dreamerland Crafts Clear Stamps), Love The Music From My Guitar – D172006 (Dreamerland Crafts)

Inks: Memento – Tuxedo Black, Versa Fine – Onyx Black

Clouds: Tim Holtz Distress Ink – Blueprint Sketch, Tim Holtz Distress Ink – Salty Ocean, Tim Holtz Distress Inks – Broken China

Grass: Tim Holtz Distress Ink – Mowed Lawn, Tim Holtz Distress Ink – Bundled Sage, Tim Holtz Distress Ink – Twisted Citron, Tim Holtz Distress Inks – Peeled Paint

Embossing Powder: Ranger – Clear Super Fine Detail embossing powder

Paper: Copic Marker X-Press It Blending Card, Mont Mart A4 Watercolour Book paper – Acid Free – 190 GSM, Recollections – White Cardstock

Die Cuts:  Your Next Stamp – Stitched Rectangle Die Set (YNSD214), Coordinating Die & Clear Stamp Package (D172906) for Character Stamp D172006 Love The Music From My Guitar (Dreamerland Crafts Clear Stamps), Avery Elle – Custom Steel Dies – Made in the USA – D-05-01 PiercedCloudsDie

Tools: MISTI – Most Incredible Stamping Tool, Cuttlebug, 3M VHB – 2 sided tape, Marvy Uchida – Embossing Heat Tool

Image coloured with Copic Markers:

Skin: E000, E00, E04, E11, E21, R22, R20

Hair: E47, E44, E43

Shirt: BG49, BG45, BG34

Pants: B26, B23, B21

Guitar: E99, E97, E93, E51, E35, E33, E31, YR27

Bird: B04, B02, B00, Y38

Dog: E35, E34, E33, E31

Rabbit: C7, C5, C3, R30, R02

Cat: W9, W7, W5

Pig: E93,E04, R20, R00, R000, E44, E04

Background: B04, B02, B00

Hope you like it and have a great week!

You can find more cards to inspire you at Dreamerland Crafts on the Facebook Fan page from the rest of our design team.