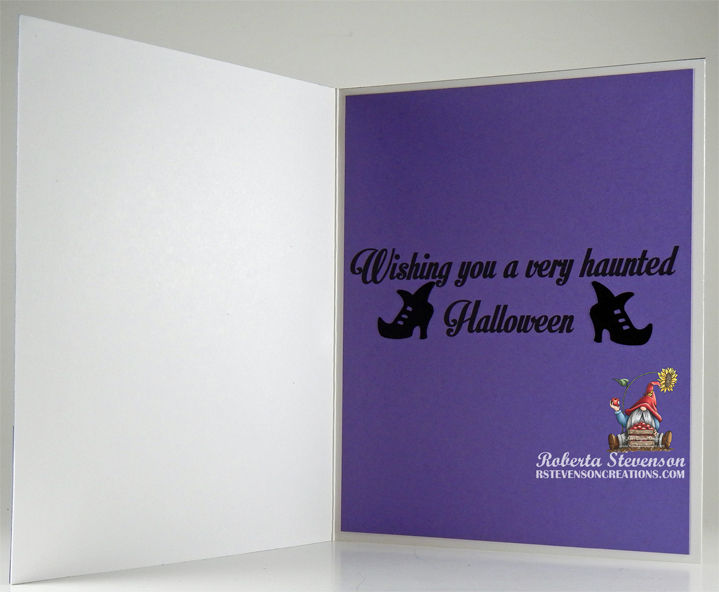
Tag Archive | Hammermill – Premium Colour 100 lb.

Graveyard Gnome – Vampire!


Today I’m sharing a Hallowe’en card using KLM Digital DesignGraveyard Gnome – Vampire from the new September 2023 release. This image also comes with 2 more sentiments, “Can’t wait to hang with our fang gang!” and “Happy Halloween, My creepy little friend”.

Hammermill – Premium Colour 100 lb. cardstock was used to create a 5.25″ x 5.5″ card base. Recollections – Black cardstock was cut to the same size and adhered directly to the base using double-sided tape.

The image and sentiment were imported into Microsoft Word and printed out onto Copic Marker X-Press It Blending Card cardstock. I printed out an extra copy of the image onto regular copy paper as well and fussy cut around it so that I could use it as a mask for later. I also cut a 2″ circle from a piece of Post-It Note so that I could use both pieces as a mask.

The image was coloured in with Copic markers. With the reverse mask from the circle, I placed it over top of the image and drew in the moon, using the mask as a guide. I added in the features of the moon with Copic markers and then blended everything together with a Copic Colorless Blender. I was now ready to do my background.

I took the mask that I created earlier of the image and placed it over top of the coloured image. Next, I tood the circle that I created from the Post-It Note and placed it over top of the image mask. This allowed me to cover both the moon and the image. With Washi Tape, I covered the bottom part above the sentiment. With multiple blending brushes and Tim Holtz Distress Inks listed below, I created the glow of the moon and the sky. Tim Holtz Distress Ink – Carved Pumpkin and Tim Holtz Distress Ink – Spiced Marmalade were combined to turn the sentiment orange. Once this was completed I moved the Washi Tape so that it covered the sentiment. This time, I blended in the green Tim Holtz Distress Inks with a blending brush. I decided I wanted a little more depth to the greens, so I removed all of the masks, but kept the Washi Tape on.  Using  Copic markers, I created a few more shadows in the grass.

I removed the Washi Tape and attached the finished image to the base card.  Some extra bats in the sky were added using Class A’ Peel Stickers from Stampendous! Crystal Stickles was applied to the small moon on the hat and the hat band. Finally, some little stars were added into the sky using a White PrismaColor Premiere Pencil to complete the card.

Card Recipe:

Stamp and Sentiment:  Graveyard Gnome – Vampire – KLM Digital Designs

Inks: HP Printer Grayscale, Tim Holtz Distress Ink – Black Soot, Tim Holtz Distress Ink – Fossilized Amber, Carved Pumpkin, Spiced Marmalade, Villainous Potion, Dusty Concord, Chipped Sapphire, Mowed Lawn, Peeled Paint

Paper: Copic Marker X-Press It Blending Card, Hammermill – Premium Colour 100 lb., Recollections – Black cardstock

Miscellaneous: Blending Brushes

Image coloured with Copic Markers:

Skin: E21, E11, E04, E00, E000

Beard: E47, E44, E43, E41

Hat, Cape and Small Moon: V17, V15, V12, Y17, Y15, Y11, R59, R37, R35

Bat: BV29, BV25, BV23

Gravestone: W5, W3, W1, W0

Leaves: YR27, YR24, YR23, YR15, YR12, Y17, Y04, R39, R02,

Grass: YG25, YG23, YG17, YG13, YG03

Moon: E41, E40, Y11, Y000, Colorless Blender

Hope you like it and have a great week!

You can find more cards to inspire you at KLM Designs, KLM Digital Design Team and KLM Digital Designs on the Facebook Fan page from the rest of our design team.

Dinosaur Pilgrim!!


Hi Everyone, I took most of the summer off to enjoy the beautiful weather and also to visit family, so I didn’t make a lot of cards. But, now I’m back and ready to start sharing some weekly creations with all of you!

Today, I’m sharing a Thanksgiving card from the new KLM Designs September release called Dinosaur Pilgrim.  He’s loving the fall colours and is sending everyone some special wishes! This stamp set also comes with 2 other sentiments, “Autumn Blessings” and “Happy Thanksgiving”.

To make the card, I first imported the image and sentiment into Microsoft Word. I sized both the image and sentiment to fit 5.5″ x 4.25″ and printed everything out onto Copic Marker X-Press It Blending Card using my HP Printer. The image was coloured in with Copic markers. Gelly Roll Sakura #8 Pen was used to create the whites of the eyes. I drew in the tree and leaves on the tree and added in the sky and background. A Black PrismaColor pencil was used to go around the entire image of the Dinosaur, pumpkin and leaves on the ground to make them stand out more. I fussy cut around the sentiment and ran both pieces through a Xyron Create a Sticker and attached 1 piece to some orange and the other to some green scrap cardstock that I had. Scrapbook Adhesives 3D Foam Strips were added to the back of the sentiments and they were both popped up onto card.

Card Recipe:

Stamp and Sentiments: Dinosaur Pilgrim (KLM Digital Designs)

Inks: HP Printer Grayscale

Paper: Copic Marker X-Press It Blending Card, Hammermill – Premium Colour 100 lb.

Image coloured with Copic Markers:

Dinosaur: YG97, YG95, YG67, YG63, YG61, G85, G82, E89, E87, E84, R27, R22, R20, R24, Y08, YR12, Gelly Roll Sakura #8 Pen

Hat: C10, C7, C5, C3, C1, Y17

Collar: C1, C00, Colorless Blender

Pumpkin: E08, YR18, YR16, YR14, YR12, G05, G02

Leaves: E99, E98, , E95, E08, R05, G07, G05, G02, Y08

Grass: YG13, YG11, YG03, YG01

Trees and Leaves: E35, E34, E27, E25, E23, YG25, R24, R05, Y17, Y08, YR12

Sky: B02, B01, B00, B000

Hope you like it and have a great week!

You can find more cards to inspire you at KLM Designs, KLM Digital Design Team and KLM Digital Designs on the Facebook Fan page from the rest of our design team.


Todd’s 60th Birthday!


Today I’m sharing a Birthday card that I made for my husband’s 60th Birthday using the image and sentiments from Art ImpressionsDance It Out – 5278 and image from Cake Popper Set (4475) (Retired). He hated the thought of turning sixty and being a few years older than him, I couldn’t resist doing a funny card for his birthday.

To create the card, I began with the card base of 5.5″ x 4.25″ using Hammermill – Premium Colour 100 lb. cardstock.  I cut Your Next Stamp Designer Pad – Birthday Boy paper to the size of 5.5″ x 1.75″ and 5.5″ x 2.5″ and adhered it to the base using double-sided tape. Lastly, Tim Holtz Distress Ink – Blueprint Sketch was applied around the edges of the card using a finger dauber.

With Memento – Tuxedo Black ink and my MISTI, I stamped all of the images onto Copic Marker X-Press It Blending Card. I coloured in all of the images and then fussy cut around them. For the image on the front of the card. I popped it up onto black cardstock using U-Line Double-Sided foam tape and then fussy cut around it again.

For the front of the card, with my Cuttlebug and Sizzix Thinlets – Balloon Occasions, I die cut the “Happy” and “birthday” twice. I ran the blue “Happy” through my Xyron Create a Sticker and attached it directly to the card. The Yellow and Blue inlays were added from the die cut pieces using liquid glue. Liquid glue was also appplied to the 2 “Birthday” die cuts and attached to the card. U-Line Double-Sided foam tape was applied to the back of the man image and popped up onto the card. I stamped the sentiment using Versafine – Majestic Blue with my MISTI. Ranger – Clear Super Fine Detail embossing powder was applied and then heat embossed with Marvy Uchida – Embossing Heat Tool. Poppystamps – Christmas Quotes dies were used to die cut the sentiment. Using a blending brush with some yellow ink still on it, I applied it and then added some U-Line Double-Sided foam tape to pop it up on the card.


For the inside of the card, the image was applied using liquid glue. The sentiments were stamped using Versafine – Onyx Black ink with my MISTI. Ranger – Clear Super Fine Detail embossing powder was applied and then heat embossed with Marvy Uchida – Embossing Heat Tool. Lastly, I thought it would be fun to add in his age onto the balloons. Using Die-Namics – Frosted Alphabet, and my Cuttlebug, I die cutted the numbers and frosting out of Copic Marker X-Press It Blending Card. The numbers were coloured in with the same colours as the cake and then Stickles – Diamond was added to the icing. Once the stickles was dry I applied the 2 pieces together with liquid glue and attached them to the balloons.


My husband loved his card and I hope you do too!

Card Recipe:

Stamps and Sentiment: Art ImpressionsDance It Out – 5278, Cake Popper Set (4475) (Discontinued)

Inks: Memento – Tuxedo Black, Tim Holtz Distress Ink – Blueprint Sketch, Versafine – Majestic Blue, Versa Fine – Onyx Black

Paper: Copic Marker X-Press It Blending Card, Hammermill – Premium Colour 100 lb., Your Next Stamp Designer Pad – Birthday Boy (6″ x 6″)

Dies: Sizzix Thinlets – Balloon Occasions (666014), Poppystamps – Christmas Quotes, Die-Namics – Frosted Alphabet

Miscellaneous: MISTI – Most Incredible Stamping Tool, Cuttlebug, Ranger – Clear Super Fine Detail embossing powder, Marvy Uchida – Embossing Heat Tool, Stickles – Diamond, U-Line Double-Sided Foam Tape

Image coloured with Copic Markers:

Skin: E21, E11, E04, E00, E000, R30, R24, R20

Man

Hair: C7, C5, C3, C2, C1, C0, C00

Shirt: B06, B04, B02, B00, Colorless Blender

Pants, Shoes and Belt: E59, E57, E29, E27, E25, E23, Y19

Woman

Hair: Y38, Y19, Y15, Y11

Dress and Earrings: BV08, BV04, BV02, BV01

Cake, Flowers and Ribbons: G99, G24, B06, B02, B00, B000, B0000,  BV04, BV02, BV01

Balloons, Numbers, Hat and Whistle: B06, B04, B02, B01, B00, B0000, BV08, BV04, BV02, BV01, BV0000

Hope you like it and have a great week!

Workout Wheelie!!


Sharing a birthday card I made using Art Impressions Workout Gal Wheelie  for the main image and sentiment. My colleague loves to workout and I thought this would be a fun card to make for her. There is a tab on the inside of the card which makes the wheels turn as she pedals.

To make my card, I began with a card base of Hammermill – Premium Colour 100 lb. cardstock, cut and scored to be 5.5″ x 4.25″. Using my Cuttlebug and Gina Marie Designs – Nested Scalloped Stitched Rectangles, I die cut Scrapbook.com – Rainbow Smooth cardstock. Then, using my Cuttlebug again and this time Momenta – Cardstock, I die cut the inside rectangle with My Creative Time – Rectangle Frame Layers.

Using my MISTI and Memento – Tuxedo Black ink, I stamped the image onto Copic Marker X-Press It Blending Card cardstock. The image was coloured in with Copic markers and then die cut with the dies that came with the stamp set.  The backgrounds and base card were also die cut to match where the wheel would be turning. Using double-sided tape, the 2 large die cuts were attached to the base card centering the holes for each of them. The brads were inserted into the holes of the die cuts for the body and wheel assembly. This was glued onto the background rectangle. I positioned the sentiments around the image using a MISTI and Versa Fine – Onyx Black ink. They were embossed using my Marvy Uchida – Embossing Heat Tool and Ranger – Clear Super Fine Detail embossing powder.  Lastly, a 1/4″ foam circle was attached to the wheel from inside the card and the cover circle and tab were added to it. This mechanism allows the card holder to turn the wheel. So much fun!

Card Recipe:

Stamp and Sentiment: Workout Gal Wheelie  (Art Impressions) (Retired)

Inks: Memento – Tuxedo Black, Versa Fine – Onyx Black

Paper: Copic Marker X-Press It Blending Card, Hammermill – Premium Colour 100 lb., Scrapbook.com – Rainbow Smooth Cardstock (4.25″ x 5.5″), Momenta – Cardstock

Dies: Gina Marie Designs – Nested Scalloped Stitched Rectangles, My Creative Time – Rectangle Frame Layers

Embossing Powder: Ranger – Clear Super Fine Detail embossing powder

Tools: MISTI – Most Incredible Stamping Tool, Cuttlebug, Marvy Uchida – Embossing Heat Tool

Image coloured with Copic Markers:

Skin: E21, E11, E04, E00, E000, R46, R89, R83, R22, R20

Hair: E47, E44, E43

Outfit: Y38, RV66, RV55, RV52, BG72, BG57, BG32, BG11

Headband and Slipper: RV66, RV55, RV52, N2, N1, N0

Towel: BG09, BG05, BG02, BG01, Y38, Y35, Y32

Earing, Glasses and Mirror: BG72, BG57, BG32

Bike, Pedal and Wheel: W9, W7, W5, C5, C4, C3, C1

Wine Glass: R89, R85, R59, R56, BG0000

Hope you like it and have a great week!

Birthday Present Girl!!


Today, I’m sharing a birthday card that I made using this fun image from Polkadoodles called Surprise Gift Digi – Winnie Celebrations 2.

To make the card, I first imported the image and sentiment into Microsoft Word. I sized the image to fit 3.75″ x 2.5″ and printed it out onto Copic Marker X-Press It Blending Card using my HP Printer. Using my Cuttlebug and My Creative Time – Rectangle Frame Dies, I die-cut the image out. The frame was die cut using Hot Buy – Recollections – Jewel Tones paper and Gina Marie Designs – Loopy Rectangle Die Set. Hammermill – Premium Colour 100 lb. cardstock was used to create the base card at the size of 5.5″ x 4.25″. Doodlebug – hey cupcake paper was cut to the same size as the base and applied using double-sided tape. Tim Holtz Distress Ink – Picked Raspberry and a finger dauber were used to ink around all of the 4 sides of the card.

The image was coloured in with Copic markers and 3M double-sided pop-up tape were applied to the back of the image and Loopy rectangle. Both were attached to the centre of the card. The sentiment was stamped onto Fuschia paper using my MISTI and then die cut with a circle punch. Using a white gel pen, I created stitched lines. 2 layers of 3M double-sided popup tape were added to the back of the circle on one side and then glue on the other half and it was popped up onto the card. Lastly, I added a few Kraftin’ Kimmie – Festive Dots just to add a little bit more colour!

Card Recipe:

Stamp: Surprise Gift Digi Stamp – Winnie Celebrations 2Polkadoodles

Inks: HP Printer Grayscale, Tim Holtz Distress Ink – Picked Raspberry

Paper: Copic Marker X-Press It Blending Card, Hammermill – Premium Colour 100 lb., Doodlebug – hey cupcake (6″x6″) paper pad, Hot Buy – Recollections – Jewel Tones

Die Cuts: Gina Marie Designs – Loopy Rectangle Die Set, My Creative Time – Rectangle Frame Dies

Miscellaneous: Kraftin’ Kimmie – Festive Dots

Image coloured with Copic Markers:

Skin: E21, E11, E00, E000, R22, R20, Eyes (Gelly Roll Sakura #8 Pen, Sakura Glaze – Black)

Hair: E47, E44, E43, E40

Dress and Shoes: BG09,  BG05, BG02, BG01

Ribbons and Dress Trim: RV04, RV02, RV00

Presents and Bows: E15, Y35, Y17, Y08, G02, G00, G000

Shadow: C3, C2, C1, Colorless Blender

Hope you like it and have a great week!

Matchbook Get Well!


Today I’m sharing a miniature Get Well card using Art ImpressionsMB Get Well – 5499MB Template Dies (5317), MB Envelope Die (5318) and MB Wall Accessories (5323) that I made for a friend that had just had surgery. Love these little cards as they are so fun to make.

To create the card, I began with the card base using Carta Bella Paper Co. – Botanical Garden double-sided paper, Cuttlebug die-cutting machine and the Art ImpressionsMB Template Dies (5317). From the same die set, the windows and window frames were cut out using Hammermill – Premium Colour 100 lb. cardstock. Lastly, with the same dies, I cut out the floor using Joy Crafts – Artist Trading Card – Wood Texture paper.

With Memento – Tuxedo Black ink and my MISTI, I stamped all of the images and the sentiment onto Copic Marker X-Press It Blending Card. I coloured in all of the images and then, using the Cuttlebug again, I die cut all of the inside pop-ups using Art ImpressionsMB Get Well – 5499 and added features using MB Wall Accessories (5323). Lastly, I die cut the envelopes out of some scrap double-sided paper that I had in my stash using the Art ImpressionsMB Envelope Die (5318).

Double-sided tape was applied to do the assembly on the tabs and wall items. They were then all adhered to the base card.  Double-side tape was also applied to the flaps of the larger envelope to complete the assembly. For the small envelope, I used the little bow and a pop-dot to close it so that it could be opened easily.

Card Recipe:

Stamps and Sentiment: Art ImpressionsMB Get Well – 5499, MB Wall Accessories (5323)

Inks: Memento – Tuxedo Black

Paper: Copic Marker X-Press It Blending Card, Hammermill – Premium Colour 100 lb., Carta Bella Paper Co. – Botanical Garden (6″ x 6″)

Dies: Art ImpressionsMB Get Well – 5499MB Template Dies (5317)MB Envelope Die (5318) and MB Wall Accessories (5323)

Miscellaneous: MISTI – Most Incredible Stamping Tool, Cuttlebug

Image coloured with Copic Markers:

Side Tables: C1, C0, C00

Bed Frame and Wheels: C7, C5, C3, C2, C1, C0, C00

Bed Sheets and Pillow: C1, C0, C00, RV01, RV00, RV000

Kleenex Box, Card, Blanket, Slippers: RV66, RV63, RV55, R27, R22

Flowers, Stems and Flower Pot: Y17, Y13, YG17, YG13, R27, R22, E99, E97, E00

Chair: E44, E43, W7, W5, W3, W1

Glass: B000

White Board: C3, C2, C1, C0, C00, R27, Y17

Clock: C3, C1, C00

Hope you like it and have a great week!

Happy Pride Day!


Today, I’m sharing a Happy Pride Day card using Craft With SarahRainbow Gnomes from the free SVG April 21st – April 30th, 2023 Gnome Craft Countdown event. The Rainbow Gnomes were offered on day 6. The sentiment is a free sentiment that can be found on Cricut Design Space. My friend and his partner are celebrating this month along with many of their friends and I’m hoping this card puts an added smile on their faces.

To create the card, I began with a card base of 4.25″ x 5.5″ using Hammermill – Premium Colour 100 lb. cardstock.  Using Lawn Fawn CutsCloudy Stencil, multiple blending brushes and multiple Tim Holtz Distress Inks, I created the clouds. With Tim Holtz Distress Ink – Mowed Lawn, I gently blended the grass into the base of the clouds.

I imported the .SVG file into Cricut Design Space and created a mirror image of the .svg so that I could have the gnomes facing in opposite directions. I cut out all of the different layers using various cardstock colours along with the sentiment with my Cricut Explore. Once the pieces were all cut out, I glued them all together as per the instructions from Craft With Sarah instructions associated with the .SVG file. These were then added to the front of the card to finish it off.

Card Recipe:

Cricut Explore, Cricut Design Space – WWW.CRAFTWITHSARAH.COM \ Gnomes – gcc-day-06-rainbow (W2.944 x H3.211, Happy Pride Day (#M278417D3) (1.755 x 1.755)

Inks: Grass: Tim Holtz Distress Ink – Mowed Lawn, Sky: Tim Holtz Distress Ink – Salty Ocean, Aged Mahagony, Squeezed Lemonade, Wilted Violet

Paper: Hammermill – Premium Colour 100 lb., miscellaneous card stock

Die Cuts: Lifestyle Crafts Cutting Dies – Nesting Circles – Size 2″

Stencil: Lawn Fawn Cuts Cloudy Stencil

Miscellaneous: Cricut Explore, Cuttlebug, Blending Brushes

Hope you like it and have a great week!

Hero Dad!


Today I’m sharing a Father’s Day card using KLM Digital DesignWheelbarrow Gnome from the new April 2023 release. This image also comes with 2 more sentiments, “Dad, you’re someone to look up to no matter how tall I grow!” and “Any man can be a Father, but it takes someone special to be a Dad”. I know that my dad will always be my hero no matter how old I get. 🙂

Hammermill – Premium Colour 100 lb. cardstock was used to create a 5.5″ x 5.5″ card base. Using my Cuttlebug and My Creative Time -Stitched Squares Inside and Out dies, I die cut a 5″ x 5″ square out of Recollections – Black cardstock and a 4″ x 4″ square out of Copic Marker X-Press It Blending Card. The black square was applied directly to the base card using double-sided tape.

The image and sentiment were imported into Microsoft Word and printed out onto Copic Marker X-Press It Blending Card prior to me cutting out the 4″ square. The image was coloured in with Copic markers. I decided I wanted some puffy clouds, so I printed out the image again, but this time it was printed onto regular copy paper and then I fussy cut around the top part of it. It was placed over top of the coloured image with some washi tape to secure it in place. I took another piece of paper and created a wavy background and placed that down over the image too! Then, with Tim Holtz Distress Ink – Salty Ocean and a blender brush, I proceeded to create the cloudy sky using a stencil that I had made earlier using Avery Elle – Pierced Clouds Dies. Once the sky was complete, I added in the dirt path and the farm field to finish off the image. U-Line double-sided tape was added to the back of the completed coloured image and it was popped up onto card to finish it off.

Card Recipe:

Stamp and Sentiment:  Wheelbarrow Gnome – KLM Digital Designs

Inks: HP Printer Grayscale. Tim Holtz Distress Ink – Salty Ocean

Paper: Copic Marker X-Press It Blending Card, Hammermill – Premium Colour 100 lb., Recollections – Black cardstock

Dies: My Creative Time -Stitched Squares Inside and Out, Avery Elle – Pierced Clouds Die (D-05-01)

Miscellaneous: U-Line double-sided tape, Cuttlebug, Blending Brush

Image coloured with Copic Markers:

Skin: E21, E11, E00, E000

Beard: E29, E27, E25, E23

Hats and Boots: C8, C6, C4, C2

Shirts: BG72, BG57, BG32, BG11

Jeans: B26, B23, B21, E23

WheelBarrow: C10, C8, C6, C3, C2, C1, R56, R37, R35, E29, E25, E23

Lawn \ Farm Field: YG25, YG23, YG21, YG17, YG13, YG03, YG01

Dirt Path: E37, E35, E33, E31

Hope you like it and have a great week!

You can find more cards to inspire you at KLM Designs, KLM Digital Design Team and KLM Digital Designs on the Facebook Fan page from the rest of our design team.

The Best Therapist!


Today is Tuesday and I’m sharing an Inspirational card using KLM Digital DesignGnomes Best Friend from the new April 2023 release. This image also comes with 2 more sentiments, “Thinking of You” and “Just Smile”. Pets make the perfect companions because they will always listen and never judge you. They sense when you are happy or sad and always make you feel wonderful! Also, your secrets are always safe with them! 🙂

Hammermill – Premium Colour 100 lb. cardstock was used to create a 5.5″ x 4.25″ card base. Scrapbook.com – Roses Smooth Cardstock – 5.5″ x 4.25″ was applied directly to the base card using double-sided tape.

The image and sentiment were imported into Microsoft Word and printed out onto Copic Marker X-Press It Blending Card. With my Cuttlebug, I die cut the image using My Creative Time – Rectangle Frame Layers to the size of 4.75″ x 3.5″. The image was coloured in with Copic Markers listed below. Some small clouds were die-cut using Lawn Fawn – Platform Pop-Up Inserts and coloured in with Copic Markers. I applied these to the coloured image with liquid glue. U-Line double-sided tape was added to the back of the completed coloured image and it popped it up onto card.

Card Recipe:

Stamp and Sentiment:  Gnomes Best Friend – KLM Digital Designs

Inks: HP Printer Grayscale

Paper: Copic Marker X-Press It Blending Card, Hammermill – Premium Colour 100 lb., Scrapbook.com – Roses Smooth Cardstock – 4.25″ x 5.5″

Dies: My Creative Time – Rectangle Frame Layers, Lawn Fawn – Platform Pop-Up Inserts

Miscellaneous: U-Line double-sided tape, Cuttlebug,

Image coloured with Copic Markers:

Skin: E21, E11, E04, E00, E000

Beard: E29, E27, E25, E23

Hat: R59, R37, R35

Clothing: BG09, BG05, BG02, BG01

Jeans: B26, B23, B21

Dog: E99, E97, E25, E23, E13, E11, E07, Y38, 100, R02, R00

Lawn: YG25, YG23, YG21, YG03, YG01

Sky: B02, B01, B00, B000

Clouds: C1, C00, B60

Hope you like it and have a great week!

You can find more cards to inspire you at KLM Designs, KLM Digital Design Team and KLM Digital Designs on the Facebook Fan page from the rest of our design team.

American Flag Gnome


Today is Thursday and I’m sharing an American Celebration card using KLM Digital DesignAmerican Flag Gnome from the new April 2023 release. This image also comes with 2 more sentiments, “Let Freedom Ring” and “Home of The Brave – America”.

Hammermill – Premium Colour 100 lb. cardstock was used to create a 5.5″ x 4.25″ card base. I found some navy blue cardstock with stars from my scrap stash and thought it went perfect with this card. I cut it to be the same size as the base and adhered it directly to base card. Tim Holtz Distress Ink – Chipped Sapphire and a finger dauber were used to ink around all of the edges of the card.

The image and sentiment were imported into Microsoft Word and printed out onto Copic Marker X-Press It Blending Card and 1 extra copy of the image was printed onto plain copy paper to be used for masking later. With my Cuttlebug, I die cut the image using My Creative Time – Rectangle Frame Layers. The image was coloured in with Copic Markers listed below. I fussy cut around the image that I had cut out from the plain copy paper and adhered it to the card with some Washi tape as a mask.

Using a blender brush, I created the clouds in the sky with Avery Elle – Pierced Clouds Die (D-05-01) which I had die cut to create stencils. The lawn was created using a blender brush, Tim Holtz Distress Ink – Mowed Lawn and Lawn Fawn – Slimline Hillside Stencils. I also used the stencils to be a mask for adding in the pathway using a blender brush and Krafty Kolours – Sandy Shores.

Once all of the background was completed, I removed the mask from the image and created a shadow under the gnome using Copic markers E33, E31 and E30. Some of the hills were made a little bit darker using Copic marker G20.

I added U-Line double-sided tape to the back of the coloured image then popped it up onto card.

Card Recipe:

Stamp and Sentiment:  American Flag Gnome – KLM Digital Designs

Inks: HP Printer Grayscale, Tim Holtz Distress Inks – Salty Ocean, Krafty Kolours – Sandy Shores, Tim Holtz Distress Ink – Chipped Sapphire, Tim Holtz Distress Ink – Mowed Lawn

Paper: Copic Marker X-Press It Blending Card, Hammermill – Premium Colour 100 lb.

Dies: My Creative Time – Rectangle Frame Layers, Avery Elle – Pierced Clouds Die (D-05-01)

Stencils: Lawn Fawn – Slimline Hillside Stencils

Miscellaneous: U-Line double-sided tape, Cuttlebug, Blending Brushes

Image coloured with Copic Markers:

Skin: E21, E11, E04, E00, E000

Beard: E29, E27, E25, E23

Hat: R59, R37, R35

Clothing: B39, B37, B29

Boots: E49, E35, E34, E31, C9, C7, C5, C4

Flag: R59, R37, R35, B39, B37, B29

Path: E33, E31, E30 and Krafty Kolours – Sandy Shores for base

Hope you like it and have a great week!

You can find more cards to inspire you at KLM Designs, KLM Digital Design Team and KLM Digital Designs on the Facebook Fan page from the rest of our design team.

Card of the Month – Round 1 – You Did It!


Yippee! I am thrilled to have been asked to enter my card into the Creative Scrapbooker Magazine’s Card of the Month Contest for April! I would love it if you voted for me! Thank you! 🙏🏻 😘💙
Here is the link on Facebook:

https://creativescrapbooker.ca/card-of-the-month-april-2023/?fbclid=IwAR3vXUqlRBglU91NoJldQ6QCgmgcI4C2ORT158UZ-ISyx7rNHNdVTyDo-L0#/bracket/4416181


The original post where I created this card can be found here. https://rstevensoncreations.com/2023/03/10/you-did-it/

Hope you like it and have a great week!

You can find more cards to inspire you at KLM Designs, KLM Digital Design Team and KLM Digital Designs on the Facebook Fan page from the rest of our design team.

Music Speaks!


Today I’m sharing a music card using KLM Digital DesignKeyboard Gnome from the new March release. This image also comes with 2 more sentiments, “Turn up the volume close your eyes and let the music take over your soul” and “Music is the voice of the soul”. No words were truer spoken, music is all around us and there is something out there for everyone to listen to!

Hammermill – Premium Colour 100 lb. cardstock was used to create a 5.5″ x 5.5″ card base. Anna Griffin – Musical Cardstock & Vellum paper was cut to the same size as the base card. Using a Sharpie – Gold Medium Point – Water Based Paint pen, I inked around all of the edges and then adhered it to the base card with double-sided tape. Recollections – Matte Gold Foil cardstock was die cut 5 times using my Cuttlebug and Joy! Crafts – Cutting and Embossing Dance to the Music die. Using liquid glue, I applied each layer on top of each other and then glued it to the bottom of the card base.

The image and sentiment were imported into Microsoft Word and printed out onto Copic Marker X-Press It Blending Card. I coloured in the image and fussy cut around it and the sentiment. The edges of the image were inked around with a black marker and the sentiments were adhered onto Recollections – Matte Gold Foil cardstock and then fussy cut again.

The card was now ready to assemble. I added 3M VHB – 2 sided pop-up tape to the backs of the sentiments and image and then popped up all of the pieces onto the card to complete it.

Card Recipe:

Stamp and Sentiment:  Keyboard Gnome – KLM Digital Designs

Inks: HP Printer Grayscale

Paper: Copic Marker X-Press It Blending Card, Hammermill – Premium Colour 100 lb., Anna Griffin – Musical Cardstock & Vellum, Recollections – Matte Gold Foil cardstock

Dies: Joy! Crafts – Cutting and Embossing Dance to the Music

Miscellaneous: Cuttlebug, Sharpie – Gold Medium Point – Water Based Paint, 3M VHB – 2 sided tape

Image coloured with Copic Markers:

Skin: E21, E11, E04, E00, E000

Hair: E15, YR23, Y38, Y21

Dress and Hat: BG09, BG05, BG02, BG01

Ribbon Sash: R46, R14, R08

Shoes: C10, C8, C6, C5, C3, C2, C1, E55, E53, E51

Keyboard Instrument and Stand: R46, R14, R08, C3, C2, C1

Hope you like it and have a great week!

You can find more cards to inspire you at KLM Designs, KLM Digital Design Team and KLM Digital Designs on the Facebook Fan page from the rest of our design team.

You Did It!


Today I’m sharing a graduation card using KLM Digital DesignGraduation Gnome II from the new March release. This image also comes with 2 more sentiments, “Be the change that you want to see in this world” and “And so the adventure begins”. This little gnome is glowing with pride after graduating and accepting his diploma. Congratulations to all of the new graduates out there this year!

Hammermill – Premium Colour 100 lb. cardstock was used to create a 4.25″ x 5.5″ card base. Recollections – Black cardstock was cut to the size of 4″ x 4-5/8″ and Recollections – Patterned paper was cut to the size of 3″ x 4.25″ using My Creative Time – Rectangle Frame Layers and my Cuttlebug. Using a Sharpie – Gold Medium Point – Water Based Paint pen, I inked around all of the edges of both pieces.

The image and sentiment were imported into Microsoft Word and printed out onto Copic Marker X-Press It Blending Card. I coloured in the image and fussy cut around it and the sentiment. Both were adhered onto Recollections Black cardstock and then fussy cut again.

The card was now ready to assemble. I added U-Line double-sided pop-up tape to the backs of the sentiment, image and both rectangular pieces. All pieces were then popped up onto card to complete it.

Card Recipe:

Stamp and Sentiment:  Graduation Gnome II – KLM Digital Designs

Inks: HP Printer Grayscale

Paper: Copic Marker X-Press It Blending Card, Hammermill – Premium Colour 100 lb., Recollections Grad Paper, Recollections Black cardstock

Dies: My Creative Time – Rectangle Frame Layers

Miscellaneous: U-Line double-sided tape, Cuttlebug, Sharpie – Gold Medium Point – Water Based Paint, Xyron Create a Sticker

Image coloured with Copic Markers:

Skin: E21, E11, E04, E00, E000

Beard: E29, E27, E25, E23

Gown and Hat: C10, C8, C6, C5, C4

Boots: 100, C10, C8, C6, C5, C4

Scroll: C1, C0

Ribbon and Tassel: YR23, Y15, Y11, Y00

Glow around image: Y00

Hope you like it and have a great week!

You can find more cards to inspire you at KLM Designs, KLM Digital Design Team and KLM Digital Designs on the Facebook Fan page from the rest of our design team.

Peace Dude!


Today I’m sharing an inspirational \ birthday card using KLM Digital DesignPeace Gnome from the new March release. This image also comes with 2 more sentiments, “Peace begins with a smile” and “There is peace even in the storm”. Seeing this image made me feel nostalgic for my younger days in the 60’s and 70’s. I still remember how excited I was to get my very first pair of GWG bell bottom jeans and then LEVIS. LOL! Flower power was all the rage and there were flowers and peace signs everywhere. I was still young, but it was a really cool time to grow up.

AC Cardstock – White was used to create a 6″ x 6″ card base. BasicGrey – Lauderdale Patterned paper was cut to the same size as the base card and adhered with double-sided tape. Tim Holtz Distress Inks – Villainous Potion was used to ink around all of the edges.

The image and sentiment were imported into Microsoft Word and printed out onto Copic Marker X-Press It Blending Card and 2 extra copies of the image were printed onto plain copy paper to be used for masking later. With my Cuttlebug, I die cut the image and the purple background layer using Quickutz Nesting Frame 7 dies. I fussy cut around the sentiment and then inked it very lightly with some purple that I had left on my blending brush. I ran it through my Xyron Create a Sticker and attached it to a scrap piece of Recollections – Purple Passions paper. Once again, I fussy cut around the sentiment. The larger frame and sentiment edges were inked around the edges with the same ink as the base card.

The image was coloured in with Copic Markers listed below. The top portion of the image was fussy cut and I applied some Washi Tape to the back of it to create a hinge and to mask the image. Using blender brushes and multiple Tim Holtz Distress Inks, I created the clouds in the sky with Lawn Fawn Cuts – Cloudy Stencil.

Once I completed the sky, I used second image that I had printed out onto the copy paper for 2 purposes. The first purpose was to use a stylus and tracing paper to transfer the image onto the patterned paper from BasicGrey – Lauderdale Paper Pad for paper piecing the gnome’s shirt. I loved the wild flower pattern and thought it was perfect for this hippie gnome. Once the pattern was transfered, I fussy cut it out. I used my Copic markers to create a small shadow on various parts of the shirt. With a Pigma Micron 03 black marker, I drew the lines in darker so that they would stand out on the shirt and then used a black marker to go around all of the pieces. Once completed, all of the pieces were put through a Xyron Create a Sticker to make it easier to stick to them to the coloured image and also so that they would lay flat. I then added the pieces to the main image.

The printed image was then fussy cut and the sand was added using a blender brush, Krafty Kolours – Sandy Shores for the base and a mixture of Copic markers listed below.

The remainder of the card was now ready to assemble. I added U-Line double-sided tape to the backs of the sentiment, large purple frame and image. They were all then popped up onto card.

Card Recipe:

Stamp and Sentiment:  Peace Gnome – KLM Digital Designs

Inks: HP Printer Grayscale, Tim Holtz Distress Inks – Salty Ocean, Wilted Violet, Aged Mahagony, Abandoned Coral, Kitsch Flamingo, Spiced Marmalade, Mustard Seed, Twisted Citron, Villainous Potion, Krafty Kolours – Sandy Shores

Paper: Copic Marker X-Press It Blending Card, AC Cardstock – White, BasicGrey – Lauderdale Paper Pad (6″ x 6″), Recollections – Purple Passions 8.5″ x 11″

Dies: Quickutz Nesting Frame 7

Stencils: Lawn Fawn Cuts – Cloudy Stencil

Miscellaneous: U-Line double-sided tape, Cuttlebug, Blending Brushes, Xyron Create a Sticker

Image coloured with Copic Markers:

Skin: E21, E11, E04, E00, E000

Beard: E29, E27, E25, E23, E21

Jeans and Hat: B26, B23, B21

Boots: E49, E35, E34, E31, E29, E27, E25, E23, E21

Shirt: Y17, Y11 (Lauderdale – Basic Grey Designer Paper)

Peace Sign: Y19, Y15, Y11

Sand: E37, E35, E34, E33, E31, E30 and Krafty Kolours – Sandy Shores for base

Glasses: N10, N9, N7, Colorless Blender

Hope you like it and have a great week!

You can find more cards to inspire you at KLM Designs, KLM Digital Design Team and KLM Digital Designs on the Facebook Fan page from the rest of our design team.

Do Not Stop!


Today I’m sharing an inspirational card using KLM Digital DesignSlow Ride Gnome from the new February release. This image also comes with 2 more sentiments, “Travel at your own pace” and “Life is a journey, not a race”.  It was hard for me to pick which sentiment to use as I loved them all. They are all so true to life.

Hammermill – Premium Colour 100 lb. cardstock was used to create a 5.5″ x 4.25″ card base. I had found Crafts Designer Paper – 02-3080678 at Dollarama and thought this paper was perfect for this card. It was cut to the same size as the base card and adhered with double-sided tape.

The image and sentiment were imported into Microsoft Word and printed out onto Copic Marker X-Press It Blending Card. With my Cuttlebug, I die cut the image using My Creative Time – Bunch of Fun Circle 3.25″ Dies. The larger circle was die cut using Recollections – Blue Ombre Cardstock and Lifestyle Crafts Cutting Dies – Nesting 3.5″ Circle. I trimmed down the sentiment to be 2.25″ x 1.5″. Using what was left on a blending brush that I used for blues, I lightly went over the paper to give it a light blue hue. Tim Holtz Distress Ink – Salvaged Patina was then inked around the 3 edges.

The image was coloured in with Copic Markers listed below. I printed out another copy of the image onto plain paper and fussy cut around the top portion. I applied some Washi Tape to the back of it to create a hinge and to mask the image. Using a blender brush, Tim Holtz Distress Ink – Salty Ocean and Lawn Fawn Cuts – Cloudy Stencil, I created the clouds in the sky.

For the assembly of the card, I added double-sided tape to the back of the sentiment and adhered it directly to the card. U-Line double-sided tape was added to the backs of the larger and smaller circle and both were popped up onto each other and the card. Lastly, to finish off everything, I added in some YNS Gumdrops – Tropical Paradise.

Card Recipe:

Stamp and Sentiment:  Slow Ride Gnome – KLM Digital Designs

Inks: HP Printer Grayscale, Tim Holtz Distress Ink – Salty Ocean, Tim Holtz Distress Ink – Salvaged Patina

Paper: Copic Marker X-Press It Blending Card, Hammermill – Premium Colour 100 lb., Crafts Designer Paper – 02-3080678, Recollections – Blue Ombre Cardstock

Dies: My Creative Time – Bunch of Fun Circle Dies, Lifestyle Crafts Cutting Dies – Nesting Circles

Stencils: Lawn Fawn Cuts – Cloudy Stencil

Miscellaneous: U-Line double-sided tape, Cuttlebug, Blending Brush, YNS Gumdrops – Tropical Paradise

Image coloured with Copic Markers:

Skin: E21, E11, E04, E00, E000

Beard: E08, YR18, YR16, YR12

Jeans: B26, B23, B21

Shoes: C9, C7, C5, C1

Shirt: B69, B63, C3, R46

Hat: BG09, BG05, BG02, BG01

Turtle: E47, E44, E43, E42, E40, BG99, BG96, BG93, BG90, G07, YG07, Y35, C1, C00, 100

Sand: E37, E35, E33, E31

Flower and Stem: G14, YG23, YG11, E33, Y38, Y35, Y32

Hope you like it and have a great week!

You can find more cards to inspire you at KLM Designs, KLM Digital Design Team and KLM Digital Designs on the Facebook Fan page from the rest of our design team.

Sending You Love!!


So happy to be colouring and creating again. I went away on a Southern Caribbean cruise at the beginning of the month and unfortunately, 3 days after being back ended up very sick with Covid. My husband was sick as well, even though we have both had all of our shots and 2 boosters. I’m so glad that we had our shots though, as I would never like to see what we would have gone through, had we not had the shots. We’re both slowly still recovering, but have a little more energy these days. We are still planning our next vacation though, as life must go on. LOL! On a good note, we did meet some really nice people on our voyage and one of them was even an international best selling author and his wife was wonderful too! Wow! How amazing is that? We were so blessed that he sent us two of his books, which I am really enjoying. I’m a little late in showcasing my cards for February, but hopefully, you’ll be seeing a lot more from me in the next little while!

*************

Today I’m sharing a special card using KLM Digital DesignValentine Gnome II from the new February release. I was a little late for Valentine’s Day, but I found this sentiment and thought it went perfect with this image.

Hammermill – Premium Colour 100 lb. cardstock was used to create a 5.5″ x 4.25″ card base. I taped off the bottom half at 4.25″ from the top of the card with some Post-It Note tape. Using a blending brush and Tim Holtz Distress Inks – Festive Berries, I inked the whole top of the card. I taped Kraftin’ Kimmie – Happy Hearts Stencil on top of the inked portion of the base card and with a blending brush and Tim Holtz Distress Inks – Candied Apple, stenciled in the hearts. With the stencil remaining in place, using a spatula and Nuvo Glimmer Paste – Moonstone, I added glitter to the hearts and set the card aside to for the paste to dry.

The main image was brought into Microsoft Word and sized to approximately 3.75″ x 3″. It was printed out onto Copic Marker X-Press It Blending Card and coloured in with Copic markers. This was then fussy cut leaving a thin border around it. I used a C1 Copic marker to go around the entire image so that it wasn’t pure white. The sentiment was stamped onto Hammermill – Premium Colour 100 lb. cardstock using my MISTI and Sending Love Cubbies Stamp by Art Impressions using Memento – Lady Bug ink. With the Cuttlebug, the sentiment was cut out using Poppystamps – Christmas Quotes dies. Penny Black – Graceful Stackers dies were also used to cut out a scrap piece of Recollections – Matte Gold Foil cardstock at the same time. Using the same blending brush, I brushed around the edges of the sentiment die cut to give it some extra colour. I cut a small piece of red cardstock to the size of 3/8″ x 4.25″ and ran it through a Xyron Create a Sticker and applied it to the card to break up the joining between the stenciled background and white background.

The rest of the card was now ready to assemble. I applied U-Line double-side tape to the backs of the coloured image, sentiment and gold frame. I added some liquid glue to the tape behind the image to make it stick better to the background with the paste and popped it up onto the card. The sentiment and frame were both popped up onto the card below the coloured image and to finish everything off, Doodlebug Design Inc. – Shape Sprinkles – Love This! hearts were added.

Card Recipe:

Stamp:  Valentine Gnome II – KLM Digital Designs

Sentiment: Sending Love Cubbies – Art Impressions

Inks: HP Printer Grayscale, Tim Holtz Distress Inks – Festive Berries, Tim Holtz Distress Inks – Candied Apple, Memento – Lady Bug

Paper: Copic Marker X-Press It Blending Card, Hammermill – Premium Colour 100 lb., Recollections – Matte Gold Foil cardstock

Stencil: Kraftin’ Kimmie – Happy Hearts Stencil

Dies: Poppystamps – Christmas Quotes, Penny Black – Graceful Stackers (51-658)

Paste: Nuvo Glimmer Paste – Moonstone

Miscellaneous: U-Line double-sided tape, Cuttlebug, Xyron Create a Sticker, Doodlebug Design Inc. – Shape Sprinkles – Love This!

Image coloured with Copic Markers:

Skin: E21, E11, E04, E00, E000

Beard: E08, YR18, YR16, YR12

Shirt: B37, B14, B12

Hat, Pants and Shoes: R59, R37, R35, R24

Stockings: B37, B14, B12, R37

Chocolates: R59, R37, R35, E49, E47, E37, E35, E34, E29, E27, E25, E23

Bowl: C2, C1, C0, C00, B000, Colorless Blender

Letter: C2, C1, C0, R35, Colorless Blender

Hope you like it and have a great week!

You can find more cards to inspire you at KLM Designs, KLM Digital Design Team and KLM Digital Designs on the Facebook Fan page from the rest of our design team.

Fido – Love You


It’s Wednesday, and today I’m sharing a card I made using KLM Digital Design –  Fido – Love You from the new January 2023 release. Our pets always give us unconditional love and they make the best companions to talk to, play with and just cuddle with with when we need a big hug!

To make my card this week, I started with a 7.25″ x 3.5″ card base using Hammermill – Premium Colour 100 lb. cardstock. Recollections – Burgundy was cut to the size of 7.25″ x 3.5″ and adhered directly to the card. Using my Cuttlebug and My Creative Time – Tall Paw Frame Dies, I die cut Martha Stewart Crafts – Enchanted Woodland paper and the little bone using scraps of brown and black cardstock. Tim Holtz Distress Inks – Festive Berries and a blending brush were used to ink around the edges of the large die cut. This was popped up onto the base using U-Line Double-Sided tape.

The image and sentiment were imported into Microsoft Word and printed out onto Copic Marker X-Press It Blending Card. The paper was cut to be 5-5/8″ x 2-5/8″ and everything was coloured in. U-Line Double-Sided tape was added to this and it was popped up onto the die cut. I ran the bone die cuts through my Xyron Create a Sticker and attached them to the card to finish it off.

Card Recipe:

Stamp and Sentiment:  Fido – Love You – KLM Digital Designs

Inks: HP Printer Grayscale, Tim Holtz Distress Inks – Festive Berries

Paper: Copic Marker X-Press It Blending Card, Hammermill – Premium Colour 100 lb., Martha Stewart Crafts – Enchanted Woodland 12″ x 12″, Recollections – Burgundy

Die Cuts: My Creative Time – Tall Paw Frame Dies

Miscellaneous: 2 sided tape, Cuttlebug, Xyron Create a Sticker, U-Line Double-Sided tape

Image coloured with Copic Markers:

Letters: R46, R14, R08

Dog: E55, E53, E51, E50, E49, E47, E29, E27, E25, E23, R30, R29, R02, R00

Sky and Clouds: BG70, C1, B02, B01, B00, B000, Colorless Blender

Grass: YG23, YG09, YG05, YG03, YG01

Hope you like it and have a great week!

You can find more cards to inspire you at KLM Designs, KLM Digital Design Team and KLM Digital Designs on the Facebook Fan page from the rest of our design team.

Make Lemonade!


Today I’m sharing an inspirational card using KLM Digital DesignLemon Gnome from the new January release. This image also comes with 2 more sentiments, “I could just Squeeze you!” and “Squeeze the day”.  I’ve always loved lemons and they are good for so many different things, baking, tea and they are high in Vitamin C, just to name a few.

Hammermill – Premium Colour 100 lb. cardstock was used to create a 5.5″ x 4.25″ card base. I had found Crafts Designer Paper – 02-3093268 at Dollarama and thought this paper was perfect for this card. I chose 2 patterns from this paper pack and cut the darker pattern to the size of 5.25″ x 2.25″ and the other piece to the size of 5.25″ x 2.75″. Two rectangles were cut out of Recollections – Black cardstock to the size of 5.5″ x 2.75″ and 5.5″ x 3″. With yellow cardstock and my Cuttlebug, I die cut the large oval using Waffle Flower – Additional Oval dies and the larger circle with Lifestyle Crafts Cutting Dies – Nesting Circles. All of the edges for the patterned pieces and the yellow die cuts were inked with Tim Holtz Distress Ink – Mustard Seed.

The image and sentiment were imported into Microsoft Word and printed out onto Copic Marker X-Press It Blending Card. With my Cuttlebug, I die cut the large oval using Waffle Flower – Additional Oval dies and the smaller circle with My Creative Time – Bunch of Fun Circle Dies. Tim Holtz Distress Ink – Squeezed Lemonade was applied to the outer edges of the smaller circle. The image was coloured in with Copic markers.

For the assembly of the card, I applied the 2 patterned pieces together with the black cardstock using double sided tape. I placed the colourful piece down first onto the base card and then the second piece was applied over top of that one. Both were adhered with double-sided tape. The image and the sentiment were both popped up onto the larger oval and larger circle using U-Line Double-Sided tape. I applied U-Line Double-Sided tape to the backs of these combined pieces and then popped them both up onto the card. Finally, I added in some YNS Gumdrops – Tropical Paradise around the sentiment to complete the card.

Card Recipe:

Stamp and Sentiment:  Lemon Gnome – KLM Digital Designs

Inks: HP Printer Grayscale, Tim Holtz Distress Ink – Mustard Seed, Tim Holtz Distress Ink – Squeezed Lemonade

Paper: Copic Marker X-Press It Blending Card, Hammermill – Premium Colour 100 lb., Recollections – Black cardstock, Crafts Designer Paper – 02-3093268 (6″ x 6″), Yellow Cardstock

Dies: My Creative Time – Bunch of Fun Circle Dies, Waffle Flower – Additional Oval dies, Lifestyle Crafts Cutting Dies – Nesting Circles

Miscellaneous: U-Line double-sided tape, Cuttlebug, YNS Gumdrops – Tropical Paradise

Image coloured with Copic Markers:

Skin: E21, E11, E04, E00, E000

Beard: E08, YR18, YR16, YR12

Jeans: B26, B23, B21

Shoes: EEE, E31, E30. E29, E27, E25, E23

Shirt: BG72, BG54, BG32, BG11

Hat: R46, R14, R08

Lemons, Straw and Lemonade: Y17, Y15, Y13, Y11, Y000

Basket: YR24, YR23, YR21, Y32

Sky: B04, B02, B01, B00

Clouds: B60, C1, Colorless Blender

Grass: G14, YG23, YG13, YG11

Hope you like it and have a great week!

You can find more cards to inspire you at KLM Designs, KLM Digital Design Team and KLM Digital Designs on the Facebook Fan page from the rest of our design team.

3 Stooges!


It’s Wednesday and today I’m sharing a birthday card using KLM Digital DesignThree Stooges Gnome from the new January release. This image also comes with 2 more sentiments, “Just relax and except the crazy” and “Make time for yourself”. I grew up watching “The 3 Stooges” and if these gnomes are anything like they were, you never know what’s going to happen. LOL!

Hammermill – Premium Colour 100 lb. cardstock was used to create a 5.5″ x 5.5″ card base. I cut Echo Park – It’s Your Birthday (6″x6″ Double-Sided) designer paper to be the same size and adhered it to the base using double-sided tape. The image and sentiment were imported into Microsoft Word and printed out onto Copic Marker X-Press It Blending Card. The printed image and Echo Park – It’s Your Birthday designer paper were both die cut using my Cuttlebug and Whimsy – Wavy Stitched Squares Die Set. I inked around the designer paper with Tim Holtz Distress Inks – Black Soot and popped it onto the base using U-Line double-sided tape. Tim Holtz Distress Ink – Spiced Marmalade was applied around all of the outer edges of the card.  The main image was coloured in with the Copic markers listed below and then popped up onto the centre of the designer paper with U-Line double sided tape. The sentiments were fussy cut and Tim Holtz Distress Ink – Spiced Marmalade was applied around the edges. I wanted the larger sentiment to stand out a little more, so I first ran it through my Xyron Create a Sticker and then adhered it to a scrap piece of Recollections – Black cardstock. I fussy cut around it again and then applied U-Line double-sided tape to both sentiments with double layers on portions of them and popped them up onto the card. Lastly, I used my Quickie Glue pen to trace around some of the spirals and dots on both designer papers and applied Martha Stewart Crafts Glitter – Crystal Fine to give it some sparkle.

Card Recipe:

Stamp and Sentiment:  Three Stooges Gnome – KLM Digital Designs

Inks: HP Printer Grayscale, Tim Holtz Distress Inks – Black Soot, Tim Holtz Distress Ink – Spiced Marmalade

Paper: Copic Marker X-Press It Blending Card, Hammermill – Premium Colour 100 lb., Echo Park – It’s Your Birthday (6″x6″ Double-Sided), Recollections – Black cardstock

Dies: Whimsy – Wavy Stitched Squares Die Set (WSD371)

Miscellaneous: U-Line double-sided tape, Cuttlebug, Xyron Create a Sticker, Martha Stewart Crafts Glitter – Crystal Fine

Image coloured with Copic Markers:

Skin: E21, E11, E04, E00, E000

Beards: E08, YR18, YR16, YR12

Jeans: B26, B23, B21

Shoes: C9, C7, C5

Shirts: BG72, BG54, BG32, BG11, V17, V15, V12, E89, E87, E84, E81

Belt: W9, W7, W5, E15, YR27, YR23, Y08

Shoes: C9, C7, C5, C3

Hats: R46, R14, R08

Rose: E15, Y19, Y17, Y08

Dandelion: Y15, G99, YG67, YG17, G21

Butterfly: Y15, B99, B66, B52, B14, UNI Posca Pen – Light Blue

Sky: B02, B01, B00, B000

Grass: G14, YG23, YG11

Hope you like it and have a great week!

You can find more cards to inspire you at KLM Designs, KLM Digital Design Team and KLM Digital Designs on the Facebook Fan page from the rest of our design team.

Penguin Joy


Sharing another Christmas card that I made using Whimsy StampsPenguin Joy – C1140. I love colouring penguins and couldn’t resist this adorable image when I saw it! LOL!

Hammermill – Premium Colour 100 lb. cardstock was used to create a 5.5″ x 4.25″ card base. I cut Recollections – Fireside paper to be the same size and adhered it to the base using double-sided tape. I applied Crafts – Sparkling Stickers – 02-3068629 – Red to a piece of Hammermill – Premium Colour 100 lb. cardstock. Using my Cuttlebug and MFT – Cross Stitch Rectangle dies, I die cut a large rectangle for the Sparkle paper combined piece and a smaller rectangle from Copic Marker X-Press It Blending Card cardstock. Using my MISTI and Memento – Tuxedo Black ink, I stamped the image onto the smaller rectangle. This was coloured in with Copic markers. I applied the snow flakes in the sky using a UNIPosca PC-3M White marker.  Stickles – Diamond was applied to create the snow on the ground. U-Line double-sided tape was applied to both of the die cuts and they were popped up onto the centre of the card.

Card Recipe:

Stamp and Sentiment:  Penguin Joy – C1140 – Whimsy Stamps

Inks: Memento – Tuxedo Black

Paper: Copic Marker X-Press It Blending Card, Hammermill – Premium Colour 100 lb., Recollections – Fireside 6″ x 6″ (15.2 cm x 15.2 cm), Crafts – Sparkling Stickers – 02-3068629 – Red

Dies: MFT – Cross Stitch Rectangle

Miscellaneous: U-Line double-sided tape, Stickles – Diamond, UNIPosca PC-3M White marker, MISTI – Most Incredible Stamping Tool

Image coloured with Copic Markers:

Penguins: W9, W7, W5, W0, E41, E40, E15, YR14, Y17, Y11

Signs: YR31, YR30

Greens: YG63, YG07, G19, G17

Reds: R59, R37, R35, R21

Holly: BG99, YG67, YG63, YG61, G21

Sky: B02, B01, B00, B000

Snow: BV20, B000

Hope you like it and have a great week!