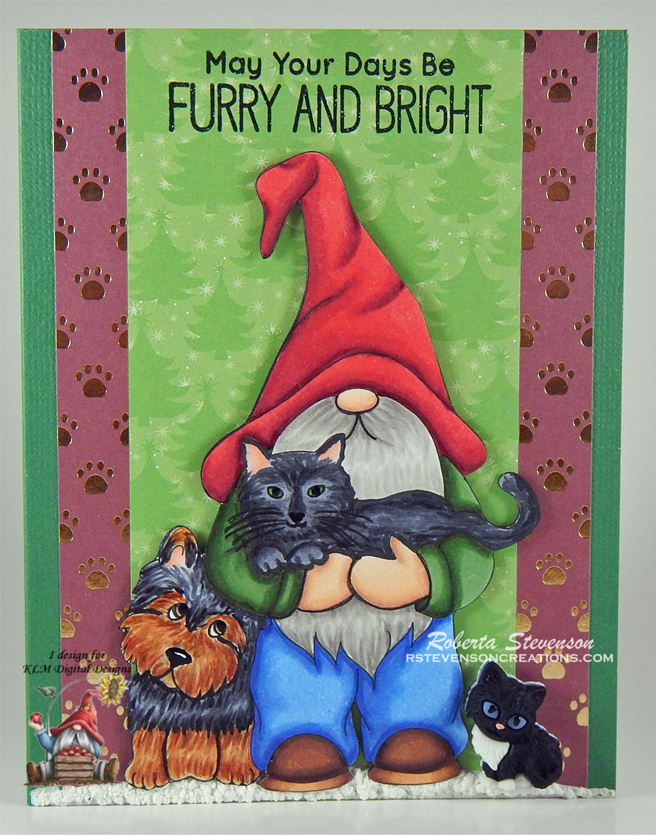
Hi Everyone! I’m participating in the 2020 Cat Lovers Blog Hop (#2020CatLoversHop) this year.
![]()
This is my third year joining the fun event. For six years, Her Peaceful Garden has been sponsoring The Cat Lover’s Blog Hop and it is a lot of fun.
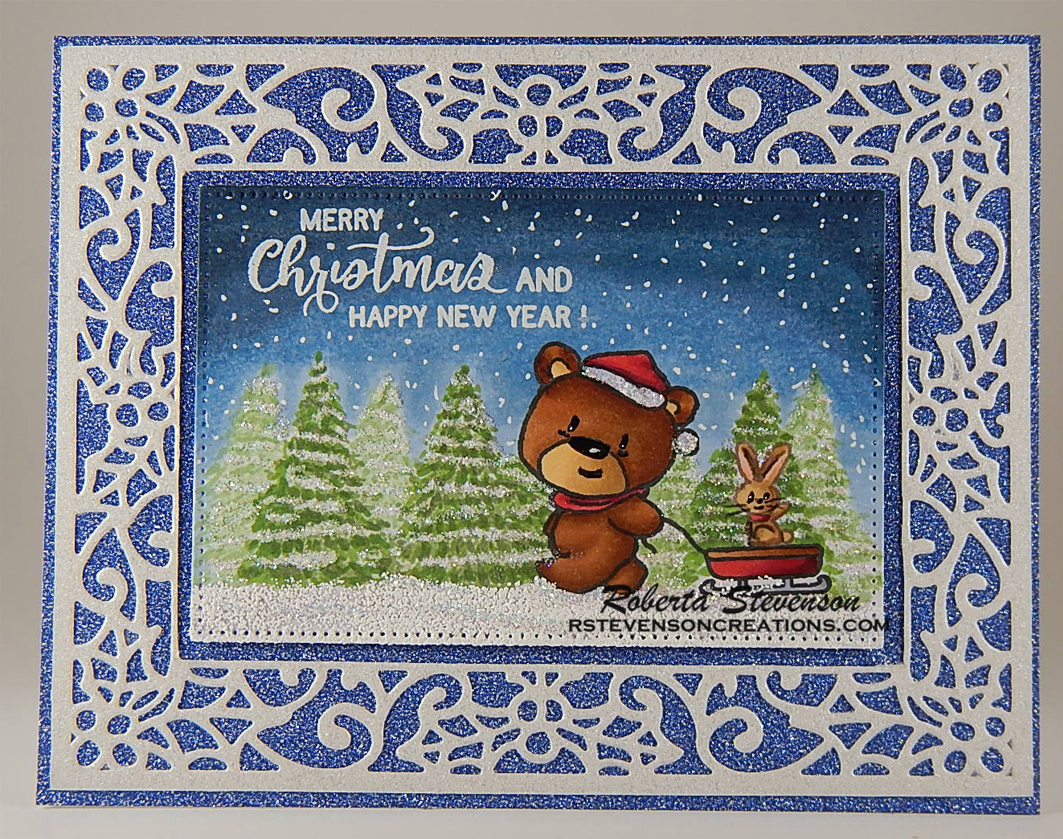
Here is a third Christmas card that I have created for the hop using Christmas Kitten – GSD617 (Gerda Steiner Designs) for the main image and sentiment. These little kittens are getting into all kinds of trouble. It reminds me so much of when I had my little fur babies. LOL!
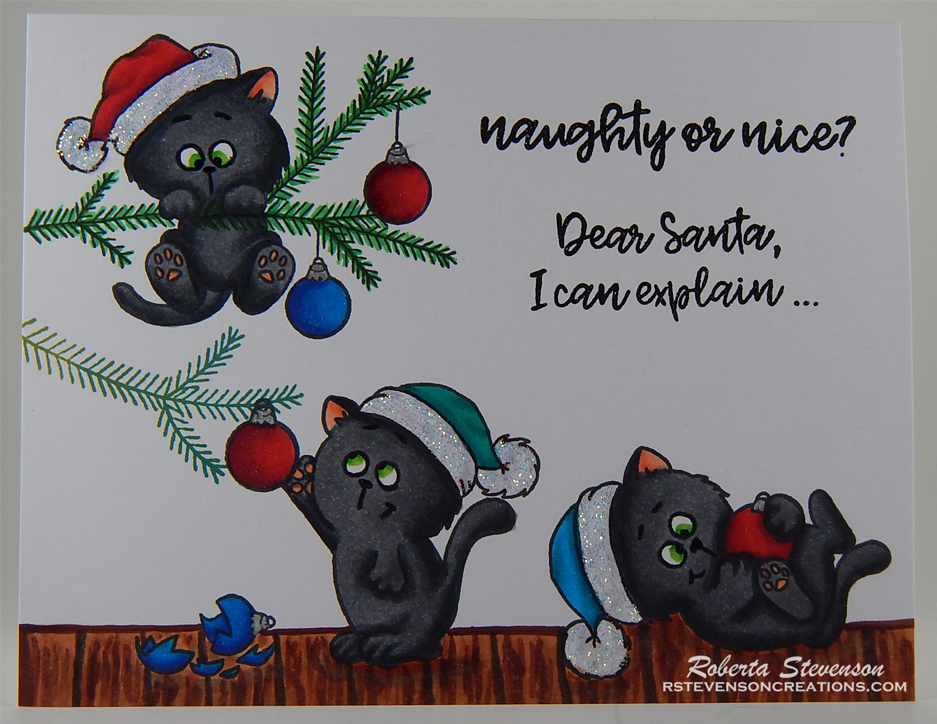
To make my card, I started with a base of 5.5″ x 4.25″. I cut some Copic Marker X-Press It Blending Card the same size and stamped on the fun images. Copic markers were used to colour the images in. Once this was done, I stamped the sentiments using Versa Fine – Onyx Black and applied Ranger – Clear Super Fine Detail embossing powder which I heat set with Marvy Uchida – Embossing Heat Tool. I adhered the completed image to the base using double-sided tape. To finish off the card, I used some Clear – Wink of Stella to add a little bit of sparkle to all of the baubles and Stickles – Diamond for the hats.
THANK YOU so much to Her Peaceful Garden for hosting this event again this year and also a big THANK YOU to Gerda Steiner Designs for being a sponsor this year as well.
Card Recipe:
Stamp and Sentiment: Christmas Kitten – GSD617 (Gerda Steiner Designs)
Inks: Memento – Tuxedo Black, Versa Fine – Onyx Black, Tim Holtz Distress Inks – Peeled Paint, Tim Holtz Distress Ink – Pine Needles
Paper: Copic Marker X-Press It Blending Card
Embossing Powder: Ranger – Clear Super Fine Detail embossing powder
Tools: MISTI – Most Incredible Stamping Tool, Diamond Stickles, Marvy Uchida – Embossing Heat Tool
Images coloured with Copic Markers:
Kittens: N8, N6, N4, R30, R22, R02, YG09, YG07, YG03, Sakura Glaze – Black for nose and eyes
Hats: BG49, BG18, BG09, BG07, BG05, BG02, R59, R39, R37, R35, C01, C0, Stickles – Diamond
Bobbles: B18, B06, B05, B04, R59, R39, R37, R35, Pental Sunburst Metalic Med Gel Pen, Clear – Wink of Stella
Pine Needles: G09, G07, G05, Tim Holtz Distress Inks – Peeled Paint, Tim Holtz Distress Ink – Pine Needles
Floor and Shadows: E49, E18, E15, E13, E11, C3
Hope you like it and have a fantastic week!