Tag Archive | Marvy Uchida – Embossing Heat Tool

Let Your Voice Sing!!


Today, I’m sharing a Christmas card that I made using Dreamerland Crafts stamps called Let Your Voice Sing – D15205 for the main image and Sentiment – Holiday Sentiments 003 – DS163003. Growing up we always had so much fun gathering with friends and family and singing Christmas carols.

To create this card I began by making a base of 5.5″ x 4.25″ using Hammermill – Premium Colour 100 lb. cardstock. Recollections – Matte Gold Foil cardstock was cut to be the same size as the base and then adhered to the card using double-sided tape. Using my Cuttlebug and Hammermill – Premium Colour 100 lb. cardstock, I embossed the music design with a Cuttlebug – ProvoCraft – Allegro embossing folder. I cut it down to the size of 5.25″ x 4″ and adhered it directly to the base card.

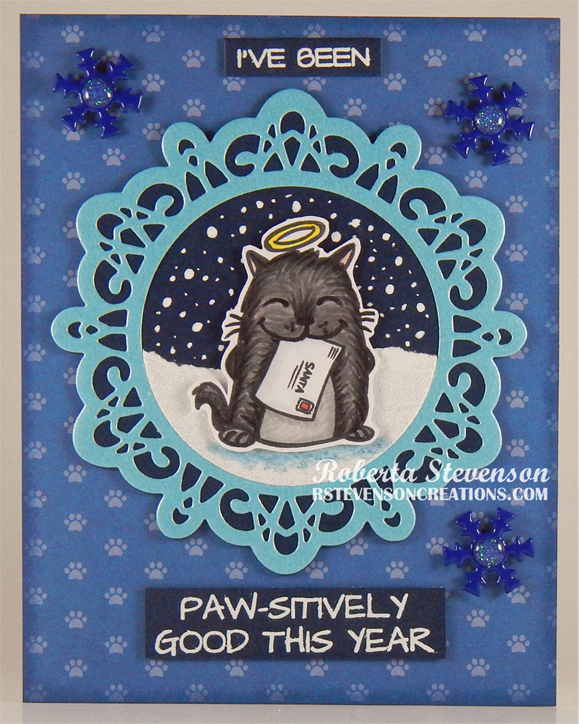
Utilizing the Cuttlebug again and Copic Marker X-Press It Blending Card cardstock, the die-cut for the image was cut out with Spellbinders – Elegant Ovals. With a MISTI, the main image was stamped onto the die cut. It was coloured in and then a Sharpie – Gold Medium Point – Water Based Paint pen was used to colour in the fancy border surrounding the image. The sentiment was stamped with my MISTI and VersaMark ink. Ranger Super Fine Gold Embossing powder was applied to the ink and then heat embossed using a Marvy Uchida – Embossing Heat Tool. I fussy cut around the sentiment. U-Line double-sided tape was applied to the sentiment and coloured image and they were both popped up onto the card. To finish the card off, I applied Dress It Up – Glitter Holly buttons with liquid glue from their Holiday Collection.

Card Recipe:

Stamps: Let Your Voice Sing – D15205 – Dreamerland Crafts

Sentiment: Sentiments – Holiday Sentiments 003 – DS163003 – Dreamerland Crafts

Inks: Memento – Tuxedo Black, VersaMark

Paper: Copic Marker X-Press It Blending Card, Hammermill – Premium Colour 100 lb., Recollections – Matte Gold Foil cardstock

Die Cuts: Spellbinders – Elegant Ovals (S4-425)

Embossing Folder: Cuttlebug – ProvoCraft – Allegro

Embossing Powder: Ranger Super Fine Gold

Tools and Miscellaneous: MISTI – Most Incredible Stamping Tool, Marvy Uchida – Embossing Heat Tool, U-Line double-sided tape, Cuttlebug, Sharpie – Gold Medium Point – Water Based Paint, Dress It Up – Glitter Holly

Image coloured with Copic Markers:

Skin: E21, E11, E04, E00, E000, R30, R24, R22, R20

Hair: E15, Y38, Y21, YR23

Robe: B18, B16, B14, B12

Wings: BV20, C1, BG0000, B0000, BV0000, YG0000, V0000, Colorless Blender

Music Book: YR30, Y000

Shadow: C1, C0, C00, B60, Colorless Blender

Hope you like it and have a great week!

You can find more cards to inspire you at Dreamerland Crafts and Pointer Scrapbooking on the Facebook Fan pages from the rest of our design team.

Udderly Fabulous Christmas!!!


It’s Wednesday, and this week, I made a CAS Christmas card using High Hopes Rubber Stamps Decorating With Charlie – TT060 for the main image and Udderly Fabulous – HDG007 for the sentiment. These little farm friends have started to decorate their tree. Have you started to decorate yours?

To make my card this week, I began with a card base of 4.25″ x 5.5″ Hammermill – Premium Colour 100 lb. cardstock. I cut Copic Marker X-Press It Blending Card cardstock to be the same size as the base card and then with my MISTI and Memento – Tuxedo Black ink, I stamped the image onto it. I coloured in the image and then placed it back into my MISTI to stamp the sentiment onto it. I applied VersaMark ink and then embossed it with Ranger Embossing Powder White – Extra Fine Detail. I heated this with my Marvy Uchida – Embossing Heat Tool. Snow was added to the sky using a UNIPosca PC-3M White marker. For the snow at the bottom of the card, Brutus Monroe – Snow Paste was applied with a small spatula and DecoArt Glamour Dust was sprinkled over top while it was still wet to give it even more sparkle. Once the snow was dry, I applied double-sided tape and liquid glue to adhere the image directly to the base card.

Card Recipe:

Stamp: Decorating With Charlie – TT060 (High Hopes Rubber Stamps)

Sentiment: Udderly Fabulous – HDG007 (High Hopes Rubber Stamps)

Inks: Memento – Tuxedo Black, VersaMark

Paper: Copic Marker X-Press It Blending Card, Hammermill – Premium Colour 100 lb.

Embossing Powder: Ranger Embossing Powder White – Extra Fine Detail

Tools: MISTI – Most Incredible Stamping Tool, Marvy Uchida – Embossing Heat Tool, DecoArt Glamour Dust, Brutus Monroe – Snow Paste, UNIPosca PC-3M White marker

Image coloured with Copic Markers:

Cow: C8, C6, C4, C3, C1, C00, B60, R30, R20, R00, R000, E95, E93, E53, E51, E50

Mouse: R30, R20, R02, R01, W5, W3, W1, W0, W00

Sky: B05, B04, B02, B01, B00

Tree and Pines: E49, E27, E23, G29

Bauble, Scarf and Collar: R59, R37, R35

Holly and Bell: G43, G29, YG63, YR24, Y35, Y08, E15

Grass: YG67, YG63

Hope you like it and have a fantastic week!

You can find lots of inspiration from the Design Team Divas at the High Hopes blog, and the High Hopes Rubber Stamps Facebook Fan page plus you can also follow us on
Instagram, Twitter and Pinterest.

Holiday Wishes!!


Today, I’m sharing a Christmas card that I made using Dreamerland Crafts stamps called Holiday Wishes – D18031 May all of your holiday wishes come true this season for you and your loved ones!

To create this card I began by making a base of 5.5″ x 4.25″ using Hammermill – Premium Colour 100 lb. cardstock. Recollections – Stardust Christmas paper was cut to be the same size as the base and then adhered to the card using double-sided tape. Lawn Fawn – Sparkle Cardstock in “Pixie Dust” paper was cut to 5.5″ x 1.25″ x 5.5″ x .75″. With my hands I tore along the top of both pieces to give the snow some texture. I applied double-sided tape to the larger piece and adhered it directly to the card. U-Line double-sided tape was applied to the smaller piece and it was popped up over top of the larger piece.

The base card was placed into my MISTI and the sentiment from Kraftin’ Kimmie Stamps – The Magic of Christmas was stamped onto it using VersaMark ink. Recollections Detail Embossing Powder – Silver was applied over top of the ink and then heat embossed using a Marvy Uchida – Embossing Heat Tool. I removed this from the MISTI and stamped the main image with Memento – Tuxedo Black ink onto Copic Marker X-Press It Blending Card cardstock. The image was coloured in and then fussy cut. With a black marker, I inked around all of the edges and then added U-Line Double-sided tape to the back of the image and popped it up onto the card and snow. Cosmic Shimmer Fluffy Stuff was placed under the couple’s boots and then heat embossed using a Marvy Uchida – Embossing Heat Tool to puff it up. Stickles – Diamond was then added over top of the fluffy snow to create more sparkle. Finally, to complete the card, Stickles – Crystal was applied to the centre of the stars in the sky.

Card Recipe:

Stamps: Holiday Wishes – D18031 – Dreamerland Crafts

Sentiment: Kraftin’ Kimmie Stamps – The Magic of Christmas

Inks: Memento – Tuxedo Black, VersaMark

Paper: Copic Marker X-Press It Blending Card, Hammermill – Premium Colour 100 lb., Lawn Fawn – Sparkle Cardstock in “Pixie Dust” (8.5″ x 11″), Recollections – Stardust Christmas (12″ x 12″)

Embossing Powder: Recollections Detail Embossing Powder – Silver

Tools and Miscellaneous: MISTI – Most Incredible Stamping Tool, Marvy Uchida – Embossing Heat Tool, U-Line double-sided tape, Cuttlebug, Cosmic Shimmer Fluffy Stuff, Stickles – Diamond, Stickles – Crystal

Image coloured with Copic Markers:

Skin: E21, E11, E04, E00, E000, R30, R22, R20

Hair: E47, E44, E43, E15, Y38, Y15, YR21

Jeans: B26, B23, B21

Girl’s Hat and Scarf and Boy’s Sweater: G99, YG67, YG17

Girl’s Coat and Boy’s Hat and Scarf: R59, R37, R35

Boy’s Jacket and Boots: E29, E27, E25, E23, E21

Hope you like it and have a great week!

You can find more cards to inspire you at Dreamerland Crafts and Pointer Scrapbooking on the Facebook Fan pages from the rest of our design team.

Carolers – Joy To The World!!


It’s Wednesday, and this week, I made a Christmas card using High Hopes Rubber Stamps Carolers – TT011 for the main image and Joy to the World – GLL012, for the sentiment. Seeing these carolers reminds me of my younger days when we would go visiting and sing Christmas carols at our cousins and our parent’s friends’ houses.

To make my card this week, I began with a card base from Recollections – Winter 4.25″ x 5.5 (Assorted Box of Cards). Using my Cuttlebug and paper from Crafter’s Companion – Luxury Cardstock – Ice Blue Pack, I die cut the snowflake border with Lawn Fawn – Snowflake Border die cuts. Using the same paper, I cut a thin strip .25″ x 5.5″. With Lawn Fawn – Sparkle Cardstock in “Pixie Dust”, I cut a strip 1″ x 5.5″. Using double-sided tape, I attached the 1″ strip directly onto the base card. I ran the other strip through my Xyron Create a Sticker and attached it to the card next to the 1″ strip. I added liquid glue to the backs of each of the snowflakes for the snowflake border and adhered them over top of the larger strip. Tim Holtz Distress Inks – Tumbled Glass and a finger dauber were used to ink around all of the edges of the card.

With my Cuttlebug and dies from My Favourite Things – Die-namics – Elegant Rectangle Stax, I die cut a large rectangle out of Copic Marker X-Press It Blending Card cardstock. The image was stamped onto the die cut using my MISTI – Most Incredible Stamping Tool and Memento – Tuxedo Black ink. I coloured in the image and then added the snow in the sky using a Gelly Roll Sakura #10 Pen. Cosmic Shimmer Fluffy Stuff was added to the trim of the girl’s jacket and then heat set with a Marvy Uchida – Embossing Heat Tool to puff it up. Crystal – Stickles was added on top of this and also along her dress hem. DecoArt Snow-Tex sprinkled with DecoArt Glamour Dust and a spatula were used to create the snow on the bottom of the image. Crystal – Stickles was added to add some extra sparkle and give some highlights. Wink of Stella – Clear was added on top of the music books. The sentiment was stamped onto Copic Marker X-Press It Blending Card using my MISTI and Memento – Northern Pine ink. It was then die cut using my Cuttlebug and Poppystamps – Christmas Quotes dies. Tim Holtz Distress Ink – Rustic Wilderness was used to ink around the edges. I added U-Line double-sided tape to the back of the sentiment and finished image and popped them both up onto the card. Lastly, I added Ranger – Snowflake Glitter with liquid glue to finish it off.

Card Recipe:

Stamps: Carolers – TT011 (High Hopes Rubber Stamps)

Sentiment: Joy to the World – GLL012 (High Hopes Rubber Stamps)

Inks: Memento – Tuxedo Black, Tim Holtz Distress Ink – Rustic Wilderness, Memento – Northern Pine, Tim Holtz Distress Inks – Tumbled Glass

Paper: Copic Marker X-Press It Blending Card, Recollections – Winter 4.25″ x 5.5 (Assorted Box of Cards), Crafter’s Companion – Luxury Cardstock – Ice Blue Pack, Lawn Fawn – Sparkle Cardstock in “Pixie Dust” (8.5″ x 11″)

Die Cuts: My Favourite Things – Die-namics – Elegant Rectangle Stax – MFT-1268, Lawn Fawn – Snowflake Border (#LF2431), Poppystamps – Christmas Quotes

Snow: DecoArt Snow-Tex, DecoArt Glamour Dust, Crystal – Stickles

Tools: MISTI – Most Incredible Stamping Tool, U-Line double-sided tape, Cosmic Shimmer Fluffy Stuff, Crystal – Stickles, DecoArt Glamour Dust, Cuttlebug, Marvy Uchida – Embossing Heat Tool, Xyron Create a Sticker, Ranger – Snowflake Glitter

Image coloured with Copic Markers:

Skin: E21, E11, E04, E00, E000, R30, R24, R21 (Eyes: Gelly Roll Sakura #10 Pen, Sakura Glaze – Black)

Hair: E15, Y38, Y21, YR23, E47, E44, E43, E42

Boy Mitts, Scarf and EarMuffs: BG09, BG05, BG02, BG01

Boy Jacket: R59, R37, R35

Boy Jeans: B26, B23, B21

Boy Boots: E27, E25, E23, E21,

Girl’s Coat and Boots: BG72, BG57, BG32, BG11, Cosmic Shimmer Fluffy Stuff, Crystal – Stickles

Girl Dress and Leggings: YG67, YG63, YG61, G19, G16, G14, Crystal – Stickles, Gelly Roll Sakura #10 Pen

Girl EarMuffs and Mittens: YG67, YG63, YG61

Song Books: YR23, Y15, Y11, Y00, Wink of Stella – Clear

Bird: R46, R14, R08

Cat: T9, T7, T5, T4, R01

Dog: E37, E35, E33, R24

Sky: B99, B97, B95, B93

Hope you like it and have a fantastic week!

You can find lots of inspiration from the Design Team Divas at the High Hopes blog, and the High Hopes Rubber Stamps Facebook Fan page plus you can also follow us on
Instagram, Twitter and Pinterest.

North Pole Greetings!!


It’s Wednesday, and this week, I made a Christmas card using High Hopes Rubber Stamps North Pole Penguin – TDG008 for the main image and Seasons Greetings – F300A, for the sentiment. Christmas is getting nearer and this little penguin is helping Santa deliver some of your presents this year!

To make my card this week, I began with a card base from Crate Paper – Boxed Cards – Mittens & Mistletoe (5.5″ x 4.25″). Tim Holtz Distress Ink – Rustic Wilderness and a finger dauber were used to ink around all of the edges. With my Cuttlebug and dies from My Favourite Things – Die-namics – Elegant Rectangle Stax, I die cut a large rectangle out of Forever In Time – Texture Rouge paper and a smaller one out of Copic Marker X-Press It Blending Card cardstock. U-Line double-sided tape was added to the large rectangle and it was popped up onto the base card.

The image was stamped onto the smaller rectangle using my MISTI – Most Incredible Stamping Tool and Memento – Tuxedo Black ink. I coloured in the image and then with a paint brush and a small mixture of DecoArt Glamour Dust, FolkArt – Extreme Glitter Acrylic Paint and Delta Ceramcoat – White, I added in the first layer of snow. A little more DecoArt Glamour Dust was added to it while it was still wet. This dried pretty quickly and Cosmic Shimmer Fluffy Stuff and more glitter were added to give the snow some texture. I also added this to the hat, pompom and sign. Lastly, I added some Crystal – Stickles because you can never have enough glitter. LOL! Wink of Stella – Clear was added to the bows, side of the ball on the pole and down the entire pole. Pental Sunburst Metalic Med Gel Pen – Gold and Wink of Stella – Clear were added to the pink present dots. Once everything was dry, I stamped the sentiment using my MISTI and VersaMark ink. Ranger Embossing Powder White – Extra Fine Detail was applied over top of the ink and then heat embossed with Marvy Uchida – Embossing Heat Tool. The snow in the sky was created using a Gelly Roll Sakura #10 Pen. I applied U-Line double-sided tape to the back of the image and popped it up on top of the larger rectangle. To complete my card, I added in 4 YNS – Holly Jolly Sparkly Gumdrops in the corners.

Card Recipe:

Stamps: North Pole Penguin – TDG008 (High Hopes Rubber Stamps)

Sentiment: Seasons Greetings – F300A (High Hopes Rubber Stamps)

Inks: Memento – Tuxedo Black, Tim Holtz Distress Ink – Rustic Wilderness, VersaMark

Paper: Copic Marker X-Press It Blending Card, Crate Paper – Boxed Cards – Mittens & Mistletoe (5.5″ x 4.25″), Forever In Time – Texture Rouge

Die Cuts: My Favourite Things – Die-namics – Elegant Rectangle Stax – MFT-1268

Embossing Powder: Ranger Embossing Powder White – Extra Fine Detail

Tools: MISTI – Most Incredible Stamping Tool, U-Line double-sided tape, Cosmic Shimmer Fluffy Stuff, Crystal – Stickles, Pental Sunburst Metalic Med Gel Pen – Gold, DecoArt Glamour Dust, FolkArt – Extreme Glitter Acrylic Paint, Delta Ceramcoat – White, Cuttlebug, Wink of Stella – Clear, Marvy Uchida – Embossing Heat Tool, YNS – Holly Jolly Sparkly Gumdrops

Image coloured with Copic Markers:

Penguin: W9, W7, W5, W3, W00, E15, YR14, Y17, Y11, RV00, EE42, E41, E40, Colorless Blender (Eyes: Gelly Roll Sakura #10 Pen, Sakura Glaze – Black)

Hat, Scarf, Sign and Ribbon: R59, R37, R35

Presents: BG72, BG57, BG32, BG11, YR24, YR23, YR21, YR08, YG07, YG05, YG03, RV14, RV13, RV10

Pole: R46, R14, R08, C1, C00, Colorless Blender

Sky: B99, B97, B95, B93

Hope you like it and have a fantastic week!

You can find lots of inspiration from the Design Team Divas at the High Hopes blog, and the High Hopes Rubber Stamps Facebook Fan page plus you can also follow us on
Instagram, Twitter and Pinterest.

Meowy Christmas!


It’s the last day of the 2022 Cat Lovers Hop and today I’m sharing a Christmas card I made using Gerda Steiner Designs –  Deck The Halls – GSD438. I thought this image was adorable! Have fun hopping everyone!

I created a 5.5″ x 4.25″ card base using Hammermill – Premium Colour 100 lb. cardstock. I cut the background to be the same size using Wild Rose Studio – Winter Bauble Paper and adhered it directly to the base using double-sided tape. Using Tim Holtz Distress Inks – Tumbled Glass and a finger dauber, I inked around all of the edges of the card. With my Cuttlebug and Hero Arts – Infinity Dies – Ornaments, I die cut a large ornament from Copic Marker X-Press It Blending Card cardstock and the ribbon and topper from a scrap piece of gold cardstock.

Using my MISTI and Memento – Tuxedo Black ink, I stamped the image onto the Copic Marker X-Press It Blending Card cardstock and with Versafine – Majestic Blue, I stamped the sentiment onto the base card. I embossed the sentiment with Ranger – Clear Super Fine Detail embossing powder and then heat set it with a Marvy Uchida – Embossing Heat Tool. The image was coloured in with Copic markers and with a Gelly Roll Sakura #8 Pen designs were added to the ornaments and light bulbs. I tried to create the ornament as close to the paper as I could. Once this was completed, using liquid glue, I attached the top piece and the bow to the ornament. U-Line double-sided tape was added to the back of ornament die cut and it was popped up onto the background. With a Gelly Roll Sakura #8 Pen, I added in some string for the bauble.

Card Recipe:

Stamp and Sentiment:  Deck The Halls – GSD438 – Gerda Steiner Designs

Inks: Memento – Tuxedo Black, Versafine – Majestic Blue, Tim Holtz Distress Inks – Tumbled Glass

Die Cuts: Hero Arts – Infinity Dies – Ornaments (D1400)

Paper: Copic Marker X-Press It Blending Card, Hammermill – Premium Colour 100 lb., Wild Rose Studio – Winter Bauble Paper (6″ x 6)

Embossing Powder: Ranger – Clear Super Fine Detail embossing powder

Miscellaneous: U-Line – 2-sided tape, Gelly Roll Sakura #8 Pen, MISTI (Most Incredible Stamping Tool), Marvy Uchida – Embossing Heat Tool,

Image coloured with Copic Markers:

Kitten: T9, T7, T5, T3, R30, R22

Large Ornament: BG09, BG05, BG02, BG01, Y11, Y00, YG00, Gelly Roll Sakura #8 Pen

Baubles: BV11, BV02, BV00, BV000

Lights and Wire Cord: R14, RV42, G07, YG07, YG01, B06, B04, B000

Hope you like it and have a great week!

Also entered into:

https://gsd-stamps.com/blogs/share-your-designs/play-along-in-november-22-challenge


Paw-sitively Good!


It’s day 5 of the 2022 Cat Lovers Hop and today I’m sharing a Christmas card I made using Your Next Stamp –  Meowy Christmas – CYNS681. Having so much fun with this amazing hop and look forward to it every year.

I created a 5.5″ x 4.25″ card base using Hammermill – Premium Colour 100 lb. cardstock. I cut the background to be the same size using My Favourite Things – Pawsome Prints paper and adhered it directly to the base using double-sided tape. Using my Cuttlebug, Creative Expressions – Festive Collection – Bold Snowflake Frame dies and Recollections – Blue Hues Shimmer Cardstock, I cut out the large snowflake and frame. Using some scrap dark blue paper, I die cut the large outline. I tore along the top of a small piece of Recollections – Christmas Inkjet Printable Glitter Paper and then die cut it with the larger cirlce die from the same die set. Using Tim Holtz Distress Ink – Faded Jeans and a finger dauber, the edges were inked all around the base card. With liquid glue, I attached the large snowflake to the background border. I then attached the snow piece that I had cut previously with liquid glue as well. Then, using a Gelly Roll Sakura #10 Pen, I coloured in some snow in the sky.

Using my MISTI and Memento – Tuxedo Black ink, I stamped the image onto Copic Marker X-Press It Blending Card. The image was coloured in with Copic markers and then I fussy cut around it. I added some U-Line double-sided tape to the image and popped it up into centre of the circle. The shadow was added using B52. The sentiments were both stamped onto the dark blue paper with VersaMark ink and then embossed with Ranger Embossing Powder White – Extra Fine Detail. I cut out the larger sentiment with my cutter and the smaller one using my Cuttlebug and Gina K Designs – Sentiment Strips. I attached U-line double sided tape the sentiments and coloured image frame and popped up everything onto the card base.

U-Line double-sided tape was applied to the backs of three Creative Impressions – Brads – Snowflake – Winter with a double layer. They were all popped up onto the card and then YNS Gumdrops – Firefly Magic Sparkly Gumdrops were applied to the centres to finish the card off.

Card Recipe:

Stamp and Sentiment:  Meowy Christmas – CYNS681 – Your Next Stamp

Inks: Memento – Tuxedo Black, VersaMark, Tim Holtz Distress Ink – Faded Jeans

Die Cuts: Creative Expressions – Festive Collection – Bold Snowflake Frame (CED3077), Gina K Designs – Sentiment Strips

Paper: Copic Marker X-Press It Blending Card, Hammermill – Premium Colour 100 lb., My Favourite Things – Pawsome Prints (6″ x 6″), Recollections – Blue Hues Shimmer Cardstock (8.5″ x 11″), Dark Blue paper, Recollections – Christmas Inkjet Printable Glitter Paper – 8.5 x 11″

Embossing Powder: Ranger Embossing Powder White – Extra Fine Detail

Miscellaneous: U-Line – 2-sided tape, YNS Gumdrops – Firefly Magic Sparkly Gumdrops, MISTI (Most Incredible Stamping Tool), Creative Impressions – Brads – Snowflake – Winter, Marvy Uchida – Embossing Heat Tool, Gelly Roll Sakura #10 Pen

Image coloured with Copic Markers:

Cat and Envelope: T9, T7, T5, T4, T3, T1, R21, C1, C0, Colorless Blender

Halo: Y08, Y04

Shadow: B52

Hope you like it and have a great week!

Also entered into https://blog.yournextstamp.com/challenge-191-midnight-comment-for-the-chance-to-win/


Making Beautiful Music!!


Today, I’m sharing a Christmas card that I made using Dreamerland Crafts stamps called Making Beautiful Music – D152002. This little angel is so sweet and is spreading Christmas cheer to everyone early this year.

To create this card I began by making a base of 5.5″ x 5.5″ using AC Cardstock – White. AC – Christmas Cardstock – Green was cut to be the same size as the base and then adhered to the card using double-sided tape. The frame was created using Couture Creations – Go Power and Emboss die-cutting machine, Creative Expressions by Sue Wilson – Festive Collection – Ornate Holly Framed Noel die and Lawn Fawn – Sparkle Cardstock in “Pixie Dust” paper. I applied liquid glue to the back of this piece and then adhered it to the card.

With my Cuttlebug, I die cut a 3.5″ x 3.5″ square using My Creative Time -Stitched Squares Inside and Out and Copic Marker X-Press It Blending Card cardstock. The main image was stamped using my MISTI and Memento – Tuxedo Black ink onto Copic Marker X-Press It Blending Card. I cleaned off the angel and then stamped in place again using VersaMark ink for the snowflakes. Ranger Embossing Powder White – Extra Fine Detail was applied to the image and then heat embossed with a Marvy Uchida – Embossing Heat Tool. I coloured in the image and then added some sparkles onto the dress using a Gelly Roll Sakura #8 Pen. Sparkle was added to wings with Clear – Wink of Stella. To make the snowflakes a little brighter and to add some smaller snowflakes in the sky, I used a white Gelly Roll Sakura #10 Pen. I created a small mixture of FolkArt – Extreme Glitter Acrylic Paint, DecoArt Glamour Dust, Delta Ceramcoat – White onto an acrylic block and with a paint brush added in the snowy background along the bottom of the square. Using a small Stylus, I added in a few more sparkly snowflakes and sprinkled DecoArt Glamour Dust over them while they were still wet. This was then put aside to dry.

Using my Cuttlebug, I die cut 6 petals and 7 leaves out of scraps of paper using Spellbinders – Holiday Flower & Greenery dies. Liquid glue was used to attach the petals together and the I added U-Line double-sided tape and some liquid glue to the bottoms of them to attach them to the card. I trimmed the leaves and with a small amount of liquid glue applied to the tips of the leaves, I adhered them to the card under the flowers. PinkFresh Studio – Essentials Jewel Mix yellow jewels were glued to the centre of each flower. Using my Cuttlebug once again, I die cut 2 sentiments using Creative Expressions by Sue Wilson – Festive Collection – Ornate Holly Framed Noel die with some scrap gold paper. The oval was die cut using Creative Expressions – Frames and Tags – Charlotte dies and a scrap piece of AC – Christmas Cardstock – Burgundy. I glued the 2 sentiments on top of each other to give it some dimension and then attached the sentiment to the oval. U-Line double-sided tape was added to the back of the finished image and it was popped up onto the centre of the card. U-Line double-sided tape was applied to the oval and it was popped up onto the top of the card to finish it off.

Card Recipe:

Stamps: Making Beautiful Music – D152002 – Dreamerland Crafts

Inks: Memento – Tuxedo Black, VersaMark

Paper: Copic Marker X-Press It Blending Card, AC – Christmas Cardstock, Lawn Fawn – Sparkle Cardstock in “Pixie Dust” (8.5″ x 11″)

Die Cuts: Creative Expressions – Frames and Tags – Charlotte (CED4319), Creative Expressions by Sue Wilson – Festive Collection – Ornate Holly Framed Noel – CED3073, Spellbinders – Holiday Flower & Greenery (S1-099), My Creative Time -Stitched Squares Inside and Out

Embossing Powder: Ranger Embossing Powder White – Extra Fine Detail

Tools: MISTI – Most Incredible Stamping Tool, Marvy Uchida – Embossing Heat Tool, U-Line double-sided tape, PinkFresh Studio – Essentials Jewel Mix, Gelly Roll Sakura #10 Pen, Gelly Roll Sakura #8 Pen, Cuttlebug, Clear – Wink of Stella

Image coloured with Copic Markers:

Skin: E21, E11, E04, E00, E000, R30, R22, R20

Hair: E47, E44, E43, E41

Dress: R59, R37, R35, R21, C1, Gelly Roll Sakura #10 Pen

Wing: BG0000, BG000, B0000, Y000, RV0000, Clear – Wink of Stella

Flower: R59, R37, R35, R21, Y35

Horn: E15, YR24, Y35, Y08

Background Sky: B02, B01, B00, B000

Snow: FolkArt – Extreme Glitter Acrylic Paint, DecoArt Glamour Dust, Delta Ceramcoat – White

Hope you like it and have a great week!

You can find more cards to inspire you at Dreamerland Crafts and Pointer Scrapbooking on the Facebook Fan pages from the rest of our design team.

Snow Kisses!!


It’s Wednesday, and this week, I made a snow lady Christmas card using High Hopes Rubber Stamps Snow Kisses – TT059 for the main image and Holly Jolly – K048 for the sentiment. I’ve always loved snow people and birds and this stamp combo makes me smile because it has both.

To make my card this week, I began with a card base of AC Cardstock – White, cut and scored to be 6″ x 6″. I cut 2 strips of Doodlebug Design Inc. – Winter Wonderland coloured snowflake pattern to the size of 6″ x .75″. 2 strips of Doodlebug Design Inc. – Spring Solid Assortment paper to the size of 6″ x .25″ and 1 strip of Forever In Time – Textura Sky cut to the size of 6″ x 4″. With Tim Holtz Distress Ink – Evergreen Bough and a blending brush, I inked around all of the edges of the larger pieces. I ran all of the smaller pieces through my Xyron Create a Sticker. The pieces were then attached to the base card from top to bottom. I used liquid glue to attach the larger piece. I trimmed around the 3 sides of the card with a paper trimmer to make it all even.

For the frame around the image, using my Couture Creations – Go Power and Emboss die cutting machine, I die cut the entire frame with Doodlebug Design Inc. – Winter Wonderland paper and Penny Black – Graceful Stackers dies. 2 dies were pieced together for the pink frame using my cutting device and Forever In Time – Textura Blush cardstock. Lastly, I stamped the image with Memento – Summer Sky ink onto Lawn Fawn – Sparkle Cardstock in “Pixie Dust” using my MISTI. I took this piece and ran it through my Couture Creations – Go Power and Emboss die cutting machine again so that it would fit snug into the frame. I cut off the remainder following the stamped snow along the top and inked it with the Memento – Summer Sky ink. Using liquid glue, I applied the pink frame over top of the snowflake die cut while carefully matching up the edges. Liquid glue was applied to the lower back of the snow piece and it was attached to the snowflake background inside the frame.

The image was stamped onto Copic Marker X-Press It Blending Card using my MISTI and Memento – Tuxedo Black ink. After colouring the images, I fussy cut around all of them and then with a black marker, inked around all of the edges. I popped up the snowlady using U-Line double-sided tape and attached her to the card under the snow. The little bird was also popped up using U-Line double-sided tape and some liquid glue. Using Copic B41, I added in some shadows in the snow and Stickles – Hibiscus was applied to the scarf and pompom to give them some extra sparkle.

The sentiment was stamped onto Doodlebug Design Inc. – Spring Solid Assortment using my MISTI and Versamark ink. Ranger Embossing Powder White – Extra Fine Detail was applied and then heat embossed using a Marvy Uchida – Embossing Heat Tool. Using my Cuttlebug and My Creative Time – More Stitched Circles, I die cut the sentiment. The edges were inked around using a finger dauber and Tim Holtz Distress Ink – Evergreen Bough. The snowflake was cut using my Cuttlebug, Lawn Fawn – Sparkle Cardstock in “Pixie Dust” cardstock and die from Recollections – Christmas Snowflakes Clear Stamp & Die set. I popped up both the sentiment and snowflake using U-Line double-sided tape onto the card. Lastly, I added 3 Doodlebug Designs Inc. – Sprinkles onto the frame to finish it off.

Card Recipe:

Stamps: Snow Kisses – TT059 (High Hopes Rubber Stamps)

Sentiment: Holly Jolly – K048 (High Hopes Rubber Stamps)

Inks: Memento – Tuxedo Black, Tim Holtz Distress Ink – Evergreen Bough, Versamark, Memento – Summer Sky

Paper: Copic Marker X-Press It Blending Card, AC Cardstock – White, Doodlebug Design Inc. – Winter Wonderland (6″ x 6″), Doodlebug Design Inc. – Spring Solid Assortment (12″ x 12″), Lawn Fawn – Sparkle Cardstock in “Pixie Dust” (8.5″ x 11″), Forever In Time – Textura Sky, Forever In Time – Textura Blush

Die Cuts: Penny Black – Graceful Stackers (51-658), My Creative Time – More Stitched Circles MCT-D136, Recollections – Christmas Snowflakes Clear Stamp & Die 529291

Embossing Powder: Ranger Embossing Powder White – Extra Fine Detail

Tools: MISTI – Most Incredible Stamping Tool, U-Line double-sided tape, Stickles – Hibiscus, Cuttlebug, Blending Brush, Doodlebug Designs Inc. – Sprinkles, Xyron Create a Sticker, Couture Creations – Go Power and Emboss, Marvy Uchida – Embossing Heat Tool

Image coloured with Copic Markers:

Snow Lady: BV20, C00, Colorless Blender, YR18, YR12, YR07, YR04, R29, R27, R24, Eyes (Sakura Glaze – Black), Stickles – Hibiscus

Mitt’s, Coat and Hat: BG72, BG57, BG32, BG13, BG11

Scarf and Trim: RV69, RV09, RV06, RV04, RV02

Birds and Earmuffs: B97, B95, B93, B91, R46, R14, R08, YR12, YR07, YR04, R85, R83, R81, RV55, RV17, RV14, BV02, BV01, BV00

Hope you like it and have a fantastic week!

You can find lots of inspiration from the Design Team Divas at the High Hopes blog, and the High Hopes Rubber Stamps Facebook Fan page plus you can also follow us on
Instagram, Twitter and Pinterest.

Present Gnomes


Sharing a Christmas card I made today using KLM Digital Design –  Pre-Colored – Present Gnome – Blue and Pre-Coloured – Present Gnome – Yellow from the new October 2022 release. Christmas is not that far away now and it’s time for me to create more cards for the holidays.

To make my card this week, I started with a 5.5″ x 4.25″ card base using Hammermill – Premium Colour 100 lb. cardstock. I cut the background paper from PhotoPlay – Gnome for the Holidays Christmas to be the same size and attached it to the base card with double-sided tape. I cut some green cardstock to the size of 4-7/8″ x 3-5/8″. U-line double-sided tape was attached to the piece and it was popped up onto the centre of the card. Stampin’ Up – Snowflake Splendor Designer Series Paper was cut to the size of 4.75″ x 3.5″. Using Tim Holtz Distress Ink – Salty Ocean, I inked around the base card and the snowflake piece.

The images were imported into Microsoft Word and I layered them together before I printed them out and fussy cut around them leaving a thin white border. I cut the snow piece to be 4.75″ x 1″ using Lawn Fawn – Sparkle Cardstock in “Pixie Dust” and then tore it look like drifting snow. I glued along the bottom of this piece with liquid glue and adhered it to the snowflake patterned paper. Using liquid glue, I attached the gnomes on top and behind the snow. I applied liquid glue to the finished piece and centred it onto the green cardstock. I stamped the sentiment on to a scrap piece of blue cardstock using Versamark ink and then applied Ranger Embossing Powder White – Extra Fine Detail. This was heat embossed with a Marvy Uchida – Embossing Heating Tool. I die cut the circle using a 1″ Circle punch and then applied Tim Holtz Distress Ink – Salty Ocean around it. U-Line double-sided tape was applied to the back of the sentiment and it was popped up onto the card. Lastly, to finish everything off, some Stampin’ Up – Snowflake Sequins were added around the sentiment.

Card Recipe:

Stamps: Pre-Colored – Present Gnome – Blue – KLM Digital Designs and Pre-Coloured – Present Gnome – Yellow – KLM Digital Designs

Sentiment: Lawn Fawn – Reveal Wheel Holiday Sentiments

Inks: HP Printer Grayscale, Tim Holtz Distress Ink – Salty Ocean, Versamark

Paper: Copic Marker X-Press It Blending Card, Hammermill – Premium Colour 100 lb., PhotoPlay – Gnome for the Holidays Christmas, Stampin’ Up – Snowflake Splendor Designer Series Paper, Lawn Fawn – Sparkle Cardstock in “Pixie Dust” (8.5″ x 11″)

Die Cuts: 1″ Circle Punch

Embossing Powder: Ranger Embossing Powder White – Extra Fine Detail

Miscellaneous: U-Line double-sided tape, Stampin’ Up – Snowflake Sequins, Marvy Uchida – Embossing Heat Tool

Hope you like it and have a great week!

You can find more cards to inspire you at KLM Designs, KLM Digital Design Team and KLM Digital Designs on the Facebook Fan page from the rest of our design team.

Ho Ho Ho!!


It’s Wednesday, and this week, I made a Christmas card using High Hopes Rubber Stamps Santa In Chimney – S202 for the image. Christmas is only a few months away, so I’m busy making more Christmas cards for this year to give away! How about you?

To make my card this week, I began with a card base of Hammermill – Premium Colour 100 lb. cardstock, cut and scored to be 5.5″ x 4.25″. DCWV – Holiday Cheer was cut to the same size and applied to the base using double-sided tape. The image was die-cut using Anna Griffin Empress Mini Cutting Machine, My Creative Time – Rectangle Frame Dies and Copic Marker X-Press It Blending Card. The image was stamped onto the Copic Marker X-Press It Blending Card using my MISTI – Most Incredible Stamping Tool and Memento – Tuxedo Black ink. Once it was coloured in, I applied some Cosmic Shimmer Fluffy Stuff to his beard and then heat set it with a Marvy Uchida – Embossing Heat Tool to make it puff up. Stickles – Diamond was applied to the Coat trim and hat, as well as the roof. Stickles – Gold was applied all around the die-cut to create some extra sparkle. Stickles – Star Dust was applied to the insides of the background flowers and some snowflakes.  Once everything was dry, I added some U-Line double-sided tape and popped up the main coloured image onto the base card. For the sentiment, I die cut Recollections Christmas Ink Jet Printable Glitter Paper with the Anna Griffin Empress Mini Cutting Machine using Jolly Quickutz – Deck the Halls limited edition gift set. I applied Scrapbook Adhesives – 3D Foam Strips to the Sentiment and popped it up onto the card to finish it off.

Card Recipe:

Stamp: Santa In Chimney – S202 (High Hopes Rubber Stamps)

Sentiment: Jolly Quickutz – Deck the Halls limited edition gift set

Inks: Memento – Tuxedo Black

Paper: Copic Marker X-Press It Blending Card, Hammermill – Premium Colour 100 lb., DCWV – Holiday Cheer (6″ x 6″), Recollections Christmas Ink Jet Printable Glitter Paper

Die Cuts: Jolly Quickutz – Deck the Halls limited edition gift set, My Creative Time – Rectangle Frame Dies

Stickles: Diamond, Gold, Star Dust

Tools: MISTI – Most Incredible Stamping Tool, U-Line double-sided tape, Anna Griffin Empress Mini Machine, Stickles – Diamond, Cosmic Shimmer Fluffy Stuff, Marvy Uchida – Embossing Heat Tool, Scrapbook Adhesives – 3D Foam Strips

Image coloured with Copic Markers:

Skin: E21, E11, E00, E000, R30, R20, Eyes (Sakura Glaze – Black)

Hair: C2, C1, C00

Coat and Hat Trim: C2, C1, C00, Stickles – Diamond

Clothing: R59, R37, R35

Belt and Mitts: 100, T9, T7, T5, E15, Y38, Y35, Y15

Sack: G99, YG67, YG63, YG61, R59, Y37, R35

Chimney: E97, E19, E08, T5, T3, T1

Roof: BV20, B60, C1, C00, Stickles – Diamond

Sky: B99, B97, B95, B93

Hope you like it and have a fantastic week!

You can find lots of inspiration from the Design Team Divas at the High Hopes blog, and the High Hopes Rubber Stamps Facebook Fan page plus you can also follow us on
Instagram, Twitter and Pinterest.

You’re O-Fish-Ally Awesome!


It’s Wednesday, and this week, I made a card using High Hopes Rubber Stamps Finnigan – P117 for the image and O-fish-ally – FLL019 for the sentiment. We have a lot of family and friends that love to fish and when I saw this image and sentiment, I could resist pairing them together.

To make my card this week, I began with a card base of Hammermill – Premium Colour 100 lb., cut and scored to be 5.5″ x 4.25″. Stampin’ UP! – Whale of a Time Designer Series Paper was cut to be the same size as the base and applied using double-sided tape. Using paper from the same pack, I fussy cut around the school of fish and applied it to the base card using a mixture of double-sided tape and glue. The excess was then trimmed off on the bottom and left side of the card. Tim Holtz Distress Ink – Evergreen Bough was applied around all of the outer edges of the card using a finger dauber. Using my Anna Griffin Empress Mini Machine and PinkFresh Studio Essentials – Blanket Stitched Circle, I die cut Copic Marker X-Press It Blending Card cardstock. Then, using my MISTI and Memento – Tuxedo Black ink, I stamped the image onto the die-cut piece. The sentiment was also stamped using my MISTI onto the same cardstock and then die cut using Gina K Designs – Sentiment Strips. Lastly, I combined the dies from PinkFresh Studio Essentials – Blanket Stitched Circle and Lifestyle Crafts Cutting Dies – Nesting Circles to create a frame using the paper from Stampin’ UP! – Whale of a Time Designer Series Paper and Anna Griffin Empress Mini Machine.

The image was coloured in with Copic markers listed below. I coloured in the fish first, then the water. Some sand was added to the bottom of the bowl using a Ranger – Emboss It Pen Clear and Seth Apter – Dirty Sand Embossing Powder. This was heat set with a Marvy Uchida – Embossing Heat Tool. I wanted the back part of the sand to appear lighter, so I just dabbed the pen in spots to add in the Embossing Powder after I had coloured it. Lastly, I applied Ranger Inkssentials – Glossy Accents to the inside of the bowl and puddles of water. This was set aside to dry.

Once the Glossy Accents was dry the card was ready to assemble.  I applied some glue to the circle frame I had created earlier and applied it over top of the coloured image circle. U-Line double-sided tape was applied to the back of the image and sentiment and they were both popped up onto the background designer papers. I thought these adorable buttons from Buttons Galore & More – Fun in the Sun Collection were perfect for this card. The button backings were removed from the backs of the fish buttons and U-Line double-sided tape was applied to them. I popped up the 3 fish on the card to finish it off.

Card Recipe:

Stamps: Finnigan – P117 (High Hopes Rubber Stamps)

Sentiment: O-fish-ally – FLL019 (High Hopes Rubber Stamps)

Inks: Memento – Tuxedo Black, Tim Holtz Distress Ink – Evergreen Bough

Die Cuts: PinkFresh Studio Essentials – Blanket Stitched Circle, Gina K Designs – Sentiment Strips, Lifestyle Crafts Cutting Dies – Nesting Circles

Embossing Powder: Seth Apter – Dirty Sand

Paper: Copic Marker X-Press It Blending Card, Hammermill – Premium Colour 100 lb., Stampin’ UP! – Whale of a Time Designer Series Paper (6″ x 6″)

Embellishments: Buttons Galore & More – Fun in the Sun Collection

Tools: MISTI – Most Incredible Stamping Tool, U-Line double-sided tape, Ranger – Emboss It Pen Clear, Marvy Uchida – Embossing Heat Tool, Ranger Inkssentials – Glossy Accents, Anna Griffin Empress Mini Machine

Image coloured with Copic Markers:

Fish: YR68, YR31, YR18, Y38, R89, R59, R39, R29, R24

Fish Bowl, Water, Sand and Water Droplets: B04, B02, B01, B00, E44, E43, E42, E41, C3, C2, C1, C00, Seth Apter – Dirty Sand

Background: BG72, BG57, BG32, BG11, E37, E35, E33, E31

Hope you like it and have a fantastic week!

Check out more adorable images at High Hopes Rubber Stamps!

You can find lots of inspiration from the Design Team Divas at the High Hopes blog, and the High Hopes Rubber Stamps Facebook Fan page plus you can also follow us on
Instagram, Twitter and Pinterest.

Dance With Me!!


Today, I’m sharing a card that I made using Dreamerland Crafts stamps called Just Dance With Me – DCS17037. Sometimes just dancing with our partners or friends can bring such joy to us. No matter where you may be, just hear the music and dance no like no one is watching!

To create this card I began by making a base of 5.5″ x 4.25″ using Hammermill – Premium Colour 100 lb. cardstock. The sky was created using Lawn Fawn Cuts – Cloudy Stencil, a  blender brush and Tim Holtz Distress Inks – Salty Ocean and Broken China. To create the grass, I first cut 2 pieces of DCWV – Pocket Blossom designer paper to the sizes of 5.5″ x 2.5″ and 5.5″ x 1-5/8″.  Lawn Fawn – Grassy Hillside Borders die cuts and my Anna Griffin Empress Mini Cutting Machine were used to die cut the 2 pieces. Using a blender brush and Tim Holtz Distress Ink – Rustic Wilderness, I inked over top of the blades of grass and then around the other 3 edges.

The main image was stamped using my MISTI and Memento – Tuxedo Black ink onto Copic Marker X-Press It Blending Card. I coloured in the image and then fussy cut around it leaving a slim white border. U-Line double-sided tape was added to the back of the image. I then placed the image onto the card before removing the tape backing to see where to place the sentiment. Using my MISTI again and Versa Fine – Onyx Black ink, I applied the sentiment onto the base card. Ranger – Clear Super Fine Detail embossing powder was then applied to it and it was heat embossed with Marvy Uchida – Embossing Heat Tool.

The final pieces of the card were now ready to assemble. I peeled off the tape backings from the large die-cut and added some liquid glue to allow me to move it into the correct position over top of the grass I had placed down earlier onto the base card. After popping up the top grass cut, I then repeated the same process and popped up the image in between the blades of grass. Finally, I added in some butterflies from the same stamp set using Tim Holtz Distress Ink – Wilted Violet. I had made them lighter by first stamping off of the page and then onto the card.

Card Recipe:

Stamps: Just Dance With Me – DSC17037 – Dreamerland Crafts

Inks: Memento – Tuxedo Black, Tim Holtz Distress Ink – Rustic Wilderness, Wilted Violet, Salty Ocean and Broken China, Versa Fine – Onyx Black

Paper: Copic Marker X-Press It Blending Card, Hammermill – Premium Colour 100 lb., DCWV – Pocket Blossom – 12″X12″ (30.5cmx30.5cm)

Die Cuts: Lawn Fawn – Grassy Hillside Borders

Stencil: Lawn Fawn Cuts – Cloudy Stencil

Embossing Powder: Ranger – Clear Super Fine Detail embossing powder

Tools: MISTI – Most Incredible Stamping Tool, Marvy Uchida – Embossing Heat Tool, U-Line double-sided tape, Anna Griffin Empress Mini Machine, Gelly Roll Sakura #10 Pen

Image coloured with Copic Markers:

Skin: E21, E11, E04, E00, E000, R30, R30, R20

Hair: E47, E44, E43, E41

Dress: V06, V04, V01, V0000, Gelly Roll Sakura #10 Pen

Shirt: BG72, BG57, BG32, BG11

Jeans: B26, B23, B21

Hope you like it and have a great week!

You can find more cards to inspire you at Dreamerland Crafts and Pointer Scrapbooking on the Facebook Fan pages from the rest of our design team.

A Million Wishes


Sharing a birthday card I made today for my husband using Whimsy Stamps –  A Million Dollars – DDB0071 and A Million Wishes – CWSD402. He works in the financial industry, so I thought this combination was perfect for him when I saw it! LOL!

To make this card, I started with stamping the A Million Dollars – DDB0071 using my large MISTI, Kraftin’ Kimmie – Wicked Black Ink and lime green cardstock. The images were stamped using my smaller MISTI, Memento – Tuxedo Black and Copic Marker X-Press It Blending Card. I coloured in the images with Copic markers and then fussy cut around them. Using my small MISTI again, Versamark ink, Recollections – Black cardstock and sentiment from A Million Wishes – CWSD402 – Whimsy Stamps, I stamped the sentiment. This was then embossed with Ranger Embossing Powder White – Extra Fine Detail and then heat embossed with my Marvy Uchida – Embossing Heat Tool. The sentiment was die cut using Poppystamps – Christmas Quotes dies and Anna Griffin Empress Mini die-cutting Machine. The “$” sign was stamped using the same stamp set with Versamark Ink and Ranger Super Fine Gold Embossing powder onto the large background and then heat embossed with my Marvy Uchida – Embossing Heat Tool.

The card was now ready to assemble. I created the base card using Hammermill – Premium Colour 100 lb. cardstock, cut and scored to be 8.25″ x 3.5″. I attached the large money piece that I had stamped earlier using double-sided tape to the base. U-Line double sided tape was added to the back of the sentiment piece and main images. Everything was then popped them up onto the background to complete the card.

Card Recipe:

Stamp and Sentiment:  A Million Dollars – DDB0071 – Whimsy Stamps, A Million Wishes – CWSD402 – Whimsy Stamps

Inks: Memento – Tuxedo Black, Versamark

Paper: Copic Marker X-Press It Blending Card, Hammermill – Premium Colour 100 lb., Recollections – Black, Lime Green Carstock

Embossing Powder: Ranger Embossing Powder White – Extra Fine Detail, Ranger Super Fine Gold Embossing powder

Dies: Poppystamps – Christmas Quotes

Miscellaneous: U-Line – 2 sided tape, Marvy Uchida – Embossing Heat Tool, Pental Sunburst Metalic Med Gel Pen – Silver, Anna Griffin Empress Mini Machine

Image coloured with Copic Markers:

Skin: E21, E11, E00, E000

Clothing, Hat Band and Money: G14, YG23, YG11

Money Bags: YR30, E31, E30

Gold Bar and Coins: E15, YR24, Y35, Y08

Wallet and Contents: E29, E27, E25, E23, E15, YR24, Y35, Y08, C5, C3, C1, C0, C00, (Pental Sunburst Metalic Med Gel Pen – Silver for the clasp.)

Hope you like it and have a great week!

Sparkle & Cheer!!


It’s Wednesday, and this week, I made a Christmas slim-line card using High Hopes Rubber Stamps Christmas Gofer – TDG003 for the image and Sparkle & Cheer – LDG001 for the sentiment. This little gofer is all set to start decorating his tree for Christmas. With all of this heat right now, snow is sounding pretty good to cool off a bit. LOL!

To make my card this week, I began with a card base of Hammermill – Premium Colour 100 lb. cardstock, cut and scored to be 4″ x 8″. I cut the background to be the same size using Creative Memories – Glacier paper and adhered it to the base card using double-sided tape. I die cut Recollections – White Cardstock and Signature Collection by Sara Davies – Glittering Snowflakes cardstock using my Anna Griffin Empress Mini Machine and My Favourite Things – Die-namics – Elegant Rectangle Stax dies. I stamped the sentiment onto the white cardstock using Memento – Tuxedo Black ink and my MISTI. Using my die cutting machine again and Waffle Flower – Nesting Square dies, I die cut Copic Marker X-Press It Blending Card. I stamped the image onto it using Memento – Tuxedo Black ink and my MISTI.

The image was coloured in with Copic markers and then I added snow to the sky using a Gelly Roll Sakura #10 Pen. For the hat trim and pop-pom, I added Cosmic Shimmer Fluffy Stuff and heated it with my Marvy Uchida – Embossing Heat Tool to puff up the liquid. I put a little bit of Stickles – Diamond onto my finger and dabbed it across the trim and pom-pom to give them an extra bit of sparkle. Lastly, I added some Stickles – Diamond to the snow. When the Stickles was all dry, I adhered the image to Signature Collection by Sara Davies – Glittering Snowflakes cardstock with double-sided tape and some glue. Using my cutter, I cut a slim border around the image. I ran the sentiment through my Xyron Creative Station and adhered it to the larger die cut. U-line double-sided tape was added behind the 2 pieces and they were both popped up onto the card. Lastly, to finish the card off, I added a few YNS Gumdrops – White Sugar and Sparkle to both sides of the sentiment.

Card Recipe:

Stamp: Christmas Gofer – TDG003 (High Hopes Rubber Stamps)

Sentiment: Sparkle & Cheer – LDG001 (High Hopes Rubber Stamps)

Inks: Memento – Tuxedo Black

Paper: Copic Marker X-Press It Blending Card, Hammermill – Premium Colour 100 lb., Creative Memories – Glacier Paper Pack 12″ x 12″, Signature Collection by Sara Davies – Glittering Snowflakes, Recollections – White Cardstock

Die Cuts: My Favourite Things – Die-namics – Elegant Rectangle Stax – MFT-1268, Waffle Flower – Nesting Square dies

Tools: MISTI – Most Incredible Stamping Tool, Anna Griffin Empress Mini Machine, U-Line double-sided tape, Cosmic Shimmer Fluffy Stuff, Marvy Uchida – Embossing Heat Tool, Gelly Roll Sakura #10 Pen, Stickles – Diamond, YNS Gumdrops – White Sugar and Sparkle, Xyron Creative Station

Image coloured with Copic Markers:

Gofer: E49, E47, E27, E25, E23, E21, R30, R20

Hat and Scarf: BG09, BG05, BG02, BG01, C2, C1, C00, Cosmic Shimmer Fluffy Stuff, Stickles – Diamond

Baubles: R59, R37, R35, YG17, YG09, YG07, YG05, C3, C2, C0

Snow: B60, B00, Stickles – Diamond

Sky: B99, B97, B95, B93, B91

Hope you like it and have a fantastic week!

You can find lots of inspiration from the Design Team Divas at the High Hopes blog, and the High Hopes Rubber Stamps Facebook Fan page plus you can also follow us on
Instagram, Twitter and Pinterest.

Santa…I Tried!!


It’s Wednesday, and this week, I made a Christmas card using High Hopes Rubber Stamps Reindeer Games – S108 for the image and Santa…I Tried – FLL001 for the sentiment. It’s never too early to start making Christmas cards and I couldn’t resist this super fun image and sentiment paired together. It just makes me laugh and I hope it makes you laugh too! I don’t think the reindeer worked very hard, I think he just wanted Santa to pull the sleigh while he relaxed. LOL!

To make my card this week, I began with a card base of Hammermill – Premium Colour 100 lb. cardstock, cut and scored to be 5.5″ x 4.25″. I cut the background to be the same size using Stampin UP! – ‘Tis The Season paper and adhered it to the base card using double-sided tape. Using Tim Holtz Distress Ink – Rustic Wilderness and a finger dauber, I inked around all of the edges of the card. Using my Cuttlebug and My Creative Time – Rectangle Frame Dies, I die cut Forever In Time – Texture Rouge paper. I added some U-Line double-sided tape to it and popped it up on top of the patterned paper. Using Copic Marker X-Press It Blending Card, my Cuttlebug and My Creative Time – Rectangle Frame Layers, I die cut Copic Marker X-Press It Blending Card cardstock.

The image was stamped with Memento – Tuxedo Black ink onto the die cut using my MISTI – Most Incredible Stamping Tool. I coloured in the image and background with Copic Markers. I added in the puffy Santa trim and pop-pom using Cosmic Shimmer Fluffy Stuff. This was then heated with my Marvy Uchida – Embossing Heat Tool to puff up the liquid. For the blue tints in the snow, I first coloured them in with Copic Marker – B60 and then using a Ranger – Emboss It Pen Clear and Stampendous – Frozen Ice Tinsel Embossing Powder, I heat embossed the snow drifts. I stamped the sentiment using my MISTI, Versamark and Ranger Embossing Powder White – Extra Fine Detail. This again was heated with my heating tool. Then, I added in the snow in the sky with a Gelly Roll Sakura #10 Pen. Lastly, I added Stickles – Diamond to add some more sparkle to the snow on the ground and Stickles – Holly all around the frame of the coloured image. I set this all aside to dry for a few hours and then applied U-Line double-sided tape to the back of the coloured image and popped it up onto the red rectangle. To finish off the card, I added in 3 pop-dots from YNS Gumdrops – Milk and Cookies – Matte.

Card Recipe:

Stamp: Reindeer Games – S108 (High Hopes Rubber Stamps)

Sentiment: Santa…I Tried! – FFL001 (High Hopes Rubber Stamps)

Inks: Memento – Tuxedo Black, Tim Holtz Distress Ink – Rustic Wilderness, Versamark

Paper: Copic Marker X-Press It Blending Card, Hammermill – Premium Colour 100 lb., Stampin UP! – ‘Tis The Season (6″x6″), Forever In Time – Texture Rouge

Die Cuts: My Creative Time – Rectangle Frame Dies, My Creative Time – Rectangle Frame Layers

Embossing Powders: Stampendous – Frozen Ice Tinsel Embossing Powder, Ranger Embossing Powder White – Extra Fine Detail.

Tools: MISTI – Most Incredible Stamping Tool, Cuttlebug, U-Line double-sided tape, Cosmic Shimmer Fluffy Stuff, Marvy Uchida – Embossing Heat Tool, Ranger – Emboss It Pen Clear, Gelly Roll Sakura #10 Pen, Stickles – Diamond, Stickles – Holly, YNS Gumdrops – Milk and Cookies – Matte

Image coloured with Copic Markers:

Skin: E21, E11, E00, E000, R30, R20, Eyes (Sakura Glaze – Black)

Hair and Beard: C3, C1, C0, Colorless Blender

Clothing: R59, R37, R35

Sleigh: R59, R37, R35, C5, C3, C1, E27, E25, E23

Mitts and Scarf: G29, G28, G24

Reindeer: E53, E51, E50, 37, E35, E34, E33, R30, R20

Hoofs and Boots: T9, T7, T5

Rope: Y19, Y17, Y15

Sky: B99, B79, B69, B29, B26, B24

Hope you like it and have a fantastic week!

You can find lots of inspiration from the Design Team Divas at the High Hopes blog, and the High Hopes Rubber Stamps Facebook Fan page plus you can also follow us on
Instagram, Twitter and Pinterest.

Mermaid and Friends!!


Today, I’m sharing a card that I made using Mermaids & Friends Fran’s Clear Stamps & Cutting Dies Stampendous Set – CSD18.

To make this card I used a base of 5.5″ x 4.25″ using Hammermill – Premium Colour 100 lb. cardstock. I cut a piece of coral cardstock to the size of 5-3/8″ x 4-1/8″ and adhered it directly to the base using double-sided tape. I created my own background paper using Crayola chalk, water and American Crafts Vicki Boutin Mixed Media Foundations Paper cut to the size of 5.25″ x 4″. Once the paper was dry, I embossed the whole background with Emboss It – Clear ink and then added Ranger – Clear Super Fine Detail embossing powder. I heat embossed this with my Marvy Uchida – Embossing Heat Tool. I did this same technique with the paper that I used to cut out coral with my Anna Griffin Empress Mini Machine and Elizabeth Craft Designs – Seaweed dies. For the main background, I added some sand to the bottom using Seth Apter – Baked Texture – Dirty Sand and my Ranger HEAT IT Craft Tool. This process takes a little longer, but it allows you to just sprinkle the embossing powder on top and then heat from the bottom first and then on top. I think this gave it a more natural look. Using U-Line double-sided tape, I added the chalk embossed background to the base card.

The images were stamped using my MISTI and Memento – Tuxedo Black ink. I coloured in the images using copic markers. For the pearl, I coloured it in using Cosmic Shimmer Opal Blaze Touch Tip – Turquoise Peach and then embossed it with Ranger – Holographic Embossing Powder and heat set it with Marvy Uchida – Embossing Heat Tool. Clear – Wink of Stella was added over top of the bikini top and the fin to make them glitter. Unfortunately, you can’t see that in this photo. Once the images were coloured, I die cut the turtle and the mermaid using the dies that came with the stamp using my Anna Griffin Empress Mini Machine.

My card was now ready to assemble. I added U-Line double-sided tape to the backs of the 2 images and all of the buttons. I removed the backs from the buttons earlier. I popped each of the characters and added a second layer of tape to the mermaid and then popped it up on the card as well. To finish it off, I added in some bubbles using Your Next Stamp Gumdrops – Crystal Clear And Sparkle Gumdrops. The crown was coloured in with Pental Sunburst Metalic Med Gel Pen – Gold.

Card Recipe:

Stamps: Mermaids & Friends Fran’s Clear Stamps & Cutting Dies Stampendous Set – CSD18.

Inks: Memento – Tuxedo Black, Emboss It – Clear ink

Paper: Copic Marker X-Press It Blending Card, American Crafts Vicki Boutin Mixed Media Foundations Paper 12″X12″ – Smooth White – 140lb, Hammermill – Premium Colour 100 lb.

Die Cuts: Mermaids & Friends Fran’s Clear Stamps & Cutting Dies Stampendous Set – CSD18, Elizabeth Craft Designs – Seaweed (1752)

Embossing Powder: Ranger – Clear Super Fine Detail embossing powder, Ranger – Holographic, Seth Apter – Baked Texture – Dirty Sand

Tools: MISTI – Most Incredible Stamping Tool, Marvy Uchida – Embossing Heat Tool, U-Line double-sided tape, Crayola Chalk, Water, Your Next Stamp Gumdrops – Crystal Clear And Sparkle Gumdrops, Pental Sunburst Metalic Med Gel Pen – Gold, Dress It Up – Ocean’s Alive, Cosmic Shimmer Opal Blaze Touch Tip – Turquoise Peach, Ranger HEAT IT Craft Tool, Clear – Wink of Stella, Anna Griffin Empress Mini Machine

Image coloured with Copic Markers:

Skin: E21, E11, E04, E00, E000, R30, R20

Hair: E15, Y38, Y21, V09, V04, V01

Fintail: V000, BG32, BG10, BG01

Bikini Top: RV66, RV63, RV558

Turtle: E97, YG11, YG07, BG34

Hope you like it and have a great week!

Smooth Sailing Ahead!!


Today, I’m sharing a card that I made using Dreamerland Crafts stamps called Wishing you a smooth sailing ahead – DCS1703. This card could be used to wish someone smooth sailing for cruising, retirement or for a new job position or even if you knew someone who just bought a new boat for fun! The stamp set also comes with 2 more sentiments, “on a Journey to find Happiness” and “Taking a break from my daily routine”.

To make this card I used a base of 5.5″ x 4.25″ using Hammermill – Premium Colour 100 lb. cardstock. Recollections – Black cardstock was die cut to the size of 4.75″ x 3.5″ using Anna Griffin Empress Mini Machine and My Creative Time – Rectangle Frame Layers. Using the same machine and My Creative Time – Rectangle Frame Dies, I die cut Copic Marker X-Press It Blending Card to the size of 4.5″ x 3.75″. The main image was stamped using my MISTI and Memento – Tuxedo Black ink. I stamped the images again onto Post-It Note paper to create a mask and fussy cut around them. After stamping the main image, I placed the masking of the little girl in the boat on top of the inked image as shown below.

I stamped the mountains starting from the left side, while still using my MISTI and Memento – Tuxedo Black ink. The mountain mask was applied over top of them and I stamped another set of mountains so that they looked like they were behind the first set of mountains. I continued to do this going across the image to create a mountain range. Then, I removed all of the masks and coloured in the image using copic markers.  Copic – Opaque White was used to create the crests of the waves and Stampin’ Up – Whisper White Ink and a small #2 round brush were used to create the clouds in the sky. Versamark, my MISTI and Ranger Embossing Powder White – Extra Fine Detail were used to add in the birds from the same stamp set. Marvy Uchida – Embossing Heat Tool was used to heat emboss the powder. I added U-Line double-sided tape to the back of the image and popped it up onto the black rectangle.

Using my MISTI, Versa Fine – Onyx Black ink and Ranger – Clear Super Fine Detail embossing powder, I stamped and embossed the sentiment onto Hammermill – Premium Colour 100 lb. cardstock. Marvy Uchida – Embossing Heat Tool was used to heat emboss this as well. Using Anna Griffin Empress Mini Machine and My Creative Time – Bunch of Fun Circle Dies, I die cut the sentiment with a 1.25″ circle. With a 1.5″ circle punch, I die cut Recollections – Black cardstock. I added U-Line double-side tape to the back of the sentiment and popped it up onto the larger black circle. I added a double layer of the U-Line double-side tape to the right of the black rectangle on each side and popped up the larger black circle to the bottom right of the card. YNS Gumdrops – Ice Ice Baby Sparkly Gumdrops were added to the top left corner of the card to finish it off.

Card Recipe:

Stamps and Sentiment: Wishing you a smooth sailing ahead – DCS17043 – Dreamerland Crafts

Inks: Memento – Tuxedo Black, Versamark, Stampin’ Up – Whisper White Ink, Versa Fine – Onyx Black

Paper: Copic Marker X-Press It Blending Card, Hammermill – Premium Colour 100 lb., Recollections – Black cardstock

Die Cuts: My Creative Time – Rectangle Frame Layers, My Creative Time – Rectangle Frame Dies, My Creative Time – Bunch of Fun Circle Dies, 1.5″ Circle Punch

Embossing Powder: Ranger Embossing Powder White – Extra Fine Detail, Ranger – Clear Super Fine Detail embossing powder

Tools: MISTI – Most Incredible Stamping Tool, Marvy Uchida – Embossing Heat Tool, U-Line double-sided tape, YNS Gumdrops – Ice Ice Baby Sparkly Gumdrops, Anna Griffin Empress Mini Machine

Image coloured with Copic Markers:

Skin: E21, E11, E04, E00, E000, R30, R30, R20

Hair: E47, E44, E43, E41

Blouse and Bow: R83, R81, RV00, RV000

Dog: E35, E33, E31, E30

Bathtub Boat: RV09, RV06, RV04, RV02, E50, E40, E30, E29, E27, E25

Water: BG70, BG53, BG32, BG11, BG10, B93, B91, B52, B41, B06, B04, B02, B01, (Copic – Opaque White)

Sky: B02, B01, B00, B000

Mountains: BV25, BV23, BV20, YG17, YG13, YG03

Hope you like it and have a great week!

You can find more cards to inspire you at Dreamerland Crafts and Pointer Scrapbooking on the Facebook Fan pages from the rest of our design team.

A Flower For You Mom!!


Today, I’m sharing a Mother’s Day card that I made using Dreamerland Crafts stamps called Say Love With Flowers – D162017It’s that time of year when we all get to celebrate our Mother’s special day. A bond between a child and their mother is something so special and rare! Happy Mother’s Day to all of you special ladies out there and especially to my mom whom we all love dearly!

To make this card I used a base of 6″ x 6″ using AC White Cardstock cardstock. Recollections – Matte Gold Foil cardstock was cut to the same size as the base and adhered with double-sided tape. P13 – Hello Spring was cut to 5.75″ x 5.75″ and the edges were inked with Tim Holtz Distress Ink – Saltwater Taffy. This was popped up onto the base card using U-Line double-sided tape. Using my Cuttlebug and PinkFresh Studio Essentials – Blanket Stitched Oval die, I die cut Copic Marker X-Press It Blending Card. The main image was stamped using my MISTI and Memento – Tuxedo Black ink. I coloured in the image using copic markers and created the background. Once the background was completed, I dipped a Q-tip into some Rubbing Alcohol ink and dotted it all over the background. Then using a Ranger – Emboss It Pen Clear, I went around the oval where the pattern was and applied Ranger Super Fine Gold Embossing powder. then heated it with my Marvy Uchida – Embossing Heat Tool. I applied U-Line double-sided tape to the back of the image and popped it up onto the card. For the sentiment, I used the stamps from Die Cutting Essentials Magazine – Issue 75 – Geo Floral Wreath Dies & Stamps. Using my MISTI, Versamark ink and Ranger Embossing Powder White – Extra Fine Detail, I embossed the sentiment onto a scrap piece of green cardstock. I fussy cut around the sentiment and applied U-Line double-side tape to pop it up at the bottom of the card.

Card Recipe:

Stamps: Say Love With Flowers – D16207 – Dreamerland Crafts

Sentiment: Die Cutting Essentials Magazine – Issue 75 – Geo Floral Wreath Dies & Stamps

Inks: Memento – Tuxedo Black, Tim Holtz Distress Ink – Saltwater Taffy, Versamark

Paper: Copic Marker X-Press It Blending Card, Recollections – Matte Gold Foil cardstock, AC White Cardstock cardstock, P13 – Hello Spring (6″ x 6″)

Die Cuts: PinkFresh Studio Essentials – Blanket Stitched Oval

Embossing Powder: Ranger Embossing Powder White – Extra Fine Detail, Ranger Super Fine Gold Embossing powder

Tools: MISTI – Most Incredible Stamping Tool, Marvy Uchida – Embossing Heat Tool, Ranger – Emboss It Pen Clear, U-Line double-sided tape

Image coloured with Copic Markers:

Skin: E21, E11, E04, E00, E000, R30, R30, R20

Hair: E47, E44, E43, E41

Dress: R83, R81, RV00, RV000

Shoes: R83, R81, RV00, W9, W7

Kitty: C7, C5, C3, R30

Flower and Stem: R83, R81, R32, RV00, RV000, Y00, Y000, YG67, YG63, YG23, YG11

Background: R11, Y11, Rubbing Alcohol and Q-Tip

Hope you like it and have a great week!

You can find more cards to inspire you at Dreamerland Crafts and Pointer Scrapbooking on the Facebook Fan pages from the rest of our design team.

Whimsy Donkeys!!


Sharing a birthday card I made using Whimsy Stamps Wonkey Donkey – DP1053 for the images and sentiments for my younger brother’s birthday card this year. I just couldn’t resist these fun characters when I saw them!

To make my card, I began with a card base of Hammermill – Premium Colour 100 lb. cardstock, cut and scored to be 8.5″ x 3.5″. For the background, I used Tim Holtz Distress Ink – Salty Ocean and a Picket Fence – Blending Brush. Using my Couture Creations – Go Power and Emboss and Whimsy Stamps – Slimline Marquee Die (WSD347), I die cut the blue patterned paper. I stamped the images onto Copic Marker X-Press It Blending Card cardstock with my MISTI and Memento – Tuxedo Black ink. I coloured them all in with Copic markers and then fussy cut around all of them. Using my MISTI and Versamark, I stamped the sentiments onto Recollections – Black cardstock. They were then embossed using my Marvy Uchida – Embossing Heat Tool and Ranger Embossing Powder White – Extra Fine Detail. I used some liquid glue to place the donkeys behind the die-cut cardstock and then applied liquid glue over the rest of the back of the die cut and adhered it directly to the base. U-Line double-sided tape was applied to the remainder of the donkeys to pop them up on the card out of the windows. Lastly, I added some U-Line double-side tape to the backs of each of the sentiments and popped them up onto the card to finish it off.

Card Recipe:

Stamp and Sentiment: Wonkey Donkey – DP1053 (Whimsy Stamps)

Inks: Memento – Tuxedo Black, Tim Holtz Distress Ink – Salty Ocean, Versamark

Paper: Copic Marker X-Press It Blending Card, Hammermill – Premium Colour 100 lb., Recollections – Black cardstock

Dies: Whimsy Stamps – Slimline Marquee Die (WSD347)

Embossing Powder: Ranger Embossing Powder White – Extra Fine Detail

Tools: MISTI – Most Incredible Stamping Tool, U-Line double-sided tape, Marvy Uchida – Embossing Heat Tool, Gelly Roll Sakura #10 Pen, Picket Fence – Blending Brush, Couture Creations – Go Power and Emboss

Image coloured with Copic Markers:

Donkey1: BG72, BG57, BG32, BG11, R30, R20, B06, B02, B01, W9, C1, C0, Gelly Roll Sakura #10 Pen

Donkey2: V17, V15, V12, R46, R30, R22, R20, R14, R08, B06, B02, B01, W9, Gelly Roll Sakura #10 Pen

Donkey3: Y38, Y35, Y32, R46, R30, R22, R20, R14, R08, B06, B02, B01, W9, C1, C0, Gelly Roll Sakura #10 Pen

Hope you like it and have a great week!