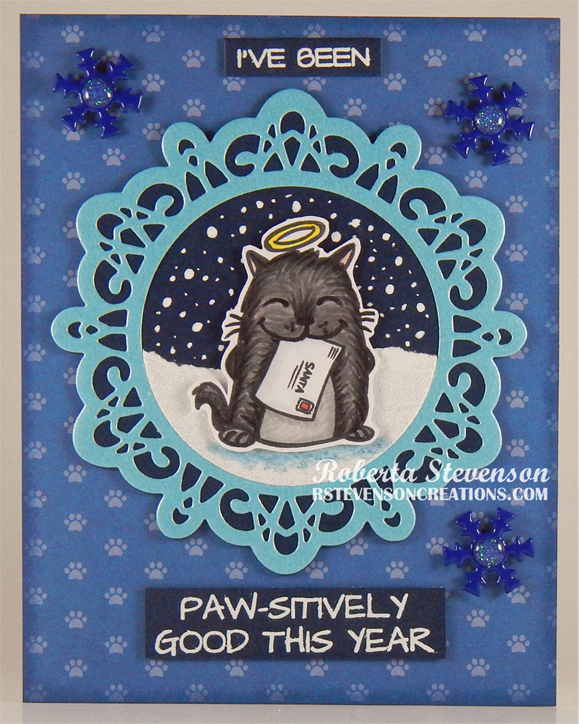
It’s the last day of the 2022 Cat Lovers Hop and today I’m sharing a Christmas card I made using Gerda Steiner Designs – Deck The Halls – GSD438. I thought this image was adorable! Have fun hopping everyone!
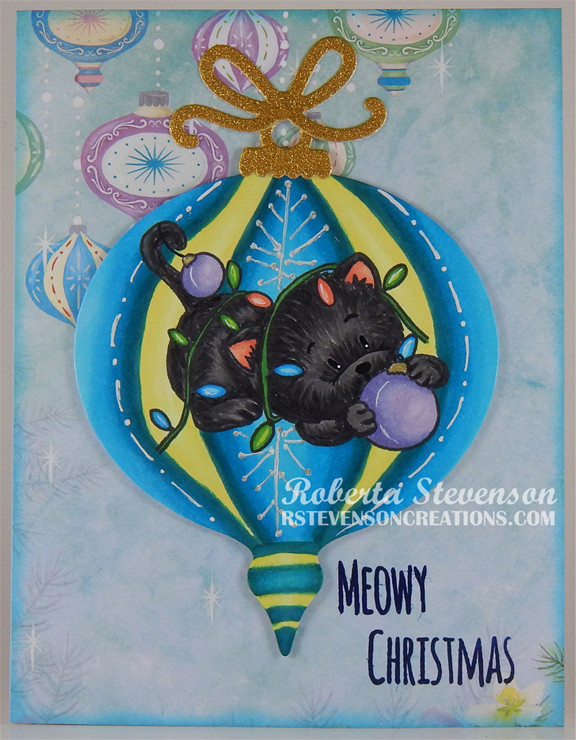
I created a 5.5″ x 4.25″ card base using Hammermill – Premium Colour 100 lb. cardstock. I cut the background to be the same size using Wild Rose Studio – Winter Bauble Paper and adhered it directly to the base using double-sided tape. Using Tim Holtz Distress Inks – Tumbled Glass and a finger dauber, I inked around all of the edges of the card. With my Cuttlebug and Hero Arts – Infinity Dies – Ornaments, I die cut a large ornament from Copic Marker X-Press It Blending Card cardstock and the ribbon and topper from a scrap piece of gold cardstock.
Using my MISTI and Memento – Tuxedo Black ink, I stamped the image onto the Copic Marker X-Press It Blending Card cardstock and with Versafine – Majestic Blue, I stamped the sentiment onto the base card. I embossed the sentiment with Ranger – Clear Super Fine Detail embossing powder and then heat set it with a Marvy Uchida – Embossing Heat Tool. The image was coloured in with Copic markers and with a Gelly Roll Sakura #8 Pen designs were added to the ornaments and light bulbs. I tried to create the ornament as close to the paper as I could. Once this was completed, using liquid glue, I attached the top piece and the bow to the ornament. U-Line double-sided tape was added to the back of ornament die cut and it was popped up onto the background. With a Gelly Roll Sakura #8 Pen, I added in some string for the bauble.
Card Recipe:
Stamp and Sentiment: Deck The Halls – GSD438 – Gerda Steiner Designs
Inks: Memento – Tuxedo Black, Versafine – Majestic Blue, Tim Holtz Distress Inks – Tumbled Glass
Die Cuts: Hero Arts – Infinity Dies – Ornaments (D1400)
Paper: Copic Marker X-Press It Blending Card, Hammermill – Premium Colour 100 lb., Wild Rose Studio – Winter Bauble Paper (6″ x 6)
Embossing Powder: Ranger – Clear Super Fine Detail embossing powder
Miscellaneous: U-Line – 2-sided tape, Gelly Roll Sakura #8 Pen, MISTI (Most Incredible Stamping Tool), Marvy Uchida – Embossing Heat Tool,
Image coloured with Copic Markers:
Kitten: T9, T7, T5, T3, R30, R22
Large Ornament: BG09, BG05, BG02, BG01, Y11, Y00, YG00, Gelly Roll Sakura #8 Pen
Baubles: BV11, BV02, BV00, BV000
Lights and Wire Cord: R14, RV42, G07, YG07, YG01, B06, B04, B000
Hope you like it and have a great week!

Also entered into:
https://gsd-stamps.com/blogs/share-your-designs/play-along-in-november-22-challenge