Tag Archive | U-Line double-sided tape

Coffee With A Friend!!


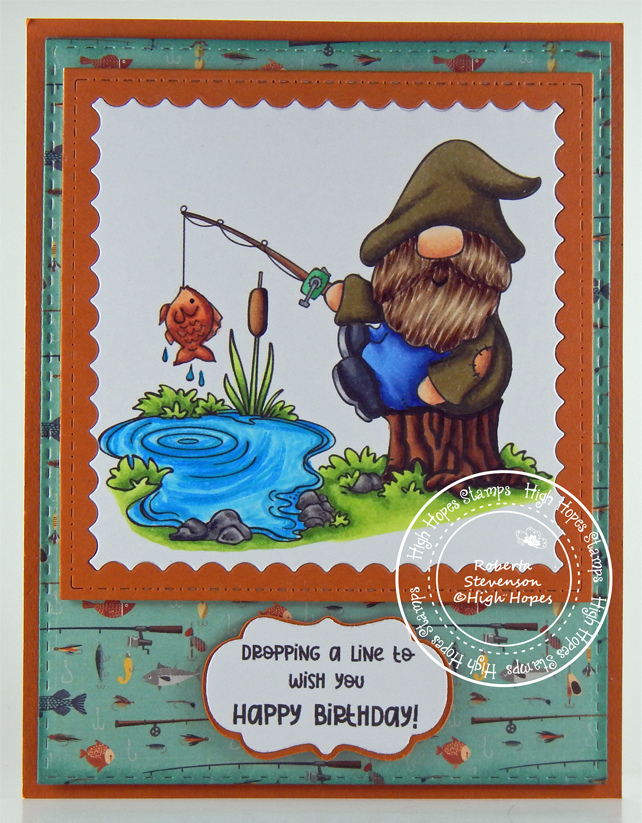
It’s Wednesday, and this week, I made a card using High Hopes Rubber Stamps Let’s Chat – TLF030  for the image and Perfect Blend – FLL022  for the sentiment. I don’t drink coffee, but really loved these little gnome buddies having a cup of coffee and getting a chance to chat.

To make my card this week, I began with a card base of Hammermill – Premium Colour 100 lb. cardstock, cut and scored to be 5.5″ x 4.25″. I cut Creative Memories – Hot Fudge cardstock to be the same size as the base card and attached it using double-sided tape. Your Next Stamp – The Perfect Blend cardstock was die cut using My Creative Time – Rectangle Frame Layers and my Cuttlebug. I popped this up onto the base background using U-Line double-sided tape. The large square was die cut using Waffle Flower – Nesting Square dies and Creative Memories – Hot Fudge cardstock. The smaller square was cut using My Creative Time -Stitched Squares Inside and Out and Copic Marker X-Press It Blending Card. The image was then stamped with my MISTI and Memento – Tuxedo Black ink onto the Copic Marker X-Press It Blending Card cardstock. I stamped the sentiment onto Hammermill – Premium Colour 100 lb. cardstock and die cut it with My Creative Time – Stitched Zig Zag Ties. The image was coloured in with Copic Markers.

The card was now ready to finish being assembled. I applied U-Line double-sided tape to the backs of all of the remaining pieces and popped them up onto the card base.

Card Recipe:

Stamps: Let’s Chat – TLF030 (High Hopes Rubber Stamps)

Sentiment: Perfect Blend – FLL022 (High Hopes Rubber Stamps)

Inks: Memento – Tuxedo Black

Paper: Copic Marker X-Press It Blending Card, Hammermill – Premium Colour 100 lb., Your Next Stamp – The Perfect Blend (6″ x 6″), Creative Memories – Hot Fudge (12″ x 12″)

Die Cuts: My Creative Time – Rectangle Frame Layers, My Creative Time – Stitched Zig Zag Ties, Waffle Flower – Nesting Square dies, My Creative Time -Stitched Squares Inside and Out

Tools: MISTI – Most Incredible Stamping Tool, U-Line double-sided tape, Cuttlebug

Image coloured with Copic Markers:

Skin: E21, E11, E00, E000

Beards: E47, E44, E43, E41, E18, E08, YR18, YR14

Hats and Clothing: B37, B14, B12, BG09, BG05, BG02, E37, E35

Boots: C9, C7, C5, C3, C2

Chairs: E59, E37, E35, E15, E13

Cups and Saucer: BG49, BG45, BG13, BG11

Table and Tablecloth: YR30, E50, E42, E41

Shadow: C3, C2, C1

Hope you like it and have a fantastic week!

You can find lots of inspiration from the Design Team Divas at the High Hopes blog, and the High Hopes Rubber Stamps Facebook Fan page plus you can also follow us on
Instagram, Twitter and Pinterest.

Feel Better Soon!!


It’s Wednesday, and this week, I made a card using High Hopes Rubber Stamps Nurse Elizabeth Jo – Q007  for the main image, Speedy Recovery Background – U004 for the background and Calling The Doctor- G211 for the sentiment. We have a lot of nurses in our family and we appreciate all of the hard work they do, especially during these tough times.

I made this a pop-up card with the sentiment.
Above is how card looks like when closed. Below is card opened up.

To make my card this week, I began with a card base of Hammermill – Premium Colour 100 lb. cardstock, cut to 11″ x 4.25″. I scored this at 2.25″ and 5.5″. With my MISTI and Memento – Tuxedo Black ink, I stamped the images and sentiment onto the Copic Marker X-Press It Blending Card cardstock. Using my Cuttlebug and My Creative Time – Rectangle Frame Layers, I die cut the background. I coloured in the background and the nurse with Copic markers. Once this was done, I fussy cut around the nurse. I cut around the sentiment with my cutter and then chopped off the corners with my 3/8″ We R Memory Keepers Corner Chomper. Using Scrapbook.com – Brights Smooth Cardstock, I attached 1 piece to the bottom half of my card base and cut the other piece to the size of 3.25″ x 1.5″. For the small piece, I used the same corner chomper.

The card was now ready for assembly. I applied the coloured background directly to the base colour. The nurse image was popped up onto the card using U-Line double-sided tape. I popped up the sentiment onto the smaller pink background with a single application of U-Line double-sided tape and popped up the pink background with 2 layers of U-Line double-sided tape. This was added to the bottom part of the card.

Card Recipe:

Stamps: Nurse Elizabeth Jo – Q007 (High Hopes Rubber Stamps) and Speedy Recovery Background – U004 (High Hopes Rubber Stamps)

Sentiment: Calling the Doctor – G211 (High Hopes Rubber Stamps)

Inks: Memento – Tuxedo Black

Paper: Copic Marker X-Press It Blending Card, Hammermill – Premium Colour 100 lb., Scrapbook.com – Brights Smooth Cardstock (4.25″ x 5.5″)

Die Cuts: My Creative Time – Rectangle Frame Layers

Tools: MISTI – Most Incredible Stamping Tool, U-Line double-sided tape, Cuttlebug, 3/8″ We R Memory Keepers Corner Chomper

Image coloured with Copic Markers:

Skin: E21, E11, E00, E000, R30, R20

Hair: E18, E08, YR18, YR14

Hat: C1, C0, C00, R46, R14, R08

Scrubs: RV17, RV14, RV13, RV11

Booties and Glove: BG02, BG01, BG000, BG0000

Stethoscope and Supplies: C9, C7, C5, C3, C1, YR30

Shadow: C3, C2, C1

Background: C9, C7, C1, C0, C00, E21, E000, E0000, BG0000

Hope you like it and have a fantastic week!

You can find lots of inspiration from the Design Team Divas at the High Hopes blog, and the High Hopes Rubber Stamps Facebook Fan page plus you can also follow us on
Instagram, Twitter and Pinterest.

Itty Bitty Heart!!


It’s Wednesday, and this week, I made a CAS card using High Hopes Rubber Stamps Sweetheart Gnome – SLF012  for the main image. I just love this sweet little gnome image as you can change the sentiments that she is holding onto. On this card, I chose to add a heart as I thought it would go great with the sentiment Itty Bitty Heart – H006.

To make my card this week, I began with a card base of Hammermill – Premium Colour 100 lb. cardstock, cut and scored to be 5.5″ x 4.25″. For the background, I used my Cuttlebug, Scrapbook.com – Brights Smooth Cardstock and the embossing folder called Cuttlebug – Thank You. After putting this paper through my Cuttlebug, I saw that the texture was white on some of the letters. I decided to take some more of the background colour off using 3M 405N Tri-M-Ite sanding paper. I just loved the rustic effect it gave. With my MISTI and Memento – Tuxedo Black ink, I stamped the image and sentiment onto Copic Marker X-Press It Blending Card cardstock. The image was coloured in and fussy cut. A cutter was used to go around the sentiment. 3/8″ We R Memory Keepers Corner Chomper was used to create the rounded corners. I inked around all of the edges of the sentiment with Tim Holtz Distress Ink – Barn Door.

To assemble the card, I attached the embossed background directly to the base using double-sided tape. The sentiment and image were both popped up onto the card using U-Line double-sided tape to complete the card.

Card Recipe:

Stamp: Sweetheart Gnome – SLF012 (High Hopes Rubber Stamps)

Sentiment: Itty Bitty Heart – H006 (High Hopes Rubber Stamps)

Inks: Memento – Tuxedo Black, Tim Holtz Distress Ink – Barn Door

Paper: Copic Marker X-Press It Blending Card, Hammermill – Premium Colour 100 lb., Scrapbook.com – Brights Smooth Cardstock (4.25″ x 5.5″)

Die Cuts: Lawn Fawn – Valentine’s Hearts Border (Heart for message)

Embossing Folder: Cuttlebug – Thank You

Tools: MISTI – Most Incredible Stamping Tool, U-Line double-sided tape, Cuttlebug

Image coloured with Copic Markers:

Skin: E21, E11, E00, E000, R30, R20

Hair: E18, E08, YR18, YR14

Clothing and Hat: BG72, BG57, BG32, BG11, BG09, BG05, BG02, BG01, R46, R14, R08

Message with Heart: E50, E41, YR30

Shadow: C3, C2, C1

Hope you like it and have a fantastic week!

You can find lots of inspiration from the Design Team Divas at the High Hopes blog, and the High Hopes Rubber Stamps Facebook Fan page plus you can also follow us on
Instagram, Twitter and Pinterest.

Toad-ally In Love!!


It’s Wednesday, and this week, I made a card using High Hopes Rubber Stamps Toad-ally In Love – M127  for the image and sentiment. I toad-ally love this sweet image because it can be used for both Valentine’s Day, an Anniversary or just to let someone know that you love them.

To make my card this week, I began with a card base of Hammermill – Premium Colour 100 lb. cardstock, cut and scored to be 5″ x 5″. I used Picket Fence – Blending Brushes, Tim Holtz Distress Ink: Mowed Lawn, Crushed Olive, Peeled Paint, Festive Berries, Fired Brick and Barn Door and Lawn Fawn – Lots of Hearts Background Stencils to create my card background. Using Lawn Fawn – Valentine’s Hearts Border and my Cuttlebug, I die cut some Craft Smith – Hot Buy – Green and Forever In Time – Texture Rouge cardstock and adhered the 2 pieces together with some glue. I did this twice and then glued the 2 finished pieces to the base card. With my MISTI and Memento – Tuxedo Black ink, I stamped the image onto the Copic Marker X-Press It Blending Card cardstock. I then die cut it using Sizzix Framelets by Stephanie Barnard – 562676 – Hearts Dotted. The image was coloured in and popped up onto the background using U-line douhble-sided tape. I applied some glue onto the backs of 3 of the pre-cut hearts and placed them onto the base background to complete the card.

Card Recipe:

Stamp and Sentiment: Toad-ally In Love – M127 (High Hopes Rubber Stamps)

Inks: Memento – Tuxedo Black, Tim Holtz Distress Ink: Mowed Lawn, Crushed Olive, Peeled Paint, Festive Berries, Fired Brick and Barn Door

Paper: Copic Marker X-Press It Blending Card, Hammermill – Premium Colour 100 lb., Craft Smith – Hot Buy – Green, Forever In Time – Texture Rouge

Die Cuts: Sizzix Framelets by Stephanie Barnard – 562676 – Hearts Dotted, Lawn Fawn – Valentine’s Hearts Border

Stencils: Lawn Fawn – Lots of Hearts Background Stencils

Tools: MISTI – Most Incredible Stamping Tool, U-Line double-sided tape, Cuttlebug

Image coloured with Copic Markers:

Toad: YG17, YG06, YG03, YG00, E81, R30, BG99, E84, E81Colorless Blender (Eyes – Sakura Glaze – Black, Gelly Roll Sakura #5 Pen)

Hearts: R46, R14, R08, YG17, YG06, YG03

Big Heart Background: R27, R24, R22, R21, R20, (C3, C2, E23 – Shadow under Toad)


Hope you like it and have a fantastic week!

You can find lots of inspiration from the Design Team Divas at the High Hopes blog, and the High Hopes Rubber Stamps Facebook Fan page plus you can also follow us on
Instagram, Twitter and Pinterest.

You Got This!!


It’s Wednesday, and this week, I made a card using High Hopes Rubber Stamps Lasso Some Snow – TDG021  for the main image and Don’t Worry – FDG021 for the sentiment. We all need a little bit of encouragement every now and then and this little snowman is here to give us some.

To make my card this week, I began with a card base of Hammermill – Premium Colour 100 lb. cardstock, cut and scored to be 5.5″ x 4.25″.  I used Echo Park Paper Co. – My Favorite Winter cardstock cut to the same size as the base card for the background. I attached this to the base using double-sided tape. Using my Cuttlebug, a mixture of square dies from My Creative Time -Stitched Squares Inside and Out and Waffle Flower – Nesting Square dies, I die cut cardstock from Scrapbook.com Neutrals Smooth Cardstock and also Copic Marker X-Press It Blending Card. I applied double-sided tape to the back of the tan square and applied it directly to the background. U-Line double-sided tape was added to the back of the dark brown square and popped up onto the centre of the tan square.

With my MISTI and Memento – Tuxedo Black ink, I stamped the image onto the Copic Marker X-Press It Blending Card cardstock square and coloured it in with Copic markers. Gelly Roll Sakura #10 Pen was used to create the snow in the sky. Sakura Glaze – Black and Gelly Roll Sakura #5 Pen were used on the eyes of the snowman. I applied U-line douhble-sided tape to the back of the completed image and popped it up onto the centre of the dark brown square.

With my MISTI and Memento – Tuxedo Black ink, I stamped the sentiment onto Recollections – White cardstock and then die cut it out using my Cuttlebug and My Creative Time – Ribbon End Dies. I inked around the edges using Copic – E59 marker to give it a dark brown border. I used my knife to remove the double border from the piece left behind and then traced the shape of the ribbon onto the remaining piece of Scrapbook.com Neutrals Smooth Cardstock. I cut this out with my cutter and scissors. U-Line double-sided tape was applied to both pieces and the completed sentiment was popped up onto the card below the main image to complete the card.

Card Recipe:

Stamp: Lasso Some Snow – TDG021 (High Hopes Rubber Stamps)

Sentiment: Don’t Worry – FDG021 (High Hopes Rubber Stamps)

Inks: Memento – Tuxedo Black

Paper: Copic Marker X-Press It Blending Card, Hammermill – Premium Colour 100 lb., Echo Park Paper Co. – My Favorite Winter (6″ x 6″), Scrapbook.com – Neutrals Smooth Cardstock (5.5″ x 4.25″), Recollections – White cardstock

Die Cuts: My Creative Time -Stitched Squares Inside and Out, Waffle Flower – Nesting Square dies, My Creative Time – Ribbon End Dies

Tools: MISTI – Most Incredible Stamping Tool, U-Line double-sided tape, Gelly Roll Sakura #10 Pen, Gelly Roll Sakura #5 Pen, Sakura Glaze – Black, Cuttlebug

Image coloured with Copic Markers:

Snowman: B60, C9, C7, C5, C00, E49, YR18, YR16, YR12, Colorless Blender (Eyes – Sakura Glaze – Black, Gelly Roll Sakura #5 Pen)

Hats, Mitts and Scarf: B99, B977, B95

Coat: E51, E50, E37, E35, E34, E33, E31

Birds: E59, E37, E35

Fence: E29, E27, E25, E23, E21

Wheel and Rope: E77, E74, E47, E44, E43, Y35, YR31

Sky: B04, B02, B01, B00

Snow: B000, B60, C00, Colorless Blender, Stickles – Diamond

Hope you like it and have a fantastic week!

You can find lots of inspiration from the Design Team Divas at the High Hopes blog, and the High Hopes Rubber Stamps Facebook Fan page plus you can also follow us on
Instagram, Twitter and Pinterest.

Beautiful Day!!


It’s Wednesday, and this week, I made a card using High Hopes Rubber Stamps Winter Kitty – SDG006  for the main image and Beautiful Day – FDG013 for the sentiment. We just had a major snowfall over the last few days and this little kitty is all bundled up and ready to play!

Growing up we had a lot of snow during the winter and couldn’t wait to put on our mitts and snow boots and go out to play. We had huge snow banks in the schoolyard across the street and would toboggan down them or just slide down in our snow suits! LOL! It was sooooo much fun! Sometimes we even made big snow forts in the backyard with tables and chairs made out of ice and snow. We hardly spent anytime indoors and didn’t usually go back into the house until we had to or we were turning blue because it was so cold out, but even then we still wanted to continue playing outdoors. LOL!

To make my card this week, I began with a card base of Hammermill – Premium Colour 100 lb. cardstock, cut and scored to be 5.5″ x 4.25″.  I used Scrapbook.com – Rainbow Smooth Cardstock for the main background paper. It was already the same size as the base, so no cutting had to be done. To get more use out of the same paper, I had cut the oval frame using my Cuttlebug and Hero Arts – Infinity Die Ovals first. Then, I placed the Rainbow cardstock onto the card base using double-sized tape. I die cut the square background using My Creative Time -Stitched Squares Inside and Out and Pebbles – Winter Wonderland paper and the rectangle to the size of 4″ x 4″. The rectangle was cut from from the same paper pack to the size of 1.25″ x 4″. I inked around the edges of both shapes with a sponge dauber and Tim Holtz Distress Ink – Evergreen Bough. Using double-sided tape, I placed both shapes over the pink background and hid where I cut the oval with the square. I cut out a smaller oval using the same Hero Arts – Infinity Die Ovals and Copic Marker X-Press It Blending Card. I also cut out a 1.5″ circle using a circle punch. Lastly, I die cut the scalloped circle using WeR Memory Keepers – Quickutz Nesting Scallops dies and Hot Buy Craft Smart – Holiday Glitz Glitter Paper.

With my MISTI and Memento – Tuxedo Black ink, I stamped the image onto the Copic Marker X-Press It Blending Card cardstock oval and the sentiment onto the circle. I coloured in the image with Copic markers and then added some Ranger – Emboss It Pen Clear to the bottom of the oval and applied WOW! Sparkling Snow Embossing Glitter. I heat embossed this and added more embossing powder several times to create a thicker layer with my Marvy Uchida – Embossing Heat Tool. Then I added some Cosmic Shimmer Fluffy Stuff and heat embossed it as well to puff it up. Gelly Roll Sakura #10 Pen was used to create the snow in the sky. Sakura Glaze – Black and Gelly Roll Sakura #5 Pen were used on the eyes and nose of the cat.

I inked around the edges of the large pink oval and the circle with Tim Holtz Distress Ink – Picked Raspberry. I applied the coloured image directly to the pink oval and the sentiment circle to the scalloped circle using some liquid glue. Both shapes were then popped up onto the card using U-Line double-sided tape. To completed the card and add in some extra sparkle, I applied some YNS Gumdrops – Winter Wonderland to the background patterned paper.

Card Recipe:

Stamp: Winter Kitty – SDG006 (High Hopes Rubber Stamps)

Sentiment: Beautiful Day – FDG013 (High Hopes Rubber Stamps)

Inks: Memento – Tuxedo Black, Tim Holtz Distress Ink – Evergreen Bough, Tim Holtz Distress Ink – Picked Raspberry, Ranger – Emboss It Pen Clear

Paper: Copic Marker X-Press It Blending Card, Hammermill – Premium Colour 100 lb., Scrapbook.com – Rainbow Smooth Cardstock (4.25″ x 5.5″), Pebbles Winter Wonderland 6″ x 6″, Hot Buy Craft Smart – Holiday Glitz Glitter Paper 12″ x 12″

Die Cuts: My Creative Time -Stitched Squares Inside and Out, Hero Arts – Infinity Die Ovals, WeR Memory Keepers – Quickutz Nesting Scallops, 1.5″ Circle Punch

Tools: MISTI – Most Incredible Stamping Tool, U-Line double-sided tape, Gelly Roll Sakura #10 Pen, Gelly Roll Sakura #5 Pen, Sakura Glaze – Black, Cuttlebug, YNS Gumdrops – Winter Wonderland

Image coloured with Copic Markers:

Kitty: N7, N5, N3, R02, R00, RV66, RV63, RV55 (Eyes – Sakura Glaze – Black, Gelly Roll Sakura #5 Pen)

Sky: B05, B04, B02, Gelly Roll Sakura #10 Pen

Snow: WOW! Sparkling Snow Embossing Glitter, Cosmic Shimmer Fluffy Stuff, Marvy Uchida – Embossing Heat Tool

Hope you like it and have a fantastic week!

You can find lots of inspiration from the Design Team Divas at the High Hopes blog, and the High Hopes Rubber Stamps Facebook Fan page plus you can also follow us on
Instagram, Twitter and Pinterest.

Good Times!!


It’s Wednesday, and this week, I made a card using High Hopes Rubber Stamps Bird Song – TDG016  for the main image and Good Times – FDG014 for the sentiment. These little birdie friends know how to whistle a tune. Unfortunately, I myself never mastered how to whistle! I’ve tried over the years, but just can’t seem to do it. LOL!

To make my card this week, I began with a card base of Hammermill – Premium Colour 100 lb. cardstock, cut and scored to be 5.5″ x 4.25″.  I used Scrapbook.com – Brights Smooth Cardstock for the background paper. This paper is great because it’s already cut to size which makes it so easy. I applied it to the base using double-sided tape. Using my Cuttlebug and Your Next Die – Stitched Frame Snowfall Hill die set, I die cut the centre piece from Copic Marker X-Press It Blending Card and the frame from Crafter’s Companion – Luxury Cardstock – Gold.

With my MISTI and Memento – Tuxedo Black ink, I stamped the image onto the Copic Marker X-Press It Blending Card cardstock and the sentiment onto Recollections – White cardstock. I coloured in the image with Copic markers and then added some Stickles – Diamond and Stickles – Waterfall to the parts of the snow to make it sparkly. Gelly Roll Sakura #10 Pen was used to create the snow in the sky. To make the eyes stand out a little more, I used Sakura Glaze – Black and then added a white dot using Gelly Roll Sakura #5 Pen. Once the stickles were dry, I turned the coloured image and frame over and taped them together on the back with some Scotch tape to keep the 2 pieces together. U-line double-sided tape was then applied and I turned it over again and popped it up onto the card. The sentiment was die cut using my Cuttlebug and Essentials by Tattered Lace Dies – Easel Slider. I inked around the edges with Sharpie – Gold Medium Point – Water Based Paint pen, added U-Line double-sided tape to the top half of the sentiment and added it on top of the image. Lastly I added some YNS Gumdrops – White Sugar and Sparkle to complete the card.

Card Recipe:

Stamp: Bird Song – TDG016 (High Hopes Rubber Stamps)

Sentiment: Good Times – FDG014 (High Hopes Rubber Stamps)

Inks: Memento – Tuxedo Black

Paper: Copic Marker X-Press It Blending Card, Hammermill – Premium Colour 100 lb., Scrapbook.com – Brights Smooth Cardstock (4.25″ x 5.5″), Recollections – White, Crafter’s Companion – Luxury Cardstock – Gold

Die Cuts: Your Next Die – Stitched Frame Snowfall Hill, Essentials by Tattered Lace Dies – Easel Slider

Tools: MISTI – Most Incredible Stamping Tool, U-Line double-sided tape, Gelly Roll Sakura #10 Pen, Gelly Roll Sakura #5 Pen, Sakura Glaze – Black, Stickles – Diamond, Stickles – Waterfall, Cuttlebug, YNS Gumdrops – White Sugar and Sparkle

Image coloured with Copic Markers:

Bird1 and Scarf: R59, R39, R37, R35, R29, R27, BG09, BG09, BG05, BG02, BG01, BG000 (Eyes – Sakura Glaze – Black, Gelly Roll Sakura #5 Pen)

Bird2 and Scarf: Y17, Y15, Y13, Y11, Y02, Y00, BG72, BG57, BG49, BG32, BG11, Gelly Roll Sakura #5 Pen

Bird3 and Scarf: R56, R46, R37, R24, R22, C9, C7, C5, G16, G14, YG23, YG03

Beaks and Claws: YR18, YR14, YR12, Y19, Y08

Pine Needles: G29

Sky: B05, B04, B02, B01, Gelly Roll Sakura #10 Pen

Snow: C1, Stickles – Diamond, Stickles – Waterfall

Hope you like it and have a fantastic week!

You can find lots of inspiration from the Design Team Divas at the High Hopes blog, and the High Hopes Rubber Stamps Facebook Fan page plus you can also follow us on
Instagram, Twitter and Pinterest.

Friendship Warms The Heart!!


It’s Wednesday, and this week, I made a card using Friends Snooze – TDG013 by High Hopes Rubber Stamps for the main image and Friendship – FDG023 (High Hopes Rubber Stamps) for the sentiment. Pop on over to High Hopes Rubber Stamps and see all of the wonderful new images as we celebrate our Winter Friends Release!

To make my card this week, I began with a card base of Hammermill – Premium Colour 100 lb. cardstock, cut and scored to be 5.5″ x 4.25″.  I cut the background paper from American Crafts – Jack Frost to be the same size and attached it directly to the base using double-sided tape. Tim Holtz Distress Ink – Chipped Sapphire was used to ink around the outside of the card. Using my Cuttlebug, My Creative Time – Rectangle Frame Layers, My Creative Time – Rectangle Frame Dies, Gina Marie Designs – Nested Scalloped Stitched Rectangles, I die cut the Copic Marker X-Press It Blending Card, Scrapbook.com – Peppermint Smooth Cardstock and Crafter’s Companion – Luxury Cardstock – Ice Blue Pack. Using U-line double-sided tape, I popped up each of the layers onto the card base.

Using my MISTI and Memento – Tuxedo Black ink, I stamped the image onto Copic Marker X-Press It Blending Card cardstock and the sentiment onto Recollections – White cardstock. I coloured in the image with Copic markers and then added some Stickles – Diamond to the parts of the snow to make it sparkly. Gelly Roll Sakura #5 Pen was used to create a starry night sky. I added U-line double-sided tape to the completed image and popped it up onto the card. The sentiment was die cut using my Cuttlebug and Poppystamps – Christmas Quotes. I inked around the edges with Tim Holtz Distress Ink – Chipped Sapphire and glued it onto the top of the image at an angle to complete the card.

Card Recipe:

Stamp: Friends Snooze – TDG013 (High Hopes Rubber Stamps)

Sentiment: Friendship – FDG023 (High Hopes Rubber Stamps)

Inks: Memento – Tuxedo Black, Tim Holtz Distress Ink – Chipped Sapphire

Paper: Copic Marker X-Press It Blending Card, Hammermill – Premium Colour 100 lb., American Crafts – Jack Frost 6 x 6 in., Crafter’s Companion – Luxury Cardstock – Ice Blue Pack, Scrapbook.com – Peppermint Smooth Cardstock – 4.25″ x 5.5″, Recollections – White

Die Cuts: My Creative Time – Rectangle Frame Layers, My Creative Time – Rectangle Frame Dies, Poppystamps – Christmas Quotes, Gina Marie Designs – Nested Scalloped Stitched Rectangles

Tools: MISTI – Most Incredible Stamping Tool, U-Line double-sided tape, Gelly Roll Sakura #10 Pen, Gelly Roll Sakura #5 Pen, Sakura Glaze – Black, Stickles – Diamond, Cuttlebug

Image coloured with Copic Markers:

Bear and Scarf: C9, C7, C5, C4, C3, E27, E25, E23, BG09, BG05, BG02, BG01 (Eyes and Nose – Sakura Glaze – Black)

Bird, Scarf and Hat: R46, R22, R14, R08, YR18, YR15, BG72, BG57, BG32, BG11, Gelly Roll Sakura #5 Pen

Pine Needles: G29

Sky: B99, B97, B95, B93, Gelly Roll Sakura #5 Pen

Snow: B60, B0000, BV20, BG0000, Colorless Blender, Stickles – Diamond

Hope you like it and have a fantastic week!

You can find lots of inspiration from the Design Team Divas at the High Hopes blog, and the High Hopes Rubber Stamps Facebook Fan page plus you can also follow us on
Instagram, Twitter and Pinterest.

Hello Winter!!!


It’s Wednesday, and this week, I made a Christmas CAS card using Penguin Tag – SDG003 by High Hopes Rubber Stamps for the main image and Hello Winter – FDG007 (High Hopes Rubber Stamps) for the sentiment. Winter is now here and these little penguins couldn’t wait to start enjoying it.

I’d like to take this time to also wish everyone a Very Merry Christmas and A Happy New Year!

To make my card this week, I began with a card base of Hammermill – Premium Colour 100 lb. cardstock, cut and scored to be 5.5″ x 4.25″.  I cut the background paper from Craft Consortium – Polar Playtime to be the same and attached it directly to the base. Tim Holtz Distress Ink – Picked Raspberry was used to ink around the outside of the card. Using my MISTI and Memento – Tuxedo Black ink, I stamped the image and sentiment onto Copic Marker X-Press It Blending Card cardstock. I coloured in the image with Copic markers and the little berries with a Pental Sunburst Metalic Med Gel Pen – Gold. I used Sakura Glaze – Black and Gelly Roll Sakura #10 Pen was used for the eyes and little dots on the hat.) Clear – Wink of Stella was applied over top of the candy canes and candy cane border. Once this was all complete, I fussy cut around the image and then coloured in around it with Copic B01. I ran the image through my Xyron Creative Station and attached it to some Hot Pink cardstock. Once again, I fussy cut around the image and then popped it up on to the card using U-Line double-sided tape. Lastly, Gelly Roll Sparkle Pen was applied to the little blue snowflakes and dots on the background paper to finish off the card.

Card Recipe:

Stamp: Penguin Tag – SDG003 (High Hopes Rubber Stamps)

Sentiment: Hello Winter – FDG007 (High Hopes Rubber Stamps)

Inks: Memento – Tuxedo Black, Tim Holtz Distress Ink – Picked Raspberry

Paper: Copic Marker X-Press It Blending Card, Hammermill – Premium Colour 100 lb., Craft Consortium – Polar Playtime (6″ x 6″), Hot Pink cardstock

Tools: MISTI – Most Incredible Stamping Tool, U-Line double-sided tape, Gelly Roll Sakura #10 Pen, Pental Sunburst Metalic Med Gel Pen – Gold, Sakura Glaze – Black, Gelly Roll Sparkle Pen, Clear – Wink of Stella, Xyron Creative Station

Image coloured with Copic Markers:

Penguin: W9, W7, W5, W3, W0, E15, YR14, Y17, Y11, R30, E42, E41, E40 (Eyes – Sakura Glaze – Black, Gelly Roll Sakura #10 Pen)

Hat, Pom Pom and Bow Tie: RV14, RV13, RV11, RV10, G14, YG23, YG11, Gelly Roll Sakura #10 Pen

Holly and Leaves: G14, YG23, YG11, R59, R37, R35

Candy Cane and Border: C1, C0, R59, R37, R35, Colorless Blender, Clear – Wink of Stella

Berries: Pental Sunburst Metalic Med Gel Pen – Gold

Hope you like it and have a fantastic week!

You can find lots of inspiration from the Design Team Divas at the High Hopes blog, and the High Hopes Rubber Stamps Facebook Fan page plus you can also follow us on
Instagram, Twitter and Pinterest.

Cake is Life


Come and check us out on Passionate Paper Creations & Friends FB group
as we are currently being sponsored by Sweet Sentiment.

If you are a member of Passionate Paper Creations & Friends FB group
you can go to the top of the page and get a shopping discount.
Not a Member? Come Join! https://bit.ly/2VwG9iz.

We are a fun loving group with a lot of inspiration.

*******************************************************

Today, I’m featuring this adorable image from Sweet Sentiment called Cake is Life. Thank you Sweet Sentiment for sponsoring us and having such amazing fun designs to choose from. I am a huge fan of your stamps.

For the base card, I used Hammermill – Premium Colour 100 lb. cardstock and cut it and scored it to be 5.5″ x 4.25″. For the background, I cut some yellow cardstock to be the same size as the base card and adhered it with double-sided tape. Using my Cuttlebug and My Creative Time – Rectangle Frame Dies, I die cut Echo Park Paper Co. – Happy Birthday Boy paper and inked the edges with Tim Holtz Distress Ink – Chipped Sapphire. This was adhered directly to the yellow background using double-sided tape.

Using my MISTI and Memento – Tuxedo Black ink, I stamped the image onto Copic Marker X-Press It Blending Card. I coloured in the image and fussy cut around it. I ran the coloured image through my Xyron Creative Station and applied it to some matching Echo Park Paper Co. – Happy Birthday Boy cardstock. Once again, I fussy cut around it. This time, I popped the image onto the background using U-Line double-sided tape.

I stamped out the sentiment onto Hammermill – Premium Colour 100 lb. paper, fussy cut around it and popped it up onto the base of the card using U-Line double-sided tape.

Card Recipe:

Stamp and Sentiment: Cake is Life – Sweet Sentiment Stamps

Inks: Memento – Tuxedo Black, Tim Holtz Distress Ink – Chipped Sapphire

Paper: Copic Marker X-Press It Blending Card, Hammermill – Premium Colour 100 lb., Echo Park Paper Co. – Happy Birthday Boy 6″ x 6″

Die Cuts: My Creative Time – Rectangle Frame Dies

Miscellaneous: U-Line double-sided tape, Xyron Creative Station, MISTI – Most Incredible Stamping Tool, Cuttlebug

Image coloured with Copic Markers:

Creature: BG72, BG57, BG32, BG11, R89, R59, R56, R39, R29, R24, R22, R21, R02, R00

Eyes: G17, G16, G14, YG03, C9, C1, Gelly Roll Sakura #10 Pen

Cake: E37, E35, E34, E33, Y18, Y08, Y04

Candle: Y17, Y06, Y04, R24

Fork: C5, C3, C1

Hope you like it and have a great week!

Christmas Wreath!!!


It’s Wednesday, and this week, I made a Christmas card using Wreath – TDG012 by High Hopes Rubber Stamps for the main image and Merry Christmas – FDG008 (High Hopes Rubber Stamps) for the sentiment. We love to decorate our home with Christmas wreaths outside and on our door! Do you decorate with Christmas wreaths too?

To make my card this week, I began with a card base of Hammermill – Premium Colour 100 lb. cardstock, cut and scored to be 5″ x 5″. I die cut Recollections – Burgundy to be the same size as the base and adhered it to the card using double-sided tape. DCWV – Holiday Cheer was cut to the size of 4.75″ x 4.75″ and a Sharpie – Medium Point Gold Water based paint was used to go around all of the edges. This was adhered to the base background using liquid glue. I die cut Copic Marker X-Press It Blending Card with my Cuttlebug and Crafting Desert Diva’s – Stitched in Circle Dies. With my MISTI and Memento – Tuxedo Black ink, I stamped the image onto the die cut and the sentiment onto Copic Marker X-Press It Blending Card cardstock. I coloured the image in with Copic markers and coloured in some of the berries with a Pental Sunburst Metalic Med Gel Pen – Gold. A Gelly Roll Sakura #5 Pen was used to add the little white dots on all of the red berries. Once the image was coloured in, I used the Sharpie – Medium Point Gold Water based paint to go around the scalloped part of the circle. I cut around the sentiment to the size of 1.25 x 2-1/8″ and then used a corner punch. Once again, I went around the edges with a Sharpie – Medium Point Gold Water based paint pen. I adhered the the finished image and sentiment to the base card using U-Line double-sided tape. Lastly, I applied Nuvo Crystal Drops – Autumn Red to complete the card.

Card Recipe:

Stamp: Wreath – TDG012 (High Hopes Rubber Stamps)

Sentiment: Merry Christmas – FDG008 (High Hopes Rubber Stamps)

Inks: Memento – Tuxedo Black

Paper: Copic Marker X-Press It Blending Card, Hammermill – Premium Colour 100 lb., DCWV – Holiday Cheer (6″ x 6″), Recollections – Burgundy

Die Cut: Crafting Desert Diva’s – Stitched in Circle Dies (Retired)

Nuvo Crystal Drops: Autumn Red

Tools: MISTI – Most Incredible Stamping Tool, U-Line double-sided tape, Gelly Roll Sakura #5 Pen, Sharpie – Medium Point Gold Water based paint

Image coloured with Copic Markers:

Wreath: G99, G21, YG67, YG17, R39, R27, R22, E27, E25, E23, G99, Pental Sunburst Metalic Med Gel Pen – Gold, Gelly Roll Sakura #5 Pen

Background: BG000, BG0000, Sharpie – Medium Point Gold Water based paint

Hope you like it and have a fantastic week!

You can find lots of inspiration from the Design Team Divas at the High Hopes blog, and the High Hopes Rubber Stamps Facebook Fan page plus you can also follow us on
Instagram, Twitter and Pinterest.

Santa Candy Cane


Today, I’m featuring this adorable Santa image from Conie Fong Art called Holiday Gnomes Bundle By Conie Fong.

For the base card, I used Hammermill – Premium Colour 100 lb. cardstock and cut it and scored it to be 5.5″ x 5.5″. For the background, I cut Craft Smith – Peppermint Twist paper to the same size as the base card and inked around the edges with Tim Holtz Distress Inks – Candied Apple. I adhered this to the base card with double-sided tape. AC – Green cardstock was die cut with my Cuttlebug and Essentials by Tattered Lace Dies – Easel Slider dies. Tim Holtz Distress Inks – Peeled Paint was used to ink around all of the edges and it was popped up onto the base card using U-Line double-sided tape.

The image using HP High Quality Grayscale was printed onto Copic Marker X-Press It Blending Card and die cut using my Cuttlebug and Essentials by Tattered Lace Dies – Easel Slider dies. The image was coloured in with Copic markers and Cosmic Shimmer Fluffy Stuff and WOW! Sparkling Snow Embossing Glitter were added to the brim of the hat and pompom. Ranger – Emboss It Pen Clear was added in parts at the bottom for snow and WOW! Sparkling Snow Embossing Glitter was applied. The hat, pompom and snow were all then heat embossed using my Marvy Uchida – Embossing Heat Tool. Stickles – Crystal was also added to the snow to add a little more sparkle. Lastly, using a Gelly Roll Sakura #10 Pen, I added snow to the background sky. The finished image was popped up onto the green cardstock using U-Line double-sided tape and Kraftin’ Kimmie – Christmas Dots were added to complete the card.

Card Recipe:

Stamp: Holiday Gnomes Bundle by Conie Fong

Inks: HP High Quality Grayscale, Tim Holtz Distress Inks – Candied Apple, Tim Holtz Distress Inks – Peeled Paint

Paper: Copic Marker X-Press It Blending Card, Hammermill – Premium Colour 100 lb., Craft Smith – Peppermint Twist 6×6 in., American Crafts – Green Cardstock

Die Cuts: Essentials by Tattered Lace Dies – Easel Slider

Miscellaneous: U-Line double-sided tape, Stickles – Crystal, Gelly Roll Sakura #10 Pen, Cosmic Shimmer Fluffy Stuff, Marvy Uchida – Embossing Heat Tool

Image coloured with Copic Markers:

Skin: E21, E11, E00, E000, R30, R20

Beard: C2, C1, C0, BV20

Hat and Clothing: R59, R37, R35, WOW! Embossing Glitter – White Puff Twinkle, Cosmic Shimmer Fluffy Stuff, Ranger – Emboss It Pen Clear

Shoes: C9, C7, C5, C3

Candy Cane: C1, C0, C00, Colorless Blender, Spectrum Noir Sparkles – Red Berry, Spectrum Noir Sparkles – Clear

Bow: G14, G07, YG23, YG11

Sky: C7, B99, B97, B95

Snow: B60, C1, Stickles – Diamond, Cosmic Shimmer Fluffy Stuff, WOW! Sparkling Snow Embossing Glitter, Ranger – Emboss It Pen Clear

Hope you like it and have a great week!


Christmas Penguins!!!


It’s Wednesday, and this week, I made a Christmas card using Christmas Penguins – TDG004 by High Hopes Rubber Stamps for the main image and Happy Holidays – FDG006 (High Hopes Rubber Stamps) for the sentiment. This is just a sneak peek to all of the wonderful images coming soon on Monday, December 6, 2022 as we celebrate our Woodland Winter Release for the month of December at High Hopes Stamps.


To make my card this week, I began with a card base of Hammermill – Premium Colour 100 lb. cardstock, cut and scored to be 5.5″ x 4.25″. I die cut Copic Marker X-Press It Blending Card with my Cuttlebug and My Creative Time – Rectangle Frame Layers. With my MISTI and Memento – Tuxedo Black ink, I stamped the image onto the die cut and the sentiment onto Copic Marker X-Press It Blending Card. I coloured the image in with Copic markers and added in the snow in the sky with Gelly Roll Sakura #10 Pen. I combined Cosmic Shimmer Fluffy Stuff and WOW! Embossing Glitter – White Puff Twinkle for their hats and pom-poms and heat embossed them with my Marvy Uchida – Embossing Heat Tool. I added in the snow on the bottom with Cosmic Shimmer Fluffy Stuff and Sprinkled some WOW! Sparkling Snow Embossing Glitter on as well after using a Ranger – Emboss It Pen Clear in spots. This too, was heat embossed with my Marvy Uchida – Embossing Heat Tool. Lastly, I added in some Stickles – Diamond for snow as well. I love sparkle. LOL! Using double-sided tape, I adhered the finished scene to the base card. I rounded the sentiment with a 1/4″ rounder on the top and cut the 2 bottoms at a diagonal. Copic Marker R37 was used to go around the edges. I popped this onto the finished image using U-Line double-sided tape to complete the card.

Card Recipe:

Stamp: Christmas Penguins – TDG004 (High Hopes Rubber Stamps)

Sentiment: Happy Holidays – FDG006 (High Hopes Rubber Stamps)

Inks: Memento – Tuxedo Black

Paper: Copic Marker X-Press It Blending Card, Hammermill – Premium Colour 100 lb.

Die Cut: My Creative Time – Rectangle Frame Layers

Tools: MISTI – Most Incredible Stamping Tool, U-Line double-sided tape, Marvy Uchida – Embossing Heat Tool, Gelly Roll Sakura #10 Pen, Ranger – Emboss It Pen Clear

Image coloured with Copic Markers:

Penguins: W9, W7, W5, W3, W00, E15, YR14, Y17, Y11, RV00, E43, E42, E41, E40

Hats and Bow for Penguin: R59, R37, R35

Holly and Bow: G14, G07, YG23, YG11

Large Gift and Small Gift: BG72, BG57, BG32, BG11, Y17, Y15, Y13

Medium Gift: V17, V15, V12

Long Gift: RV66, RV63, RV55

Ribbons: Y38, Y35, Y32, RV66, RV63, RV55

Sky: B05, B04, B03, B02

Snow: BV06, Cosmic Shimmer Fluffy Stuff, WOW! Sparkling Snow Embossing Glitter, WOW! Embossing Glitter – White Puff Twinkle, Stickles – Diamond

Hope you like it and have a fantastic week!

You can find lots of inspiration from the Design Team Divas at the High Hopes blog, and the High Hopes Rubber Stamps Facebook Fan page plus you can also follow us on
Instagram, Twitter and Pinterest.

Work Hard, Dream Big!!


Check out the sale for KLM Digital Designs Clear Stamps
going on now while supplies last! Just click on the link provided or go here: https://klmdigitaldesign.com.

Today, I’m sharing a card I made using KLM Digital Designs –  Office Gnome from the new November release. This image also comes with 2 more sayings: “You got this!” and “Strive for progress, not perfection”. This card would also be great for someone you know just starting a new position or a recent graduate as well.

To make the card, I started with a base created with Hammermill – Premium Colour 100 lb. cardstock cut and folded to the size of 5.5″ x 4.25″. I taped off the top of the card with some Post-It Note tape and inserted the Heffy Doodle – Cityscape stencil over top of the bottom half of the card. I taped off the bottom of the stencil and the sides to keep it place. Using multiple Picket Fence – Blending Brushes, I added in the buildings using Memento – Gray Flannel, Memento – London Fog and Tim Holtz Distress Ink – Hickory Smoke. I removed the stencil and reapplied it over the card, this time using the stencil to cover the buildings. I re-applied the tape to the bottom of the stencil to keep it in place. Using stencils that I had previously created using Avery Elle – Pierced Clouds Die, I applied the clouds in using Tim Holtz Distress Ink – Fossilized Amber, Picked Raspberry and Salty Ocean with Picket Fence – Blending Brushes. I removed the stencil and turned it around. This time using Tim Holtz Distress Ink – Hickory Smoke to add in the windows on the buildings along with just a touch of Tim Holtz Distress Ink – Fossilized Amber. I moved the tape up to where the buildings ended on the bottom and once again placed it across the card. This time, I used Tim Holtz Distress Ink – Black Soot. The background was now complete.

The image and sentiment were both imported into Microsoft Word and printed out onto Copic Marker X-Press It Blending Card. I used my Brother Scan and Cut to die cut the image with a small margin around it. This was coloured in with Copic markers. My Cuttlebug, My Creative Time – Rectangle Frame Dies and My Creative Time – Rectangle Frame Layers were used to die cut the sentiment and black cardstock. U-Line double-sided tape was applied to the backs of the images and 2 die cuts to pop-up them all up onto the finished background to complete the card.

Card Recipe:

Stamp and Sentiment:  Office Gnome – KLM Digital Designs

Inks: HP Printer Grayscale, Memento – Gray Flannel, Memento – London Fog, Tim Holtz Distress Ink – Hickory Smoke, Fossilized Amber, Picked Raspberry, Salty Ocean, Black Soot

Paper: Copic Marker X-Press It Blending Card, Hammermill – Premium Colour 100 lb.

Die Cuts: My Creative Time – Rectangle Frame Dies, My Creative Time – Rectangle Frame Layers, Avery Elle – Pierced Clouds Die (D-05-01)

Stencil: Heffy Doodle – Cityscape

Miscellaneous: U-Line – 2 sided tape, Picket Fence – Blending Brushes, U-Line double-sided tape

Image coloured with Copic Markers:

Skin: E21, E11, E00, E000

Beard and Hair: E47, E44, E43, E41

Dress Shirt: B45, B39, B37, C1, C0, C00

Pants: T7, T5, T3

Hat: C9, C7, C5, C3

Boots: C9, C7, C5, C3, C0

Tie: R24, B37, C2

Brief Case: E29, E27, E25, E23, E21

Shadow: C2, C1, C0

Hope you like it and have a great week!

You can find more cards to inspire you at KLM Designs, KLM Digital Design Team and KLM Digital Designs on the Facebook Fan page from the rest of our design team.

Ugly Sweaters!!!


It’s Wednesday, and this week, I made a Christmas card using Ugly Sweater Time – SLF025 by High Hopes Rubber Stamps for the main image and Ugly Sweater Time – FFL025 (High Hopes Rubber Stamps) for the sentiment. I have a few ugly Christmas sweaters, that I love wearing at Christmas time. How many do you have? LOL!

To make my card this week, I began with a card base of Hammermill – Premium Colour 100 lb. cardstock, cut and scored to be 5.5″ x 4.25″. I cut the main background paper from Hot Buy – Recollections – Jewel Tones to be the same size and applied this directly to the base card using double-sided tape. Your Next Stamp – Winter Knits patterns were cut to the size of a little over .5″ each x 4.25″ and applied to the top and bottom of the card using double-sided tape. My Cuttlebug and My Creative Time -Stitched Squares Inside and Out were used to die cut PhotoPlay – Tulla & Norbert’s Christmas Party paper to the size of 4″ x 4″. Tim Holtz Distress Ink – Evergreen Bough was applied around the edges and double-sided tape was used to adhere it to the base card. The large oval was die cut using my Cuttlebug, Hero Arts – Infinity Die Ovals and Hot Buy – Recollections – Jewel Tones paper. This was popped up onto the square using U-Line double-sided tape.

With my MISTI and Memento – Tuxedo Black ink, I stamped both the image and the sentiment onto Copic Marker X-Press It Blending Card. The image was die-cut using my Cuttlebug and Hero Arts – Infinity Die Ovals. I coloured the image in with Copic markers. The sentiment was die cut with Whimsy Stamps – Quick Strips Die Set and Tim Holtz Distress Ink – Evergreen Bough was used to ink around the edges. The coloured image and sentiment were both popped up onto the card using U-Line double-sided tape to finish it off.

Card Recipe:

Stamp: Ugly Sweater Time – SLF025 (High Hopes Rubber Stamps)

Sentiment: Ugly Sweater Time – FFL025 (High Hopes Rubber Stamps)

Inks: Memento – Tuxedo Black, Tim Holtz Distress Ink – Evergreen Bough

Paper: Copic Marker X-Press It Blending Card, Hammermill – Premium Colour 100 lb., PhotoPlay – Tulla & Norbert’s Christmas Party (6″ x 6″), Your Next Stamp – Winter Knits (6″ x 6″), Hot Buy – Recollections – Jewel Tones

Die Cut: Hero Arts – Infinity Die Ovals, My Creative Time -Stitched Squares Inside and Out, Whimsy Stamps – Quick Strips Die Set – WSD330

Tools: MISTI – Most Incredible Stamping Tool, U-Line double-sided tape

Image coloured with Copic Markers:

Skin: E21, E11, E00, E000

Beard: B60, C1, C0, C00

Hat and Clothing: BG72, BG57, BG32, BG11, Y17, Y15, Y13, R59, R37, R35

Shoes: C8, C6, C4, C2, C1, C0

Sweater: E53, E51, E50, E35, E34, E33, E31, G07, G05, G03, Y17, Y15, Y13, R59, R37, R35, R02, YG03, B16, B14, B12

Knitting Needles: YG03, G07

Shadow: N2, N1, N0, BG000

Hope you like it and have a fantastic week!

You can find lots of inspiration from the Design Team Divas at the High Hopes blog, and the High Hopes Rubber Stamps Facebook Fan page plus you can also follow us on
Instagram, Twitter and Pinterest.

Christmas Dragon


Come and check us out on Passionate Paper Creations & Friends FB group
as we are currently sponsoring Lee Holland ArtLee Holland Illustration Inspiration Facebook Group for the month of November.

Check out the Etsy store for more fantastic designs from Lee Holland Art. You can click on any of the links above or you can click here too:  https://www.etsy.com/ca/shop/leehollandart. There is a 50% off Black Friday sale going on. You should check it out!

Jump over to Passionate Paper Creations & Friends. Not a Member? Come Join! https://bit.ly/2VwG9iz.

If you are not a member just click join. We are a fun loving group with a lot of inspiration.

Lee Holland Art has been sponsoring us throughout the month of November at  Passionate Paper Creations & Friends FB group site!! Today, I’m featuring this adorable dragon image from Lee Holland Art called Reindeer Antlers Christmas Dragon. Thank you Lee Holland Art for sponsoring us and having such amazing fun designs to choose from. I love all of your little dragons.


For the base card, I used AC Cardstock – White and cut it and scored it to be 6″ x 6″. For the background, I cut Creative Memories – Mermaid Cove Designer Paper to the same size as the base card. The image using HP High Quality Grayscale was printed onto Copic Marker X-Press It Blending Card. Using my Cuttlebug and Essentials by Tattered Lace Dies – Easel Slider dies, the printed image and Hot Buy – Recollections Ombre Brights Paper were both die cut. The sentiment was stamped using my Misti, VersaMark Ink and sentiment stamps from Lawn Fawn – “Offset Sayings – Christmas” and Lawn Fawn “Winter Skies”. Ranger Super Fine Gold Embossing powder was applied to the stamped sentiments and then heat set with a Marvy Uchida – Embossing Heat Tool.

I cut the sentiment down to be 3-3/8″ x 1-2/8″ and then used W R Memory Keepers – Crop-A-Dile Corner Chomper to create .25″ corners. Using a Sharpie – Gold Medium Point – Water Based Paint pen, I went around all of the edges of the cuts with the exception of the image die cut. The image was coloured in with Copic markers and then I used a Gelly Roll Sakura #10 Pen to create the snow in the sky and a combination of Stickles – Crystal, Stickles – Waterfall and Cosmic Shimmer Fluffy Stuff which was applied prior to the Stickles being added.

The card was now ready to be assembled. I applied U-Line double-sided tape to the backs of the coloured image and cut frame to pop them up. I doubled up the tape for behind the sentiment. The base paper was applied directly to the card base using double-sided tape. I peeled off the tape from the backings of the elements and popped them all up onto the base card to finish it off.

Card Recipe:

Stamp: Reindeer Antlers Christmas Dragon – Lee Holland Art

Sentiments: Offset Sayings – Christmas – Lawn Fawn,  Winter Skies – Lawn Fawn

Inks: HP High Quality Grayscale, Versamark

Paper: Copic Marker X-Press It Blending Card, AC Cardstock – White, Creative Memories – Mermaid Cove Designer Paper Pack, Hammermill – Premium Colour 100 lb., Hot Buy – Recollections Ombre Brights Paper Pack (12″ x 12″)

Die Cuts: Essentials by Tattered Lace Dies – Easel Slider

Miscellaneous: U-Line double-sided tape, Sharpie – Gold Medium Point – Water Based Paint, Stickles – Crystal, Stickles – Waterfall, Gelly Roll Sakura #10 Pen, W R Memory Keepers – Crop-A-Dile Corner Chomper Cosmic Shimmer Fluffy Stuff, Marvy Uchida – Embossing Heat Tool

Image coloured with Copic Markers:

Dragon: BG72, BG57, BG32, BG11, BG09, BG05, BG02, BG01, V15, V12, V06. V000, G14, YG23, YG11, YG03, YG01

Box: E27, E25, E23

Ornaments: R59, R37, R35, E15, Y35, YR24, Y08, YG67, YG17, YG21, E35, E34, E33, E31

Sky: B05, B04, B02, B01, Gelly Roll Sakura #10 Pen

Snow: B60, C1, Stickles – Crystal, Stickles – Waterfall, Cosmic Shimmer Fluffy Stuff

Hope you like it and have a great week!

Believe in Santa!!


Hi everyone…today we are having a sponsor day over at the Passionate Paper Creations & Friends FB group site with Joy Clair Designs!! Today I’m using this adorable Santa image and sentiment from Joy Clair Designs called Love Santa Digital Stamps. Thank you Joy Clair Designs for sponsoring us.

I printed out the image and sentiment using HP High Quality Grayscale onto Copic Marker X-Press It Blending Card. The image was coloured in with Copic markers and then fussy cut. The sentiment was die cut with my Cuttlebug and Whimsy Stamps – Quick Strips Die Set – WSD330.

For the base card, I used AC Cardstock – White and cut it and scored it to be 6″ x 6″. For the background, I applied Craft Consortium – Made By Elves (6″ x 6″) to the base using double-sided tape. A Sharpie – Gold Medium Point – Water Based Paint was used to go around the edges of the card and also around the sentiment. I applied some Ranger Inkssentials – Glossy Accents on top of the snow to make it look like an icy pond and applied some Stickles – Crystal around the edges. Once it was dried, I popped up the image and sentiment onto the background using U-line double sided tape to complete the card.

Card Recipe:

Stamp and Sentiment: Love Santa Digital Stamps – Joy Clair Designs

Inks: HP High Quality Grayscale

Paper: Copic Marker X-Press It Blending Card, AC Cardstock – White, Craft Consortium – Made By Elves (6″ x 6″), Hammermill – Premium Colour 100 lb.

Die Cuts: Whimsy Stamps – Quick Strips Die Set – WSD330

Miscellaneous: U-Line double-sided tape, Ranger Inkssentials – Glossy Accents, Sharpie – Gold Medium Point – Water Based Paint, Stickles – Crystal, Stickles – Star Dust

Image coloured with Copic Markers:

Skin: E21, E11, E01, E00, R30, R20

Beard and Hair: C3, C2, C1, C0, Colorless Blender

Hat and Clothing: R59, R37, R35, B60, C1, C0, E15, Y35, YR24, Y08, Stickles – Star Dust

Skates: C2, C1, C0, W3, W2, W1, Pental Sunburst Metalic Med Gel Pen – Silver

Hope you like it and have a great week!

Come and check us out on Passionate Paper Creations & Friends FB group
as we are currently sponsoring Joy Clair DesignsJoy Clair Designs Facebook Group.

Oh you don’t want to miss this big sale! Jump over to Passionate Paper Creations & Friends. Not a Member? Come Join! https://bit.ly/2VwG9iz.

If you are a member of Passionate Paper Creations & Friends FB group
you can go to the top of the page and get a shopping discount.

If you are not a member just click join. We are a fun loving group with a lot of inspiration.

Created With Love!!!


It’s Wednesday, and this week, I made a Crafty Gnome using Let’s Color – TLF028 by High Hopes Rubber Stamps for the main image and Created With Love – FFL012 (High Hopes Rubber Stamps) for the sentiment. Crafting is always so much fun and I love to colour up new stamps all the time! This month’s Gnome Mania at High Hopes Rubber Stamps has a lot of fun new gnome stamps to choose from.

To make my card this week, I began with a card base of Hammermill – Premium Colour 100 lb. cardstock, cut and scored to be 5.5″ x 5.5″. I cut the background paper from Photo-Play – Crafting With My Gnomies Paper Pack to be the same size and applied this directly to the base card using double-sided tape. Tim Holtz Distress Ink – Twisted Citron was used to ink around all of the edges. Using my Cuttlebug and dies from My Creative Time – Bunch of Fun Circle Dies, I die cut Copic Marker X-Press It Blending Card and then stamped the image onto it using my MISTI and Memento – Tuxedo Black ink. My Creative Time – Stitched Zig Zag Tie die was used to die cut Hammermill – Premium Colour cardstock and the sentiment was stamped using my MISTI and Memento – Tuxedo Black ink. I coloured in the main image with Copic markers and then Tim Holtz Distress Ink – Twisted Citron was used to go around the edges of both die cuts. The image and sentiment were both popped up onto the background using U-Line double-sided tape. Finally, I ran small pieces of paper through my Xyron Create a Sticker from Hot Buy – Recollections – Jewel Tones paper pack and then through my Cuttlebug using My Creative Time – Stitched Zig Zag Ties die cuts. I placed the hearts onto the card to finish it off.

Card Recipe:

Stamp: Let’s Color – TFL028 (High Hopes Rubber Stamps)

Sentiment: Created With Love – FLL012 (High Hopes Rubber Stamps)

Inks: Memento – Tuxedo Black, Tim Holtz Distress Ink – Twisted Citron

Paper: Copic Marker X-Press It Blending Card, Hammermill – Premium Colour 100 lb., Photo-Play – Crafting With My Gnomies (6″ x 6″), Hot Buy – Recollections – Jewel Tones

Die Cuts: My Creative Time – Bunch of Fun Circle Dies, My Creative Time – Stitched Zig Zag Ties

Tools: MISTI – Most Incredible Stamping Tool, U-Line – 2 sided tape, Xyron Create a Sticker

Image coloured with Copic Markers:

Skin: E21, E11, E00, E000

Beard: E47, E44, E43, E41

Hat: RV14, RV13, RV11, YG25, YG23, YG21

Clothing: BG09, BG05, BG02, BG01, E35, E34, E33, E31

Shoes: C8, C6, C4, C3, C1, C0

Table and Chair Legs: E35, E34, E33, E31

Chair: BG72, BG57, BG32, BG11

Markers and Box: C5, C4, C3, C2, C1, C0, C00, BG72, BG57, BG32, BG11, BG05, BG02, BG01, RV14, RV13, RV11, YG25, YG23, YG21, Y17, Y15, Y13, G19, G17, G16, B95, B93, B91

Paper: YR30

Shadow: C2, C1, C0, Colorless Blender

Hope you like it and have a fantastic week!

You can find lots of inspiration from the Design Team Divas at the High Hopes blog, and the High Hopes Rubber Stamps Facebook Fan page plus you can also follow us on
Instagram, Twitter and Pinterest.

Jolly Reindeer Cheers!!


Hi everyone…today we are having a sponsor day over at the Passionate Paper Creations & Friends FB group site with Di’s Digi Stamps!! Today I’m using this adorable reindeer image from Di’s Digi Stamps called Jolly Reindeer Cheers.

For the base card, I used AC Cardstock – White and cut it and scored it to be 6″ x 6″. For the background, I applied Craft Consortium – It’s Snome Time (6″ x 6″) to the base using double-sided tape. Green cardstock cut the size of approximately 1″ was added to the bottom using double-sided tape. I added Crafts – Sparkling Stickers – 02-3068629 – Red to Hammermill – Premium Colour 100 lb. to make it more sturdy and then cut 2 pieces, 1″ x 6″ and .75″ x 6″ to add to the top and bottom. I applied double-sided tape to adhere it the card. I ran some gold cardstock from Forever In Time – Glam Glitter Cardstock – Gold Medley cut to the size of 1.25″ x 6″ through my Xyron Create a Sticker. Using my Cuttlebug and Your Next Stamp – Jingle Bell Border Die, I cut the bells out. I peeled off the sticker backing and applied it to the top of my card. Using Lifestyle Crafts Cutting Dies – Nesting Circles – I cut out a circle 3.75″ from the same cardstock and using U-Line double-sided tape, I popped it up in the centre of the card background. The same dies were also used to cut a 3.5″ circle out of Craft Consortium – Ink Drops Vivid Craft Papers and this was popped up onto the gold circle using U-Line double-sided tape. Hot Buy Craft Smart – Holiday Glitz Glitter Paper was cut and I ran it through my Xyron Creative Station. This was used to die-cut the sentiment with my Cuttlebug and Jolly Quickutz – Deck the Halls limited edition gift set. The sentiment was die-cut 4 times and stacked on top of each other to create a raised embellishment and placed in the centre of the red and green stripe on the bottom of the card.

I printed out the image using HP High Quality Grayscale onto Copic Marker X-Press It Blending Card. The image was coloured in with Copic markers and then fussy cut. It was popped up onto the smaller circle using U-line double sided tape to complete the card.

Card Recipe:

Stamp: Jolly Reindeer Cheers – Di’s Digi Stamps

Sentiment: Jolly Quickutz – Deck the Halls limited edition gift set

Inks: HP High Quality Grayscale

Paper: Copic Marker X-Press It Blending Card, Crafts – Sparkling Stickers – 02-3068629 – Red, Hot Buy Craft Smart – Holiday Glitz Glitter Paper 12″ x 12″, AC Cardstock – White, Craft Consortium – Ink Drops Vivid Craft Papers, Forever In Time – Glam Glitter Cardstock – Gold Medley, Green Cardstock, Craft Consortium – It’s Snome Time (6″ x 6″), Hammermill – Premium Colour 100 lb.

Die Cuts: Your Next Stamp – Jingle Bell Border Die, Lifestyle Crafts Cutting Dies – Nesting Circles, Jolly Quickutz – Deck the Halls limited edition gift set

Miscellaneous: U-Line double-sided tape, Cuttlebug, Xyron Create a Sticker, Xyron Creative Station

Image coloured with Copic Markers:

Reindeer and Antlers: E53, E51, E50, E49, E47, E44, E29, E27, E25, E23, R30

Hat: RV14, R85, R83, G14, YG23, YG11

Collar and Bell: E15, YR24, Y35, Y08, R59, R37, R35

Baubles: G14, YG11, R59, R37, R35, T5

Hope you like it and have a great week!

Come and check us out on Passionate Paper Creations & Friends FB group
as we are currently sponsoring Di’s Digi Stamps  \ DisDigiStamps Fan Page Group for November, 2021.

If you are a member of Passionate Paper Creations & Friends FB group
you can go to the top of the page and get a shopping discount.

If you are not a member just click join. We are a fun loving group with a lot of inspiration.

Dropping A Line!!!


It’s Wednesday, and this week, I made a birthday card using Just Fishin’ – TLF029 by High Hopes Rubber Stamps for the main image and Dropping A Line – FFL013 (High Hopes Rubber Stamps) for the sentiment. High Hopes just released November “Gnome Mania”. There are so many new super adorable gnomes to choose from.

To make my card this week, I began with a card base of Hammermill – Premium Colour 100 lb. cardstock, cut and scored to be 5.5″ x 4.25″. I cut the background paper from Rust coloured cardstock to be the same size and applied this directly to the base card using double-sided tape. Using my Cuttlebug and My Creative Time – Rectangle Frame Layers, I die cut the patterned paper from Photo-Play – Camp Happy Bear. Tim Holtz Distress Ink – Evergreen Bough was used to ink around the edges. I added some thin double-sided U-line tape to this piece and popped it up onto the background. With my MISTI and Memento – Tuxedo Black ink, I stamped both the image and the sentiment onto Copic Marker X-Press It Blending Card. Craftin Desert Diva’s – Inside Scalloped Squares dies were used to die cut the Rust coloured paper and Copic Marker X-Press It Blending Card. I cut a 3.75″ square out of Hammermill – Premium Colour 100 lb. cardstock and used this to piece the 2 die-cuts together after I finished colouring in the image with Copic Markers. This made the 2 pieces more sturdy for adding double-sided tape to pop it up onto the printed background. I die-cut the sentiment using My Creative Time – Curly Frames and then ran it through my Xyron Create a Sticker so that it would lay nice and flat onto the Rust coloured cardstock. I didn’t have a larger border frame, so I used my Brother Scan and Cut to create a border around the die cut. Lastly, to finish off the card, I popped this up using U-Line double-sided tape.

Card Recipe:

Stamp: Just Fishin’ – TLF029 (High Hopes Rubber Stamps)

Sentiment: Dropping A Line – FFL013 (High Hopes Rubber Stamps)

Inks: Memento – Tuxedo Black. Tim Holtz Distress Ink – Evergreen Bough

Paper: Copic Marker X-Press It Blending Card, Hammermill – Premium Colour 100 lb., Photo-Play – Camp Happy Bear (6″ x 6″), Rust Cardstock

Die Cuts: Craftin Desert Diva’s – Inside Scalloped Squares (Retired), My Creative Time – Rectangle Frame Layers, My Creative Time – Curly Frames

Tools: MISTI – Most Incredible Stamping Tool, U-Line – 2 sided tape, Brother Scan and Cut, Xyron Create a Sticker

Image coloured with Copic Markers:

Skin: E21, E11, E00, E000, R30, R20

Beard: E47, E44, E43, E41

Hat and Shirt: E89, E87, E84, E25, E23, E21

Jeans: B26, B23, B21

Tree Stump: E49, E35, E33, E25, E23

Cattail and Grass: E49, E25, E31, YG17, YG13, YG11, YG03, YG01

Fishing Rod and Reel: E25, E23, G05, G02, C3

Fish: E97, E94, E19, E17

Stones: T6, T4, T1

Water and Droplets: BG05, BG02, BG000, B05, B01

Hope you like it and have a fantastic week!

You can find lots of inspiration from the Design Team Divas at the High Hopes blog, and the High Hopes Rubber Stamps Facebook Fan page plus you can also follow us on
Instagram, Twitter and Pinterest.