Tag Archive | Copic Marker X-Press It Blending Card

Musical Penguin Parade


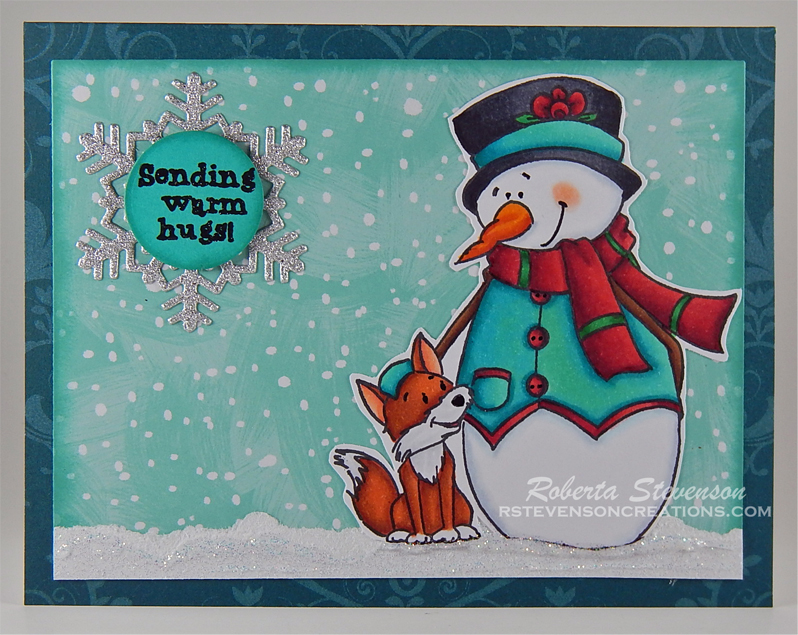
Hi There! Today I’d like to share a Christmas Card I made using Top Hat Penguin – RLF005 (High Hopes Rubber Stamps), Trumpet Penguin – RLF006 (High Hopes Rubber Stamps) and Flute Penguin – RLF002 (High Hopes Rubber Stamps). Musical Wishes – GLL014 (High Hopes Rubber Stamps) was chosen for the sentiment. I just love these adorable penguins and couldn’t resist putting them all together to create a musical penguin parade. LOL!

To make my card this week, I used Recollections – White cardstock for the base card which is 7.25″ x 7″. I scored the paper at 3.5″ to create the dimensions of 7.25″ x 3.5″. The red background was cut to the same size using Crafter’s Companion Luxury Cardstock – Red. The musical notes layer was cut from Craftsmart – Classic Village at 7″ x 3.25″. The snowy background was die cut to the same size in length using Recollections – Christmas Inkjet Printable Glitter Paper. I used My Creative Time – Tall Frame Dies, My Creative Time – Tall Frame Layers in order to achieve this. Once the snowy background paper was die cut, I tore along it in order to create the illusion of white snow drifts along the top of the snow. I adhered all of the layers with double-sided tape. Using my large Misti, I stamped the sentiment using Versa Fine – Onyx Black and embossed it with Ranger – Clear Super Fine Detail embossing powder. Marvy Uchida – Embossing Heat Tool was used to heat set the embossing powder.

I stamped all of the images onto Copic Marker X-Press It Blending Card using my Misti and Memento – Tuxedo Black ink. The images were then all coloured in with Copic markers and die cut using my Brother Scan and Cut machine. Then I ran all of the images through my Xyron Creative Station to make them all stickers. I placed them on the card and then used Stickles – Diamond to create some snow drifts. Clear – Wink of Stella was added to the Candy Cane to make it sparkle and also to all of the leaves and holly on the hats.

To complete the card, I edged all around the scene with Stickles – Sea Glass.

Card Recipe:

Stamp:  Top Hat Penguin – RLF005 (High Hopes Rubber Stamps), Trumpet Penguin – RLF006 (High Hopes Rubber Stamps), Flute Penguin – RLF002 (High Hopes Rubber Stamps)

Sentiment Background: Musical Wishes – GLL014 (High Hopes Rubber Stamps)

Inks: Memento – Tuxedo Black, Versa Fine – Onyx Black

Paper: Copic Marker X-Press It Blending Card, Recollections – Christmas Inkjet Printable Glitter Paper – 8.5 x 11″, Hot Buy Craftsmart – Classic Village – 12″ x 12″ paper, Crafter’s Companion Luxury Cardstock – Red – 8.5 x 11″

Die Cuts: My Creative Time – Tall Frame Dies, My Creative Time – Tall Frame Layers

Embossing Powder: Ranger – Clear Super Fine Detail embossing powder

Tools: MISTI – Most Incredible Stamping Tool, Cuttlebug,  Xyron Creative Station, Stickles – Sea Glass, Stickles – Diamond, Clear – Wink of Stella, Marvy Uchida – Embossing Heat Tool

Images coloured with Copic Markers:

Penguin Bodies: W9, W7, W5, W3, E15, Y17, YR16, YR15, E43, E42, E41, E40, R11, RV00, Colorless Blender, White Prismacolor Premier Pencil

Top Hats: C9, C8, C6, C3

Scarfs and Hat Bands: BG78, BG75, BG09, BG07, BG02

Vest and Mouse: R59, R39, R37, R24, C3, C1

Horn and Flute: E97, E23, Y17, Y15, Y11

Holly and Leaves: YG97, YG95, YG01, G21, R39, R24

Bird: Y19, Y15, Y11, YR15

Candy Cane: R37, R35, C1, C0, Colorless Blender, Clear – Wink of Stella

Hope you like it and have a fantastic week!

You can find lots of inspiration from the Design Team Divas at the High Hopes blog, and the High Hopes Rubber Stamps Facebook Fan page plus you can also follow us on
Instagram, Twitter and Pinterest.


Happy Fall Y’All


It’s Wednesday, and this week I’m sharing a card featuring Fall Joy – T041 from (High Hopes Rubber Stamps) with the sweet sentiment Happy Fall Y’All – G290 (High Hopes Rubber Stamps). These racoons are having a blast playing in the leaves. We used to do that too when we were little. So much fun. I love seeing all of the beautiful fall colours. Such a wonderful time of the year.


To create the card this week, I stamped the main image and then coloured it in with Copic Markers. Using My Creative Time – Rectangle Frame Dies, My Creative Time – Rectangle Frame Layer Dies and my Cutttlebug, I die cut the main image and the background layers.

For the base card 5.25″ x 4.25″, I used The Paper Studio – Primary Base Colours. The backing behind the main images is from AC Cardstock – Autumn. I attached the main image to this piece using double-sided tape. The plaid paper is from PhotoPlay – Gnome for the Holidays Thanksgiving. Once this background paper was die-cut, all of the edges were inked with Tim Holtz Distress Ink – Carved Pumpkin. This was then applied directly to the base with double-sided tape.

To complete the assembly, I added 3M VHB – 2 sided tape on the back of the first layers and popped them up onto the bottom 2 layers. The sentiment was stamped with Memento – Tuxedo Black in and I fussy cut around it. I ran this through my Xyron Create a Sticker and then layered it onto some Orange cardstock. Then I fussy cut around it again and ran it through my Xyron as well. Then I inked around the edges with the same Tim Holtz ink I used earlier. I placed it over the main image and used 2 very small pieces of 3M VHB – 2 sided tape where it went over the edges of the main image.

Card Recipe:

Stamp: Fall Joy – T041 (High Hopes Rubber Stamps)

Sentiment: Happy Fall Y’All – G290 (High Hopes Rubber Stamps)

Inks: Memento – Tuxedo Black, Tim Holtz Distress Ink – Carved Pumpkin

Paper: Copic Marker X-Press It Blending Card, The Paper Studio – Primary Base Colours, AC Cardstock – Autumn, PhotoPlay – Gnome for the Holidays Thanksgiving

Die Cuts: My Creative Time – Rectangle Frame Layers, My Creative Time – Rectangle Frame Dies

Tools and Miscellaneous: MISTI – Most Incredible Stamping Tool, Cuttlebug, Xyron Create a Sticker

Image coloured with Copic Markers:

Racoons: E49, E44, E31, W8, W6, W4, W2, W0, R02, PrismaColor Premiere Pencils – Black (PC935), 90% Gray (PC1076), 70% Gray (PC1056),  30% Gray (PC1052), Chocolate (PC1082)

Trees: E49, E37, E25, E23

Leaves: YG93, YG61, YG25, YG06, YG03, R14, R08, R05, R02, YR68, YR15, YR14, YR12, Y19, Y08

Hope you like it and have a fantastic week!

You can find lots of inspiration from the Design Team Divas at the High Hopes blog, and the High Hopes Rubber Stamps Facebook Fan page plus you can also follow us on
Instagram, Twitter and Pinterest.

Sending Warm Hugs


Sharing a card I made today for a challenge using Super Cool Pals  from Kraftin’ Kimmie Stamps. I really love anything Christmas and winter related and who couldn’t resist this adorable snowman and little fox?

To make my card, I started out by stamping the image using my MISTI and Memento Tuxedo Black ink onto Copic Marker X-Press It Blending Card. I coloured the image with Copic markers and then fussy cut around it. I die cut the background paper using My Creative Time – Rectangle Frame Dies. It’s from Stampin Up’, but I received it in a Mystery Box, so I’m not sure what paper pack it comes from. Then I tore up some Recollections – Christmas Inkjet Printable Glitter Paper and taped it to the bottom of the panel.

The snowflake was die cut using Hot Buy Craft Smart – Holiday Glitz Glitter Paper 12″ x 12″ and Tim Holtz – Sizzix Thinlets – Paper Snow Flakes. I ran the paper and my finished coloured image through my Xyron Creative Station and also the Holiday Glitz paper was put through it as well before I die cut it. This allowed me to make stickers out of both items. For the sentiment, I used my MISTI, Versa Fine – Onyx Black and then embossed it with Ranger – Clear Super Fine Detail embossing powder. This was then heat embossed with my Marvy Uchida – Embossing Heat Tool. Once this was done, I die-cut the sentiment with Lifestyle Crafts Cutting Dies – Nesting Circles and edged all around it with Kraftin’ Kimmie – Lovely Lagoon Ink. I also edged all around the snowy background with the same ink.

For the assembly, I started out using the base from Recollections -Christmas Cards and Envelopes set at 5.5″ x 4.25″. Using double-sided tape, I  adhered the snowy background to the base. Then I added my main image and snowflake. The sentiment was popped up using some 3M VHB – 2 sided tape and Stickles – Diamond glitter was added to parts of the snow to finish the card off.

Card Recipe:

Stamp and Sentiment: Super Cool Pals (Kraftin’ Kimmie Stamps)

Inks: Memento – Tuxedo Black, Kraftin’ Kimmie – Lovely Lagoon Ink, Versa Fine – Onyx Black

Embossing Powder: Ranger – Clear Super Fine Detail embossing powder

Paper: Copic Marker X-Press It Blending Card, Hot Buy Craft Smart – Holiday Glitz Glitter Paper 12″ x 12″, Recollections – Christmas Cards and Envelopes Set, Recollections – Christmas Inkjet Printable Glitter Paper – 8.5 x 11″

Die Cuts: Tim Holtz – Sizzix Thinlets – 661599 – Paper Snow Flakes, Lifestyle Crafts Cutting Dies – Nesting Circles, My Creative Time – Rectangle Frame Dies

Tools: MISTI – Most Incredible Stamping Tool, Cuttlebug, 3M VHB – 2 sided tape, Marvy Uchida – Embossing Heat Tool, Stickles – Diamond, Xyron Creative Station

Image coloured with Copic Markers:

Fox: E99, E97, E15, E08, C2, C1, C0, R24, R02, R00

Snowman: C0, BV20, B000, R08, YR18, YR16, YR14

Vest: BG49, BG45, BG34, BG32

Hat and Flower: BG49, BG45, BG34, BG32, C10, C8, C6, R39, R37, R35, G07, G05

Scarf: G09, G07, G05, R59, R39, R37, R35

Hope you like it and have a great week!

Dreams Take Flight!!


Today, I’m featuring a card I made using Embrace Your Dream – D19039  from Dreamerland Crafts. My dad always dreamed of flying and he would build all kinds of model airplanes. Then one day he decided to build a real plane with the assistance of his brother and a friend. It took them a long time, but in the end it was a beautiful plane and the best part was that we were all taken for rides in it. It’s an experience we will never forget. So just as my dad followed his dreams, he taught us all to follow our dreams as well. If you dream about something long enough, eventually it will become a reality for you. So never be afraid to follow your dreams.


To make this card I used a white base card of 4.25″ x 5.5″. The background was die cut using My Creative Time – Rectangle Frame Die Layers – MCT-D274 and my Cuttlebug. The paper is from Doodlebug Design Inc. – I Love Travel. Once die cut, the edges were inked around using Tim Holtz Distress Ink – Salty Ocean. I also used this colour to do the clouds in the sky on the image. I adhered the background to the base using glue so that I could move it around to fit better.

The sentiment was stamped using my MISTI, VersaMark ink and Ranger Embossing Powder White – Extra Fine Detail and the stamp from Kraftin’ Kimmie – Sky’s The Limit. The powder was then heat embossed with Marvy Uchida – Embossing Heat Tool. It was die cut using My Creative Time – Sentiment Label Dies.

The image was die cut using My Creative Time – Bunch of Fun Circle Dies from Copic Marker X-Press It Blending Card. The circle behind the main image was die cut with My Creative Time – More Stitched Circles MCT-D136 from black cardstock. I coloured in the entire image with Copic markers and then created a mask. I added in the clouds and used a small piece of old rag and some rubbing alcohol to create some texture in the grass.

To assemble the card, I ran the main image through Xyron Creative Station to make like a sticker and so that it would lay completely flat on the black circle. 3M VHB – 2 sided tape was used to pop up the main image and sentiment to complete the card.

Card Recipe:

Stamp:  Embrace Your Dream – D19039 (Dreamerland Crafts)

Sentiment: Kraftin’ Kimmie – Sky’s The Limit

Inks: Memento – Tuxedo Black, Tim Holtz Distress Ink – Salty Ocean, VersMark

Paper: Copic Marker X-Press It Blending Card, Doodlebug Design Inc. – I Love Travel (6 x 6), Black cardstock White cardstock

Die Cuts: My Creative Time – Bunch of Fun Circle Die, Avery Elle – Custom Steel Dies – Made in the USA – D-05-01 PiercedCloudsDie, My Creative Time – Rectangle Frame Die Layers – MCT-D274, My Creative Time – Sentiment Label Dies – MCT-D139, My Creative Time – More Stitched Circles MCT-D136

Embossing Powder: Ranger Embossing Powder White – Extra Fine Detail

Tools: MISTI – Most Incredible Stamping Tool, Cuttlebug, Marvy Uchida – Embossing Heat Tool, Xyron Creative Station, 3M VHB – 2 sided tape

Image coloured with Copic Markers:

Face: E21, E11, E04, E00, E000

Hair: E47, E44, E43

Jacket:  E37, E35, E34, E33

Pants: E87, E84, E81

Boots: N8, N6, N4, E53, E51, E50

Goggles: E37, E35, E33

Scarf and Helmet: E33, E31, E30

Gloves: E79, E77, E74

Airplane: C5, C3, C1, C0, Y08, Y04

Grass: YG17, YG13, YG03, YG01

Sky: Tim Holtz Distress Ink – Salty Ocean, Avery Elle – Custom Steel Dies – Made in the USA – D-05-01 PiercedCloudsDie

Hope you like it and have a great week!

You can find more cards to inspire you at Dreamerland Crafts and Pointer Scrapbooking on the Facebook Fan pages from the rest of our design team.

Gnome – Merry Christmas!


It’s Wednesday, and this week I’m featuring a Christmas card I made using the image Flying Gnome – TLF008 and sentiment Sm Christmas Script – F051 from (High Hopes Rubber Stamps).  I just love colouring these adorable little gnomes. Also, it’s always good to make Christmas cards a little at a time throughout the year so that you are not rushing to get them all done in December. LOL! Have you started making your Christmas cards yet this year?

To create the card this week, I first used the die cut from Creative Expressions by Sue Wilson – Festive Collection – Pointsettia Mini Background – CED3049 to cut some Copic Marker X-Press It Blending Card using my Cuttlebug. I stamped the main image and then coloured it with Copic Markers. I started off doing the sky first as I didn’t want any of the Reds smearing into it. (This happens sometimes if you are not careful.) Once the image was all coloured in, I used Sakura Glaze – Black and Gelly Roll Sakura #8 Pen to increase the intensity of the eye on the bird. I outlined the entire image with Pigma Micron 03 black marker to make it stand out more against the sky. Lastly, I used a mixture of Gelly Roll Sakura #8 Pen and Gelly Roll Sakura #10 Pen to create the snow and stars in the sky.

For the base of the card, I began with a standard white card base of 4.25″ x 5.5″. I cut another piece of white cardstock the same size and applied the red shimmer topping on it using Crafts – Sparkling Stickers – 02-3068629. I used the same die cut listed above to cut out the intricate design using my Cuttlebug and the gold paper from Hot Buy Craft Smart – Holiday Glitz Glitter Paper. I had put the gold paper through my Xyron Creative Station before I die cut it. This made it easier to just peel and stick onto the base.

For the sentiment, I die cut some spare red cardstock using Craftin Desert Diva’s – Flag Banner Dies. Using my MISTI and VersaMark ink, I stamped the sentiment onto the die cut and embossed it using Ranger Super Fine Gold Embossing powder. This was heated with my Marvy Uchida – Embossing Heat Tool. The image and the sentiment were both popped up with 3M VHB – 2 sided tape to complete the card.

Card Recipe:

Stamp: Flying Gnome – TLF008 (High Hopes Rubber Stamps)

Sentiment: Sm Christmas Script – F051 (High Hopes Rubber Stamps)

Inks: Memento – Tuxedo Black, VersaMark

Paper: Copic Marker X-Press It Blending Card, Hot Buy Craft Smart – Holiday Glitz Glitter Paper 12″ x 12″, Crafts – Sparkling Stickers – 02-3068629

Die Cut: Creative Expressions by Sue Wilson – Festive Collection – Pointsettia Mini Background – CED3049, Craftin Desert Diva’s – Flag Banner Dies (Retired)

Embossing Powder: Ranger Super Fine Gold

Tools and Miscellaneous: MISTI – Most Incredible Stamping Tool, Cuttlebug, Pigma Micron 03 black marker, Xyron Creative Station, Marvy Uchida – Embossing Heat Tool

Image coloured with Copic Markers:

Skin: E21, E11, E04, E00, E000

Beard: W5, W4, W3, W2, W1, W0, W00

Hat and Outfit: R59, R39, R37, R35, YG97, YG95, YG93, G43

Cardinal Bird: R37, R35, R24, R22, R17, R14, R08, R05, R02, R000, YR15, YR12, C3, N10, N8, Gelly Roll Sakura #8 Pen, Sakura Glaze – Black

Leaves and Holly: R59, R37, R24, YG97, YG95, YG93, YG05, G43

Shoe: E34, E33, E31

Sky: B99, B97, B95, B93, Gelly Roll Sakura #8 Pen, Gelly Roll Sakura #10 Pen

Hope you like it and have a fantastic week!

You can find lots of inspiration from the Design Team Divas at the High Hopes blog, and the High Hopes Rubber Stamps Facebook Fan page plus you can also follow us on
Instagram, Twitter and Pinterest.


Basketball Birthday!!


Today I’m sharing  Basketball Player (KLM Digital Designs) image from the September release. When creating this card, I thought of my younger brother who used to eat, sleep and dream about basketball all the time when he was young. You barely ever saw him without a basketball in his hand. He was always on the basketball court, shooting hoops or playing games. He actually excelled in a lot of sports and won the trophy for all around athlete in High School. Of course, that was many, many, many years ago. LOL!

I printed out the main image onto Copic Marker X-Press It Blending Card using my HP Printer. The image was then die cut with my Cuttlebug and My Creative Time – Rectangle Frame Dies Layers and then coloured in with Copic markers.  For the sentiment, I brought the original digital image into Microsoft Word and then used the developer tools to crop it so that it went into 3 lines to fit my image better. Then I printed it out and fussy cut around it. The sentiment was then layered onto some chocolate brown cardstock and fussy cut again.

For the basketball background paper, I downloaded from the site listed below and then printed it out on my printer. I die cut it with My Creative Time – Rectangle Frame Dies then glued directly onto the The Paper Studio – Primary Base Colours 5.5″ x 4.25″ cardstock base. The main image was adhered directly to the chocolate brown cardstock. I added a small basketball brad and then popped up the entire image onto the background using 3M VHB – 2 sided tape. The sentiment was also popped up.

Card Recipe:

Stamp and Sentiment: Basketball Player (KLM Digital Designs)

Inks: HP Printer Grayscale

Paper: Copic Marker X-Press It Blending Card, http://www.printablepapertreats.com/slam-dunk-silhouette-digital-papers, The Paper Studio – Primary Base Colours

Die Cuts: My Creative Time – Rectangle Frame Dies, My Creative Time – Rectangle Frame Layers

Tools: 3M VHB – 2 sided tape, Cuttlebug

Image coloured with Copic Markers:

Skin: E000, E00, E04, E11, E21, R22, R20

Hair: E47, E44, E43

Clothing and Shoes: E29, E27, E25, E23, E15, YR24, Y35, Y115

Basketball: E08, YR18, YR16, YR12

Shadow: W5, W3, W1

Background around boy: Y04, Y02, Y00, Y000

Hope you like it and have a great week!

You can find more cards to inspire you at KLM Designs, KLM Digital Design Team and KLM Digital Designs on the Facebook Fan page from the rest of our design team.

Birthday Belle!


It’s Wednesday, and this week I’m sharing a CAS card featuring Birthday Belle – T076 from (High Hopes Rubber Stamps) with the sweet sentiment Bummer – H263 (High Hopes Rubber Stamps). Our birthday girl this week isn’t too keen on having another birthday to remind her how old she is, but she is still having fun blowing out all of the candles. LOL! I decided to colour her outfit and cake pink, because I remember how much my grandmother loved that colour.

To create the card this week, I stamped the main image and then coloured it in with Copic Markers. My Creative Time -Stitched Squares Inside and Out die and my Cutttlebug were used to cut out the main coloured image and the hot pink background paper.

For the base card I cut some yellow cardstock 10″ long by 5″ high. It was then scored and folded in half to be 5″ x 5″. All of the edges for the base card and die-cuts were then inked around using the various Tim Holtz Distress inks listed below. I mounted the hot pink cardstock directly to the base using double-sided tape. Then the main image was popped up with 3M VHB – 2 sided tape. Finally, to finish it off, I used some crafty dots by Crafts.

Card Recipe:

Stamp: Birthday Belle – T076 (High Hopes Rubber Stamps)

Sentiment: Bummer – H263 (High Hopes Rubber Stamps)

Inks: Memento – Tuxedo Black, Tim Holtz Distress Ink – Picked Raspberry, Tim Holtz Distress Ink – Fossilized Amber, Tim Holtz Distress Ink – Evergreen Bough

Paper: Copic Marker X-Press It Blending Card, Hot Pink Cardstock, Yellow Cardstock

Die Cuts: My Creative Time -Stitched Squares Inside and Out

Tools and Miscellaneous: MISTI – Most Incredible Stamping Tool, Cuttlebug, Crafts Stickers – 02-3010802

Image coloured with Copic Markers:

Skin,Lips and Eyeshadow: E21, E11, E04, E00, E000, R22, R20, YG09, YG06, YG03

Hair: N5, N3, N1

Blouse and Cake Icing and Earring Pinks: RV09, RV06, RV04, RV02, RV00, RV000

Cake Flowers, Leaves and Trim : G17, G14, G07, Y38, Y19, Y18, Y04, BG32, BG13, BG10

Balloons: BG34, BG18, BG15, BG10, RV09, RV06, RV04, RV00, Y38, Y19, Y04, Y00

Candles: BG34, BG13, BG10, YR14, Y19, Y04, Y00

Hat: RV09, RV06, RV02, BG34, BG10

Hope you like it and have a fantastic week!

You can find lots of inspiration from the Design Team Divas at the High Hopes blog, and the High Hopes Rubber Stamps Facebook Fan page plus you can also follow us on
Instagram, Twitter and Pinterest.


Witchy Poo’s Happy Hallowe’en!!!


It’s Wednesday, and Sitting Witchy Poo from (High Hopes Rubber Stamps) is back again to celebrate a Happy Hallowe’en and wondering what to do with all her candy.  My husband and I just LOVE Hallowe’en! We try to decorate our yard every year for the little ghosts and goblins who come to visit and we give out lots and lots of candy. Our front lawn gets turned into a grave yard for a day with spooky black cats, crows, skeletons, and more. On the porch we put out all of the animated little toys and of course the talking skeletons playing poker at the Bistro table. LOL! The children just love it and so do the parents! LOL!

To create the card this week, I stamped the main image and then coloured it with Copic Markers listed below. I fussy cut around Witchy Poo leaving just a little bit of white around the top of her body, but going directly to the line for the bottom of her. Flag Banner Dies from Craftin’ Desert Diva’s (restired) were used for the die cut and then the sentiment was stamped onto it. Tim Holtz Distress Ink – Carved Pumpkin was applied around the edges to create a frame around the orange cardstock.

To create the background, Pebbles – Boo! paper was used. I wanted to add something a little extra so I pulled out my Kraftin’ Kimmie – Bats and Moons Stencil and applied Nuvo Glimmer Paste – Amethyst Purple! I just love the way it turned out. The bottom piece of cardstock was cut at 1″ x 5.5″. Tim Holtz Distress Ink – Black Soot was used to go around all of the edges of the top and bottom piece.

Once everything was dry my card was ready to be assembled. I began with a standard white card base of 4.25″ x 5.5″. I mounted the coloured circles and bats cut at the same size directly on top of the base with 2-sided tape. I did the same with the candy on the very bottom. The image and the sentiment were both popped up with 3M VHB – 2 sided tape. Finally, to cover some of my paste boo-boos, I added in some candy corn from Dress My Craft – Dessert Mix.

Card Recipe:

Stamp: Sitting Witchy Poo – S151 (High Hopes Rubber Stamps)

Sentiment: Happy Halloween – H232 (High Hopes Rubber Stamps)

Inks: Memento – Tuxedo Black, Tim Holtz Distress Ink – Carved Pumpkin, Tim Holtz Distress Ink – Black Soot

Paper: Copic Marker X-Press It Blending Card, Pebbles – Boo! (6×6 in / 15.2×15.2 cm), Orange cardstock, White Cardstock

Die Cut: Craftin Desert Diva’s – Flag Banner Dies (Retired)

Stencil: Kraftin’ Kimmie – Bats and Moons

Tools and Miscellaneous: MISTI – Most Incredible Stamping Tool, Cuttlebug, Nuvo Glimmer Paste – Amethyst Purple, Dress My Craft – Dessert Mix

Image coloured with Copic Markers:

Skin: BG96, BG93, BG90, YG23, G40

Hair: E18, E08, YR18, YR14

Hat, Blouse, Pantaloons: V17, V09, V06, V04

Vest, Dress and Hat Band: YR68, YR65, YR18, YR15, YR12, YR00

Socks: YR18, YR15, YR12, YG09, YG07

Shoes: V17, V09, V06, V04, N6, N4, N2, E15, Y38, Y35, Y15

Star: E15, Y38, Y35, Y15

Hope you like it and have a spooktacular week!

You can find lots of inspiration from the Design Team Divas at the High Hopes blog, and the High Hopes Rubber Stamps Facebook Fan page plus you can also follow us on
Instagram, Twitter and Pinterest.


Furry and Bright!!


Today I’m sharing this adorable Gnomes and Pets image from KLM Digital Designs new August release. I just loved this adorable stamp and decided it would make an awesome Christmas card for all of your furry loving friends. Who couldn’t resist those adorable little faces?

I printed out the main image onto Copic Marker X-Press It Blending Card using my HP Printer. The image was coloured in with Copic markers, and my Brother Scan and Cut was used to fussy cut around the image. A black marker was used to go around all of the edges.

For the main background, a green card base of 5.5″ x 4.25″ by The Paper Studio – Christmas Box of Cards 2012 Collection was used. Recollections – “Jolly Holiday” paper was cut at 5.5″ 2.25″ x and Recollections – Christmas Pets was cut at 5.5″ x .5″ twice. Glue was used to adhere each panel to the base card. The sentiment was stamped using Versa Fine – Onyx Black and embossed with Ranger – Clear Super Fine Detail embossing powder and heat embossed using Marvy Uchida – Embossing Heat Tool. Along the bottom, Marvy Uchida Snow Marker was applied and while still wet, Martha Stewart Crafts – Crystal Fine Glitter was applied. To make it fluffy, Marvy Uchida – Embossing Heat Tool was used.

I popped up the image with 3M VHB – 2 sided tape. The little black and white kitty from Dress It Up – Kitten Kaboodle was added to complete the card.

Card Recipe:

Stamp: Gnomes and Pets (KLM Digital Designs)

Sentiment: My Favourite Things – Happy Pawlidays

Inks: HP Printer Grayscale, Versa Fine – Onyx Black

Paper: Copic Marker X-Press It Blending Card, Recollections – “Jolly Holiday” – 6″ x 6″ paper pad, Recollections – Christmas Pets – 6″ x 6″ paper pad, The Paper Studio – Christmas Box of Cards 2012 Collection

Embosssing Powder: Ranger – Clear Super Fine Detail embossing powder

Tools: 3M VHB – 2 sided tape, Martha Stewart Crafts – Crystal Fine Glitter, Marvy Uchida – Embossing Heat Tool, Dress It Up – Kitten Kaboodle, Marvy Uchida Snow Marker 3MM

Image coloured with Copic Markers:

Skin: E000, E00, E04, E11, E21

Beard: W5, W4, W3, W2, W1, W0, W00

Shirt: G99, G21, YG67, YG17

Pants: B26, B23, B21

Hat: R59, R39, R37, R35

Boots: E29, E27, E25, E23, E21

Dog: E37, E35, E33, E31, E23, E15, C7, C5, C3, C2, C1, Black, R22, R02, R00, Gelly Roll Sakura #8 Pen, Sakura Glaze – Black

Cat: C9, C7, C5, C4, C3, C1, R22, R02, R00, YG05, Sakura Glaze – Black

Hope you like it and have a great week!

KLM is having a LABOR DAY SALE.
You should check it out. Special is available until September 20, 2020.
15% OFF ALL CLEAR STAMPS
CODE: LABORDAY

You can find more cards to inspire you at KLM Designs, KLM Digital Design Team and KLM Digital Designs on the Facebook Fan page from the rest of our design team.

Happy Trick or Treating!


It’s Wednesday, and today I’m sharing a CAS card using Witchy Poo with Kitty Frame – P120 (High Hopes Rubber Stamps) for the main image and Trick or Treat Greeting – H231 (High Hopes Rubber Stamps) for the sentiment. Witchy Poo and Kitty are looking out to see all of the wonderful little trick or treaters coming to visit them for their treats! What are you dressing up as this year?

To make the card, I started with a 5.5″ x 4.25″ cards base. My Mind’s Eye – Dolled Up – 6″ x 6″ was cut to the same size and adhered to the base card with double-sided tape. Tim Holtz Distress Ink – Walnut Stain ink was used to edge across the bottom of the card. The image was stamped and then coloured in with Copic Markers. I used my Brother Scan and Cut to cut around the image and then used a black marker to go around all of the edges.

The sentiment was stamped and then die cut with Essentials by Tattered Lace Dies – Easel Slider. Tim Holtz Distress Ink – Carved Pumpkin and a black marker were used to ink all of the 4 sides of the sentiment.

The coloured image and sentiment were popped up onto the card using 3M VHB – 2 sided tape and some stickers were add for embellishments.

Card Recipe:

Stamp: Witchy Poo with Kitty Frame – P120 (High Hopes Rubber Stamps)

Sentiment: Trick or Treat Greeting – H231 (High Hopes Rubber Stamps)

Inks: Memento – Tuxedo Black, Tim Holtz Distress Ink – Carved Pumpkin, Tim Holtz Distress Ink – Walnut Stain

Paper: Copic Marker X-Press It Blending Card, My Mind’s Eye – Dolled Up – 6″ x 6″, Orange Cardstock

Die Cut: Essentials by Tattered Lace Dies – Easel Slider

Tools: MISTI – Most Incredible Stamping Tool, Cuttlebug, Hallowe’en Stickers – HCM0001F, HCM0001C, HCM0001A, Brother Scan and Cut

Image coloured with Copic Markers:

Skin: BG96, BG93, BG90, YG23, G40, R22, R20

Hair: E18, E08, YR18, YR14

Hat and Dress: V25, V17, V15, V09, V06, V04, YR68, YR65, YR18, YR15, YR12, YR00, Gelly Roll Sparkle Pen for Swirls

Cat: C9, C7, C5, C3, YG09, YG07, YG03, Y02, R22, R02, R00

Moon and Stars: V17, V15, V09, V06, V04

Window Background: E15, Y38, Y35, Y15, Y06

Window Frame: E29, E25, E23

Hope you like it and have a spooktacular week!

You can find lots of inspiration from the Design Team Divas at the High Hopes blog, and the High Hopes Rubber Stamps Facebook Fan page plus you can also follow us on
Instagram, Twitter and Pinterest.


Birthday Sentiments For Ewe


Today I’m sharing  Sheep and Sentiments (KLM Digital Designs) image from KLM Digital Designs new September Release. These little “Ewes” are so fun to colour up and I just love their adorable expressions. This stamp comes with 3 sentiments, 2 of which I have used in the cards below and also “Wooly Hope Ewe Feeling Better”! I wooly love this stamp set and I’m sure you will too! LOL!


I printed out the main images onto Copic Marker X-Press It Blending Card using my HP Printer. The image was then die cut with my Cuttlebug and My Creative Time -Stitched Squares Inside and Out. Both of the images were then coloured in with Copic Markers. For both cards, Hot Buy – Recollections – Watercolour Solids Cards & Envelopes – 5.5″ x 4.25″, Doodle Bug Designs Inc. – Down on the Farm – 6″ x 6″ paper pad were used to create the backgrounds. I edged around the printed backgrounds with Tim Holtz Distress Ink – Evergreen Bough ink.

My Creative Time – Rectangle Frame Dies Layers were used to die-cut the background paper for the 2nd card. The sentiments were both printed out onto Recollections – White card stock and then fussy cut. They were then placed onto some Dark Yellow Cardstock and fussy cut around again. All of the layers were now ready to be assembled. The image, background layer and sentiments were all popped up with 3M VHB – 2 sided tape. Some Kraftin’ Kimmie Dots – Neon Rainbow were added to the 1st card.

Card Recipe:

Stamp: Sheep and Sentiments (KLM Digital Designs)

Inks: HP Printer Grayscale, Tim Holtz Distress Ink – Evergreen Bough

Paper: Copic Marker X-Press It Blending Card, Hot Buy – Recollections – Watercolour Solids Cards & Envelopes, Doodle Bug Designs Inc. – Down on the Farm – 6″ x 6″ paper pad

Die Cuts: My Creative Time – Rectangle Frame Layers, My Creative Time -Stitched Squares Inside and Out

Tools: 3M VHB – 2 sided tape, Kraftin Kimmie Dots – Neon Rainbow

Image coloured with Copic Markers:

Sheep: B60, C5, C3, C1, R21, R02, R01, YG09, YG07, Colorless Blender

Grass: YG17, YG13, YG03, YG01

Sky and Clouds: B60, B02, B01, B00, B000, B000, C0, Colorless Blender

Hope you like it and have a great week!

You can find more cards to inspire you at KLM Designs, KLM Digital Design Team and KLM Digital Designs on the Facebook Fan page from the rest of our design team.

Stuffed with Love


It’s Wednesday, and this week, I used Angel Bear Scarecrow – T110 (High Hopes Rubber Stamps) for the main image and Scarecrows Stuffed – H087 (High Hopes Rubber Stamps) for the sentiment. The turkey is hiding behind the angel bear for protection from becoming captured. He doesn’t want to become someone’s Thanksgiving Dinner. The crows are shrugging their shoulders, because they are just not sure what’s going to happen! Let’s hope this little angel bear can protect him. LOL!

To make my card this week, I started out with a simple white card base, sized at 5.5″ x 5.5″. The base background was also cut at 5.5″ x 5.5″ using PhotoPlay – Mad 4 Plaid Fall paper. The added touches at the top and bottom are also from the same paper pad.

The main image was stamped onto Copic Marker X-Press It Blending Card and then die cut with My Creative Time – Rectangle Frame Dies Layers. It was coloured in with Copic Markers and Sakura Glaze – Black pen was used for the eyes and nose. The layer behind the image was die cut from green cardstock using My Creative Time – Rectangle Frame Dies. The sentiment square was die cut using orange cardstock and My Creative Time -Stitched Squares Inside and Out. The image and sentiment were popped up on top of the remaining layers with 3M VHB – 2 sided tape and some Kraftin’ Kimmie Dots were added to finish the card off.

Card Recipe:

Stamp: Angel Bear Scarecrow – T110 (High Hopes Rubber Stamps)

Sentiment: Scarecrows Stuffed – H087 (High Hopes Rubber Stamps)

Inks: Memento – Tuxedo Black

Paper: Copic Marker X-Press It Blending Card, PhotoPlay – Mad 4 Plaid Fall paper 6″ x 6″, Green Cardstock, Brown Cardstock

Die Cuts: My Creative Time – Rectangle Frame Dies Layers, My Creative Time – Rectangle Frame Dies, My Creative Time -Stitched Squares Inside and Out

Tools: MISTI – Most Incredible Stamping Tool, Cuttlebug, 3M VHB – 2 sided tape, Kraftin Kimmie Dots, Sakura Glaze – Black

Image coloured with Copic Markers:

Bear: E35, E34, E33, E31, E30, R21, R02, R01

Wings: E53, E51, E50

Shirt: YG67, YG61, R37, R24

Pants: B26, B23, B21

Bow Tie, Patch, Hat Brim: R59, R37, R35, R24

Turkey: E35, E34, E33, E31, YR18, YR16, YR12, YR02, R59, R37, R24, Y38, Y18

Pumpkin and Stem: YR18, YR16, YR12

Straw: E34, YR23, Y23, Y21

Crows: C9, C7, C5, Y38, Y18

Flower: Y38, Y35, Y18, YG17, YG13, YG03, YG01

Grass and Greenery for Plants: YG17, YG13, YG03, YG01

Clouds and Sky: B60, B02, B01, B00, B000, C0, Colorless Blender

Hope you like it and have a fantastic week!

You can find lots of inspiration from the Design Team Divas at the High Hopes blog, and the High Hopes Rubber Stamps Facebook Fan page plus you can also follow us on
Instagram, Twitter and Pinterest.


Blowing Bubbles


Today I’m sharing  Summertime Fun (KLM Digital Designs) image from KLM Digital Designs. This little boy is enjoying his day just having a wonderful time not thinking about what is going on around him. He is just living in the moment and having fun blowing bubbles. I remember doing this on many occasions as a child. Do you?

I printed out the main image onto Copic Marker X-Press It Blending Card using my HP Printer. The image was then die cut with my Cuttlebug and My Creative Time – Rectangle Frame Dies Layers and then coloured in with Copic markers. The sentiment was then added using Versa Fine – Onyx Black and embossed with Ranger – Clear Super Fine Detail embossing powder. This was heat embossed using Marvy Uchida – Embossing Heat Tool.

For the main background, Hot Buy – Recollections – Watercolour Solids 5.5″ x 4.25″ was used. My Creative Time – Rectangle Frame Dies were used to die cut Hot Buy – Recollections – Jewel Tones paper. All of the layers were now ready to be assembled. The image and background layer were both popped up with 3M VHB – 2 sided tape.

Card Recipe:

Stamp: Summertime Fun (KLM Digital Designs)

Sentiment: Craftin Desert Divas – Adventure Awaits (Retired Stamp)

Inks: HP Printer Grayscale, Versa Fine – Onyx Black

Paper: Copic Marker X-Press It Blending Card, Hot Buy – Recollections – Jewel Tones, Hot Buy – Recollections – Watercolour Solids Cards & Envelopes

Die Cuts: My Creative Time – Rectangle Frame Dies, My Creative Time – Rectangle Frame Layers

Embosssing Powder: Ranger – Clear Super Fine Detail embossing powder

Tools: 3M VHB – 2 sided tape, Marvy Uchida – Embossing Heat Tool

Image coloured with Copic Markers:

Skin: E000, E00, E04, E11, E21, R22, R20

Hair: E47, E44, E43

Shirt: YG99, YG97, YG63, G21

Pants: B26, B24, B21

Shoes: E29, E27, E25, E23, YR14, YR07

Bubbles: BV00, RV00, B000, B0000, Gelly Roll Sakura #8 Pen

Grass: YG17, YG13, YG03, YG01

Sky and Clouds: B60, B02, B01, B00, B000, B000, C0, Colorless Blender

Hope you like it and have a great week!

You can find more cards to inspire you at KLM Designs, KLM Digital Design Team and KLM Digital Designs on the Facebook Fan page from the rest of our design team.

Make it Rain!


Sharing a fun birthday card that I made for my husband this week using Make It Rain – CYNS728 (#YourNextStamp) for the main image and sentiment. I thought it would be fun to put the image inside a balloon too! Now if only that could be Lottery Winnings he was holding onto. LOL!

To make my card this week, I started out with a simple lime green card base, sized at 5.5″ x 4.25″.  For the bottom layer I used Hammermill – Premium Colour 100 lb. paper and multiple Tim Holtz inks which I have listed below. Then I die-cut the top layer with my Cuttlebug and #Your Next Stamp – Confetti Panel Die. Hammermill paper was used for this also. I mounted the bottom layer directly onto  the base card and then attached the top die-cut layer using 3M VHB – 2 sided tape.

For both of the sentiments, I used my MISTI, VeraMark ink and Ranger Embossing Powder White – Extra Fine Detail on black cardstock. Then a Marvy Uchida – Embossing Heat Tool was used to heat emboss the powder.

The balloon was die cut using My Creative Time – Stitched Circle Balloon Dies MCT-D137 to cut Copic Marker X-Press It Blending Card which I then stamped the main image onto using Memento – Tuxedo Black ink and my MISTI. The image was coloured with Copic Markers.

To assemble the remainder of the card, the image and sentiment were popped up on top with 3M VHB – 2 sided tape. Some ribbon was tied to the bottom of the balloon and some Kraftin’ Kimmie dots were used.

Card Recipe:

Stamp and Sentiment: Make It Rain – CYNS728 (#YourNextStamp)

Inks: Memento – Tuxedo Black, Tim Holtz Distress Ink – Barn Door, Tim Holtz Distress Ink – Carved Pumpkin, Tim Holtz Distress Ink – Crushed Olive, Tim Holtz Distress Ink – Mermaid Lagoon, Tim Holtz Distress Ink – Mustard Seed, Tim Holtz Distress Ink – Spiced Marmalade, Tim Holtz Distress Ink – Twisted Citron, Versamark

Paper: Copic Marker X-Press It Blending Card, Hammermill – Premium Colour 100 lb.

Die Cuts: My Creative Time – Stitched Circle Balloon Dies MCT-D137, My Creative Time – Rectangle Frame Die Layers – MCT-D274Your Next Stamp – Confetti Panel Die – YNSD770

Embossing Powder: Ranger Embossing Powder White – Extra Fine Detail

Tools: MISTI – Most Incredible Stamping Tool, Cuttlebug, 3M VHB – 2 sided tape, American Crafts – Premium Ribbon, Marvy Uchida – Embossing Heat Tool, Kraftin’ Kimmie Dots

Image coloured with Copic Markers:

Dog: E33, E31, E29, E27, E25, E23, R89, R59, R39, R37, R35, R24, C0, Sakura Glaze – Black, Gelly Roll Sakura #8 Pen

Money: G99, G94, G21, G82, YG05, YG04

Balloon: BG09, BG07, BG05, BG000

Hope you like it and have a fantastic week!


Time to Smell the Flowers!


It’s Wednesday, and this week, I used Daffodil Bunny – SLF006 (High Hopes Rubber Stamps) for the main image from the new August 2020 release and Smell The Flowers – G189 (High Hopes Rubber Stamps) for the sentiment. This adorable little bunny is taking time out to smell the flowers. We have a really nice garden of flowers that my husband takes care of. I’m not a green thumb at all. LOL! It’s always nice to take a moment and enjoy the beauty of them.

To make my card this week, I started out with a simple white card base, sized at 6″ x 6″. The base background was also cut at 6″ x 6″ using Craft Consortium – Cottage Garden paper and then inked around the edges with Tim Holtz Distress Ink – Fossilized Amber. I just thought this paper went so well with this adorable image. I added the 2 colours of ribbon with some 2-sided tape and then adhered the entire background paper to the base with 2-sided tape.

The scalloped circle and inside image circle were both die cut using my Cuttlebug and Craftin Desert Diva’s Stitched in Circle Dies. The circle in between the 2 of them was die cut with Lifestyle Crafts Cutting Dies – Nesting Circles. The edges of the large scalloped circle were inked with Tim Holtz Distress Ink – Picked Raspberry. For the sentiment, My Creative Time – Rectangle Frame Dies were used. The die was larger in depth, so I just die cut one side and then turned it around and only put it part way through my Cuttlebug to cut the other edge. It too, was then inked around the edges with Tim Holtz Distress Ink – Fossilized Amber. The image was coloured with Copic Markers.

To assemble the remainder of the card, the mid circle was attached directly to the large scalloped circle and then popped up with 3M VHB – 2 sided tape. The image and sentiment were popped up on top with 3M VHB – 2 sided tape as well.

Card Recipe:

Stamp: Daffodil Bunny – SLF006 (High Hopes Rubber Stamps)

Sentiment: Smell The Flowers – G189 (High Hopes Rubber Stamps)

Inks: Memento – Tuxedo Black, Tim Holtz Distress Ink – Fossilized Amber, Tim Holtz Distress Ink – Picked Raspberry

Paper: Copic Marker X-Press It Blending Card, Momenta – Cardstock, Crafts Sparkling Stickers – 02-3068629, Craft Consortium – Cottage Garden 6″x6″

Die Cuts: Craftin Desert Diva’s Stitched in Circle Dies, Lifestyle Crafts Cutting Dies – Nesting Circles, My Creative Time – Rectangle Frame Dies

Tools: MISTI – Most Incredible Stamping Tool, Cuttlebug, 3M VHB – 2 sided tape

Image coloured with Copic Markers:

Bunny: E37, E35, E34, E33, E31, E30, R11, R02, R000

Bow: RV19, RV17, RV13

Grass and Greenery for Plants: BG99, BG97, G21, YG17, YG13, YG07, YG03, YG01

Daffodil: E15, Y38, Y18, Y04

Clouds and Sky: B60, B01, B00, B000, B0000, C0, Colorless Blender

Hope you like it and have a fantastic week!

You can find lots of inspiration from the Design Team Divas at the High Hopes blog, and the High Hopes Rubber Stamps Facebook Fan page plus you can also follow us on
Instagram, Twitter and Pinterest.


Friends Together


Welcome Back Dreamerland Craft Fans!

Today, I’m sharing an inspirational card that I made using Mix and Match Clear Stamps – DCS 19096 to create the little scenes and also for the sentiment. I wanted to show a variety of scenes that you could make with this cute set and so for the first time for me ever, I created this little flip card.

Panel 1 – Bears hugging in the rain.

Panel 2: The rain has stopped and there is a beautiful rainbow for the little couple.

Panel 3 – The sun has come out and is now beaming.

Panel 4: I just love this adorable sentiment and it finishes off the little story of the 2 little bears hugging each other through all of the different types of weather.

Here is the flip card in action.


To make this card I used a base card of 4.25″ x 5.5″. DCWV – Pocket Blossom was cut to the same size and using double-sided tape was attached to the base card. Then, Tim Holtz Distress Ink – Salty Ocean was used to ink around all of the edges. I die cut X-Press It Blending Card using my Cuttlebug and dies from Lawn Fawn – Flippin’ Awesome. I used the largest square of the die set in order to have more room to create the scenes. The larger square was die cut using Recollection – White paper using My Creative Time – Rectangle Frame Dies. The die-cut for the mechanism of the Flip Card was also from Lawn Fawn – Flippin’ Awesome. So easy to use. I love this die set.

I created a mask of the bears so that I could add in the different elements on each panel. All of the images were coloured in with Copic Markers. For the rain, Memento – Bahama Blue ink was used. For the sunbeams, Kraftin’ Kimmie – Summer Sunshine, Kraftin’ Kimmie – Yummy Yellow and Kraftin’ Kimmie – Starburst Stencil were used.

Versa Fine – Onyx Black ink was used to stamp the sentiment and then Ranger – Clear Super Fine Detail embossing powder was applied. Marvy Uchida – Embossing Heat Tool was used to heat up the embossing powder.

Once all of the panels were completed, I die cut the sparkly blue paper using Lawn Fawn – Flippin’ Awesome – Add-On dies. The flipping mechanism was then attached to the sparkling blue paper. This was then attached directly to the base of the card.

Card Recipe:

Stamps and Sentiments:  Mix and Match Clear Stamps – DCS 19096 (Dreamerland Crafts)

Inks: Memento – Tuxedo Black, Versa Fine – Onyx Black, Kraftin’ Kimmie – Summer Sunshine, Kraftin’ Kimmie – Yummy Yellow, Memento – Bahama Blue, Tim Holtz Distress Ink – Salty Ocean

Paper: Copic Marker X-Press It Blending Card, DCWV – Pocket Blossom –  12″X12″ (30.5cmx30.5cm), Craft Thick Glitter Paper – 02-3022270

Die Cuts: My Creative Time – Rectangle Frame Dies, Lawn Fawn – Flippin’ Awesome, Lawn Fawn – Flippin’ Awesome – Add-On

Stencil: Kraftin’ Kimmie – Starburst Stencil

Tools: MISTI – Most Incredible Stamping Tool, Cuttlebug, Marvy Uchida – Embossing Heat Tool

Image coloured with Copic Markers:

Bears: E55, E53, E51, E35, E34, E33, E31, E29, E27, E25, E23, R20, R02, R00

Sky:  B01, B00, B000, B000

Hearts and Umbrella: R39, R37, R24, Pental Sunburst Metalic Med Gel Pen

Rainbow: V17, V15, V20, YR18, YR16, YR15, Y15, Y08, Y04

Clouds: B60, C0, Colorless Blender

Flowers: Y38, Y35, E15

Hope you like it and have a great week!

You can find more cards to inspire you at Dreamerland Crafts and Pointer Scrapbooking on the Facebook Fan pages from the rest of our design team.

Beautiful Mindset


Today I’m sharing a CAS card that I made using  Nesting Bird (KLM Digital Designs).  This image from KLM Digital Designs new August release comes with 3 beautiful sentiments “Create Your Own Sunshine” and “Hope You Have A Beautiful Day” and the one I’ve featured with my card. These sentiments and stamp could be used for an Inspirational or Birthday Card! I just love the feeling of peace that this image gives me.

The image and sentiment were printed out with my HP Printer onto Copic Marker X-Press It Blending Card using High Quality Grayscale. This prevents the image from smearing when you go to colour it in. The image and sentiment were die cut with my Cutttlebug and dies from Essentials by Tattered Lace Dies – Easel Slider. The base of the card is 5.5″ x 5.5″. I cut some Momenta – Cardstock at the same size. To go around the background paper and die cuts, a Sharpie – Gold Medium Point – Water Based Paint marker was used. This helps give the illusion that it is mounted on gold paper. I adhered the background directly to the base card with glue so that I could move it into place easier.

The image was coloured in with Copic markers and for the eye of the bird a Sakura Glaze – Black pen was used. Then, the completed image was glued directly on top of the background. The sentiment was popped up with 3M VHB – 2 sided tape. To finish off the card, some Kraftin’ Kimmie – Rainy Day Dots were added.

Card Recipe:

Stamp and Sentiment: Nesting Bird (KLM Digital Designs)

Inks: HP Printer High Quality Grayscale, Sharpie – Gold Medium Point – Water Based Paint, Sakura Glaze – Black

Paper: Copic Marker X-Press It Blending Card, Momenta – Cardstock

Die Cuts: Essentials by Tattered Lace Dies – Easel Slider

Miscellaneous: Kraftin’ Kimmie – Rainy Day Dots, 3M VHB – 2 sided tape, Cuttlebug

Image coloured with Copic Markers:

Flowers: BV17, BV13, BV11, BV000, E15, Y38, Y18, Y04

Leaves: BG99, BG93, G21, YG23

Bird: E99, E97, YR20, YR16, YR15, YR12, Y32, B39, B14, B12, B06, B05, BG01, C8, C5, C3, C1, C0, Rubbing Alcohol, Q-Tip

Background: Y00, Y000, Colorless Blender

Hope you like it and have a great week!

You can find more cards to inspire you at KLM Designs, KLM Digital Design Team and KLM Digital Designs on the Facebook Fan page from the rest of our design team.

Butterfly Hi!


It’s Wednesday, and this week, I used Butterfly Chick – SLF007 (High Hopes Rubber Stamps) for the main image from the new August 2020 release and Flutter’in By – F004 (High Hopes Rubber Stamps) for the sentiment. This little butterfly has decided to take a moment to say “Hi” to this adorable little chick. Have you taken a moment to call someone and just “Hi” today?

To make my card this week, I started out with a simple white card base, sized at 6″ x 6″. I used the retired die cuts from Craftin Desert Diva’s – Inside Scalloped Squares and a mixture of Momenta – Cardstock and American Crafts – Basics paper for my background. The same die cut was also used to cut the Copic Marker X-Press It Blending Cardstock. The Copic paper was then stamped on with my MISTI and Memento – Tuxedo Black ink. I coloured in the image with Copic markers.

For the assembly of the card, I first placed down the large background using 2-sided tape. Then I added in the 1st yellow inset using glue as it was easier to move around and get it into place. Lastly, I added in the last inset for the large scalloped square. For the smaller square, the coloured image and yellow cardstock were turned over and then taped together with some Scotch Tape. Then 3M VHB – 2 sided tape was used to pop it up into the centre of the larger square.

The sentiment was stamped with Memento – Tuxedo Black and then die cut with My Creative Time – Rectangle Frame Dies. Tim Holtz Distress Ink – Fossilized Amber was used to go around all of the edges. Then the sentiment was also popped up with 3M VHB – 2 sided tape.

To finish off the card I added on some butterflies and also a few Kraftin’ Kimmie – Polar Dots in a few places.

Card Recipe:

Stamp: Butterfly Chick – SLF007 (High Hopes Rubber Stamps)

Sentiment: Flutter’in By – F004 (High Hopes Rubber Stamps)

Inks: Memento – Tuxedo Black, Tim Holtz Distress Ink – Fossilized Amber

Paper: Copic Marker X-Press It Blending Card, Momenta – Cardstock, American Crafts – Basics (6″x6″, 15.2cmx15.2cm)

Die Cuts: Craftin Desert Diva’s – Inside Scalloped Squares, My Creative Time – Rectangle Frame Dies

Tools: MISTI – Most Incredible Stamping Tool, Cuttlebug, 3M VHB – 2 sided tape, Kraftin’ Kimmie – Polar Dots, Butterfly Stickers – 02-3051386

Image coloured with Copic Markers:

Chick and Bow: Y17, Y15, Y13, YR18, YR16, YR14, YR12, B18, B16, B14, BV00, BV000

Grass: YG17, YG13, YG03, YG01

Butterfly: E79, E77, E71, B18, B16, B14, BV08, V05, V04, Black (100), Gelly Roll Sakura #8 Pen

Clouds and Sky: B60, B01, B00, B000, B0000, C0, Colorless Blender

Hope you like it and have a fantastic week!

You can find lots of inspiration from the Design Team Divas at the High Hopes blog, and the High Hopes Rubber Stamps Facebook Fan page plus you can also follow us on
Instagram, Twitter and Pinterest.


Birthday Message For You!


Welcome Back Dreamerland Craft Fans!

Today, I’m sharing a birthday card that I made using a combination of Dreamerland Crafts stamps.  A Special Message For You – D16001 was used for the boy image and sentiment, Mailbox & Wall – Mix & Match Collection – M18301 and  Window & Gate – Mix & Match Collection – M18302 were used to create the background. I just love how these stamps came together to help me to create this scene.


To make this card I used a base card of 6″ x 6″. I die cut X-Press It Blending Card using my Cuttlebug and dies from Creative Expression Craft Dies by Sue Wilson – Noble Dies – Double Pierced Squares – Set B. I used the square die that was about 5.75″ x 5.75″.

Next, I created a mask of each of the stamps I was going to use to create the scene. The boy was stamped first and then I placed the mask over top of him. Next was the gate, then the brick wall and the foliage.  I added the masks after stamping each piece. Lastly, I stamped the 2 windows. All masking was removed at this point.

To create the main building brick wall, I used Kraftin’ Kimmie Stencil – Brick Wall. Using my magentic mat, small magnets were used to hold the stencil down over the image. Then Copic markers were used to create the texture of the brick. Once all of the brick was done, C4 and C2 were used to fill in the spaces in between. I drew in the sidewalk using a combination of C0 – C5 markers.

After all of the main colouring was done, Tim Holtz Distress Ink – Blueprint Sketch was used to stamp the sentiment. Then, because I was using my MISTI, it was easy to then re-ink the sentiment with Versamark ink and then emboss it with Ranger – Clear Super Fine Detail embossing powder. Marvy Uchida – Embossing Heat Tool was used to heat up the embossing powder.

Card Recipe:

Stamps:  A Special Message For You – D16001 (Dreamerland Crafts), Mailbox & Wall – Mix & Match Collection – M18301 (Dreamerland Crafts), Window & Gate – Mix & Match Collection – M18302 (Dreamerland Crafts)

Sentiment: A Special Message For You – D16001 (Dreamerland Crafts)

Inks: Memento – Tuxedo Black, Tim Holtz Distress Ink – Blueprint Sketch, Versamark

Embossing Powder: Ranger – Clear Super Fine Detail embossing powder

Paper: Copic Marker X-Press It Blending Card

Die Cuts: Creative Expression Craft Dies by Sue Wilson – Noble Dies – Double Pierced Squares – Set B

Stencil: Kraftin’ Kimmie – Brick Wall Stencil

Tools: MISTI – Most Incredible Stamping Tool, Cuttlebug, Marvy Uchida – Embossing Heat Tool

Image coloured with Copic Markers:

Skin: E000, E00, E04, E11, E21, R22, R20

Hair:  E47, E44, E43

Shirt: YG97, YG95, G21

Pants: B26, B23, B21

Boot: E29, E27, E25, E23, E21

Main Building Brick Wall: E37, E35, E08, E04, C4, C2, Kraftin’ Kimmie – Brick Wall Stencil

Lower Brick Wall: E53, E51, E44, E43, E34, E31, E30, BV23, BV20

Gate: E39, E37, E34, E31

Foliage and Flowers: YG17, YG13, YG03, YG01, G07, V17, V15

Window and Ledgings: E44, E43, E31, E30, E27, E25, E23, E21, E42, E41, E40

Sidewalk: C4, C3, C2, C1, C0

Hope you like it and have a great week!

You can find more cards to inspire you at Dreamerland Crafts and Pointer Scrapbooking on the Facebook Fan pages from the rest of our design team.

Cupcake Gnome


Today I’m sharing this adorable Cupcake Gnome image from KLM Digital Designs new August release. He’s made this big cupcake just in time to help a special someone celebrate another amazing  birthday year!

I printed out the main image onto Copic Marker X-Press It Blending Card using my HP Printer. The image was then coloured in with Copic markers, fussy cut, then lined around all of the edges with a black marker.

For the main background, I used a white card base of 5.5″ x 4.25″.  PhotoPlay – Party Girl paper was used to create the background. To do this, multiple layers of the paper were cut out using a mixture of My Creative Time – Rectangle Frame Dies and Layers. Then the cut rectangles were edged with Kraftin Kimmie – Mermaid Melody and Kraftin’ Kimmie – Pink Pizzaz inks.

For the sentiment. “Happy Birthday” was die cut 5 times and then layered to give it dimension. Once all of the layers were completely assembled the tops of each were stamped with VersaMark ink and then heat embossed with Ranger – Clear Super Fine Detail embossing powder.

I popped up the image and background layers with 3M VHB – 2 sided tape to complete the card and added in a few Kraftin’ Kimmie Krafty Dots.

Card Recipe:

Stamp and Sentiment: Cupcake Gnome (KLM Digital Designs)

Inks: HP Printer Grayscale, Kraftin Kimmie – Mermaid Melody, Kraftin’ Kimmie – Pink Pizzaz

Paper: Copic Marker X-Press It Blending Card, Photo-Play “Party Girl” by Samantha Walker – 6″ x 6″ paper pad

Die Cuts: My Creative Time – Rectangle Frame Dies, My Creative Time – Rectangle Frame Layers, PaperCrafter Today – 15 Die Cut Sentiment Set

Embosssing Powder: Ranger – Clear Super Fine Detail embossing powder

Tools: 3M VHB – 2 sided tape, Kraftin’ Kimmie Party Time Dots, Kraftin’ Kimmie Under Water Dots, Marvy Uchida – Embossing Heat Tool

Image coloured with Copic Markers:

Skin: E000, E00, E04, E11, E21

Beard: W5, W4, W3, W2, W1, W0, W00

Hat and Shirt: BG09, BG07, BG05, BG02

Pants: B26, B23, B21

Boots: E29, E27, E25, E23, E21

Cupcake Icing and Wrapper: Y19, Y18, Y17, Y04, Y02, Y00, RV17, RV14, RV13, RV11, RV10, E27, E25, E23, Atayou Spica – Twinkling Like Stars! 08 – Turquoise, 04 – Orange, 02 – Pink, Gelly Roll Sakura #8 Pen

Hope you like it and have a great week!

You can find more cards to inspire you at KLM Designs, KLM Digital Design Team and KLM Digital Designs on the Facebook Fan page from the rest of our design team.