Tag Archive | Sakura Glaze – Black

Fido Friend


Sharing a card I made today using KLM Digital Design –  Fido Friend from the new April 2022 release. We took a break for a little while, but now we are back with some wonderful new images. This is a free stamp this month for everyone to enjoy.

I created a 3.75″ x 7.5″ card base using Hammermill – Premium Colour 100 lb. cardstock. I imported the image into Microsoft Word and printed it out onto Copic Marker X-Press It Blending Card. Using my Couture Creations – Go Power and Emboss machine and My Creative Time – Tall Frame Dies, I die cut the image and coloured it in with Copic markers. I applied U-Line double-sided tape and popped it up onto the base card. To finish it off I glued on some Sprinkletz  Embellishments – Top Dog.

Card Recipe:

Stamp and Sentiment:  Fido Friend – KLM Digital Designs

Inks: HP Printer Grayscale

Paper: Copic Marker X-Press It Blending Card, Hammermill – Premium Colour 100 lb.

Die Cuts: My Creative Time – Tall Frame Dies

Miscellaneous: U-Line – 2 sided tape, Gelly Roll Sakura #10 Pen, Sakura Glaze – Black, Sprinkletz  Embellishments – Top Dog (NK146), Couture Creations – Go Power and Emboss

Image coloured with Copic Markers:

Dog: E49, E47, E44, E43, E42, E41, E40, E25, E23, R30, R27, R24, R22, R20, Y35, Gelly Roll Sakura #10 Pen, Sakura Glaze – Black

Lettering: Y38, Y35, Y32, Y26, Y19, Y18, Y17, Y15, Y13

Grass: Y17, Y13, Y03

Hope you like it and have a great week!

You can find more cards to inspire you at KLM Designs, KLM Digital Design Team and KLM Digital Designs on the Facebook Fan page from the rest of our design team.

Ex-Cuse Me!!


Sharing a birthday card I made for my sister-in-law this year using C.C. DesignsRoberto’s Rascals – Grouchy Pets and Roberto’s Rascals – Cutie Cats. Her name is Kitty and I always try to find fun images with cats to make her card. LOL!

To make the card, I began with the base of 3.5″ x 8.5″ Hammermill – Premium Colour cardstock. I also die cut the Hammermill – Premium Colour cardstock with the Whimsy Stamps – Slimline Marquee Die and my Cuttlebug. Using multiple Picket Fence – Blending Brushes and Tim Holtz Distress Inks listed below, I created my own background. Using the window pieces from the die cut, I traced around them onto Doodlebug – hey cupcake (6″x6″) paper and fussy cut around them. I applied some glue along the edges and attached them to the back of the panel.  Then I applied double-sided tape to the backing and attached this to the base.

Using my MISTI and Memento – Tuxedo Black ink, the images were stamped onto Copic Marker X-Press It Blending Cardstock and coloured in with Copic Markers. Once everything was coloured, I fussy cut around each of them. The sentiments were stamped onto Recollections – Black cardstock with Versamark ink and then heat embossed with Ranger Embossing Powder White – Extra Fine Detail and my Marvy Uchida – Embossing Heat Tool. Using my cutter, I cut around each of the sentiments. I added double-sided tape to the back of the images and sentiments and popped them all up onto the base card. Finally, I added some Kraftin’ Kimmie Pop Dots.

Inside of the card: 

For the inside of the card, I used my large MISTI and Memento – Tuxedo Black ink to stamp the sentiments from Art Impressions Glamour Pop-Ups – 5355 and Purrrfect Sentiments – HoneyBee Stamps. I ran the little kitty from the Roberto’s Rascals – Cutie Cats – C.C. Designs set that I had coloured earlier through my Xyron Create a Sticker and attached it directly to the card to finish everything off.

Thankfully, she loved her card and I hope you do too!

Card Recipe:

Stamp and Sentiments: Roberto’s Rascals – Grouchy Pets – C.C. Designs, Roberto’s Rascals – Cutie Cats – C.C. Designs

Sentiments: Purrrfect Sentiments – HoneyBee Stamps, Dance It Out Set – Art Impressions

Inks: Memento – Tuxedo Black, Versa Fine – Onyx Black, Tim Holtz Distress Ink: Picked Raspberry, Carved Pumpkin, Mustard Seed, Peacock Feathers

Paper: Copic Marker X-Press It Blending Card, Hammermill – Premium Colour 100 lb., Doodlebug – hey cupcake (6″x6″) paper pad

Die Cut: Whimsy Stamps – Slimline Marquee Die (WSD347)

Embossing Powder: Ranger Embossing Powder White – Extra Fine Detail

Miscellaneous: Marvy Uchida – Embossing Heat Tool, Gelly Roll Sakura #10 Pen, Kraftin’ Kimmie – Seashore Dots, Xyron Create a Sticker, Sakura Glaze – Black

Image coloured with Copic Markers:

Cats: N9, N7, N5, N3, RV11, R20, G14, YG23, YG11 (Gelly Roll Sakura #10 Pen, Sakura Glaze – Black)

Hope you like it and have a great week!

Rain or Shine!


Sharing a card I made today using Penny Black Stamps – Rain or Shine. My husband and I always celebrate the first day that we started going out together and also our wedding anniversary each year. Yesterday, marked 36 wonderful years together. We had bears on the top of our wedding cake, so I thought it would be great to make him a card with bears to celebrate our special day.

To make my card, I started out with Hammermill – Premium Colour 100 lb. cardstock to create a card base of 5.5″ x 4.25″. Using My Creative Time – Rectangle Frame Dies and my Cuttlebug, I die cut a small rectangle into the front of the card. For the raindrops, I first applied some Post-It tape down the centre of the card and then applied Tim Holtz Distress Inks – Tumbled Glass with a Picket Fence – Blending Brush. I placed Kraftin’ Kimmie – Rainy Day Stencil over top of this blue section and this time I applied Tim Holtz Distress Ink – Salty Ocean. I removed the stencil and the Post-it Note tape and covered the centre where the blue colour ended. Using a Picket Fence – Blending Brush and Tim Holtz Distress Ink – Squeezed Lemonade, I applied yellow to the entire right side of the card. Lastly, I placed Kraftin’ Kimmie – Starburst Stencil over top and using the same brush, I applied Tim Holtz Distress Ink – Mustard Seed. I die cut the word “Happy” using My Creative Time – Happy Everything Stamp Set and Recollections – Black cardstock. Lastly, using a sentiment from the same stamp set, I stamped and heat embossed the word “Anniversary” using Versa Fine – Onyx Black and Ranger – Clear Super Fine Detail embossing powder.

Here is the inside of the card.

I stamped the image onto Copic Marker X-Press It Blending Card using my MISTI and Memento – Tuxedo Black ink. I die cut it using Lawn Fawn – Zig Zag Square Stackables and coloured in the image with Copic markers. Using my MISTI again, I heat embossed the sentiment onto Recollections – Black cardstock using VersaMark and Ranger Embossing Powder White – Extra Fine Detail. Gina K. Designs – Master Layouts – #9 was used to die cut the sentiment. I applied glue to the back of the image and sentiment and attached them both to the inside of the card.

Card Recipe:

Stamp and Sentiments: Rain or Shine (Penny Black Stamps) and Happy Everything Stamp Set (My Creative Time)

Inks: Memento – Tuxedo Black, Tim Holtz Distress Inks – Tumbled Glass, Tim Holtz Distress Ink – Salty Ocean, Tim Holtz Distress Ink – Squeezed Lemonade, Tim Holtz Distress Ink – Mustard Seed, Versa Fine – Onyx Black, VersaMark

Embossing Powder: Ranger Embossing Powder White – Extra Fine Detail, Ranger – Clear Super Fine Detail embossing powder

Paper: Copic Marker X-Press It Blending Card, Hammermill – Premium Colour 100 lb., Recollections – Black cardstock

Die Cuts: Lawn Fawn – Zig Zag Square Stackables, My Creative Time – Rectangle Frame Dies, My Creative Time – Happy Everything Stamp Set, Gina K. Designs – Master Layouts – #9

Stencils: Kraftin’ Kimmie – Rainy Day Stencil, Kraftin’ Kimmie – Starburst Stencil

Tools: MISTI – Most Incredible Stamping Tool, Cuttlebug, Picket Fence – Blending Brushes

Image coloured with Copic Markers:

Bears: E53, E51, E50, E35, E34, E33, E31, E27, E25, E23, E21 (Eyes: Sakura Glaze – Black and Gelly Roll Sakura #10 Pen)

Umbrella: R46, R14, R12, R08, B26, B24, B23, B21, Y19, Y17, Y13, Y11, YR16, YR15, YR14, YR12, YG09, YG07, YG06, YG03, V04, V01, E49, E47, E44

Grass: YG23, YG17, YG03, YG01

Sky: B02, B01, B00, B000

Hope you like it and have a great week!

Every Little Moment!!


Today, I’m sharing a card using Dreamerland Crafts stamps called When You Love Someone – D20005 and Mix and Match Collection – Railing and Lampost – M18309 for the main images and Mix and Match – DCS19095 for the sentiment. Loved combining these stamps as they could be used for Valentine’s Day, Anniversary or just a note to let your special someone know how much you love them.

To make this card I used a base of 5.5″ x 4.25″ using Hammermill – Premium Colour 100 lb. cardstock. I die cut Copic Marker X-Press It Blending Card paper with my Cuttlebug and My Creative Time – Rectangle Frame Layers. Using my MISTI and Memento – Tuxedo Black ink, I stamped the Dreamerland image When You Love Someone – D20005 and then stamped it again onto Post-It Note paper. I cut around the image on the Post-It Note paper and applied it over top of my stamped image. Once this was in place, I used my MISTI and Memento – Tuxedo Black ink to stamp the Dreamerland image Mix and Match Collection – Railing and Lampost – M18309. The railings were stamped on both sides of the image and then again using my MISTI, I stamped the lamp posts multiple times. I also used Copic – W9 to make the bottom halves a little darker as well. This was done on both sides of the main image. I had used some Post-It note paper to put on both ends so that the fence wouldn’t go past the small border around the card when I was stamping. I coloured in the image with Copic Markers. Once the image and background were coloured in, I stamped the sentiment using VersaMark ink, my MISTI and Ranger Embossing Powder White – Extra Fine Detail. Lastly, some stars were added to the sky using Gelly Roll Sakura #5 Pen and Gelly Roll Sakura #10 Pen.  I adhered the completed image to some Recollections – Black cardstock using double-sided tape. To finish off the card, I applied U-Line double-sided tape and popped the completed image and matting onto the base card.

Card Recipe:

Stamps: When You Love Someone – D20005 – Dreamerland Crafts, Mix and Match Collection – Railing and Lampost – M18309 – Dreamerland Crafts

Sentiment: Mix and Match – DCS19095 – Dreamerland Crafts

Inks: Memento – Tuxedo Black, Versamark

Paper: Copic Marker X-Press It Blending Card, Hammermill – Premium Colour 100 lb., Recollections – Black cardstock

Die Cuts: My Creative Time – Rectangle Frame Layers

Embossing Powed: Ranger Embossing Powder White – Extra Fine Detail

Tools: MISTI – Most Incredible Stamping Tool, Gelly Roll Sakura #5 Pen, Gelly Roll Sakura #10 Pen

Image coloured with Copic Markers:

Skin: E21, E11, E00, E000, R30, R20, Eyes – Gelly Roll Sakura #10 Pen for highlight

Hair: E47, E44, E43, E41

Dress and Shoes: R83, R81, RV00, RV000, E23, 21

Jeans: B26, B23, B21

Boots: E27, E25, E23, E21

Shirt: BG99, YG67, YG17, G21

Walkway: E55, E53, E51, E50, W4, W3

Night Sky and Lights: B99, B97, B95, B93, Y02, Y000, Gelly Roll Sakura #5 Pen, Gelly Roll Sakura #10 Pen

Hope you like it and have a great week!

You can find more cards to inspire you at Dreamerland Crafts and Pointer Scrapbooking on the Facebook Fan pages from the rest of our design team.

You Got This!!


It’s Wednesday, and this week, I made a card using High Hopes Rubber Stamps Lasso Some Snow – TDG021  for the main image and Don’t Worry – FDG021 for the sentiment. We all need a little bit of encouragement every now and then and this little snowman is here to give us some.

To make my card this week, I began with a card base of Hammermill – Premium Colour 100 lb. cardstock, cut and scored to be 5.5″ x 4.25″.  I used Echo Park Paper Co. – My Favorite Winter cardstock cut to the same size as the base card for the background. I attached this to the base using double-sided tape. Using my Cuttlebug, a mixture of square dies from My Creative Time -Stitched Squares Inside and Out and Waffle Flower – Nesting Square dies, I die cut cardstock from Scrapbook.com Neutrals Smooth Cardstock and also Copic Marker X-Press It Blending Card. I applied double-sided tape to the back of the tan square and applied it directly to the background. U-Line double-sided tape was added to the back of the dark brown square and popped up onto the centre of the tan square.

With my MISTI and Memento – Tuxedo Black ink, I stamped the image onto the Copic Marker X-Press It Blending Card cardstock square and coloured it in with Copic markers. Gelly Roll Sakura #10 Pen was used to create the snow in the sky. Sakura Glaze – Black and Gelly Roll Sakura #5 Pen were used on the eyes of the snowman. I applied U-line douhble-sided tape to the back of the completed image and popped it up onto the centre of the dark brown square.

With my MISTI and Memento – Tuxedo Black ink, I stamped the sentiment onto Recollections – White cardstock and then die cut it out using my Cuttlebug and My Creative Time – Ribbon End Dies. I inked around the edges using Copic – E59 marker to give it a dark brown border. I used my knife to remove the double border from the piece left behind and then traced the shape of the ribbon onto the remaining piece of Scrapbook.com Neutrals Smooth Cardstock. I cut this out with my cutter and scissors. U-Line double-sided tape was applied to both pieces and the completed sentiment was popped up onto the card below the main image to complete the card.

Card Recipe:

Stamp: Lasso Some Snow – TDG021 (High Hopes Rubber Stamps)

Sentiment: Don’t Worry – FDG021 (High Hopes Rubber Stamps)

Inks: Memento – Tuxedo Black

Paper: Copic Marker X-Press It Blending Card, Hammermill – Premium Colour 100 lb., Echo Park Paper Co. – My Favorite Winter (6″ x 6″), Scrapbook.com – Neutrals Smooth Cardstock (5.5″ x 4.25″), Recollections – White cardstock

Die Cuts: My Creative Time -Stitched Squares Inside and Out, Waffle Flower – Nesting Square dies, My Creative Time – Ribbon End Dies

Tools: MISTI – Most Incredible Stamping Tool, U-Line double-sided tape, Gelly Roll Sakura #10 Pen, Gelly Roll Sakura #5 Pen, Sakura Glaze – Black, Cuttlebug

Image coloured with Copic Markers:

Snowman: B60, C9, C7, C5, C00, E49, YR18, YR16, YR12, Colorless Blender (Eyes – Sakura Glaze – Black, Gelly Roll Sakura #5 Pen)

Hats, Mitts and Scarf: B99, B977, B95

Coat: E51, E50, E37, E35, E34, E33, E31

Birds: E59, E37, E35

Fence: E29, E27, E25, E23, E21

Wheel and Rope: E77, E74, E47, E44, E43, Y35, YR31

Sky: B04, B02, B01, B00

Snow: B000, B60, C00, Colorless Blender, Stickles – Diamond

Hope you like it and have a fantastic week!

You can find lots of inspiration from the Design Team Divas at the High Hopes blog, and the High Hopes Rubber Stamps Facebook Fan page plus you can also follow us on
Instagram, Twitter and Pinterest.

Beautiful Day!!


It’s Wednesday, and this week, I made a card using High Hopes Rubber Stamps Winter Kitty – SDG006  for the main image and Beautiful Day – FDG013 for the sentiment. We just had a major snowfall over the last few days and this little kitty is all bundled up and ready to play!

Growing up we had a lot of snow during the winter and couldn’t wait to put on our mitts and snow boots and go out to play. We had huge snow banks in the schoolyard across the street and would toboggan down them or just slide down in our snow suits! LOL! It was sooooo much fun! Sometimes we even made big snow forts in the backyard with tables and chairs made out of ice and snow. We hardly spent anytime indoors and didn’t usually go back into the house until we had to or we were turning blue because it was so cold out, but even then we still wanted to continue playing outdoors. LOL!

To make my card this week, I began with a card base of Hammermill – Premium Colour 100 lb. cardstock, cut and scored to be 5.5″ x 4.25″.  I used Scrapbook.com – Rainbow Smooth Cardstock for the main background paper. It was already the same size as the base, so no cutting had to be done. To get more use out of the same paper, I had cut the oval frame using my Cuttlebug and Hero Arts – Infinity Die Ovals first. Then, I placed the Rainbow cardstock onto the card base using double-sized tape. I die cut the square background using My Creative Time -Stitched Squares Inside and Out and Pebbles – Winter Wonderland paper and the rectangle to the size of 4″ x 4″. The rectangle was cut from from the same paper pack to the size of 1.25″ x 4″. I inked around the edges of both shapes with a sponge dauber and Tim Holtz Distress Ink – Evergreen Bough. Using double-sided tape, I placed both shapes over the pink background and hid where I cut the oval with the square. I cut out a smaller oval using the same Hero Arts – Infinity Die Ovals and Copic Marker X-Press It Blending Card. I also cut out a 1.5″ circle using a circle punch. Lastly, I die cut the scalloped circle using WeR Memory Keepers – Quickutz Nesting Scallops dies and Hot Buy Craft Smart – Holiday Glitz Glitter Paper.

With my MISTI and Memento – Tuxedo Black ink, I stamped the image onto the Copic Marker X-Press It Blending Card cardstock oval and the sentiment onto the circle. I coloured in the image with Copic markers and then added some Ranger – Emboss It Pen Clear to the bottom of the oval and applied WOW! Sparkling Snow Embossing Glitter. I heat embossed this and added more embossing powder several times to create a thicker layer with my Marvy Uchida – Embossing Heat Tool. Then I added some Cosmic Shimmer Fluffy Stuff and heat embossed it as well to puff it up. Gelly Roll Sakura #10 Pen was used to create the snow in the sky. Sakura Glaze – Black and Gelly Roll Sakura #5 Pen were used on the eyes and nose of the cat.

I inked around the edges of the large pink oval and the circle with Tim Holtz Distress Ink – Picked Raspberry. I applied the coloured image directly to the pink oval and the sentiment circle to the scalloped circle using some liquid glue. Both shapes were then popped up onto the card using U-Line double-sided tape. To completed the card and add in some extra sparkle, I applied some YNS Gumdrops – Winter Wonderland to the background patterned paper.

Card Recipe:

Stamp: Winter Kitty – SDG006 (High Hopes Rubber Stamps)

Sentiment: Beautiful Day – FDG013 (High Hopes Rubber Stamps)

Inks: Memento – Tuxedo Black, Tim Holtz Distress Ink – Evergreen Bough, Tim Holtz Distress Ink – Picked Raspberry, Ranger – Emboss It Pen Clear

Paper: Copic Marker X-Press It Blending Card, Hammermill – Premium Colour 100 lb., Scrapbook.com – Rainbow Smooth Cardstock (4.25″ x 5.5″), Pebbles Winter Wonderland 6″ x 6″, Hot Buy Craft Smart – Holiday Glitz Glitter Paper 12″ x 12″

Die Cuts: My Creative Time -Stitched Squares Inside and Out, Hero Arts – Infinity Die Ovals, WeR Memory Keepers – Quickutz Nesting Scallops, 1.5″ Circle Punch

Tools: MISTI – Most Incredible Stamping Tool, U-Line double-sided tape, Gelly Roll Sakura #10 Pen, Gelly Roll Sakura #5 Pen, Sakura Glaze – Black, Cuttlebug, YNS Gumdrops – Winter Wonderland

Image coloured with Copic Markers:

Kitty: N7, N5, N3, R02, R00, RV66, RV63, RV55 (Eyes – Sakura Glaze – Black, Gelly Roll Sakura #5 Pen)

Sky: B05, B04, B02, Gelly Roll Sakura #10 Pen

Snow: WOW! Sparkling Snow Embossing Glitter, Cosmic Shimmer Fluffy Stuff, Marvy Uchida – Embossing Heat Tool

Hope you like it and have a fantastic week!

You can find lots of inspiration from the Design Team Divas at the High Hopes blog, and the High Hopes Rubber Stamps Facebook Fan page plus you can also follow us on
Instagram, Twitter and Pinterest.

Good Times!!


It’s Wednesday, and this week, I made a card using High Hopes Rubber Stamps Bird Song – TDG016  for the main image and Good Times – FDG014 for the sentiment. These little birdie friends know how to whistle a tune. Unfortunately, I myself never mastered how to whistle! I’ve tried over the years, but just can’t seem to do it. LOL!

To make my card this week, I began with a card base of Hammermill – Premium Colour 100 lb. cardstock, cut and scored to be 5.5″ x 4.25″.  I used Scrapbook.com – Brights Smooth Cardstock for the background paper. This paper is great because it’s already cut to size which makes it so easy. I applied it to the base using double-sided tape. Using my Cuttlebug and Your Next Die – Stitched Frame Snowfall Hill die set, I die cut the centre piece from Copic Marker X-Press It Blending Card and the frame from Crafter’s Companion – Luxury Cardstock – Gold.

With my MISTI and Memento – Tuxedo Black ink, I stamped the image onto the Copic Marker X-Press It Blending Card cardstock and the sentiment onto Recollections – White cardstock. I coloured in the image with Copic markers and then added some Stickles – Diamond and Stickles – Waterfall to the parts of the snow to make it sparkly. Gelly Roll Sakura #10 Pen was used to create the snow in the sky. To make the eyes stand out a little more, I used Sakura Glaze – Black and then added a white dot using Gelly Roll Sakura #5 Pen. Once the stickles were dry, I turned the coloured image and frame over and taped them together on the back with some Scotch tape to keep the 2 pieces together. U-line double-sided tape was then applied and I turned it over again and popped it up onto the card. The sentiment was die cut using my Cuttlebug and Essentials by Tattered Lace Dies – Easel Slider. I inked around the edges with Sharpie – Gold Medium Point – Water Based Paint pen, added U-Line double-sided tape to the top half of the sentiment and added it on top of the image. Lastly I added some YNS Gumdrops – White Sugar and Sparkle to complete the card.

Card Recipe:

Stamp: Bird Song – TDG016 (High Hopes Rubber Stamps)

Sentiment: Good Times – FDG014 (High Hopes Rubber Stamps)

Inks: Memento – Tuxedo Black

Paper: Copic Marker X-Press It Blending Card, Hammermill – Premium Colour 100 lb., Scrapbook.com – Brights Smooth Cardstock (4.25″ x 5.5″), Recollections – White, Crafter’s Companion – Luxury Cardstock – Gold

Die Cuts: Your Next Die – Stitched Frame Snowfall Hill, Essentials by Tattered Lace Dies – Easel Slider

Tools: MISTI – Most Incredible Stamping Tool, U-Line double-sided tape, Gelly Roll Sakura #10 Pen, Gelly Roll Sakura #5 Pen, Sakura Glaze – Black, Stickles – Diamond, Stickles – Waterfall, Cuttlebug, YNS Gumdrops – White Sugar and Sparkle

Image coloured with Copic Markers:

Bird1 and Scarf: R59, R39, R37, R35, R29, R27, BG09, BG09, BG05, BG02, BG01, BG000 (Eyes – Sakura Glaze – Black, Gelly Roll Sakura #5 Pen)

Bird2 and Scarf: Y17, Y15, Y13, Y11, Y02, Y00, BG72, BG57, BG49, BG32, BG11, Gelly Roll Sakura #5 Pen

Bird3 and Scarf: R56, R46, R37, R24, R22, C9, C7, C5, G16, G14, YG23, YG03

Beaks and Claws: YR18, YR14, YR12, Y19, Y08

Pine Needles: G29

Sky: B05, B04, B02, B01, Gelly Roll Sakura #10 Pen

Snow: C1, Stickles – Diamond, Stickles – Waterfall

Hope you like it and have a fantastic week!

You can find lots of inspiration from the Design Team Divas at the High Hopes blog, and the High Hopes Rubber Stamps Facebook Fan page plus you can also follow us on
Instagram, Twitter and Pinterest.

Friendship Warms The Heart!!


It’s Wednesday, and this week, I made a card using Friends Snooze – TDG013 by High Hopes Rubber Stamps for the main image and Friendship – FDG023 (High Hopes Rubber Stamps) for the sentiment. Pop on over to High Hopes Rubber Stamps and see all of the wonderful new images as we celebrate our Winter Friends Release!

To make my card this week, I began with a card base of Hammermill – Premium Colour 100 lb. cardstock, cut and scored to be 5.5″ x 4.25″.  I cut the background paper from American Crafts – Jack Frost to be the same size and attached it directly to the base using double-sided tape. Tim Holtz Distress Ink – Chipped Sapphire was used to ink around the outside of the card. Using my Cuttlebug, My Creative Time – Rectangle Frame Layers, My Creative Time – Rectangle Frame Dies, Gina Marie Designs – Nested Scalloped Stitched Rectangles, I die cut the Copic Marker X-Press It Blending Card, Scrapbook.com – Peppermint Smooth Cardstock and Crafter’s Companion – Luxury Cardstock – Ice Blue Pack. Using U-line double-sided tape, I popped up each of the layers onto the card base.

Using my MISTI and Memento – Tuxedo Black ink, I stamped the image onto Copic Marker X-Press It Blending Card cardstock and the sentiment onto Recollections – White cardstock. I coloured in the image with Copic markers and then added some Stickles – Diamond to the parts of the snow to make it sparkly. Gelly Roll Sakura #5 Pen was used to create a starry night sky. I added U-line double-sided tape to the completed image and popped it up onto the card. The sentiment was die cut using my Cuttlebug and Poppystamps – Christmas Quotes. I inked around the edges with Tim Holtz Distress Ink – Chipped Sapphire and glued it onto the top of the image at an angle to complete the card.

Card Recipe:

Stamp: Friends Snooze – TDG013 (High Hopes Rubber Stamps)

Sentiment: Friendship – FDG023 (High Hopes Rubber Stamps)

Inks: Memento – Tuxedo Black, Tim Holtz Distress Ink – Chipped Sapphire

Paper: Copic Marker X-Press It Blending Card, Hammermill – Premium Colour 100 lb., American Crafts – Jack Frost 6 x 6 in., Crafter’s Companion – Luxury Cardstock – Ice Blue Pack, Scrapbook.com – Peppermint Smooth Cardstock – 4.25″ x 5.5″, Recollections – White

Die Cuts: My Creative Time – Rectangle Frame Layers, My Creative Time – Rectangle Frame Dies, Poppystamps – Christmas Quotes, Gina Marie Designs – Nested Scalloped Stitched Rectangles

Tools: MISTI – Most Incredible Stamping Tool, U-Line double-sided tape, Gelly Roll Sakura #10 Pen, Gelly Roll Sakura #5 Pen, Sakura Glaze – Black, Stickles – Diamond, Cuttlebug

Image coloured with Copic Markers:

Bear and Scarf: C9, C7, C5, C4, C3, E27, E25, E23, BG09, BG05, BG02, BG01 (Eyes and Nose – Sakura Glaze – Black)

Bird, Scarf and Hat: R46, R22, R14, R08, YR18, YR15, BG72, BG57, BG32, BG11, Gelly Roll Sakura #5 Pen

Pine Needles: G29

Sky: B99, B97, B95, B93, Gelly Roll Sakura #5 Pen

Snow: B60, B0000, BV20, BG0000, Colorless Blender, Stickles – Diamond

Hope you like it and have a fantastic week!

You can find lots of inspiration from the Design Team Divas at the High Hopes blog, and the High Hopes Rubber Stamps Facebook Fan page plus you can also follow us on
Instagram, Twitter and Pinterest.

Birthday Owl!!


Come and check us out on Passionate Paper Creations & Friends FB group
as we are currently sponsoring KLM Designs for the month of December.

If you are a member of Passionate Paper Creations & Friends FB group
you can go to the top of the page and get a shopping discount.
Not a Member? Come Join! https://bit.ly/2VwG9iz.

We are a fun loving group with a lot of inspiration.

*******************************************************

Thank you KLM Designs for sponsoring us. Today, I’m sharing a card I made using KLM Designs –  Owl and Sentiments. I really love your adorable images and working with them.

The base was created with AC Cardstock – White cut and folded to the size of 6″ x 6″. I cut the background paper from My Mind’s Eye – Hootenanny designer paper to be the same size as the background and applied it to the base using double-sided tape. From the same paper pack, I cut a piece of the designer paper to the size of 6″ x 1″ and glued this on top of the background at the bottom of the card. I cut a piece of Recollections – Brown cardstock to the size of 6″ x 5/8″ and applied that above the wording on the bottom of the card. Tim Holtz Distress Ink – Rusty Hinge was used to ink around all of the edges of the card.

The image and sentiment were both imported into Microsoft Word and printed out onto Copic Marker X-Press It Blending Card. The image was coloured in with Copic markers and then I fussy cut around it and the sentiment. I applied Sakura Glaze – Black to the eyes and Gelly Roll Sakura #10 Pen for the highlights. With a FolkArt 1837 – Perfect Liner #1 and Copic Opaque White I added in some white onto the wings. I ran the image through my Xyron Creative Station and the sentiment through my Xyron Create a Sticker and applied them to Recollections – Brown cardstock and Recollections – Black cardstock. Then I fussy cut around the 2 again. I popped them up onto the card using U-Line double-sided tape to complete the card.

Card Recipe:

Stamp and Sentiment:  Owl and Sentiments – KLM Digital Designs

Inks: HP Printer Grayscale, Tim Holtz Distress Ink – Rusty Hinge

Paper: Copic Marker X-Press It Blending Card, AC Cardstock – White, Recollections – Black cardstock, Recollections – Brown cardstock, My Mind’s Eye – Hootenanny Designer Paper (6″ x 6″)

Miscellaneous: U-Line double-sided tape, Xyron Creative Station, Xyron Create a Sticker

Image coloured with Copic Markers:

Owl: E95, E93, E43, E42, E41, E18, E15, E13, E11, Y38, Y35, Y32, YR21, C9, W0, W00, Eyes (Sakura Glaze – Black and Gelly Roll Sakura #10 Pen), Copic Opaque White

Hope you like it and have a great week!

You can find more cards to inspire you at KLM Designs, KLM Digital Design Team, KLM Digital Designs and Passionate Paper Creations & Friends FB group
on the Facebook Fan page from the rest of our design team.

Hello Winter!!!


It’s Wednesday, and this week, I made a Christmas CAS card using Penguin Tag – SDG003 by High Hopes Rubber Stamps for the main image and Hello Winter – FDG007 (High Hopes Rubber Stamps) for the sentiment. Winter is now here and these little penguins couldn’t wait to start enjoying it.

I’d like to take this time to also wish everyone a Very Merry Christmas and A Happy New Year!

To make my card this week, I began with a card base of Hammermill – Premium Colour 100 lb. cardstock, cut and scored to be 5.5″ x 4.25″.  I cut the background paper from Craft Consortium – Polar Playtime to be the same and attached it directly to the base. Tim Holtz Distress Ink – Picked Raspberry was used to ink around the outside of the card. Using my MISTI and Memento – Tuxedo Black ink, I stamped the image and sentiment onto Copic Marker X-Press It Blending Card cardstock. I coloured in the image with Copic markers and the little berries with a Pental Sunburst Metalic Med Gel Pen – Gold. I used Sakura Glaze – Black and Gelly Roll Sakura #10 Pen was used for the eyes and little dots on the hat.) Clear – Wink of Stella was applied over top of the candy canes and candy cane border. Once this was all complete, I fussy cut around the image and then coloured in around it with Copic B01. I ran the image through my Xyron Creative Station and attached it to some Hot Pink cardstock. Once again, I fussy cut around the image and then popped it up on to the card using U-Line double-sided tape. Lastly, Gelly Roll Sparkle Pen was applied to the little blue snowflakes and dots on the background paper to finish off the card.

Card Recipe:

Stamp: Penguin Tag – SDG003 (High Hopes Rubber Stamps)

Sentiment: Hello Winter – FDG007 (High Hopes Rubber Stamps)

Inks: Memento – Tuxedo Black, Tim Holtz Distress Ink – Picked Raspberry

Paper: Copic Marker X-Press It Blending Card, Hammermill – Premium Colour 100 lb., Craft Consortium – Polar Playtime (6″ x 6″), Hot Pink cardstock

Tools: MISTI – Most Incredible Stamping Tool, U-Line double-sided tape, Gelly Roll Sakura #10 Pen, Pental Sunburst Metalic Med Gel Pen – Gold, Sakura Glaze – Black, Gelly Roll Sparkle Pen, Clear – Wink of Stella, Xyron Creative Station

Image coloured with Copic Markers:

Penguin: W9, W7, W5, W3, W0, E15, YR14, Y17, Y11, R30, E42, E41, E40 (Eyes – Sakura Glaze – Black, Gelly Roll Sakura #10 Pen)

Hat, Pom Pom and Bow Tie: RV14, RV13, RV11, RV10, G14, YG23, YG11, Gelly Roll Sakura #10 Pen

Holly and Leaves: G14, YG23, YG11, R59, R37, R35

Candy Cane and Border: C1, C0, R59, R37, R35, Colorless Blender, Clear – Wink of Stella

Berries: Pental Sunburst Metalic Med Gel Pen – Gold

Hope you like it and have a fantastic week!

You can find lots of inspiration from the Design Team Divas at the High Hopes blog, and the High Hopes Rubber Stamps Facebook Fan page plus you can also follow us on
Instagram, Twitter and Pinterest.

Wish Upon A Star!!


Today, I’m sharing a card using Dreamerland Crafts stamps called Being With Each Other – D17011.  This boy and his little kitty are enjoying the moment and wishing upon a star!

To make this card I used a base of 5.5″ x 4.25″ using Hammermill – Premium Colour 100 lb. I stamped the image using my MISTI and Memento – Tuxedo Black ink onto Copic Marker X-Press It Blending Card which was cut to the size of 5-1/8″ x 3-7/8″. I coloured in the image with Copic Markers and added some stars in the sky using Gelly Roll Sakura #5 Pen, Gelly Roll Sakura #8 Pen and Gelly Roll Stardust – Clear pen.  I adhered the completed image to the base card using double-sided tape.

Card Recipe:

Stamp: Being With Each Other – D17011 – Dreamerland Crafts

Inks: Memento – Tuxedo Black

Paper: Copic Marker X-Press It Blending Card, Hammermill – Premium Colour 100 lb.

Tools: MISTI – Most Incredible Stamping Tool, Gelly Roll Sakura #5 Pen, Gelly Roll Sakura #8 Pen and Gelly Roll Stardust – Clear

Image coloured with Copic Markers:

Skin: E21, E11, E00, E000, R30, R22, R20,

Hair: E47, E44, E43, E41, Sakura Glaze – Black – Eyes

Sweater: BG72, BG57, BG32, BG11, BG09, BG05, BG02, BG01, R46, R14, R08

Jeans: B26, B23, B21

Boots: E27, E25, E23, E21

Kitten: T7, T5, T3, R02

Grass: G99, YG67, YG17, G21

Night Sky and Moon: B99, B97, B95, B60, C7, C2, C1, C0, C00, BV23, BV20, Y000

Hope you like it and have a great week!

You can find more cards to inspire you at Dreamerland Crafts and Pointer Scrapbooking on the Facebook Fan pages from the rest of our design team.

Believe!!!


It’s Wednesday, and this week, I made a Christmas card using Believe Snowman – TFL006 and Snow Globe – ULF002 by High Hopes Rubber Stamps for the main image and North Pole Greetings – GLL005 (High Hopes Rubber Stamps) for the sentiment. It’s time to start believing the magic of Christmas and the joy that it brings to everyone!

To make my card this week, I began with a card base using AC Cardstock – White cut and folded to 6″ x 6″. The snowflake background is from Lawn Fawn – Let It Shine Snowflakes (6″ x 6″) paper pad. I applied this directly to the base using double-sided tape.

Using Lifestyle Crafts Cutting Dies – Nesting Circles and my Cuttlebug, I die cut a 3.75″ circle from Copic Marker X-Press It Blending Card paper. With my MISTI and Memento – Tuxedo Black ink, I stamped the snowman scene image onto it. I coloured in the image with Copic markers and then added some snow to the sky and snowman’s arms using a Gelly Roll Sakura #8 Pen. Sakura Glaze – Black was added to the eyes of the snowman and birds and the snowman’s mouth. With a Ranger – Emboss It Pen Clear, I added some ink to the top of the Snowman’s hat, sign, icicles, tops of the birdhouses and snow drifts and then heat embossed everything with WOW! Sparkling Snow Embossing Glitter and a Marvy Uchida – Embossing Heat Tool. Stickles – Diamond was added as an extra layer to the snow and Wink of Stella – Clear was applied over all the snowman. This was then set aside to dry.

With my MISTI and Memento – Summer Sky ink I stamped the top part of the globe onto Copic Marker X-Press It Blending Card paper. I cleaned off the stamp and this time, I used some Post-it Notes to hide the background inside the globe and inked the braided border for both the top and bottom of the base with Versamark ink. I applied Ranger Super Fine Detail Gold Embossing powder and heat embossed it using a Marvy Uchida – Embossing Heat Tool. With my globe image still in place on my MISTI, I removed the snowglobe stamp and added the sentiment turning up both ends of the stamp slightly to give the words some curvature. The sentiment was stamped using Versamark ink and then Ranger Super Fine Detail Gold Embossing powder was applied to it and then heat embossed using a Marvy Uchida – Embossing Heat Tool. The base was then coloured in using my Copic markers and a Gelly Roll Stardust – Clear pen was used to colour in the white areas to give it some glitter. I also added some of this pen to the tops of the snowman’s arms. With my scissors, I fussy cut around the entire snow globe.

The card was now ready to assemble. I attached 3M double-side tape to pop up the snow globe onto the main background and then added 3M double-sided tape to the back of the circle and centred it on the top part of the globe. Lastly, to finish off the card, I applied some Nuvo Crystal Drops – Caribbean Ocean, Violet Galaxy and Nuvo Glitter Drops – Sherbert Shimmer to some of the snowflakes on the base card.

Card Recipe:

Stamp: Believe Snowman – TFL006 (High Hopes Rubber Stamps), Snow Globe – ULF002 (High Hopes Rubber Stamps)

Sentiment: North Pole Greetings – GL005 (High Hopes Rubber Stamps)

Inks: Memento – Tuxedo Black, Memento – Summer Sky ink, Versamark

Paper: Copic Marker X-Press It Blending Card, AC Cardstock – White, Lawn Fawn – Let It Shine Snowflakes (6″ x 6″)

Die Cut: Lifestyle Crafts Cutting Dies – Nesting Circles

Stickles: Diamond

Nuvo: Crystal Drops – Caribbean Ocean, Violet Galaxy and Glitter Drops – Sherbert Shimmer

Embossing Powder:Ranger Super Fine Detail Gold Embossing powder, WOW! Sparkling Snow Embossing Glitter

Tools: MISTI – Most Incredible Stamping Tool, Marvy Uchida – Embossing Heat Tool, Cuttlebug, Gelly Roll Sakura #8 Pen, Ranger – Emboss It Pen Clear, Sakura Glaze – Black pen, Gelly Roll Stardust – Clear pen

Image coloured with Copic Markers:

Snowman: B60, C1, C00, Colorless Blender

Hat and Buttons: C10, C8, C6, C4

Arms and Sign: E27, E25, E23, E21

Scarves, Patches, Hat Band: RV66, RV63, RV55, BG09, BG07, BG02, BG01

Bird Houses: RV66, RV63, RV55, BG09, BG07, BG02, BG01, E27, E25, E23, E21

Birds: R46, R14, R08

Sky: B99, B97, B95, B93, B91

Snow: B60, C1, C00, B0000, BG0000, Colorless Blender

Snow Globe: R46, R14, R08

Hope you like it and have a fantastic week!

You can find lots of inspiration from the Design Team Divas at the High Hopes blog, and the High Hopes Rubber Stamps Facebook Fan page plus you can also follow us on
Instagram, Twitter and Pinterest.

Time to Celebrate!!


Today, I’m sharing a Christmas card using Dreamerland Crafts stamps called Let’s Celebrate – D19074 for the main image and Christmas Snow Scene – M18313 for the background. For the sentiment, I used Holiday Sentiments Set 001 – D163001


To make this card I used a base of 5.5″ x 4.25″ using Hammermill – Premium Colour 100 lb. cardstock. My Cuttlebug and My Creative Time – Rectangle Frame Layers Die were used to die-cut Copic Marker X-Press It Blending Cardstock. Using the background stamps, I stamped the background using my MISTI and Memento – Summer Sky ink. I coloured in the sky, trees and house with Copic markers and then added some snow using Gelly Roll Sakura #8 Pen. Once this was done, I added Gina K Designs – Glitz Glitter Gel – Iridescent to the remainder of the die cut for the sparkling snow. I added a little bit more where the boys feet would land and set it aside to dry. Once again, I used my MISTI and Memento – Tuxedo Black ink and stamped the main images. I coloured them in with Copic markers and then applied Ranger – Emboss It Pen Clear to the fur trims for the hats and clothing. I applied WOW! Sparkling Snow Embossing Glitter to the inked areas and then heat embossed everything with my Marvy Heat Embossing Tool. For the pompoms, I applied Cosmic Shimmer Fluffy Stuff and then heat embossed the liquid for it to puff up. For the present, I added some gold swirls using a Pental Sunburst Metalic Med Gel Pen. Then I fussy cut around the images leaving a thin white border. I stamped the sentiment using my MISTI and Lawn Fawn – Peacock Ink on to the base card. Then I stamped it again, this time using Versamark ink and then added Ranger – Clear Super Fine Detail embossing powder and heat embossed it.

The card was now ready to assemble. Using double-sided tape, I attached the background to the scalloped border. I added 3M double-sided tape to the back of the scalloped border and popped it up onto the base card. Using 3M double-sided tape, I popped up the main image and present onto the background. A little more of the Stickles – Diamond was added to snow where his feet are to complete the card.

Card Recipe:

Stamps: Let’s Celebrate – D19074 – Dreamerland Crafts, Christmas Snow Scene – M18313 – Dreamerland Crafts

Sentiment: Holiday Sentiments Set 001 – DS163001 – Dreamerland Crafts

Inks: Memento – Tuxedo Black, Versamark, Lawn Fawn – Peacock Ink, Memento – Summer Sky ink

Paper: Copic Marker X-Press It Blending Card, Hammermill – Premium Colour 100 lb., Hot Buy – Recollections – Jewel Tones

Die Cuts: My Creative Time – Rectangle Frame Layers, Gina Marie Designs – Nested Scalloped Stitched Rectangles

Stickles: Diamond

Embossing Powder: WOW! Sparkling Snow Embossing Glitter, Cosmic Shimmer Fluffy Stuff, Ranger – Clear Super Fine Detail embossing powder

Tools: MISTI – Most Incredible Stamping Tool, Cuttlebug,  Marvy Heat Embossing Tool, Sakura Glaze – Black, Gelly Roll Sakura #8 Pen, Gelly Roll Sakura #5 Pen, 3M VHB – 2 sided tape and Pental Sunburst Metalic Med Gel Pen

Image coloured with Copic Markers:

All Eyes and Small Noses:  Sakura Glaze – Black pen, Gelly Roll Sakura #5 Pen

Skin: E21, E11, E00, E000, R30, R22, R20

Hair: E47, E44, E43

Clothing and Hat: B37, B14, B12

Mitts: YG67, YG63, YG61

Boots: C8, C6, C4, C2, C1

Bear: E57, E55, E53, E51

Pig: E95, E93, R00, R000

Rabbit: C2, C1, C00, R30, R20

Present and Bow: BG09, BG05, BG02, BG01, E15, Y38, Y15, Y08

House: E40, E41, E30, E18, E15, Y04

Trees: G99, G21, YG67, YG17

Sky: B04, B02, B01, B00

Hope you like it and have a great week!

You can find more cards to inspire you at Dreamerland Crafts and Pointer Scrapbooking on the Facebook Fan pages from the rest of our design team.

Hot Cocoa and Snowfolk!!!


It’s Wednesday, and this week, I made a card using Snowman Cup Of Love – S149 by High Hopes Rubber Stamps for the main image and Dot Warm Heart – G117 (High Hopes Rubber Stamps) for the sentiment. Hot chocolate is one of my favourite drinks during cold winter days. It looks like it is for this snowman too!

To make my card this week, I began with a card base of AC Cardstock – White cut and scored to be 6″ x 6″. I cut the background paper from Hot Buy – Recollections – Jewel Tones cardstock to the same size as the base and used double-side tape to apply it directly to it. Pebbles – Winter Wonderland paper was cut to the size of 5.75″ x 5.75″ and inked around the edges using Tim Holtz Distress Ink – Mermaid Lagoon. I applied this directly to the main background using double-sided tape. I cut 2 more strips from the Hot Buy – Recollections – Jewel Tones paper at 6″ x 1.5″ and 6″ x .75″ and applied them midway across the card using double-sided tape.

The image and sentiment were stamped using my MISTI and Memento – Tuxedo Black ink. I die-cut the sentiment using my Cuttlebug and Hero Arts – Infinity Dies – Rounded Rectangle and inked around the edges with Tim Holtz Distress Ink – Mermaid Lagoon. This was popped up on the card using 3M double-sided tape. The image was die cut with Creative Expression Craft Dies by Sue Wilson – Noble Dies – Double Pierced Ovals and inked around the edges with Tim Holtz Distress Ink – Mermaid Lagoon. I coloured in the image in with Copic markers and popped it up on the card using 3M double-sided tape. Lastly, I added some Clear Glitter Glue to the bottom of the snowman to create some snow. You can’t see it in this picture, but I also added Wink of Stella – Clear to make the snowman sparkle too!

Card Recipe:

Stamp: Snowman Cup Of Love – S149 (High Hopes Rubber Stamps)

Sentiment: Dot Warm Heart – G117 (High Hopes Rubber Stamps)

Inks: Memento – Tuxedo Black, Tim Holtz Distress Ink – Mermaid Lagoon

Paper: Copic Marker X-Press It Blending Card, AC Cardstock – White, Hot Buy – Recollections – Jewel Tones, Pebbles – Winter Wonderland 6″ x 6″

Die Cuts: Hero Arts – Infinity Dies – Rounded Rectangle (DI465), Creative Expression Craft Dies by Sue Wilson – Noble Dies – Double Pierced Ovals

Tools: MISTI – Most Incredible Stamping Tool, 3M – 2 sided tape, Sakura Glaze – Black Pen, Gelly Roll Sakura #8 Pen, Cuttlebug, Wink of Stella – Clear

Image coloured with Copic Markers:

Eyes: Sakura Glaze – Black Pen, Gelly Roll Sakura #8 Pen

Snowman: YR18, YR16, YR12, B60, C1, C0, C00, Colorless Blender

Hat, Scarf, Mitts, Coat, Patches and Cup: BG09, BG05, BG02, BG01, G99, YG67, YG17, R85, R83, R81

Cinnamon Stick: E27, E23

Background: G43, G40, G12

Snow: Clear Glitter Glue

Hope you like it and have a fantastic week!

You can find lots of inspiration from the Design Team Divas at the High Hopes blog, and the High Hopes Rubber Stamps Facebook Fan page plus you can also follow us on
Instagram, Twitter and Pinterest.

Winter Fun!!!


It’s Wednesday, and this week, I made a card using Bearly Swooshin’ – T202 by High Hopes Rubber Stamps for the main image and Roundin’ Up – G190 (High Hopes Rubber Stamps) for the sentiment. Winter was always a fun time for me growing up. We had so many outdoor rinks and played so many winter sports. I tried X-Country skiing, but in no way would ever attempt downhill skiing, I was dangerous enough on X-Cross Country skis. I wonder it that’s why everyone I ever went skiing with would only go once with me. LOL!

To make my card this week, I began with a card base of AC Cardstock – White cut and scored to be 6″ x 6″. I cut the background paper from Recollections – Burgundy cardstock to the same size as the base and used double-side tape to apply it directly to it. Photo-Play – O Canada 2 – Ice Rink paper was cut to the size of 5.75″ x 5.75″ and inked around the edges using Tim Holtz Distress Ink – Rustic Wilderness. I applied this directly to burgundy background using double-sided tape. Using Hero Arts – Infinity Dies – Rounded Rectangle dies and my Cuttlebug, I die cut the following: Copic Marker X-Press It Blending Card, Recollections – Burgundy cardstock, AC – Green Cardstock and Recollections – White cardstock.

The image and sentiment were stamped using my MISTI and Memento – Tuxedo Black ink. I coloured in the image with Copic markers and used a Gelly Roll Sakura #8 Pen to create the snow in the sky and whites of the bear’s eyes. Sakura Glaze – Black Pen was used for the eyes and nose. Just love the embossed look those 2 pens give to an image. Lastly, I added some Stickles – Diamond and some Clear Glitter glue for the snow. Once the glitter was all dry, I attached the finished image to the burgundy rounded rectangle with 3M VHB double-sided tape to pop it up. Then, I applied 3M double-sided tape onto the back of the larger rectangle to pop it up on the pictured background. The sentiment was inked with Tim Holtz Distress Ink – Rustic Wilderness and I ran it through my Xyron Create a Sticker and placed it on top of the small green rectangle. I added 3 layers of the 3M VHB – 2 sided tape to the one side to pop it up and some glue and placed it on top of the popped-up coloured image. Lastly, to complete the card, I added some YNS Gumdrops.

Card Recipe:

Stamp: Bearly Swooshin’ – T202 (High Hopes Rubber Stamps)

Sentiment: Roundin’ Up – G190 (High Hopes Rubber Stamps)

Inks: Memento – Tuxedo Black, Tim Holtz Distress Ink – Rustic Wilderness

Paper: Copic Marker X-Press It Blending Card, AC Cardstock – White, Photo-Play – O Canada 2 – Ice Rink (12″ x 12″), Recollections – Burgundy, AC – Green Cardstock and Recollections – White Cardstock

Die Cuts: Hero Arts – Infinity Dies – Rounded Rectangle (DI465)

Tools: MISTI – Most Incredible Stamping Tool, 3M – 2 sided tape, Sakura Glaze – Black Pen, Gelly Roll Sakura #8 Pen, Xyron Create a Sticker, 3M VHB – 2 sided tape, YNS Gumdrops, Cuttlebug

Image coloured with Copic Markers:

Eyes: Sakura Glaze – Black Pen, Gelly Roll Sakura #8 Pen

Bear: E47, E44, E43

Hat, Scarf, Mitts and Bindings: R59, R37, R35, C1, C0, C00, Colorless Blender

Skis, Goggles and Poles: B99, B95, B93, B91, B00, 100, T6

Background: G43, G40, G12

Snow: Stickles – Diamond, Clear Glitter Glue

Hope you like it and have a fantastic week!

You can find lots of inspiration from the Design Team Divas at the High Hopes blog, and the High Hopes Rubber Stamps Facebook Fan page plus you can also follow us on
Instagram, Twitter and Pinterest.

Merry Little Christmas!!


Today, I’m sharing a Christmas card using Dreamerland Crafts stamps called The Most Wonderful Gift Of All – D18038 and for the sentiment Happiness Is Time Spent With A Good Friend – D20009. Do you remember playing with your train sets at Christmas time? I remember playing with my brothers and cousins sets. It was always so much fun watching the trains go around the tracks.


To make this card I used a base of 5.5″ x 4.25″ using Hammermill – Premium Colour 100 lb. cardstock. For the background paper, I used Recollections – Burgundy cardstock cut to the same size as the base. The background layer was cut from Carta Bella – Santa’s Workshop paper, cut to the size of 5-3/8″ x 4-1/8″. Tim Holtz Distress Ink – Rustic Wilderness was used to ink around the edges and it was attached to the burgundy background using double-sided tape. My Cuttlebug and My Creative Time – Rectangle Frame Die was used to die-cut the Recollections – Burgundy cardstock for the background to go behind the coloured image. This was popped up onto the main background with 3M double-sided tape. Using my Cuttlebug and My Creative Time – Rectangle Frame Layers, I die cut Copic Marker X-Press It Blending Cardstock. With my MISTI and Memento – Tuxedo Black ink, I stamped the main image onto this die cut. I then taped the die cut back over the paper and coloured in the image using Copic markers. This allowed me to keep a thin white border around the coloured image. Stickles – Diamond was used to fill in the area on the inside of the tracks to represent a snowy base. I used Gelly Roll Sakura #8 Pen to add some snow to the little trees and some of the roof tops. Once the Stickles was all dry, I stamped the sentiment using Versamark ink. This was embossed using my Marvy Heat Embossing Tool and Ranger – Clear Super Fine Detail embossing powder. I added 3M double-sided tape to the back of the coloured image and popped it up.

Lastly, I placed some washi-tape onto white cardstock and trimmed it to have a thin white border. I ran this through my Xyron Create a Sticker so that it would lay flat and placed it onto some Recollections – Burgundy cardstock. Using my paper trimmer, I trimmed around the edges and them popped it up onto the background using 3M VHB – 2 sided tape to finish off the card.

Card Recipe:

Stamp: The Most Wonderful Gift Of All – D18038 – Dreamerland Crafts

Sentiment: Happiness Is Time Spent With A Good Friend – D20009 – Dreamerland Crafts

Inks: Memento – Tuxedo Black, Versamark, Tim Holtz Distress Ink – Rustic Wilderness

Paper: Copic Marker X-Press It Blending Card, Hammermill – Premium Colour 100 lb., Carta Bella – Santa’s Workshop (12″ x 12″), Recollections – Burgundy

Die Cuts: My Creative Time – Rectangle Frame Layers, My Creative Time – Rectangle Frame Dies

Stickles: Diamond

Embossing Powder: Ranger – Clear Super Fine Detail

Tools: MISTI – Most Incredible Stamping Tool, Cuttlebug,  Marvy Heat Embossing Tool, Sakura Glaze – Black, Gelly Roll Sakura #8 Pen, Xyron Create a Sticker, 3M VHB – 2 sided tape, Gelly Roll Sakura #5 Pen

Image coloured with Copic Markers:

Skin: E21, E11, E04, E00, E000, R30, R22, R20 (Eyes – Sakura Glaze – Black pen, Gelly Roll Sakura #5 Pen)

Hair: E47, E44, E43, E41

PJ’s: B37, B14, B12

Bear: E57, E55, E53, E51, R22, R20 (Eyes and Nose – Sakura Glaze – Black pen, Gelly Roll Sakura #5 Pen)

Trees: YG67, YG17, G21, E23

Homes: B02, B00, C2, C1, C00, E23

Train: Y17, Y15, Y02, T7, T5, T3, T1, C2, C1, C00, R37, R35

Floor: E43, E42, E41

Wall: Y08, Y06, Y04

Floor Boards: C1, C0, C00, Colorless Blender

Hope you like it and have a great week!

You can find more cards to inspire you at Dreamerland Crafts and Pointer Scrapbooking on the Facebook Fan pages from the rest of our design team.

Drummer Boy!!!


It’s Wednesday, and this week, I made a card using Drummer & Friends – RDG005 by High Hopes Rubber Stamps for the main image and Pa Rum Pa Pum Pum – H090 (High Hopes Rubber Stamps) for the sentiment. This is the start of a new month and we’re celebrating the Christmas Cheer release for the month of September at High Hopes.

To make my card this week, I began with a card base of AC Cardstock – White cut and scored to be 6″ x 6″. I cut the background paper from Heartfelt Creations – Festive Winterscapes Collection – Sheet 9A paper to be the same size as the base and inked around the edges using Tim Holtz Distress Ink – Chipped Sapphire. I applied this directly to the base card using double-sided tape. The sentiment was then stamped onto the background paper using Versamark Ink and heat embossed using my Marvy Uchida – Embossing Heat Tool and Ranger Embossing Powder White – Extra Fine Detail.

The image was stamped using my MISTI and Memento – Tuxedo Black ink. I coloured in the image with Copic markers.  I fussy cut around it and then inked the edges with a black marker. I popped it up onto the background using 3M double-sided tape. I inked under the image with C2 copic marker to create a shadow and finish off the card.

Card Recipe:

Stamp: Drummer & Friends – RDG005 (High Hopes Rubber Stamps)

Sentiment: Pa Rum Pa Pum Pum – H090 (High Hopes Rubber Stamps)

Inks: Memento – Tuxedo Black, Tim Holtz Distress Ink – Chipped Sapphire, Versamark

Paper: Copic Marker X-Press It Blending Card, AC Cardstock – White, Heartfelt Creations – Festive Winterscapes Collection – Sheet 9A

Embossing Powder: Ranger Embossing Powder White – Extra Fine Detail

Tools: MISTI – Most Incredible Stamping Tool, 3M – 2 sided tape, Sakura Glaze – Black, Pen Gelly Roll Sakura #5 Pen, Marvy Uchida – Embossing Heat Tool

Image coloured with Copic Markers:

Eyes and Small Noses for all: Sakura Glaze – Black Pen, Gelly Roll Sakura #5 Pen

Skin: E21, E11, E00, E000, R30, R20

Hair: E47, E44, E43

Robe and Hat: E55, E53, E51, B95, B93, B91, YG67, YG63, YG61

Lamb: B60, C3, C2, C1, C00

Camel: E44, E43, E42, E41

Horse: E29, E27, E25, E23, E21

Cow: C7, C5, C3, C1, C00, R59, R37, R35, R30, R22, R02, R00, E53, E51, E50, E31, E30, E15, Y38, Y17, Y08, Colorless Blender

Drum, Drumsticks and Rope: E53, E51, E50, E15, Y38, Y23, Y21, Y19, Y17, Y15, Y08, Y02, R59, R37, R35

Hope you like it and have a fantastic week!

You can find lots of inspiration from the Design Team Divas at the High Hopes blog, and the High Hopes Rubber Stamps Facebook Fan page plus you can also follow us on
Instagram, Twitter and Pinterest.

Free Broom Rides!!!


It’s Wednesday, and this week, I made a card using Free Broom Rides – TT017 by High Hopes Rubber Stamps for the main image and Wicked – FF052 (High Hopes Rubber Stamps) for the sentiment. Wouldn’t you love to go on a magical broom for a ride? I know I would.

To make my card this week, I began with a card base made from Hammermill – Premium Colour 100 lb. cut and scored to be 5.5″ x 5.5″. I cut the background paper from Echo Park – I Love Halloween paper pad to be the same size as the base and inked around the edges and onto the paper using Tim Holtz Distress Ink – Carved Pumpkin and a Picket Fence – Blending Brush. I applied this directly to the base card using double-sided tape. Using my Cuttlebug and Essentials by Tattered Lace Dies – Easel Slider dies, I die cut Copic Marker X-Press It Blending Card and orange cardstock. Using black cardstock I cut another piece to the size of 5.5″ x 1.25″. I applied this to the base using double-sided tape. I inked around the orange die cut with a Picket Fence – Blending Brush and Tim Holtz Distress Ink – Black Soot. I applied 3M VHB – 2 sided tape to the back of the orange die cut and applied it to the base.

The image and sentiment were then stamped using my MISTI and Memento – Tuxedo Black ink. I coloured in the image with Copic markers. The sentiment was die cut with my Cuttlebug and Whimsy – Quick Strips Die Set dies. I inked around the edges and on top by first using Tim Holtz Distress Ink – Carved Pumpkin with a Picket Fence – Blending Brush and then around the edges again, this time using Tim Holtz Distress Ink – Black Soot. To finish off the card, I applied 3M VHB – 2 sided tape to the back of the image and sentiment and popped them both up.

Card Recipe:

Stamp: Free Broom Rides – TT017 (High Hopes Rubber Stamps)

Sentiment: Wicked – FF052 (High Hopes Rubber Stamps)

Inks: Memento – Tuxedo Black, Tim Holtz Distress Ink – Black Soot, Tim Holtz Distress Ink – Carved Pumpkin

Paper: Copic Marker X-Press It Blending Card, Hammermill – Premium Colour 100 lb., Echo Park – I Love Halloween (6″x6″), Orange cardstock, Black Cardstock

Die Cuts:  Essentials by Tattered Lace Dies – Easel Slider, Whimsy – Quick Strips Die Set

Tools: MISTI – Most Incredible Stamping Tool, 3M VHB – 2 sided tape, Sakura Glaze – Black, Pen Gelly Roll Sakura #5 Pen, Gelly Roll Stardust – Clear, Picket Fence – Blending Brush

Image coloured with Copic Markers:

Skin: E21, E11, E00, E000, R30, R24, R20 (Eyes: Sakura Glaze – Black, Pen Gelly Roll Sakura #5 Pen)

Hair: YG67, YG23, YG17

Dress: BV29, BV25, BV23, V06, V04, V01, Gelly Roll Stardust – Clear

Socks: BV25, BV23, V04, V01, YG23, YG17

Boots, Cat and Hat: BV29, BV25, BV23, R30, R20, V04, V01, YG17, YG13, E15, YR24, Y08 (Eyes: Sakura Glaze – Black, Pen Gelly Roll Sakura #5 Pen)

Sign Post, Pole and Broom Handle: E37, E35, E34, E31

Broom: E08, YR18, YR15, YR12, YR02, E97, C5, C3, C1

Spider: C7, C5, C3 (Eyes: Sakura Glaze – Black)

Grass: G17, G14, G07

Sky: B02, B01, B00, B000, B000

Hope you like it and have a fantastic week!

You can find lots of inspiration from the Design Team Divas at the High Hopes blog, and the High Hopes Rubber Stamps Facebook Fan page plus you can also follow us on
Instagram, Twitter and Pinterest.

Frightfully Delightful!!!


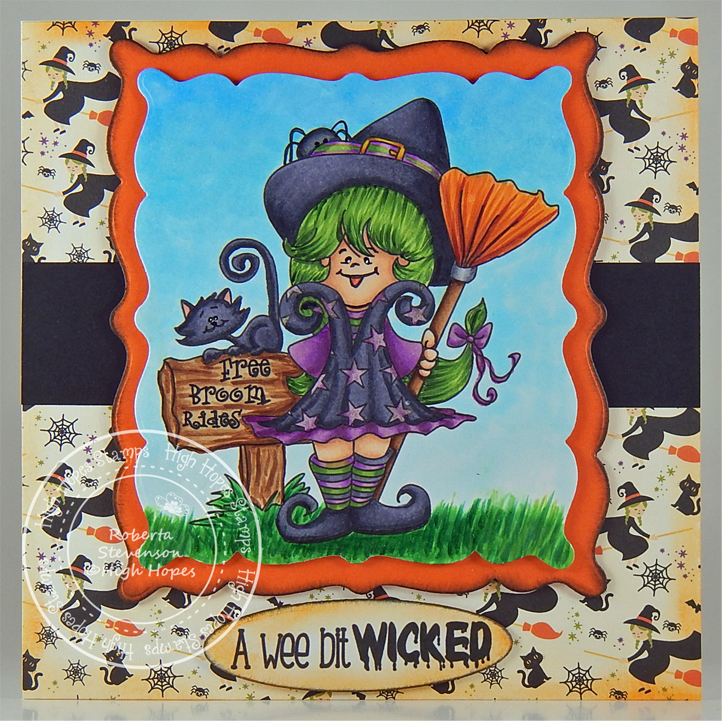
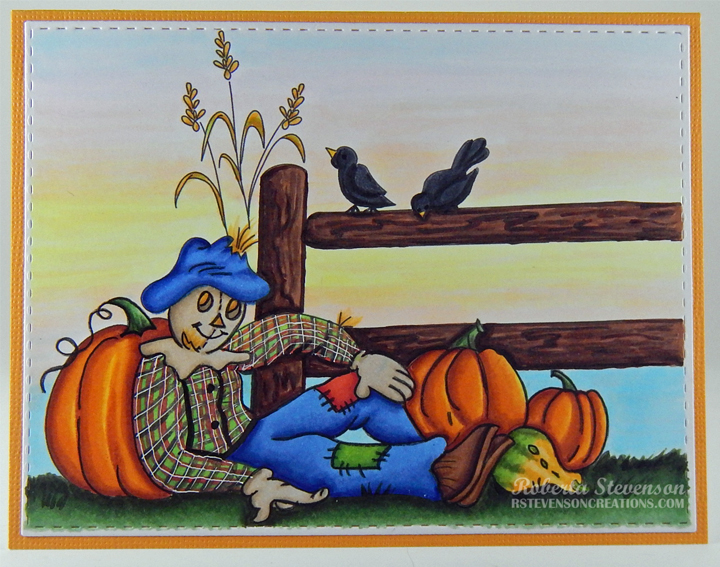
It’s Wednesday, and this week, I made a card using Frankie – TT021 by High Hopes Rubber Stamps for the main image and Frightfully Delightful – FF054 (High Hopes Rubber Stamps) for the sentiment. Frankie is all set for Hallowe’en this year with his little pumpkin full of candy. We used to use a pillow case when we were younger to get a lot more goodies when we went Trick or Treating. LOL!

To make my card this week, I began with stamping the image and sentiment onto Copic Marker X-Press It Blending Card using my MISTI and Memento – Tuxedo Black ink. Using my Brother Scan and Cut, I cut around the image leaving a small white border. I coloured in the image and then used Copic C0 to go around all of the edges. I fussy cut around the sentiment and applied Copic Y17 around the edges. I put this through my Xyron Create a Sticker and then applied it to some scrap yellow cardstock. Once again, I fussy cut around the sentiment.

Using my Cricut Explore, I die cut the Haunted House from the Holiday Cakes Cricut Cartridge and the Haunted Tree from the October 31 Cricut Cartridge. I decided to cut the second layer of the haunted house out of Copic Marker X-Press It Blending Card rather than solid cardstock. This gave me the chance to colour in the windows, doors, shutters and moon the way I wanted to in order to make it more spooky with Copic Markers. The moon was coloured in with a mixture of Tim Holtz Distress Ink – Hickory Smoke, Tim Holtz Distress Ink – Fossilized Amber and Picket Fence Studio Blender Brushes. Using glue, I pieced everything together for the Haunted house.

My card was now ready to assemble. I started with a 6″ x 6″ base card made from AC Cardstock – White. I cut the bats background to the same size from Echo Park – I Love Halloween paper pack. I applied this directly to the base with double-sided tape. Using Tim Holtz Distress Ink – Hickory Smoke and a Picket Fence Studio Blender Brush I inked around all of the edges and across the top of the card to darken the sky a little bit. Next, I die cut the grass using my Cuttlebug, Lawn Fawn – Watercolor Wishes Rainbow paper and Lawn Fawn – Simple Stitched Hillside Borders. I applied this directly to the bottom of the card using liquid glue. I applied glue to the haunted tree and haunted house and then applied both of them directly to background. Frankie and the sentiment were both popped up on the card using 3M VHB – 2 sided tape.

Card Recipe:

Stamp: Frankie – TT021 (High Hopes Rubber Stamps)

Sentiment: Frightfully Delightful – FF054 (High Hopes Rubber Stamps)

Inks: Memento – Tuxedo Black, Tim Holtz Distress Ink – Hickory Smoke, Tim Holtz Distress Ink – Fossilized Amber

Paper: Copic Marker X-Press It Blending Card, AC Cardstock – White, Echo Park – I Love Halloween, Lawn Fawn – Watercolor Wishes Rainbow – 6″ x 6″

Die Cut:Lawn Fawn – Simple Stitched Hillside Borders – Lawn Cut

Cricut Die Cuts: – October 31 – Haunted Tree (#M3DCC2), Holiday Cakes – Haunted House – (#M40A62)

Tools: MISTI – Most Incredible Stamping Tool, 3M VHB – 2 sided tape, Sakura Glaze – Black Pen, Gelly Roll Sakura #5 Pen, Brother Scan and Cut, Xyron Create a Sticker and Picket Fence Studio Blender Brushes, Cricut Explore

Image coloured with Copic Markers:

Skin: BV23, BV20, G00, BG93, BG90, R29, R24 (Eyes: Sakura Glaze – Black Pen, Gelly Roll Sakura #5 Pen)

Hair: 100, B39, B32, C9, C7, C5, C3, PrismaColor Premier – Black

Jacket and Pants: V99, V95, V93, V91

Shirt: C9, C7, C5

Shoes: 100, C10, C9, C7, C5, C3

Bat: BV29, BV25, BV23 (Eyes: Sakura Glaze – Black Pen, Gelly Roll Sakura #5 Pen)

Pumpkin: E08, YR18, YR16, YR12, Y15, Y08, C10

Candy: V09, V06, V04, YG17, YG13, YG11

House Background: V17, V15, V09, V06, V04, Y17, Y08, Y04, C3, C2, BV20

Shadow below Frankie: YG17, YG13

Hope you like it and have a fantastic week!

You can find lots of inspiration from the Design Team Divas at the High Hopes blog, and the High Hopes Rubber Stamps Facebook Fan page plus you can also follow us on
Instagram, Twitter and Pinterest.

Scarecrow!!


Sharing a card I made today using KLM Digital Designs – Harvest Scarecrow from the new August release. I don’t think the crows are very scared of this scarecrow just chillaxing on a beautiful autumn day.

To make the card, I first imported the image and sentiment into Microsoft Word and printed it out onto Copic Marker X-Press It Blending Card. I die cut the image and frame using my Cuttlebug and My Creative Time – Rectangle Frame Layers dies. I applied painters tape around all of the edges to keep the slim white border around the image. I coloured in the the image with Copic markers and then attached it to the card base from The Paper Studio – Primary Simply Solids (4.25″ x 5.5″) using double-sided tape.

Card Recipe:

Stamp: Harvest Scarecrow – KLM Digital Designs

Inks: HP Printer Grayscale

Paper: Copic Marker X-Press It Blending Card, The Paper Studio – Primary Simply Solids (4.25″ x 5.5″)

Die Cut: My Creative Time – Rectangle Frame Layers

Miscellaneous:  Cuttlebug, Gelly Roll Sakura #5 Pen, Sakura Glaze – Black

Image coloured with Copic Markers:

Scarecrow Face and Gloves: E43, E42, E41, E40

Jeans and Hat: B26, B23, B21

Patches: R27, R24, R22, YG17, YG11, YG03

Shirt: W9, W7, YG07, YG05, R27, R24, R05, Gelly Roll Sakura #5 Pen

Shoes: E37, E35, E34, E27, E25, E23

Straw and Hay: YR23, YR21, Y35, YG05

Crows: C9, C7, C5 (Eyes: Sakura Glaze – Black)

Pumpkins: Y04, E08, YR18, YR16, YR12

Gourd: YG63, YG03, Y17, Y15, YR31

Grass and Pumpkin Stems: G99, G21, YG67, YG17

Fence: E29, E27, E25, E23

Sky: R000, RV000, YR000, Y00, B000

Hope you like it and have a great week!

You can find more cards to inspire you at KLM Designs, KLM Digital Design Team and KLM Digital Designs on the Facebook Fan page from the rest of our design team.