Tag Archive | MISTI – Most Incredible Stamping Tool

Saying Hi!


Welcome Back Dreamerland Craft Fans!

Today, I’m sharing Mix and Match Clear Stamps – DCS 19093 (Dreamerland Crafts) for the images and sentiment that I used to create this little scene. I just love how you can used these little stamps to create a variety of scenes. To colour my card this week, I thought I would try using Zig Clean Color Real Brush Markers. I normally colour with Copic markers, so this was a bit of a challenge for me.

To make this card I used a base card of 4.25″ x 5.5″ by Hot Buy – Recollections – Watercolour Solids. The sentiment was stamped directly onto the background paper using my MISTI, VersaMark ink and Ranger Embossing Powder White – Extra Fine Detail. The powder was then heat embossed with Marvy Uchida – Embossing Heat Tool.

Strathmore – Watercolor Paper – 140 lb. was die cut using my Cuttlebug and dies from My Creative Time -Stitched Squares Inside and Out. For the images, I used my MISTI and Kraftin’ Kimmie – Wicked Black Ink.  I created a mask of the bear’s head using some Post-it Note paper and set it aside. To create the scene it was done in stages. First the bear and the little flower pots were stamped. Then the mask created earlier was put overtop of the little bear as show below. The poles, clothesline and grass were then stamped next.

Lastly, the T-Shirts, birds and clouds were stamped. Once this was completed, the mask for the bear was removed. The images were coloured in with the colour recipe listed below and Sakura Glaze – Black was used for all of the little eyes. Once the colouring was all completed, the finished scene was mounted directly to the base with 2-sided tape. Kraftin’ Kimmie – Lovely Dots were added to put a finishing touch on the card.

Card Recipe:

Stamps and Sentiments:  Mix and Match Clear Stamps – DCS 19093 (Dreamerland Crafts)

Inks: Kraftin’ Kimmie – Wicked Black Ink, VersaMark, Sakura Glaze – Black

Paper: Strathmore – Watercolor Paper – 140 lb., Hot Buy – Recollections – Watercolour Solids

Die Cuts: My Creative Time -Stitched Squares Inside and Out

Embossing Powder: Ranger Embossing Powder White – Extra Fine Detail

Tools: MISTI – Most Incredible Stamping Tool, Cuttlebug, Marvy Uchida – Embossing Heat Tool, Kraftin’ Kimmie – Lovely Dots

Image coloured with Zig Clean Color Real Brush Markers:

Bear: No. 64 – Oatmeal, No. 61 – Light Brown, No. 201 – Pink Haze, No. 26 – Light Pink

Sky:  No. 31 – Cobalt Blue, No. 36 – Light Blue

Clouds: No. 99 – Cool Gray 1, No. 90 – Gray

Grass: No. 47 – May Green, No. 41 – Light Green

Poles: No. 58 – Deep Brown, No. 62 – Dark Brown, No. 66 – Dark Oatmeal

Flowers: No. 61 – Light Brown, No. 52 – Bright Yellow, No. 55 – Pale Yellow,

Watering Can: No. 090 – Gray

Birds: No. 32 – Persian Blue, No. 30 – Blue

T-Shirts: No. 84 – Deep Violet, No. 83 – Lilac

Hope you like it and have a great week!

You can find more cards to inspire you at Dreamerland Crafts and Pointer Scrapbooking on the Facebook Fan pages from the rest of our design team.

Stuffed with Love


It’s Wednesday, and this week, I used Angel Bear Scarecrow – T110 (High Hopes Rubber Stamps) for the main image and Scarecrows Stuffed – H087 (High Hopes Rubber Stamps) for the sentiment. The turkey is hiding behind the angel bear for protection from becoming captured. He doesn’t want to become someone’s Thanksgiving Dinner. The crows are shrugging their shoulders, because they are just not sure what’s going to happen! Let’s hope this little angel bear can protect him. LOL!

To make my card this week, I started out with a simple white card base, sized at 5.5″ x 5.5″. The base background was also cut at 5.5″ x 5.5″ using PhotoPlay – Mad 4 Plaid Fall paper. The added touches at the top and bottom are also from the same paper pad.

The main image was stamped onto Copic Marker X-Press It Blending Card and then die cut with My Creative Time – Rectangle Frame Dies Layers. It was coloured in with Copic Markers and Sakura Glaze – Black pen was used for the eyes and nose. The layer behind the image was die cut from green cardstock using My Creative Time – Rectangle Frame Dies. The sentiment square was die cut using orange cardstock and My Creative Time -Stitched Squares Inside and Out. The image and sentiment were popped up on top of the remaining layers with 3M VHB – 2 sided tape and some Kraftin’ Kimmie Dots were added to finish the card off.

Card Recipe:

Stamp: Angel Bear Scarecrow – T110 (High Hopes Rubber Stamps)

Sentiment: Scarecrows Stuffed – H087 (High Hopes Rubber Stamps)

Inks: Memento – Tuxedo Black

Paper: Copic Marker X-Press It Blending Card, PhotoPlay – Mad 4 Plaid Fall paper 6″ x 6″, Green Cardstock, Brown Cardstock

Die Cuts: My Creative Time – Rectangle Frame Dies Layers, My Creative Time – Rectangle Frame Dies, My Creative Time -Stitched Squares Inside and Out

Tools: MISTI – Most Incredible Stamping Tool, Cuttlebug, 3M VHB – 2 sided tape, Kraftin Kimmie Dots, Sakura Glaze – Black

Image coloured with Copic Markers:

Bear: E35, E34, E33, E31, E30, R21, R02, R01

Wings: E53, E51, E50

Shirt: YG67, YG61, R37, R24

Pants: B26, B23, B21

Bow Tie, Patch, Hat Brim: R59, R37, R35, R24

Turkey: E35, E34, E33, E31, YR18, YR16, YR12, YR02, R59, R37, R24, Y38, Y18

Pumpkin and Stem: YR18, YR16, YR12

Straw: E34, YR23, Y23, Y21

Crows: C9, C7, C5, Y38, Y18

Flower: Y38, Y35, Y18, YG17, YG13, YG03, YG01

Grass and Greenery for Plants: YG17, YG13, YG03, YG01

Clouds and Sky: B60, B02, B01, B00, B000, C0, Colorless Blender

Hope you like it and have a fantastic week!

You can find lots of inspiration from the Design Team Divas at the High Hopes blog, and the High Hopes Rubber Stamps Facebook Fan page plus you can also follow us on
Instagram, Twitter and Pinterest.


Make it Rain!


Sharing a fun birthday card that I made for my husband this week using Make It Rain – CYNS728 (#YourNextStamp) for the main image and sentiment. I thought it would be fun to put the image inside a balloon too! Now if only that could be Lottery Winnings he was holding onto. LOL!

To make my card this week, I started out with a simple lime green card base, sized at 5.5″ x 4.25″.  For the bottom layer I used Hammermill – Premium Colour 100 lb. paper and multiple Tim Holtz inks which I have listed below. Then I die-cut the top layer with my Cuttlebug and #Your Next Stamp – Confetti Panel Die. Hammermill paper was used for this also. I mounted the bottom layer directly onto  the base card and then attached the top die-cut layer using 3M VHB – 2 sided tape.

For both of the sentiments, I used my MISTI, VeraMark ink and Ranger Embossing Powder White – Extra Fine Detail on black cardstock. Then a Marvy Uchida – Embossing Heat Tool was used to heat emboss the powder.

The balloon was die cut using My Creative Time – Stitched Circle Balloon Dies MCT-D137 to cut Copic Marker X-Press It Blending Card which I then stamped the main image onto using Memento – Tuxedo Black ink and my MISTI. The image was coloured with Copic Markers.

To assemble the remainder of the card, the image and sentiment were popped up on top with 3M VHB – 2 sided tape. Some ribbon was tied to the bottom of the balloon and some Kraftin’ Kimmie dots were used.

Card Recipe:

Stamp and Sentiment: Make It Rain – CYNS728 (#YourNextStamp)

Inks: Memento – Tuxedo Black, Tim Holtz Distress Ink – Barn Door, Tim Holtz Distress Ink – Carved Pumpkin, Tim Holtz Distress Ink – Crushed Olive, Tim Holtz Distress Ink – Mermaid Lagoon, Tim Holtz Distress Ink – Mustard Seed, Tim Holtz Distress Ink – Spiced Marmalade, Tim Holtz Distress Ink – Twisted Citron, Versamark

Paper: Copic Marker X-Press It Blending Card, Hammermill – Premium Colour 100 lb.

Die Cuts: My Creative Time – Stitched Circle Balloon Dies MCT-D137, My Creative Time – Rectangle Frame Die Layers – MCT-D274Your Next Stamp – Confetti Panel Die – YNSD770

Embossing Powder: Ranger Embossing Powder White – Extra Fine Detail

Tools: MISTI – Most Incredible Stamping Tool, Cuttlebug, 3M VHB – 2 sided tape, American Crafts – Premium Ribbon, Marvy Uchida – Embossing Heat Tool, Kraftin’ Kimmie Dots

Image coloured with Copic Markers:

Dog: E33, E31, E29, E27, E25, E23, R89, R59, R39, R37, R35, R24, C0, Sakura Glaze – Black, Gelly Roll Sakura #8 Pen

Money: G99, G94, G21, G82, YG05, YG04

Balloon: BG09, BG07, BG05, BG000

Hope you like it and have a fantastic week!


Time to Smell the Flowers!


It’s Wednesday, and this week, I used Daffodil Bunny – SLF006 (High Hopes Rubber Stamps) for the main image from the new August 2020 release and Smell The Flowers – G189 (High Hopes Rubber Stamps) for the sentiment. This adorable little bunny is taking time out to smell the flowers. We have a really nice garden of flowers that my husband takes care of. I’m not a green thumb at all. LOL! It’s always nice to take a moment and enjoy the beauty of them.

To make my card this week, I started out with a simple white card base, sized at 6″ x 6″. The base background was also cut at 6″ x 6″ using Craft Consortium – Cottage Garden paper and then inked around the edges with Tim Holtz Distress Ink – Fossilized Amber. I just thought this paper went so well with this adorable image. I added the 2 colours of ribbon with some 2-sided tape and then adhered the entire background paper to the base with 2-sided tape.

The scalloped circle and inside image circle were both die cut using my Cuttlebug and Craftin Desert Diva’s Stitched in Circle Dies. The circle in between the 2 of them was die cut with Lifestyle Crafts Cutting Dies – Nesting Circles. The edges of the large scalloped circle were inked with Tim Holtz Distress Ink – Picked Raspberry. For the sentiment, My Creative Time – Rectangle Frame Dies were used. The die was larger in depth, so I just die cut one side and then turned it around and only put it part way through my Cuttlebug to cut the other edge. It too, was then inked around the edges with Tim Holtz Distress Ink – Fossilized Amber. The image was coloured with Copic Markers.

To assemble the remainder of the card, the mid circle was attached directly to the large scalloped circle and then popped up with 3M VHB – 2 sided tape. The image and sentiment were popped up on top with 3M VHB – 2 sided tape as well.

Card Recipe:

Stamp: Daffodil Bunny – SLF006 (High Hopes Rubber Stamps)

Sentiment: Smell The Flowers – G189 (High Hopes Rubber Stamps)

Inks: Memento – Tuxedo Black, Tim Holtz Distress Ink – Fossilized Amber, Tim Holtz Distress Ink – Picked Raspberry

Paper: Copic Marker X-Press It Blending Card, Momenta – Cardstock, Crafts Sparkling Stickers – 02-3068629, Craft Consortium – Cottage Garden 6″x6″

Die Cuts: Craftin Desert Diva’s Stitched in Circle Dies, Lifestyle Crafts Cutting Dies – Nesting Circles, My Creative Time – Rectangle Frame Dies

Tools: MISTI – Most Incredible Stamping Tool, Cuttlebug, 3M VHB – 2 sided tape

Image coloured with Copic Markers:

Bunny: E37, E35, E34, E33, E31, E30, R11, R02, R000

Bow: RV19, RV17, RV13

Grass and Greenery for Plants: BG99, BG97, G21, YG17, YG13, YG07, YG03, YG01

Daffodil: E15, Y38, Y18, Y04

Clouds and Sky: B60, B01, B00, B000, B0000, C0, Colorless Blender

Hope you like it and have a fantastic week!

You can find lots of inspiration from the Design Team Divas at the High Hopes blog, and the High Hopes Rubber Stamps Facebook Fan page plus you can also follow us on
Instagram, Twitter and Pinterest.


Friends Together


Welcome Back Dreamerland Craft Fans!

Today, I’m sharing an inspirational card that I made using Mix and Match Clear Stamps – DCS 19096 to create the little scenes and also for the sentiment. I wanted to show a variety of scenes that you could make with this cute set and so for the first time for me ever, I created this little flip card.

Panel 1 – Bears hugging in the rain.

Panel 2: The rain has stopped and there is a beautiful rainbow for the little couple.

Panel 3 – The sun has come out and is now beaming.

Panel 4: I just love this adorable sentiment and it finishes off the little story of the 2 little bears hugging each other through all of the different types of weather.

Here is the flip card in action.


To make this card I used a base card of 4.25″ x 5.5″. DCWV – Pocket Blossom was cut to the same size and using double-sided tape was attached to the base card. Then, Tim Holtz Distress Ink – Salty Ocean was used to ink around all of the edges. I die cut X-Press It Blending Card using my Cuttlebug and dies from Lawn Fawn – Flippin’ Awesome. I used the largest square of the die set in order to have more room to create the scenes. The larger square was die cut using Recollection – White paper using My Creative Time – Rectangle Frame Dies. The die-cut for the mechanism of the Flip Card was also from Lawn Fawn – Flippin’ Awesome. So easy to use. I love this die set.

I created a mask of the bears so that I could add in the different elements on each panel. All of the images were coloured in with Copic Markers. For the rain, Memento – Bahama Blue ink was used. For the sunbeams, Kraftin’ Kimmie – Summer Sunshine, Kraftin’ Kimmie – Yummy Yellow and Kraftin’ Kimmie – Starburst Stencil were used.

Versa Fine – Onyx Black ink was used to stamp the sentiment and then Ranger – Clear Super Fine Detail embossing powder was applied. Marvy Uchida – Embossing Heat Tool was used to heat up the embossing powder.

Once all of the panels were completed, I die cut the sparkly blue paper using Lawn Fawn – Flippin’ Awesome – Add-On dies. The flipping mechanism was then attached to the sparkling blue paper. This was then attached directly to the base of the card.

Card Recipe:

Stamps and Sentiments:  Mix and Match Clear Stamps – DCS 19096 (Dreamerland Crafts)

Inks: Memento – Tuxedo Black, Versa Fine – Onyx Black, Kraftin’ Kimmie – Summer Sunshine, Kraftin’ Kimmie – Yummy Yellow, Memento – Bahama Blue, Tim Holtz Distress Ink – Salty Ocean

Paper: Copic Marker X-Press It Blending Card, DCWV – Pocket Blossom –  12″X12″ (30.5cmx30.5cm), Craft Thick Glitter Paper – 02-3022270

Die Cuts: My Creative Time – Rectangle Frame Dies, Lawn Fawn – Flippin’ Awesome, Lawn Fawn – Flippin’ Awesome – Add-On

Stencil: Kraftin’ Kimmie – Starburst Stencil

Tools: MISTI – Most Incredible Stamping Tool, Cuttlebug, Marvy Uchida – Embossing Heat Tool

Image coloured with Copic Markers:

Bears: E55, E53, E51, E35, E34, E33, E31, E29, E27, E25, E23, R20, R02, R00

Sky:  B01, B00, B000, B000

Hearts and Umbrella: R39, R37, R24, Pental Sunburst Metalic Med Gel Pen

Rainbow: V17, V15, V20, YR18, YR16, YR15, Y15, Y08, Y04

Clouds: B60, C0, Colorless Blender

Flowers: Y38, Y35, E15

Hope you like it and have a great week!

You can find more cards to inspire you at Dreamerland Crafts and Pointer Scrapbooking on the Facebook Fan pages from the rest of our design team.

Butterfly Hi!


It’s Wednesday, and this week, I used Butterfly Chick – SLF007 (High Hopes Rubber Stamps) for the main image from the new August 2020 release and Flutter’in By – F004 (High Hopes Rubber Stamps) for the sentiment. This little butterfly has decided to take a moment to say “Hi” to this adorable little chick. Have you taken a moment to call someone and just “Hi” today?

To make my card this week, I started out with a simple white card base, sized at 6″ x 6″. I used the retired die cuts from Craftin Desert Diva’s – Inside Scalloped Squares and a mixture of Momenta – Cardstock and American Crafts – Basics paper for my background. The same die cut was also used to cut the Copic Marker X-Press It Blending Cardstock. The Copic paper was then stamped on with my MISTI and Memento – Tuxedo Black ink. I coloured in the image with Copic markers.

For the assembly of the card, I first placed down the large background using 2-sided tape. Then I added in the 1st yellow inset using glue as it was easier to move around and get it into place. Lastly, I added in the last inset for the large scalloped square. For the smaller square, the coloured image and yellow cardstock were turned over and then taped together with some Scotch Tape. Then 3M VHB – 2 sided tape was used to pop it up into the centre of the larger square.

The sentiment was stamped with Memento – Tuxedo Black and then die cut with My Creative Time – Rectangle Frame Dies. Tim Holtz Distress Ink – Fossilized Amber was used to go around all of the edges. Then the sentiment was also popped up with 3M VHB – 2 sided tape.

To finish off the card I added on some butterflies and also a few Kraftin’ Kimmie – Polar Dots in a few places.

Card Recipe:

Stamp: Butterfly Chick – SLF007 (High Hopes Rubber Stamps)

Sentiment: Flutter’in By – F004 (High Hopes Rubber Stamps)

Inks: Memento – Tuxedo Black, Tim Holtz Distress Ink – Fossilized Amber

Paper: Copic Marker X-Press It Blending Card, Momenta – Cardstock, American Crafts – Basics (6″x6″, 15.2cmx15.2cm)

Die Cuts: Craftin Desert Diva’s – Inside Scalloped Squares, My Creative Time – Rectangle Frame Dies

Tools: MISTI – Most Incredible Stamping Tool, Cuttlebug, 3M VHB – 2 sided tape, Kraftin’ Kimmie – Polar Dots, Butterfly Stickers – 02-3051386

Image coloured with Copic Markers:

Chick and Bow: Y17, Y15, Y13, YR18, YR16, YR14, YR12, B18, B16, B14, BV00, BV000

Grass: YG17, YG13, YG03, YG01

Butterfly: E79, E77, E71, B18, B16, B14, BV08, V05, V04, Black (100), Gelly Roll Sakura #8 Pen

Clouds and Sky: B60, B01, B00, B000, B0000, C0, Colorless Blender

Hope you like it and have a fantastic week!

You can find lots of inspiration from the Design Team Divas at the High Hopes blog, and the High Hopes Rubber Stamps Facebook Fan page plus you can also follow us on
Instagram, Twitter and Pinterest.


Birthday Message For You!


Welcome Back Dreamerland Craft Fans!

Today, I’m sharing a birthday card that I made using a combination of Dreamerland Crafts stamps.  A Special Message For You – D16001 was used for the boy image and sentiment, Mailbox & Wall – Mix & Match Collection – M18301 and  Window & Gate – Mix & Match Collection – M18302 were used to create the background. I just love how these stamps came together to help me to create this scene.


To make this card I used a base card of 6″ x 6″. I die cut X-Press It Blending Card using my Cuttlebug and dies from Creative Expression Craft Dies by Sue Wilson – Noble Dies – Double Pierced Squares – Set B. I used the square die that was about 5.75″ x 5.75″.

Next, I created a mask of each of the stamps I was going to use to create the scene. The boy was stamped first and then I placed the mask over top of him. Next was the gate, then the brick wall and the foliage.  I added the masks after stamping each piece. Lastly, I stamped the 2 windows. All masking was removed at this point.

To create the main building brick wall, I used Kraftin’ Kimmie Stencil – Brick Wall. Using my magentic mat, small magnets were used to hold the stencil down over the image. Then Copic markers were used to create the texture of the brick. Once all of the brick was done, C4 and C2 were used to fill in the spaces in between. I drew in the sidewalk using a combination of C0 – C5 markers.

After all of the main colouring was done, Tim Holtz Distress Ink – Blueprint Sketch was used to stamp the sentiment. Then, because I was using my MISTI, it was easy to then re-ink the sentiment with Versamark ink and then emboss it with Ranger – Clear Super Fine Detail embossing powder. Marvy Uchida – Embossing Heat Tool was used to heat up the embossing powder.

Card Recipe:

Stamps:  A Special Message For You – D16001 (Dreamerland Crafts), Mailbox & Wall – Mix & Match Collection – M18301 (Dreamerland Crafts), Window & Gate – Mix & Match Collection – M18302 (Dreamerland Crafts)

Sentiment: A Special Message For You – D16001 (Dreamerland Crafts)

Inks: Memento – Tuxedo Black, Tim Holtz Distress Ink – Blueprint Sketch, Versamark

Embossing Powder: Ranger – Clear Super Fine Detail embossing powder

Paper: Copic Marker X-Press It Blending Card

Die Cuts: Creative Expression Craft Dies by Sue Wilson – Noble Dies – Double Pierced Squares – Set B

Stencil: Kraftin’ Kimmie – Brick Wall Stencil

Tools: MISTI – Most Incredible Stamping Tool, Cuttlebug, Marvy Uchida – Embossing Heat Tool

Image coloured with Copic Markers:

Skin: E000, E00, E04, E11, E21, R22, R20

Hair:  E47, E44, E43

Shirt: YG97, YG95, G21

Pants: B26, B23, B21

Boot: E29, E27, E25, E23, E21

Main Building Brick Wall: E37, E35, E08, E04, C4, C2, Kraftin’ Kimmie – Brick Wall Stencil

Lower Brick Wall: E53, E51, E44, E43, E34, E31, E30, BV23, BV20

Gate: E39, E37, E34, E31

Foliage and Flowers: YG17, YG13, YG03, YG01, G07, V17, V15

Window and Ledgings: E44, E43, E31, E30, E27, E25, E23, E21, E42, E41, E40

Sidewalk: C4, C3, C2, C1, C0

Hope you like it and have a great week!

You can find more cards to inspire you at Dreamerland Crafts and Pointer Scrapbooking on the Facebook Fan pages from the rest of our design team.

Gnome For the Holidays


It’s Wednesday, and this week, I used Snowy Gnome – TLF024 (High Hopes Rubber Stamps) for the main image from the new August 2020 release and From Our Gnome – GLL001 (High Hopes Rubber Stamps) for the sentiment. This little gnome has gone home for the holidays to celebrate with friends and family. As you can see there are a lot of activities going on in Gnome Town. This little gnome has his snowballs ready for the next snowball fun fight! LOL! While waiting for the other team to get ready, he’s decided to take a little break and enjoy nature with his little cardinal friends. Then, let the fun begin!!!

To make my card this week, I started out with a simple white card base, sized at 6″ x 6″. I cut some dark blue cardstock, just slightly smaller and adhered it to the card with Tombow Mutli-Liquid Glue. I just love this paper from PhotoPlay called Gnome for the Holidays Christmas. I thought it went perfectly with this new stamp. I cut it at about 5.75″ x 5.75″. Then I glued it to the blue paper.

I die cut multiple circles in a variety of sizes using a mixture of My Creative Time – More Stitched Circles and Lifestyle Crafts Cutting Dies – Nesting Circles using dark blue and red cardstock and also Copic Marker X-Press It Blending Card for the main image.

The image was stamped onto the Copic Marker X-Press It Blending Cardstock circle using my MISTI and Memento – Tuxedo Black. It was then coloured it in with Copic markers. For the snow, I used Recollections – Christmas Snow Paste, Martha Stewart Crafts Glitter – Crystal Fine and a spatula and let it dry overnight. Then  Stickles – Diamond was added onto the top of it. For the sky a mixture of 2 Gel pens were used and then a little bit of Stickles – Diamond to add some glitter to it. I was trying to get it to match the background paper. Once the Stickles was dry, I glued the bottom 2 layers of circles together and then the top 2 circles.  Both were done separately. The sentiment was stamped with Versa Mark and then embossed with Ranger Embossing Powder White – Extra Fine Detail and heated with Marvy Uchida Embossing Heat Tool. I fussy cut around the sentiment and glued it directly on top of some red cardstock. Then I cut around that as well.

To complete the card I popped up the bottom circles, top circles with coloured image and sentiment with the 3M VHB – 2 sided tape.

Lastly, I added some more sparkle with Stickles – Diamond by adding it to the base of the card in random places.

Card Recipe:

Stamp: Snowy Gnome – TLF024 (High Hopes Rubber Stamps)

Sentiment: From Our Gnome – GLL001 (High Hopes Rubber Stamps)

Inks: Memento – Tuxedo Black, Versamark

Paper: Copic Marker X-Press It Blending Card, PhotoPlay – Gnome for the Holidays Christmas, AC White Cardstock Dark Blue Cardstock, Red Cardstock

Die Cuts: My Creative Time – More Stitched Circles MCT-D136, Lifestyle Crafts Cutting Dies – Nesting Circles

Embossing Powder: Ranger Embossing Powder White – Extra Fine Detail

Tools: MISTI – Most Incredible Stamping Tool, Cuttlebug, 3M VHB – 2 sided tape, Stickles – Diamond, Marvy Uchida – Embossing Heat Tool

Image coloured with Copic Markers:

Skin: E21, E11, E04, E00, E000, R22, R20

Beard: W5, W4, W3, W2, W1, W0, W00

Shirt, Hat and Berries: R59, R37, R35, R24, R22, Stickles – Diamond, Gelly Roll Sakura #8 Pen

Pants, Leaves and Mitts: G99, G94, G21, YG03

Shoes: C9, C7, C5

Cardinals and Scarves: R59, R37, R35, R24, R22, C7, C5, C3, YR16, YR12

Snowballs: BV23, BV20, Stickles – Diamond

Sky: B16, B14, B12, Gelly Roll Sakura #8 Pen, Gelly Roll Sakura #10 Pen, Stickles – Diamond

Ground: Recollections – Christmas Snow Paste, Martha Stewart Crafts Glitter – Crystal Fine, Stickles – Diamond

Hope you like it and have a fantastic week!

You can find lots of inspiration from the Design Team Divas at the High Hopes blog, and the High Hopes Rubber Stamps Facebook Fan page plus you can also follow us on
Instagram, Twitter and Pinterest.


Magical Friendship


It’s Wednesday, and this week, we are celebrating a brand new August 2020 Release with variety of fun new images! Be sure to go and check them out, you won’t be disappointed.

Today, I’m using Dreamy Dragon – SLF019 (High Hopes Rubber Stamps) for my main image from this new release along with the sentiment Magic Friendship – F234 (High Hopes Rubber Stamps). This little dragon looks so peaceful and it looks like he’s found a new friend too!

To make my card this week, I started out with a simple white card sized at 5.5″ x 5.5″. Then cut Recollections – Petite Floral paper to the same size and taped it down onto the base card. Next, Kraftin’ Kimmie – Purple Petunia ink was used to ink around the card. Another piece was cut from the same paper collection at 1.25″ x 5.5″ and Kraftin’ Kimmie – Party Peach ink was used to ink around the edges. The cardstock was put through my Xyron Create a Sticker and then mounted on top of the base card.

Next, My Creative Time – Bunch of Fun Circle Dies and my Cuttlebug were used to die cut the scalloped circle background out of Recollections – Purple Passions and circle for the main image out of Copic Marker X-Press It Blending Card. The main image and sentiment were both stamped with Memento – Tuxedo Black Ink using my MISTI. The image was coloured in with Copic markers and then the sentiment was die cut using My Creative Time – Sentiment Label Dies. I traced around the outside of the die and then cut it out of the same Recollections – purple paper so that the die cut piece would have a thin border around it. I ran the sentiment through my Xyron and adhered it directly on top of it. I cut off one side of the label so that it would be flush with the edge of the card. The same purple ink used earlier was used again to edge around it. The image, sentiment and large scalloped circle was then popped up with 3M VHB – 2 sided tape.

Once this was done, Stickles – Purple was used to go around the edges of the large scallop and Stickles – Icicle was used to go around the main image. Lastly, a few flowers from Crafts – Mini Fabric Flower Picks were added to finish off the card.

Card Recipe:

Stamp: Dream Dragon – SLF019 (High Hopes Rubber Stamps)

Sentiment: Magic Friendship – F234 (High Hopes Rubber Stamps)

Inks: Memento – Tuxedo Black, Kraftin’ Kimmie – Party Peach, Kraftin’ Kimmie – Purple Petunia

Paper: Copic Marker X-Press It Blending Card, Recollections – Petite Floral (12 x 12 in – 30.4 x 30.4 cm), Recollections – Purple Passions 8.5″ x 11″

Die Cuts: My Creative Time – Bunch of Fun Circle Dies, My Creative Time – Sentiment Label Dies – MCT-D139

Tools: MISTI – Most Incredible Stamping Tool, Cuttlebug, 3M VHB – 2 sided tape, Stickles – Purple, Stickles – Icicle, Xyron Create a Sticker, Crafts Mini Fabric Flower Picks – 02-0201883

Image coloured with Copic Markers:

Dragon: YG95, YG93, YG17, YG13, YG03, YG01, V12, V09, V04, Y18, Y17, Y15, E15, R02, R01, R000

Butterfly: V12, V04, V01, Y18, Y17, Y15, E15, YG03

Sky: B12, B02, B01, B00

Grass: G17, G14, G07

Hope you like it and have a fantastic week!

You can find lots of inspiration from the Design Team Divas at the High Hopes blog, and the High Hopes Rubber Stamps Facebook Fan page plus you can also follow us on
Instagram, Twitter and Pinterest.


Happy Birthday Gnome


It’s Wednesday, and this week, I used Balloon Gnome – SLF016 (High Hopes Rubber Stamps) for the main image and Mini Sentiment Set #1 – HLL001 (High Hopes Rubber Stamps) for the sentiment from the new release this month. The mini sentiment comes with 3 more sayings as well, which means you can use this little gnome to make a variety of different cards for multiple occasions. I chose to make a birthday card this time.

To make my card this week, I started out with a simple white card sized at 5.5″ x 4.25″. Then I used Doodlebug Design Inc. – Fairy Tales paper to create my background rectangles. To do this, I used my Cuttlebug and die cuts from My Creative Time – Rectangle Frame Dies and My Creative Time – Rectangle Frame Layers. Then I used Tim Holtz Distress Ink – Wilted Violet and Tim Holtz Distress Inks – Peacock Feathers to ink around the edges of the frames. I layered the first 2 layers directly onto the base and also glued the 2 smaller rectangles together. Then I popped up the smaller rectangles with 3M VHB – 2 sided tape.

I stamped the image and sentiment onto Copic Marker X-Press It Blending Cardstock and then coloured it in with Copic markers. Once completed, I used my Brother Scan and Cut to cut around the image. Then I popped up the image with the 3M VHB – 2 sided tape as well.

To finish the card off, I added some bling using Kraftin Kimmie – Summer Dots,  Kraftin Kimmie – Festive Dots and CC Designs – Dragon Dreams Enamel Dots.

Card Recipe:

Stamp: Balloon Gnome – SLF016 (High Hopes Rubber Stamps)

Sentiment: Mini Sentiment Set #1 – HLL001 (High Hopes Rubber Stamps)

Inks: Memento – Tuxedo Black, Tim Holtz Distress Ink – Wilted Violet, Tim Holtz Distress Inks – Peacock Feathers

Paper: Copic Marker X-Press It Blending Card, Doodlebug Design Inc. – Fairy Tales (6″ x 6″)

Die Cuts: My Creative Time – Rectangle Frame Dies, My Creative Time – Rectangle Frame Layers

Tools: MISTI – Most Incredible Stamping Tool, Cuttlebug, 3M VHB – 2 sided tape, Kraftin Kimmie – Summer Dots, Kraftin Kimmie – Festive Dots, CC Designs – Dragon Dreams Enamel Dots, Brother Scan and Cut

Image coloured with Copic Markers:

Skin: E21, E11, E04, E00, E000, R22, R20

Beard: W5, W4, W3, W2, W1, W0, W00

Hat and Outfit: BG45, BG18, BG15, V17. V5, V12, V09

Shoes: E27, E25, E23, E21

Balloon: Y08, Y06, Y02, Y000

Hope you like it and have a fantastic week!

You can find lots of inspiration from the Design Team Divas at the High Hopes blog, and the High Hopes Rubber Stamps Facebook Fan page plus you can also follow us on
Instagram, Twitter and Pinterest.


The Song of Birds


It’s Wednesday, and this week, I used Bluebird – TLF015 from High Hopes Rubber Stamps new release for the main image and Kiss of the Sun – H223 (High Hopes Rubber Stamps) for the sentiment. I just fell in love with this image and sentiment and knew it was the perfect combination for a slim line card.

Closer Look: Blue Bird

Closer Look: Poem

For my card this week, I stamped the images and sentiment onto Copic Marker X-Press It Blending Card using my MISTI and Memento – Tuxedo Black ink. The main image was die cut using my Cuttlebug and Essentials by Tattered Lace Dies – Easel Slider. The sentiment was die cut using My Creative Time – Rectangle Frame Dies and My Creative Time – Rectangle Frame Layers. The image was coloured in with Copic markers. Once all of the colouring was completed, I went around all of the die cuts with a Sharpie – Gold Medium Point – Water Based Paint pen.

I decided to make this a slim line card starting out with a white card base sized at 8.75″ x 4″. I just received some new Cosmic Shimmer Pixie Powders and just had to try them out. So I cut some Monte Marte – Watercolour Book – 190 GSM paper the same size and started playing. This background is the one that I decided to go with. I just loved the way it picked up some of the same colours as the flowers. The powder was easy to use. You just sprinkle some powder on the paper and spritz with water. You can’t really make it out in the photo, but the paper actually has a beautiful pearlesque look to it. I also went around all of the sides of the base with the Sharpie pen as well. I then popped up the sentiment and coloured image with 3M VHB – 2 sided tape and added some embellishments.

When I went to decorate the little flower embellishments with Stickles – Yellow, some accidentally went onto my background paper.  I decided I really liked the look and then just added it everywhere using the tip of my stylus.

Card Recipe:

Stamp:  Bluebird – TLF015  (High Hopes Rubber Stamps)

Sentiment: Kiss of the Sun – H223 (High Hopes Rubber Stamps)

Inks: Memento – Tuxedo Black, Cosmic Shimmer Pixie Powder – Candy Pink

Paper: Copic Marker X-Press It Blending Card, Monte Marte – Watercolour Book – 190 GSM, Hot Pink cardstock

Die Cuts: My Creative Time – Rectangle Frame Dies, My Creative Time – Rectangle Frame Layers, Essentials by Tattered Lace Dies – Easel Slider

Tools: MISTI – Most Incredible Stamping Tool, Cuttlebug, 3M VHB – 2 sided tape, Craft – Rhinestone Stickers, Sharpie – Gold Medium Point – Water Based Paint

Image coloured with Copic Markers:

Flowers: RV17, RV04, RV02, RV000, E15, Y38, Y15, Y04

Leaves: YG67, YG17, YG09

Branches: E31, E29, E23

Bird: E99, E97, YR20, YR16, YR15, YR12, Y32, B39, B14, B12, B06, B05, BG01, C8, C5, C3, C1, C0, W5, W3, W1, Colorless Blender

Background: Y02, Y00, Y000, Q-Tip, Rubbing Alcohol

Main Background: Cosmic Shimmer Pixie Powder – Candy Pink, Stickles – Yellow, Forever In Time Bling Tape – Floral, Water Spritzer

Hope you like it and have a fantastic week!

Be sure to check out all of the fun new images on the High Hopes website. You can find lots of inspiration from the Design Team Divas at the High Hopes blog, and the High Hopes Rubber Stamps Facebook Fan page plus you can also follow us on
Instagram, Twitter and Pinterest.


All Dreams Come True


It’s Wednesday, and this week, High Hopes Rubber Stamps new release Dreamy Willa – SLF010 is looking up into the stars and sharing this special moment with her little friend. I thought All Dreams Come True – G011 (High Hopes Rubber Stamps) was the perfect sentiment to go with this adorable new image. Sometimes it’s nice to be just like Willa and just gaze up at the stars and just live in the peace and tranquility of the moment. Have you ever done this? I know I have.


To make my card this week, I started out with a base card of 6″ x 6″. Then I cut the main background the same size using Hot Buy Craft Smart – Moon Flower Magic. I just fell in love with this paper and thought it went so perfectly with the new image. I also die cut some miscellaneous cardstock that I had which had little stars and is navy blue using My Creative Time – Scalloped Stitched Oval Dies. I also, die cut the main image with the same set of dies out of Copic Marker X-Press It Blending Card. The sentiment was die cut using My Creative Time – Ribbon End Dies. All of the die cuts were then edged with Sharpie – Gold Medium Point – Water Based Paint.

Both the main image and sentiment were stamped using my Misti and Memento – Tuxedo Black ink. The image was then coloured in using Copic markers which I have listed below. Once the image was all coloured, I bumped up the background, image and sentiment with 3M VHB – 2 sided tape.

Card Recipe:

Stamp:  Dreamy Willa – SLF010 (High Hopes Rubber Stamps)

Sentiment Background: All Dreams Come True – G011 (High Hopes Rubber Stamps)

Inks: Memento – Tuxedo Black

Paper: Copic Marker X-Press It Blending Card, Hot Buy Craft Smart – Moon Flower Magic, Miscellaneous Cardstock

Die Cuts: My Creative Time – Scalloped Stitched Oval Dies, My Creative Time – Ribbon End Dies

Tools: MISTI – Most Incredible Stamping Tool, Cuttlebug, 3M VHB – 2 sided tape, Sharpie – Gold Medium Point – Water Based Paint

Image coloured with Copic Markers:

Willa: W5, W4, W3, W1, W0, W00, E93, R20, R02, B05, B04, B02, C0, Gelly Roll Sakura #10 Pen, Sakura Glaze – Black, Pigma Micron 01 black marker

Grass: YG17, YG13, YG03, YG01

Sky: B99, B97, B79, B69, B39, B37, B29, B28

Moon: BV23, C1, C0, Y0000, Colorless Blender

Lady Bug: R24, Sakura Glaze – Black, Gelly Roll Sakura #8 Pen, Pigma Micron 01 black marker

Stars: Gelly Roll Stardust – Clear

Hope you like it and have a fantastic week!

You can find lots of inspiration from the Design Team Divas at the High Hopes blog, and the High Hopes Rubber Stamps Facebook Fan page plus you can also follow us on
Instagram, Twitter and Pinterest.


Missed Your Birthday!! Tusk! Tusk!


I was late sending out a friends card recently, so today I’m sharing a card I made using (Kraftin’ Kimmie Stamps) Long in the Tooth!, Turtle-y Awesome! and Oceans of Love. For the background, I used Kraftin’ Kimmie Stencils Krafty Scenery 3 and Basics Stencil. I just love these little images and thought this cute sentiment was perfect for a belated birthday.

To create this card, I cut Hammermill – Premium Colour 100 lb. paper at 5.5″ x 4.25″. I created the background clouds using Tim Holtz Distress Ink – Salty Ocean and Kraftin’ Kimmie – Basics Stencil. The ocean and waves were created using Kraftin’ Kimmie – Krafty Scenery 3 and Krafty Kolours – Lovely Lagoon and Tim Holtz Distress Ink – Salty Ocean. The white caps were created using Copic Opaque White. The sun was also created using the same stencil using Krafty Kolours – Summer Sunshine. The sand was created using a mixture of the 2 stencils and Krafty Kolours – Sandy Shores. The images were coloured with Copic markers and then I used my Brother Scan and Cut to die cut them out. I went around each one of the images with a black marker and then ran them through my Xyron’s and placed them onto the background. I used some pop-dots to adhere the seashells to the card.

Card Recipe:

Stamps: Long in the Tooth! (Kraftin’ Kimmie Stamps), Turtle-y Awesome! (Kraftin’ Kimmie Stamps), Oceans of Love (Kraftin’ Kimmie Stamps)

Sentiment: Long in the Tooth! (Kraftin’ Kimmie Stamps!

Inks: Memento – Tuxedo Black, Versa Fine – Onyx Black, Krafty Kolours – Sandy Shores, Krafty Kolours – Lovely Lagoon, Krafty Kolours – Summer Sunshine, Tim Holtz Distress Ink – Salty Ocean

Embossing Powder: Ranger – Clear Super Fine Detail embossing powder

Paper: Copic Marker X-Press It Blending Card, Hammermill – Premium Colour 100 lb.

Stencils: Kraftin’ Kimmie – Krafty Scenery 3, Kraftin’ Kimmie – Basics Stencil

Tools: MISTI – Most Incredible Stamping Tool, Brother Scan and Cut, Xyron Create a Sticker, Xyron Creative Station

Image coloured with Copic Markers:

Walrus: E81, E49, E47, E44, E43, E42, E41, E40

Crab: YR18, YR16, YR14

Little Duck and Shovel: Y08, Y04, Y02, R39, R37, R35, B26, B24

Seashell Small: Spectrum Noir Sparkle – Tangerine, Spectrum Noir Sparkle – Cotton Candy

Starfish: Spectrum Noir Sparkle – Tangerine

Tops of Waves and Shore: Copic Opaque White

Hope you like it and have a great week!

Speedy Recovery!


It’s Wednesday, and this week, I used Walker Walter – TLF013 (High Hopes Rubber Stamps) from the new release for the main image and Speedy Recovery Background – U004 (High Hopes Rubber Stamps) for the sentiment. I have an older friend in the hospital right now waiting to have an operation and I thought this little card would definitely cheer him up.

To make my card this week, I used Recollections – Cape Cod cardstock for the base card which is 4.25″ x 5.5″. I stamped both the large background image and Walter using my Misti and Memento – Tuxedo Black ink.

Then I ran the background image through my Cuttlebug using Your Next Stamp – Stitched Rectangle Die Set to die cut it.

Both images were coloured using Copic Markers. I edged around the background image and card base with Tim Holtz Distress Ink – Blueprint Sketch. I used my Brother Scan and Cut to cut around “Walker Walter” and then outlined the image with Copic Markers C3 and C1. Next, I ran the image through my Xyron Creative Station and adhered it to some Black cardstock. I again used the Scan and Cut to cut around the image. I thought the border was too large, so I just manually fussy cut around the image leaving a smaller black border around it.

To complete the card, I bumped up both the background and the main image with 3M VHB – 2 sided tape.

Card Recipe:

Stamp:  Walker Walter – TLF013 (High Hopes Rubber Stamps)

Sentiment \ Background: Speedy Recovery Background – U004 (High Hopes Rubber Stamps)

Inks: Memento – Tuxedo Black, Tim Holtz Distress Ink – Blueprint Sketch

Paper: Copic Marker X-Press It Blending Card, Recollections – Cape Cod cardstock, Recollections – Black cardstock

Die Cuts: Your Next Stamp – Stitched Rectangle Die Set (YNSD214)

Tools: MISTI – Most Incredible Stamping Tool, Cuttlebug, 3M VHB – 2 sided tape, Xyron Creative Station

Images coloured with Copic Markers:

Skin: E21, E11, E04, E00, E000, R22, R20

Hair: C5, C3, C1, Gelly Roll Sakura #8 Pen

Shirt: YG67, YG45, YG41, G07

Pants: B26, B24, B21

Shoes: E27, E25, E23, E21

Tennis Ball: YG67, YG45, YG41

Walker: R59, R39, R37, R29, R27, R24, C9, C7, C5, C3, C2, C1, C0,

Bandages: E21, E00, E000

Syringes: C2, C1, C0, Y08, C9, Colorless Blender

Pills: B00, B000, B000, C1, C0, R24, Colorless Blender

Scissors: R29, R24, C2

Spool: E53, E51, E50

Stethoscope: C9, C2, C1, C0

Outline around image: C3, C1

Hope you like it and have a fantastic week!

You can find lots of inspiration from the Design Team Divas at the High Hopes blog, and the High Hopes Rubber Stamps Facebook Fan page plus you can also follow us on
Instagram, Twitter and Pinterest.


Have A Purr-fect Day!


Happy Canada Day to all of my fellow Canadians!!!

It’s Wednesday, and this week, I used Kitty’s Perch – TLF021 from High Hopes Rubber Stamps new release for the main image and Pawsitively – G307 (High Hopes Rubber Stamps) for the sentiment. This happy little kitty is having a great day exploring and has taken some time out to wish you a “Pawsitively Purr-fect Day”!! Hopefully, he puts a little smile on your face!

For my card this week, I began with a white base card of 5.5″ x 4.25″. I cut some Recollections – Green cardstock the same size and adhered it directly on the front of the base. Then I used my Cuttlebug and Your Next Stamp – Stitched Rectangle Die Set using the various dies to create the layers using both the base green cardstock and also Recollections – Petite Floral. I adhered the next to layers directly to the base. Then popped up the last 2 layers with 3M VHB – 2 sided tape. The image was coloured with Copic markers and was stamped using my MISTI and Memento – Tuxedo Black onto Copic Marker X-Press It Blending Card.

I used my MISTI and Memento – Tuxedo Black ink for the sentiment as well, then I cut it to size and ran it through my Xyron Create a Sticker and placed it directly over the 2nd layer. Lastly, to finish off the card, I added some Craft- Rhinestone Stickers over the flowered background.

Card Recipe:

Stamp:  Kitty’s Perch – TLF021  (High Hopes Rubber Stamps)

Sentiment: Pawsitively – G307 (High Hopes Rubber Stamps)

Inks: Memento – Tuxedo Black

Paper: Copic Marker X-Press It Blending Card, Recollections – Petite Floral – Double Sided 12 x 12 in (30.4 x 30.4 cm), Recollections – Green

Die Cuts: Your Next Stamp – Stitched Rectangle Die Set (YNSD214)

Tools: MISTI – Most Incredible Stamping Tool, Cuttlebug, 3M VHB – 2 sided tape, Craft – Rhinestone Stickers, Xyron Create a Sticker

Image coloured with Copic Markers:

Kitty’s Fur: E95, R22, C7, C5, C3, C1, C0, Prismacolor Premier Pencils – PC935 – Black and PC1056 – 70% Warm Grey

Collar: R59, R39, R37

Garbage Can: C3, G28, G19, G07, G05, YG67, YG09

Grass: YG17, YG13, YG03, YG01

Sky: B01, B00, B000, B0000

Clouds: Stampin’ Up – Whisper White ink and Q-Tip

Hope you like it and have a fantastic week!

You can find lots of inspiration from the Design Team Divas at the High Hopes blog, and the High Hopes Rubber Stamps Facebook Fan page plus you can also follow us on
Instagram, Twitter and Pinterest.


Birthday Wishes!!


Welcome Back Dreamerland Craft Fans!

Today, I’m sharing a birthday card that I made using Dreamerland Crafts stamp Together for the Holidays – DS19048 for my main image and Birthday 08 – DS17059 (Dreamerland Crafts) for the sentiment.


To make this card I used a base card of 4.25″ x 5.5″. I die cut X-Press It Blending Card using my Cuttlebug and die cut from Papercraft Inspirations. Then I stamped the image using Memento – Tuxedo Black ink and my MISTI. The original stamp also has snowflakes. I removed them for this card. I coloured in the image with Copic markers and then I used the same die cut to make the frame using Crafts – Sparkling Stickers – 02-3068629. I also used the same paper for my base background colour.

I used Your Next Stamp – Stitched Rectangle Die Set to die cut Echo Park Paper Co. – Happy Birthday Girl paper and then inked around the edges using Tim Holtz Distress Ink – Fossilized Amber. Next, I stamped the sentiment using Versa Fine – Onyx Black ink and my MISTI. I used Ranger – Clear Super Fine Detail embossing powder and then heat embossed the powder with Marvy Uchida – Embossing Heat Tool. Then I adhered this to the base of the card. Lastly, I used 3M VHB – 2 sided tape to pop up the image and added a few pop dots from Kraftin’ Kimmie to complete the card.

Card Recipe:

Stamp:  Together For the Holidays – DS19048 (Dreamerland Crafts)

Sentiment: Birthday 08 – DS17059 (Dreamerland Crafts)

Inks: Memento – Tuxedo Black, Versa Fine – Onyx Black, Tim Holtz Distress Ink – Fossilized Amber

Embossing Powder: Ranger – Clear Super Fine Detail embossing powder

Paper: Copic Marker X-Press It Blending Card, Echo Park Paper Co. – Happy Birthday Girl 6″ x 6″, Crafts – Sparkling Stickers – 02-3068629

Die Cuts: Your Next Stamp – Stitched Rectangle Die Set (YNSD214), Papercraft Inspirations

Tools: MISTI – Most Incredible Stamping Tool, Cuttlebug, Marvy Uchida – Embossing Heat Tool, 3M VHB – 2 sided tape, Kraftin’ Kimmie – Under Water Dots

Image coloured with Copic Markers:

Skin: E000, E00, E04, E11, E21, R22, R20

Hair:  E47, E44, E43, E41

Dress: BG18, BG15, BG13, BG11, BG10

Bear: E35, E33, E31, E29, E27, E25, E23, Sakura Glaze – Black Pen

Present: BG15, BG13, BG11, Y08, Y04, Y00

Swing: E35, E33, E31, E17, E15

Hope you like it and have a great week!

You can find more cards to inspire you at Dreamerland Crafts and Pointer Scrapbooking on the Facebook Fan pages from the rest of our design team.

Happy Birthday To Ye!


It’s Wednesday, and this week, I used Peg Leg Pete – R088 (High Hopes Rubber Stamps) for the main image and Pirates Birthday – F147 (High Hopes Rubber Stamps) for the sentiment. Peg Leg Pete is showing off his map of previous adventures from his pirating days around the Caribbean. He’s gathered quite a treasure of findings. But, when you are a pirate, there is always more places and ships out there to plunder. LOL!

To make my card this week, I used Scrapberry’s – The Pirate’s Treasure (6×6 Paper Collection) paper for the main background which fit onto a card base of 6″ x 6″ perfectly.

I stamped the image onto Copic Marker X-Press It Blending Cardstock and then coloured it in with Copic markers. Next, I fussy cut around the entire image and used a black marker to go around all of the edges.
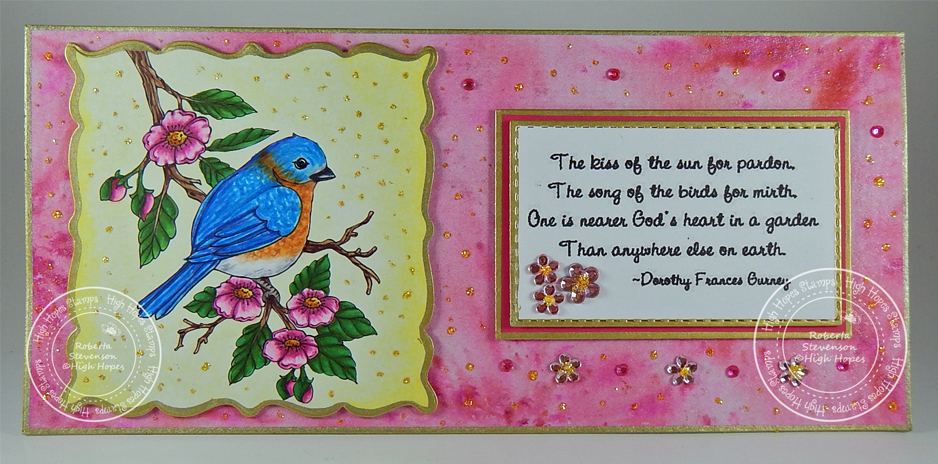
To create the look of a ship in the background, I cut 2 small pieces of paper from Joy Crafts – Wood Texture and Joy Crafts Tough Textures miniature 4 x 9 designs. Then I joined them both together using 2-sided tape. Next, I ran both pieces through my Cuttlebug using My Creative Time – More Stitched Circles die cut. I popped up both the image and the small half circle background with 3M VHB – 2 sided tape and placed it in the centre of the card.

Once again, I used my MISTI and Memento – Tuxedo Black ink for the sentiment. I taped down the sentiment onto some scrap red cardstock and bumped it up on the card with 3M VHB – 2 sided tape. Lastly, to finish it off, I went around the entire outer edges with Tim Holtz Distress Ink – Rusty Hinge and added a few Kraftin Kimmie – Seashore Dots.

Card Recipe:

Stamp:  Peg Leg Pete – R088  (High Hopes Rubber Stamps)

Sentiment: Pirates Birthday – F147 (High Hopes Rubber Stamps)

Inks: Memento – Tuxedo Black, Tim Holtz Distress Ink – Rusty Hinge

Paper: Copic Marker X-Press It Blending Card, Scrapberry’s – The Pirate’s Treasure (6×6 Paper Collection), Joy Crafts – Artist Trading Card – Wood Texture (2-3/8×3-3/8″ – 85mm x 60mm) and Joy Crafts – Artist Trading Card – Tough Textures (2-3/8×3-3/8″ – 85mm x 60mm))

Die Cuts: My Creative Time – More Stitched Circles

Tools: MISTI – Most Incredible Stamping Tool, Cuttlebug, 3M VHB – 2 sided tape, Kraftin Kimmie – Seashore Dots

Image coloured with Copic Markers:

Skin: E21, E11, E04, E00, E000, R22, R20

Hair: E29, E25, E23

Hat: B99, B69, B66

Coat: B99, B69, B66, R59, R37, R35

Shirt and Vest: E35, E33, E31, C2, C1, C0, Colorless Blender

Socks: E33, E31

Shoe and Sash: C8, C6, C4

Sword: C3, C2, C1

Hope you like it and have a fantastic week!

You can find lots of inspiration from the Design Team Divas at the High Hopes blog, and the High Hopes Rubber Stamps Facebook Fan page plus you can also follow us on
Instagram, Twitter and Pinterest.


Buddy’s Surprize!!


It’s Wednesday, and this week, I made a birthday card using Buddy Bear’s Surprise – S193 (High Hopes Rubber Stamps) for the main image and Shhh Party! – H038 (High Hopes Rubber Stamps) for the sentiment. Buddy is not very good at keeping secrets though or spelling! LOL! He is however, ready to bring you presents and party on!

To make my card this week, I started off with a card base of 5.5″ x 4.25″.  I love this background party paper by Echo Park called “It’s Your Birthday”. I cut it the same size as the base card and then used 2-sided tape to attach it to the base. Then I inked around the entire outside edges of the card with Tim Holtz Distress Ink – Wilted Violet.

I used My Creative Time – Stitched Squares Inside and Out to cut some Copic Marker X-Press It Blending Card. Then I used my MISTI and Memento – Tuxedo Black Ink to stamp the image. I coloured in the main image with Copic markers. I stamped the sentiment onto some yellow cardstock with Memento – Tuxedo Black ink and then used Your Next Stamp – Stitched Rectangle Die Set to die cut it out. Next, I ran both my image and sentiment through the Xyron Creative Station to turn them both into stickers. I applied both of these to some Violet cardstock and trimmed a small border. Lastly, I popped up both the image and the sentiment using 3M VHB – 2 sided tape.

Card Recipe:

Stamp:  Buddy Bear’s Surprise – S193  (High Hopes Rubber Stamps)

Sentiment: Shhh Party! – H038 (High Hopes Rubber Stamps)

Inks: Memento – Tuxedo Black, Tim Holtz Distress Ink – Wilted Violet

Paper: Copic Marker X-Press It Blending Card, Echo Park – It’s Your Birthday (6″x6″ Double-Sided)

Die Cuts: My Creative Time – Stitched Squares Inside and Out, Your Next Stamp – Stitched Rectangle Die Set (YNSD214)

Tools: MISTI – Most Incredible Stamping Tool, 3M VHB – 2 sided tape, Xyron Creative Station

Image coloured with Copic Markers:

Bear: E29, E27, E25, E23, R22, R20, R00, R14

Banner and Bow: BG18, BG13, BG11, Y00

Hat: V09, V06, V04, Y19, Y11

Present: BV04, BV02, BV00, Y38, Y19, Y11, YR16, YR15

Flowers and Leaves: G07, YG13, RV22, RV23, RV21,

Grass: YG17, YG13, YG03, YG01

Sky: B01, B00, B000, B0000

Hope you like it and have a fantastic week!

You can find lots of inspiration from the Design Team Divas at the High Hopes blog, and the High Hopes Rubber Stamps Facebook Fan page plus you can also follow us on
Instagram, Twitter and Pinterest.


Have A Beary Special Day!


Welcome Back Dreamerland Craft Fans!

Today, I’m sharing a birthday card that I made with Dreamerland Crafts stamp called With My Love – D19024. This little bear is on his way to wish someone a “Beary Good Birthday”!


To make this card I used a base card of 4.25″ x 5.5″. I stamped the image onto Copic Marker X-Press It Blending Card using Memento – Tuxedo Black ink and my MISTI. I coloured in the image and background with Copic markers and then used my Brother Scan and Cut to cut around it.

I cut out at rectangle 4.25″ x 5.5″ from Hammermill – Premium Colour 100 lb. paper and then I used various dies and Tim Holtz inks to create the background. I have listed them below. I had die cut templates using the dies which makes it really easy to create the backgrounds.

I stamped the sentiment from Jaded Blossom – Forest Friends using Versa Fine – Onyx Black ink and my MISTI onto some Turquoise Cardstock. I used Ranger – Clear Super Fine Detail embossing powder and then heat embossed the powder with Marvy Uchida – Embossing Heat Tool. Next, I edged around the background sentiment outer edges with Tim Holtz Distress Ink – Peacock Feathers. I went around the main image outline with Copic Markers – B000 and YG03. Then, I popped up the image with 3M VHB – 2 sided tape and added in some balloons which I die-cut using Your Next Stamp – Mini Balloon Trio Die Set and drew little strings from them.

Card Recipe:

Stamp:  With My Love – D19024 (Dreamerland Crafts)

Sentiment: Jaded Blossom – Forest Friends

Inks: Memento – Tuxedo Black, Versa Fine – Onyx Black, Tim Holtz Distress Ink – Mermaid Lagoon, Tim Holtz Distress Ink – Mowed Lawn, Tim Holtz Distress Inks – Peeled Paint, Tim Holtz Distress Ink – Crushed Olive, Tim Holtz Distress Inks – Peacock Feathers

Embossing Powder: Ranger – Clear Super Fine Detail embossing powder

Paper: Copic Marker X-Press It Blending Card, Crafts – Sparkling Stickers – 02-3068629, Hammermill – Premium Colour 100 lb.

Die Cuts: Your Next Stamp – Mini Balloon Trio Die Set (YNSD241), Avery Elle – Custom Steel Dies – Made in the USA – D-05-01 PiercedCloudsDie, Lawn Fawn – Grassy Hillside Borders

Tools: MISTI – Most Incredible Stamping Tool, Cuttlebug, Marvy Uchida – Embossing Heat Tool, 3M VHB – 2 sided tape

Image coloured with Copic Markers:

Bear: E33, E31, E30, E29, E27, E25, E23, R22, R20

Balloon: R59, R37, R35, R24

Hope you like it and have a great week!

You can find more cards to inspire you at Dreamerland Crafts and Pointer Scrapbooking on the Facebook Fan pages from the rest of our design team.

Hang in There!


It’s Wednesday, and this week, I thought I’d make an inspirational card to share with you using Raggedy Ann-ouncement – R044 (High Hopes Rubber Stamps) for the main image and Hang In There – D278 (High Hopes Rubber Stamps) for the sentiment.

To make my card this week, I started off with a card base of 5.5″ x 4.25″.  I created the background on Hammermill – Premium Colour cardstock using various stencils, Picket Fence Studio Blender Brushes and Tim Holtz inks which I have listed below. I thought the sun rays reflected a ray of hope for everyone and I hope that we will all be seeing better days soon. Once the background was finished, I used 2 sided tape and mounted it onto the base card.

I stamped the image  and sentiment onto Copic Marker X-Press It Blending Card and coloured in the main image with Copic markers. I ran the coloured image through my Brother Scan and Cut to create a slim border around it and then went around the edges with Y06 – Yellow and YG25 – Celadon Green to make it blend into the background. Lastly, I popped up the image using 3M VHB – 2 sided tape and created a small shadow below Raggedy Ann.

Card Recipe:

Stamp:  Raggedy Ann-ouncement – R044  (High Hopes Rubber Stamps)

Sentiment: Hang In There – D278 (High Hopes Rubber Stamps)

Inks: Memento – Tuxedo Black, Tim Holtz Distress Ink – Squeezed Lemonade, Tim Holtz Distress Ink – Mustard Seed, Tim Holtz Distress Ink – Mowed Lawn, Tim Holtz Distress Ink – Crushed Olive, Tim Holtz Distress Inks – Peeled Paint

Paper: Copic Marker X-Press It Blending Card, Hammermill – Premium Colour 100 lb.

Stencil: Kraftin’ Kimmie – Starburst, Lawn Fawn – Lawn Cut dies (Made into Stencil), Kraftin’ Kimmie – Krafty Scenery 2

Tools: MISTI – Most Incredible Stamping Tool, 3M VHB – 2 sided tape, Picket Fence Studio Blender Brushes

Image coloured with Copic Markers:

Skin: E21, E11, E04, E00, E000, R22, R20

Hair: R35, R17, R14, R08

Dress: R59, R37, R35

Patch: B52, B41, B12

Apron and Socks: C-2, C-1, C-0

Shoes: C10, C8, C5, C3

Sign: E37, E35, E33, E31, E30

Shadow below feet: YG25, YG06, YG03

Hope you like it and have a fantastic week!

You can find lots of inspiration from the Design Team Divas at the High Hopes blog, and the High Hopes Rubber Stamps Facebook Fan page plus you can also follow us on
Instagram, Twitter and Pinterest.